OK, today in Part 2 we’re looking at the Post Processing I did to yesterday’s image, and for that I used the new Lucis Art Pro plug-in (which I’m going to mini-review in this same post).
DISCLAIMER: If you hate the Dave Hill look, or you’re tired of it, or whatever…do me a favor—just skip this post. The reason I did the post in the first place is that this is the #1 most-requested technique I get from readers, and I thought I’d give it a whirl. Obviously, this was a huge mistake on my part, because apparently it just mostly made people mad at me (I don’t know why it always has to come to this—it’s just a Photoshop technique for goodness sakes). But since I did part one and promised to show the post-processing, I feel like I should finish it, so I’m going to. However, it’s mean comments like the ones I received yesterday that make me think I should stick to safer topics, like the Nikon D3x pricing and more Lightroom conspiracies. ;-)
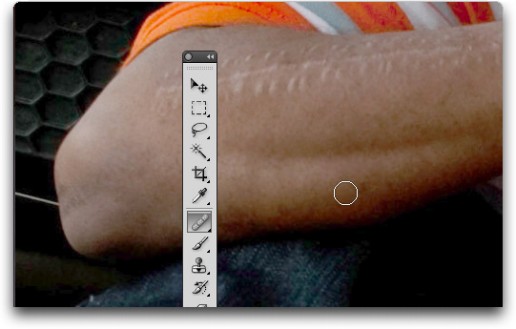
Step One: Before you run the Lucis Pro 6.0 plug-in, you’ll need to do something to soften your subject’s skin, because the hyper-sharpening the plug-in adds will greatly magnify every blemish, spot, or skin irregularity and it looks pretty bad. So, I started by using the Healing Brush. I Option-clicked [PC: Alt-clicked] in a nearby area that didn’t have a blemish (to sample that skin texture), then I chose a brush size just slightly bigger than the blemishes I wanted to remove, then I moved over the blemish and just clicked once to remove it. So, I went through the image and did that first.
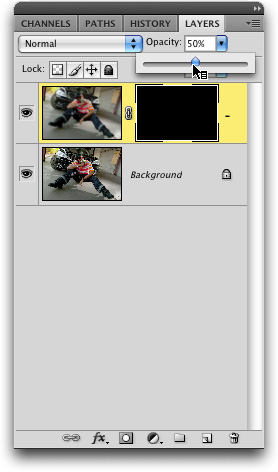 Step Two: Next, you’ll need to do an overall softening of the skin. What I did for this picture is apply the same type of skin softening I might to a portrait of a woman, but I used a higher amount of blurring than I would normally use. I started by duplicating the background layer. Then I applied a 25 pixel Gaussian Blur, then I lowered the opacity of this layer to 50%, as shown here (so it’s half as blurry). Then I held the Option key [PC: Alt-key] and clicked on the Layer Mask icon at the bottom of the Layer panel. This hides the blurry layer behind a black mask (as seen here). Then I changed the foreground color to white, and I took the Brush tool and painted over just his skin. I avoided the edges of his skin or any areas that were supposed to have detail (like his eyes, eyebrows, lips, etc.). This left the rest of the image sharp, but his skin very soft.
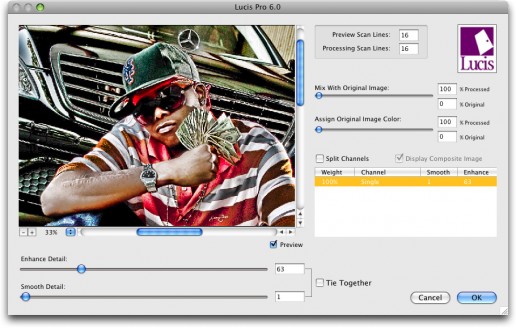
Step Three: Now I applied the Lucis Pro 6.0 plug-in (shown above). All I did in this plug-in was to drag the Enhance Detail slider over to 65, and then I clicked OK. Simple enough.
Step Four: Now, the key part of this is Dodging and Burning the heck out of the image, in other words, over exaggerate the highlights and shadows, so the photo almost looks cartoonish (basically, you’re going to make the darkest parts darker, and the brightest parts brighter). If you have Photoshop CS4, you can use the Dodge and Burn tools, because they’ve been greatly enhanced. We’ll start with Burning; after you choose the Burn tool, go up to the Options Bar, set the Range to Shadows (so it just effects the shadows), and lower the Exposure amount to 20%. Now paint over the shadow areas in your photo (like in the folds of his shirt, his pants, on his hat, etc.). You have to really exaggerate the shadows, so you’ll have to paint over the shadow areas a few times, and let it build up a bit.
Step Five: Now switch to the Dodge tool. Up in the Options bar, switch the Range to Highlights, and paint over the highlight areas in his shirt, pants, and along both side edges of him, where the brighter light is hitting. Again, you’ll probably have to paint over these highlight areas a few times to really exaggerate the look.
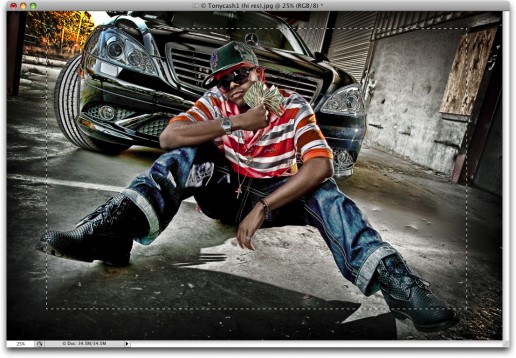
Step Six: Lastly, you’ll finish off by darkening the edges (kind of an edge vignette effect). I did mine by duplicating the background layer and switching the Layer Blend mode to Multiply. Then I made a rectangular selection that’s about 1 inch in from the image borders all the way around (as shown above). Then I added a 250-pixel Feather, and then hit the Delete key, which knocked a hole out of the darker layer, which gave the darkened edge vignette look. That’s how I did the final image you saw yesterday (and the final shown below).
Lucis Pro 6 Plug-in Review
I had reviewed the previous version of this plug-in, called LucisArt2, last year, and while I liked the plug-in, there was a problem (one problem for Mac users, one for Windows users). On the Mac, to use the old plug-in you had to launch Photoshop in Mac OS X’s “Rosetta” mode, which is a much slower (but more compatible) mode. This slowed Photoshop down quite a bit, but I’d only run in Rosetta when running this plug-in (unless, of course, I forgot to quit Photoshop, turn off Rosetta mode, and relaunch Photoshop, which I did all the time).
Well, luckily, in the new Batch of LucisArt plug-ins, they all run in regular Mac OS X. On Windows, they completely rebuilt the interface, and now it’s dramatically better. Besides fixing OS stuff, there are a lot of improvements, including a new algorithm that gives better, cleaner results, a better more streamlined interface, much more control over how the affect is applied, and in Lucis Pro 6, you can run the plug-in on 16-bit images (the other, less expensive, and less featured LucisArt3 plug-ins can only run on 8-bit images). So, overall—lots of improvements to the effect and functionality.
That being said, in my opinion there are two really huge problems with this plug-in.
- It’s crazy expensive at nearly $600 ($595 US). That’s twice what Lightroom costs and nearly as much as Photoshop CS4 itself (you can buy the full version of CS4 from Amazon.com for $639), for a plug-in that is essentially a “one trick pony.” There are less expensive versions of the plug-in (like LucisArt3), but of course, they have less features and can’t run on 16-bit images, but you can get one of those for around $300 (about the same price as Lightroom). Now, the case can be made that if your clients are willing to pay for this look, then it may be worth the investment, but outside of that, I would have a hard time justifying the high price.
- I think Lucis Pro 6 has a bigger problem than the price. It requires a USB hardware dongle. To me, this is the deal breaker. I absolutely would not buy the plug-in because of this requirement (Note: the cheaper LucisArt3 does not require this dongle). I know they’re doing this to cut down on software piracy, but this isn’t penalizing the pirates—it’s penalizing their highest-paying customers. Plus, if I need to use the plug-in on a laptop and my home machine, now I have to carry the dongle in my case. If I leave it at home, and need it at work; I’m out of luck. If I need to use more than one USB port on my laptop, now I can’t use the plug-in. Ridiculous! I don’t know of a single software product in our industry that has become a success while using a hardware dongle (just ask Quark, who added a hardware dongle to QuarkXPress for a very short time), and I hope the people at LucisArt will rethink this going forward
The Bottomline
While the plug-in does a very good job at what it does, I would have a hard time recommending the product for the two reasons I just listed above. While Lucis Pro 6.0 is a big improvement over its predecessor, LucisArt 2, in just about every way, I think the 400% price increase is way off the mark, especially with the limited looks this plug-in can provide (Though the market will ultimately decide if the price is too high). As for the hardware dongle; for me–it’s the deal killer.
Here’s a link to their site for more details, complete pricing for all three plug-ins with a list of each product’s features, and a comparison of how LucisArt 3 compares with LucisArt 2.



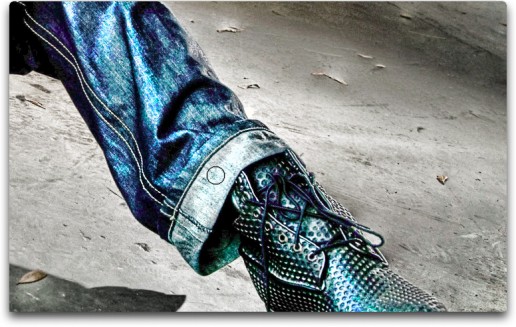

I used some of daves tecnique on this photo but whithout the highligts… wearesimple.dk
just reread these tutorials and am going to use them on a few upcoming shoots… thanks for the info again!
Brent
http://www.immaculatephoto.ca