

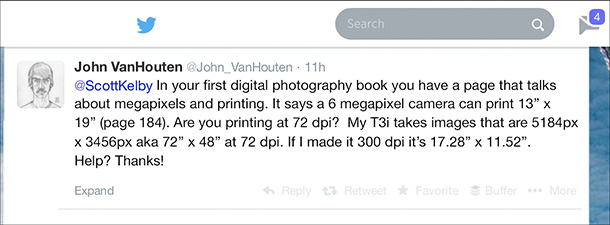
Hi Gang: I thought I’d kick off this Monday by answering a question I was asked over on my Twitter page:
To answer John’s question, the first thing we have to get over is the age-old myth that you need to print at 300 dpi. For today’s ink-jet printers you need a minimum of around 200 ppi (and people love to argue this next figure endlessly) but most of the pros I know who are seriously into printing feel that the “sweet spot” resolution for today’s printers is 240 ppi, and anything above that doesn’t give you a better print (just a larger file size).
I print at 240 ppi max, sometimes less, but I personally don’t print at a higher ppi than 240 ever (by the way; that’s Lightroom’s default printing resolution as well). If you want to argue about resolution, feel free to go find a printing forum and have at it — I really didn’t want to host that debate here, but John asked me and I’m answering him (based on how I do it) here because I know some other folks might have similar questions. To make it easier I did a short video on two different ways to use Photoshop to get the size and resolution you want (since Lightroom does all this math automatically under the hood). Here ya go:
I hope you found that helpful.
Photoshop CC’s “Two Install” issue
Those of you who installed last week’s Photoshop CC update (the one called “The 2014 update of Photoshop CC” – ugh), have learned that it left your old Photoshop CC there and installed a new separate version. Terry White did a post about the hows and why and what to do with your extra copy over on his tech blog.
By the way, did I mention that Terry actually works for Adobe as their worldwide evangelist (I think he’s worked there around 14 or so years now) and he would love to hear your comments (his words) over on his tech blog, so if for any reason you’re unhappy, grumpy, or perhaps you’re happy, cheerful and full of glee, here’s the link to Terry’s blog — that’s Terry “the human pin cushion” White from Adobe Systems where you are going straight to the source directly, fully and totally unfettered (whatever unfettered means).
That’s it for today!
Hope you all have an awesome Monday and we’ll see ya back here tomorrow. :)
Best,
-Scott
Scott- you’re simply THE BEST. Love your tips & your books- I digest all the new ones of both. Thanks for all you do & please keep ‘me coming!
*giggle*
Is it my imagination or is there no sound on this video?
I don’t have sound either. Weird.
No sound on my iPad either.
Glad its not just me! Scott, you discuss inkjet printers above, but do the same resolutions apply when enlarging an image for sending to a lab for traditional prints or are there different settings?
It applies unless you’re resizing like 200% or 300%. Then you use a different technique.
Would love to kn ow what that technique is – Im looking at some of the Plugins like Perfect Resize, but if theres a better way Id love to know. many thanks
If you have 2014, look at the resize option as it’s been enhanced so you can watch the resize effects and details before committing to it.
Thanks lyle – Im on CS6, so not sure if it has that feature.
This is something that I’ve never given much thought about, as I’ve just gone with the default Lightroom setting. Thanks for the how’s and whys on that setting, though.
–John
Hey John — that’s the great thing about Lightroom — you don’t have to worry about it — it takes care of it automatically. I love Lightroom. :)
Oh, and I didn’t get any sound on the video, as well. Or was that intentional, like your Quick Tips? What ever happened to those, btw? They were great!
–John
Hi John: I messed up — I reuploaded a new copy that works (so refresh your page). As for the 30-second quick tips — less and less people were watching them, so I stopped doing them. They may make a re-appearance again though, soon. :)
I just want to throw in a my vote for the return of the 30 second tips. I watched every single one and really appreciated them.
where are those ?
Thanks Scott! I just watched it now. Great tips, and it was much easier to follow with your mellow voice….. :-)
–John
No sound
I hate to jump in here, but no sound with the video! I’ve watched Matt and you with the guy from Epson on printing and that has help me a bunch even though I own a Canon 9500 MkII.:-) Also, I have your PS books as ebooks and I’m always referring to them when stuff like this comes up! Awesome reference!
Dennis
Crud!!!! I’m fixing it right now. So sorry about that (and thanks for the heads up).
OK, the Audio is fixed (thanks everybody for letting me know). So sorry about that (it was totally my fault). Appreciate the heads up. :)
It’s been removed?
Refresh your page —- a new one, with audio, has taken it’s place.
Thanks for all of the help Scott. This helps quite a bit. I just need something else cleared up. On page 184 of your first digital photography book you say that a 10-12 megapixel camera can make prints that are 24″x36″. Are you referring to 240 ppi when you say that (and when you refer to all of the sizes listed on that page)? My T3i is an 18 megapixel camera and at 240 dpi the image is only 21.6″x14.4″. Thanks again for all of the help.
You can increase the size of images quite a bit, if you do it right. :)
Do you have another post on doing that?
Wouldn’t the better sequence for Adobe be: 1. Do the big dog and pony show, but delay the release for a week. 2. Let the Kelbys and Whites tell us what it really means and how its done. Let the Kelbys focus on the mechannics and meaning to photographers, then 3. Release the software especially if there are options or something out of the ordinary..
The copy the plugin folder from CC to CC2104 generated a startup error message for me for old onOne. (none generated for CC).
i get that message too. frustrating to get a whole new product when it was supposed to just be released into CC with updates continually. I had to put all my panels, actions, plug-ins, and other items back in.
Who said there would never be a complete new version of the product? I don’t ever remember Adobe saying that. I remember them saying there would be new features added as they were ready.
Yes…new features added to the same program. The CC functionality to me would have eliminated getting new versions of the same program. I would just get new features, like adding a deck on to my house.
I think this time they created a whole new release based on the new Mercury engine but I don’t know how many people actually forecasted a whole new program releasing until the big event. and Scott nailed it, i’d like to see more of a highlight on new features as released but it feels like you have to go find them on the blog. oh well.
Reading the replies from Terry White to his reader’s comments today: the CC2014 version no longer supports Flash Technology. Some of the configurator extensions written by Terry and Doc Brown will no longer work. I wonder if this is why the Oil Paint filter went AWOL?
Jeff Tranberry has a FAQ on CC2014 that is extensive:
http://blogs.adobe.com/crawlspace/2014/06/2014-release-of-photoshop-cc-faq.html
Hi Scott and hi all, there’s a good reason for the “sweet spot†of 240 ppi (I teach Foundations of Computer Science at the University and I do one lecture just on monitor and print sizes :-).
Now, the starting point is human visual acuity.
To make it very simple, from a distance of 30 centimetres, our eye can see at most ten distinct points each millimetre (assuming that you have the best contrast you can get, a white background and black points, otherwise the number of distinct points is smaller).
An inch is equal to 2,54 centimetres, therefore our eye can see around 250 points per inch from a distance of 30 cm. This is the reason why you don’t get any advantage in increasing this number (unless you want to stuck your nose into the photo…).
This is a very simple rule of thumb, there are other factors that one could take into account (for example the number of colours of a printer, the paper you use, etc.) but for this time I’ll stop here :-)
All the best
Giorgio
Interesting bit of information there, Giorgio. I suspect this is similar logic that Apple used with making their “retina” displays that at most holding/interaction distances, pixels are too small to perceive.
When I first started printing from Lightroom, I never changed the DPI and hung them with great satisfaction. Now that I know this, nothing is going to change.
Exactly Johnathan, each Apple “retina” device has a different pixel density, the smaller the device the higher the number of pixels because you’re supposed to hold the smaller device close to your eyes. For example, MacBook Pro Air has less pixels than an Iphone 5 because your eye is supposed to be at a different distance from the screen.
To add a bit more of information, as I said before, we are able to distinguish ten points for each millimetre; this means that we are also able to detect the white space that there is between each point (the white background if you like). Therefore, the count of points per millimetre is double (10 points and 10 spaces) and so the number of points per inch (around 500 ppi). Now, remember that we are talking about ideal conditions (perfect contrast) and excellent vision.
Most of the people do not have this acuity, and 99.99% of the times you don’t hold a picture at 30 centimetres from your eyes.
THANK YOU! The 240 ppi explanation was a new one to me, and I’ve been doing this for several years. I appreciate it greatly!
Very informative Scott, thanks for your time. The biggest thing to remember in my opinion is the correlation between DPI, PPI and Resolution. Change one and the other changes and all are different. See you in September!!
Great and informative post Scott, you answered two of the questions I had, in one post!
By the way, your Prague video inspired me to watch your photo book video and then make a photo
book of a recent trip to Haiti. It came today and it turned out great, way beyond my expectations.
Thanks Scott!
hi Scott, thanks for this video.
if i need to print a picture in canvass 16″ x16″ whats the minimum size the image can be to come out good enough? thanks
I believe that you can print less than tack sharp photos to canvas and it will turn out fine because of the way the canvas texture sticks through the photo. Therefore, you can enlarge a photo to fit a canvas and it might be unnoticeable that you enlarged the photo. I hope this helps.
Hi Scott….I downloaded the new Photoshop cc 2014, and none of my plug-ins migrated…specifically, Nik’s filters and the OnOne Suite…do you know how to “reload” those plug-ins? My “extensions” button is grayed out…
PS…I am writing this before checking out Terry’s blog…maybe Terry talks about this?
Since they got rid of the Oil Paint filter in CC 2014, I’m actually glad that I downloaded early to have both the CC and the CC 2014 versions. thanks for the update!
Hi Scott, I know back in the dark ages you used to be in DTP (desktop publishing for you young whippersnappers -whatever a whippersnapper is).
So did I for a while. Back then 300dpi was considered at best a low res proof.
We’d bang that out on the LaserWriter II and if it looked OK we’d send it off to a bureau (ona Syquest drive cartridge with separate fonts and high res images) for output.
The finished art would then be out put at something like 2400dpi on film or bromide, which we’d send to the printer with proof copies.
Do you know why the professional benchmark has changed so dramatically?
Trick photography isn’t just a mediocre form of photography because one must have creative ideas and technical skills to be able to accomplish a decent photo. You can learn more: http://www.learntotrickphotography.com/