


Mornin’ everybody. I wanted to wrap up the week with a quick trick for creating realistic backgrounds for compositing, so here goes:
When I was in Seattle for my “Shoot Like a Pro” Tour, before the seminar kicked off in the morning, Brad and I went just outside the convention center so I could create some real shallow depth-of-field backgrounds I could use in Compositing. I did this mostly because I hate how it looks when you take an in-focus background and try and “fake it” by adding a massive Gaussian Blur or Lens Blur filter in Photoshop.
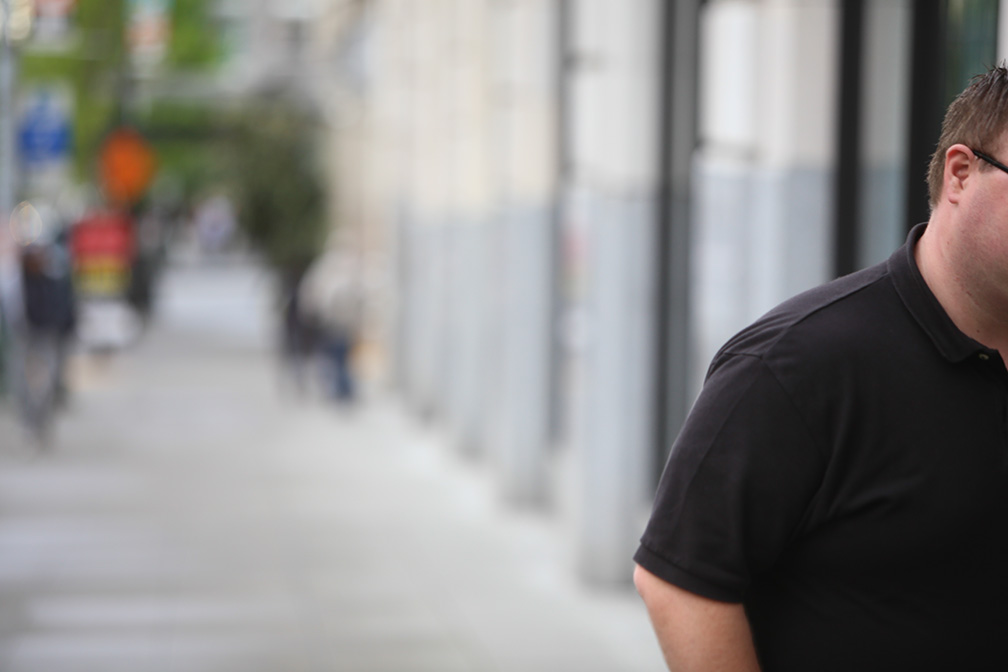
Above: I had Brad stand in the street, and I zoomed-in fairly tight on him with a 70-200mm f/2.8 lens, at f/2.8 so the background would be way out of focus (as seen here). Once I was focused on Brad, I would hold the shutter button half-way down to lock the focus on Brad, then I would give Brad a signal and he would walk out of the frame (that’s Brad walking out of the frame above).

Above: Once Brad was fully out of the frame, I’d just press the shutter button the rest of the way down and take the shot. Mission accomplished — a realistic shallow depth-0f-field background.
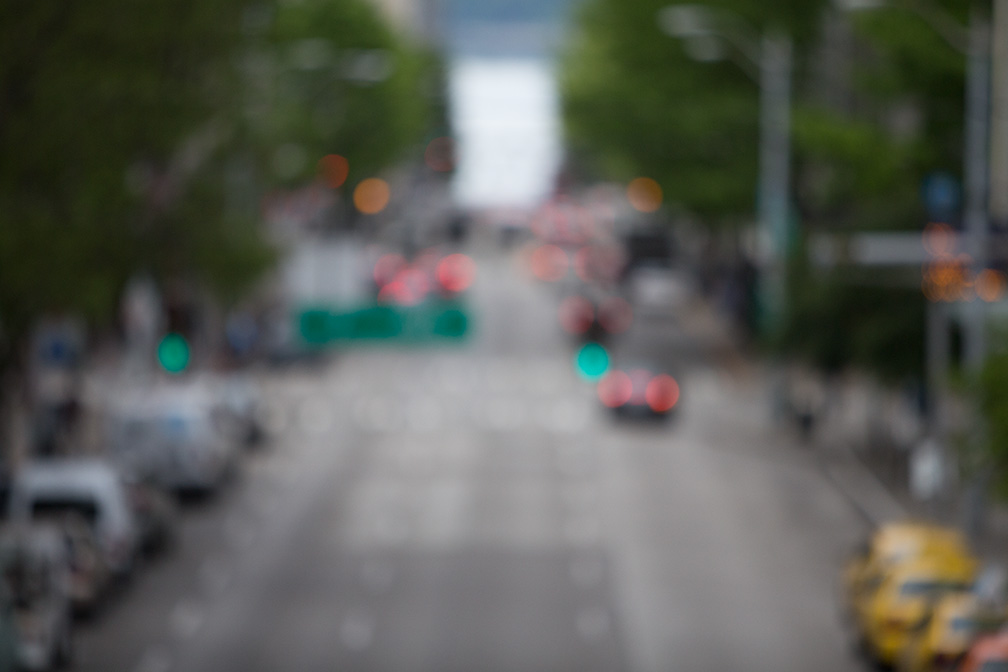
Above: Since this technique literally took less than 30-seconds, we shot a handful of different backgrounds, at different angles and on nearby streets, and every time the technique was the same: Brad stands in place: I focus on him at f.2/8; hold the shutter button half-way down; I give him the signal; he walks out of the frame; then “click.” I had 20 or so background in just 10 minutes.
Above: Here’s the image at the top again — it was my first test of the concept. I didn’t crop our subject here as tightly as I had actually shot Brad, so it would be more realistic if I had matched her size relative to the frame, but at least I can see that it worked — now I just have to find the right image for the foreground.
My subject was shot on a light gray background in my studio, and then I used Photoshop’s Quick Select tool along with the Refine Edge feature to remove her from that background and then I copy and pasted her onto the out-of-focus background. Once there, I matched her overall color-tone to the background, and then lastly I put a slight tint over the entire image (to help visually unify the two) and I added a soft glow effect as well (a 50-pixel Gaussian Blur, and then I changed the blend mode to Soft Light and lowered the opacity to 50%).
Anyway, just a quickie for Friday, and maybe something you’ll consider next time you’re out shooting with a friend who can act as an “in-focus” stand-in to create some out-of-focus backgrounds.
Back to Football
This weekend I’m shooting the Bucs vs. Cardinals NFL game with the Buc’s new starting quarterback Mike Glennon. That should keep me busy during the first quarter, eh? Also, trying some new techniques I picked up from the just-released book, “Peter Read Miller on Sports Photography.”
I’ll share some shots next week, but next week is also Worldwide Photo Walk week (the actual walk is next Saturday, and we have 1.200 walks organized in cities all over the world, with more than 22,000 walkers so far. Hope you’ll join us next Saturday.
Here’s to a great weekend. Hope it’s a safe and fun one. :)
What an awesome technique for compositing! I just wish you had included a shot of Brad dancing before he moved out of the frame. Have an great time at the game on Sunday. Hope to see some killer shots next week.
–John
P.S. Any idea when hotel info for Atlanta will be posted up on the PSW website? All the Vegas info is still there. Got to plan my trip, you know!
Why not manuel focus at a short distance? You can get the same result even when Brad is not there :)
Roelof, I think Scott was simply trying to get Brad to exercise more!
The idea was to have Brad in “for scale” which is why I took a frame each time with Brad still in it (seen above), and I mentioned it would have been better if I had matched the scale with the image I used.
Cool tip! It should look great too with night street scene, city lights, will try that. Happy weekend, everyone!
Nice little tip Scott. I never thought of it. I have been shooting backgrounds sharp and then blurring them as needed – but f/2.8 gives that nice bokeh that is best accomplished in camera.
Wow how easy is that. My lenses aren’t fast but this would still work great. Thanks.
Tips like this one are great and so helpful. I really wish you would do more tips and techniques like this. Thanks!
A technique….. what a refreshing change. Thank you!
Killer tips from da pro, shot Scott!
Do you use the same aperture for the background as the subject? Do you have any leeway in how to shoot the background vs the portrait?
Ideally, you’d shoot them at the same f/stop right? Unfortunately, in the test image I think she was at something like f/11.
Looks fake.
It is. Duh.
best reply everr.. :)
It would have been better if you matched the lighting.
I think he was talking about Brad. Are you sure he’s not a robot?
Well what’s the point if it looks fake! The title you chose was “Realistic” Duh!!!
Ottoman, read Kelby’s title again. “How to Create Realistic Shallow Depth-of-Field Backgrounds…” He created a very realistic shallow depth of field background, as the title precisely implies.
What you’re judging, while making a fool out of yourself, is the final composition. Take something from him and learn it.
Not only fake but also a typical fashion ( indoor) shot on a outside background.
I don’t like it. Green is not my favourite color .You can do it M if you cannot afford a Brad or if you are shooting without a friend. But the ‘tip’ is awesome. Thanks Scott.
so can you critique this image and point out exactly what points make it look fake?
Er, well, I think if you study the picture you should be able to ascertain a modicum of fakery, judged by the fact that it looks totally unreal, as acknowledged by Mr Scott Kelby in his retort to my observation.
Yes Kelby acknowledged that it was fake. (However, he didn’t agree that it looks totally unreal). If he didn’t tell you, would you have known?
Me “looks fake” Kelby “it is” That pretty much nails it.
I don’t think that nails it because he was basically telling you how to make a fake look real. I was just curious if you could explain why. But I suppose I do agree that you can tell it is a fake. The model is too much in focus, and needs to be shot in a shallower depth of field I think.
To me, it looks great. If she was standing next to the wall then maybe it would look fake. Try to take a shot of an individual outside with a 2.8 f stop I would bet it would look darn close, if not exactly, to the composite.
yeah I like it. But I am not one who thinks all photograph have to look ‘real’. Its the manipulation process that I really love about photography.
Love the tip Scott, keeping Brad in there for scale is a great idea!
Hi Scott,
To what exactly are you applying the 50 pixel gaussian blur? Are you creating a duplicate layer, then applying the blur? Looks great.
Trev J.
Hey Trev: That’s it — duplicate the layer; apply the blur; change the blend mode to Soft Light, then lower the Opacity to around 50%.
I hope I’m right on this but on your Nikons, doesn’t the AF-S setting need to be selected when focusing on Brad (as opposed to the AF-C selection), so that the camera does not do continuous focusing? Not sure what the equivalent would be on Canon or other makes of cameras.
Yeah you would want to use the AF-S for this to work. Or you could switch to M (manual) and have the freedom to take more than one image at the same focus setting.
ok now i want to be in the middle of a busy street and i want to buy that book. i love football photography (one of my passions). wish i was standing beside you shooting. i started a fb group called Football Photography if you would like to contribute I would be beyond blessed. going to add your blog…..any sports tips coming any time soon? go plop a photo down in our group if you have time.
have a great weekend!!!!
Great idea. I wonder why I didnit come up with this. Simple concept. And it looks so much better than Photoshop-OUT-OF-FOCUS. Thanx.
If only LR5 had layers ….can this be done with that on one thingy ?
Yes…
Nice tip and idea. The idea of the placeholder person for scale is good idea and I am sure it helps to give indication on the lighting in the scene that would be more difficult on defocused background only.
I like the technique and will have to give it a go. Btw, it will be hard to figure out which team wants to lose more. The Cards have potential but seem so inept at times (especially with pass blocking). Make sure you get at least one of Larry Fitzgerald and post it on Monday.
Thanks.
You know I will. :)
Thanks Scott, I’ll be looking forward to it. Now that I live in AZ I feel I should root for the Cards even though I grew up in the Tampa Bay area. I still remember one of John McKay’s famous lines about the Bucs. A reporter asked him about his team’s execution and he said, “I’m all for it.”
You know I will. :)
Thx Scott, Looking forward to the Worldwide Photo Walk on the 5th, should be fun
I agree with the process, but, with respect, why would you choose a subject whose lighting is so completely wrong for this background? The background looks like you shot on an overcast day, and the shadows on this subject are clearly to much to make this shot look realistic. This works much better when your subject is shot in the same or similar area, or under similar lighting conditions but where there background is less than suitable.
And just as a side note with respect to the comment below. A lot of people come to Scott Kelby because they respect the name and what it is supposed to mean. Your response “It is. Duh.” is just a tad unprofessional. Just saying.
If you read any of Kelby’s books you would know his personality, and expect that much from him.
Marjorie: I wrote in the post that this was a test-shot. It wasn’t even shot at the same f/stop which you’d need to do to make it more interesting, and I mentioned I didn’t crop it to the proper proportions. I just opened the first shot I found on my laptop shot on a gray background and popped it in to test the concept. This wasn’t a tutorial about creating composites (I do that in my books, and I do it right in the books). This was about the background concept, and obviously most people “got it” but a few that didn’t read the post and missed the point, like the guy I commented to, get a “duh.” By the way, it’s not my job to provide “professional comments.” This is my personal blog.
Marjorie: I wrote in the post that this was a test-shot. It wasn’t even shot at the same f/stop which you’d need to do to make it more interesting, and I mentioned I didn’t crop it to the proper proportions. I just opened the first shot I found on my laptop shot on a gray background and popped it in to test the concept. This wasn’t a tutorial about creating composites (I do that in my books, and I do it right in the books). This was about the background concept, and obviously most people “got it” but a few that didn’t read the post and missed the point, like the guy I commented to, get a “duh.” By the way, it’s not my job to provide “professional comments.” This is my personal blog.
I think this gets even easier if you disable the shutter from activating focus (how I shoot all the time). It lets you prefocus on things, and if you don’t move and the subject doesn’t move, but say, if the light changes slightly, you don’t have to worry about the AF hunting again and potentially missing a photos (like at an event or a wedding). It took some getting used to, but after a few years I could never go back.
hi Doug: I keep my main camera set to Back Button focus and love it. Once you do that, it’s hard to go back (especially for sports). :)
Hey Scott/Brad, this is another excellent example of a tip that is easy if you think of it, but for most of us, like me, would never think of.
Thanks for another amazing tip for those of us who are think outside the box challenged!
Mike
You had me fooled. However I agree with shooting your own backgrounds, not only being a good technique but also being unique. Most likely no one else has it.
Trudat! :)
Great idea! I use OnOneSoftware’s Focal point program to fuzz a vignette around subjects but if you get to close, it’s a disaster. This looks great. And I don’t blame you for not spending all your time trying to “trick” the hyper-critics. The concept came through loud and clear. I use PostEdit every so often and they always ask me if I have other pics with more of a background in them, so I’ve learned to try to take a few at different f-stops of whatever background is behind my subjects, in case I need to do something like this… or they do!
Ginny — thank you for “getting it.” :)
The composite of the girl looks real. It’s the photo of Brad stepping out of the frame that looks fake. ;-)
I added in Brad after the fact. ;-)
Is Brad fake? I thought Brad is real?
Brad is actually constructed by Skynet
well done
Scott first of all thanks for your amazing books. nothing has ever been more instructive and I’ll always be grateful Well, to cut it short, any chance we get a whole book from you with only your amazing “photo recipes” (like the ones at the end of your “The Digital Photography book” 1-2-3-4 ).
Hi Luca: that’s the next book in the series, but expanded with a behind-the-scenes shot on the left page, and the final image on the right. More room and more photos to better explain how to get the shots, and it’s coming next. :)
Wow!! Can’t wait for it to be published! If it’s not already covered it its first series, I would love if you’d also cover so called “substractive” lighting, there’s so little about it in the web (use of cutters/gobo/black reflectors around the subject to block laterar/vertical lighting for dramatic frontal lighting). I saw Peter Lindbergh always uses this sort of black tent around his models http://video.vogue.com/watch/va-va-boom and the effect is super cool.
So simple, and yet so un-thought. (it’s a new word) … thanks for sharing. but then again, you do this all the time…
Something I will need to give a shot Scott, thanks for sharing, another thing learned or the concept anyway the composite work is a different story ;)
I like the idea and the picture. I always get faked out by composites; I think my mind wants to believe and overrules my eyes.
I like it and I think the overall effect is excellent. But why not just shoot the out oif focus bg with mf?
Nicely done Scott. BTW, which of your online courses covers extraction and compositing. I’ve watched Joel Grimes’s excellent video class several times, but am still left with a bit of “edge” or ghost around my images. Would love to know what other instructors class you’d recommend.
never mind. I saw my question answered already.