

[Note from Brad: Nick was getting questions about this topic after his first guest blog, so he offered to do a follow-up post about it. Enjoy!]
Additive Color Theory and How to Have Fun with Flash Gels
Since the success of my guest post last month, I have received a few emails from people wanting to know the process behind the multi-colored, multi-shadowed image.
Flash setup
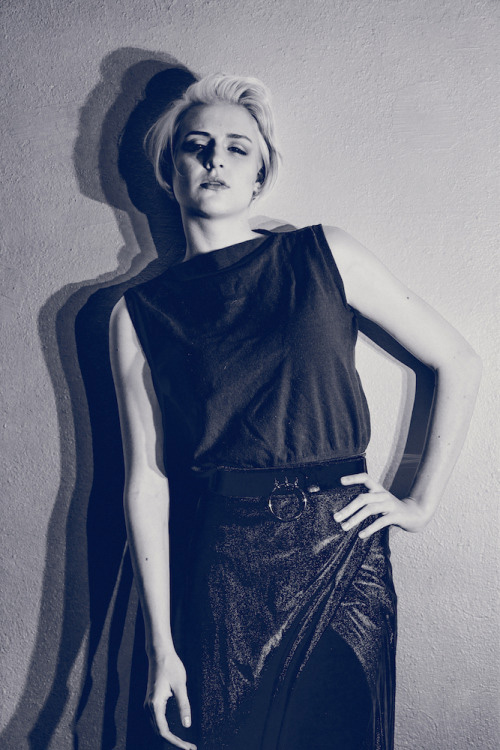
Final image
I will now break it down for you, starting from the beginning.
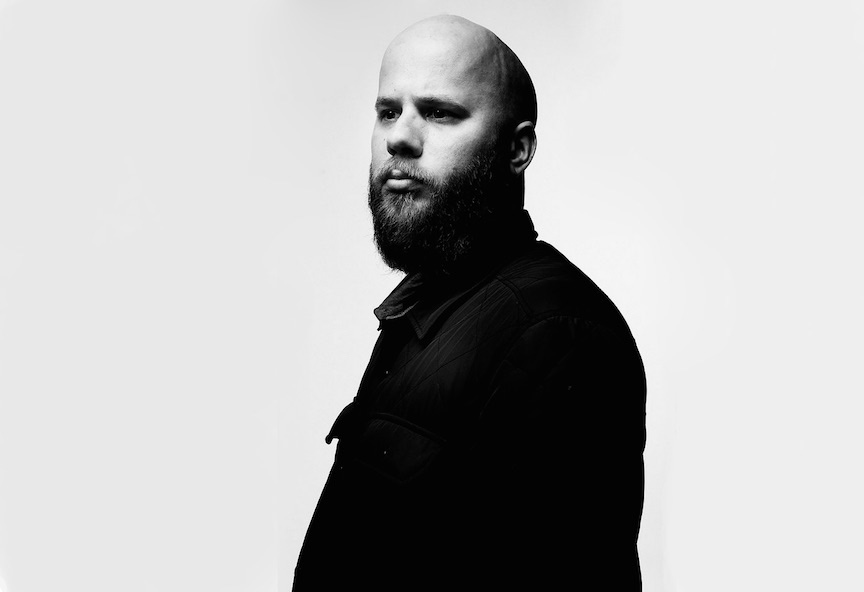
My absolute favorite publication and source of constant inspiration (and self-doubt) is Interview Magazine. A few months ago, there was an interview and editorial of Game of Thrones actor Michael Huisman, shot by master S¸lve Sundsb¸. Being the lighting phenom that he is, Sundsb¸ once again peeled back my brain with his insanely gorgeous and experimental images of the actor. And being the lighting nerd that I am, I immediately started trying to reverse engineer his techniques, based on shadow hardness and direction.
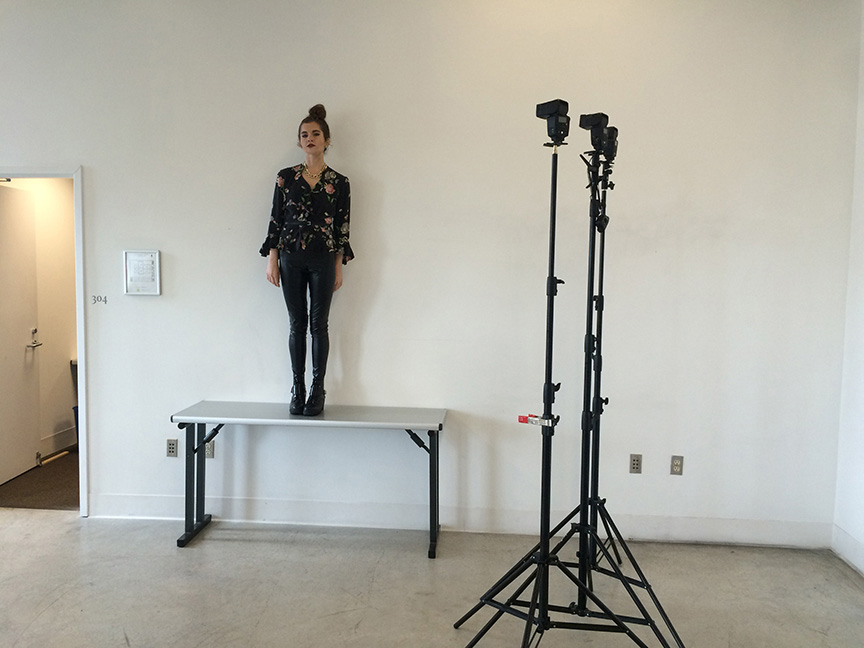
I could tell that he was using 3-4 hard (un-modified) lights from the side. It just so happens that I own 3 speedlites, so I immediately set up a test shoot with the first model that was available (I am an impatient guy). I locked in Stephnaie Flor, a illustration major from a local art college, and I met her in the hallway outside her classroom (after all, all I needed was 15 minutes and a white wall). In Sundsb¸'s image, difference in flash distance from the subject was the cause, I reasoned, for varying opacities in shadow. So I set up the three flashes, a bit lower than her head, keeping six inches between them and staggering them one foot in front of another.
Flash setup
Successful homage to Sundsb¸
I was happy with the results, but wanted to play with the technique a bit more.
A week or so after this experiment, I found myself thinking a lot about additive color theory. I had taken a color theory course in college and had really enjoyed it. I loved learning that there is a science behind which colors complement each other and why. I had also learned about how to balance the Cyan, Magenta and Yellow adjustments in the darkroom, with the color enlargers. For reasons unknown to me, I had started thinking back to what I had learned about different color theories- specifically CMYK and RGB and the difference between the two. I was fuzzy on the info, so I looked it up. To sum up, when red, green and blue light overlap, they create cyan, magenta and yellow light. When cyan, magenta and yellow light overlaps, white light is created.
It just so happened that my flash gel kit contains cyan, magenta and yellow gels and I own three flashes. Serendipity. So I grabbed a vase of flowers (best thing I could find in the five minutes I spent looking) and set up a product shot.
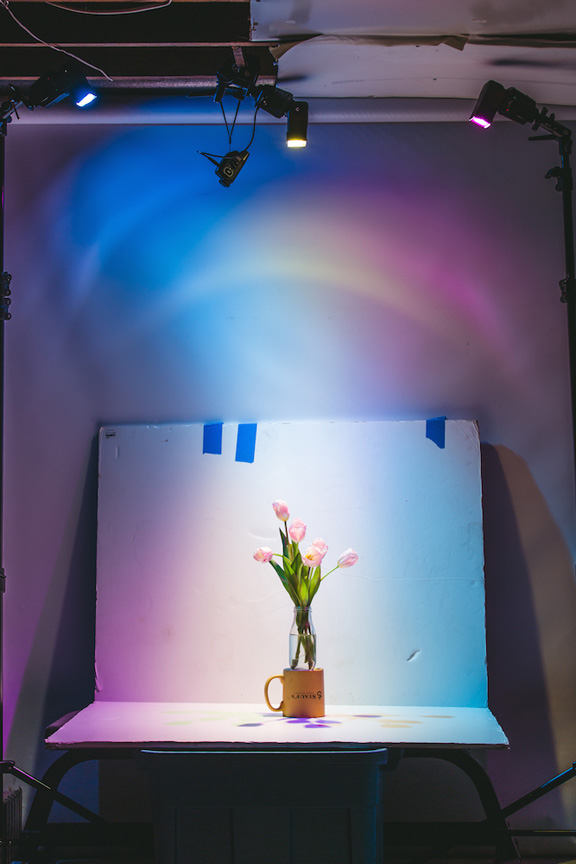
Flash setup
I had no preconceived notion of what the resulting image would look like, or if the experiment would even work at all. I was just experimenting on a slow day of work. I placed one flash on either side of the flowers and one directly overhead, zooming the flash heads in to 105mm. I aimed the heads so that they would all intersect on the flower vase. And wouldn't you know it- it worked!
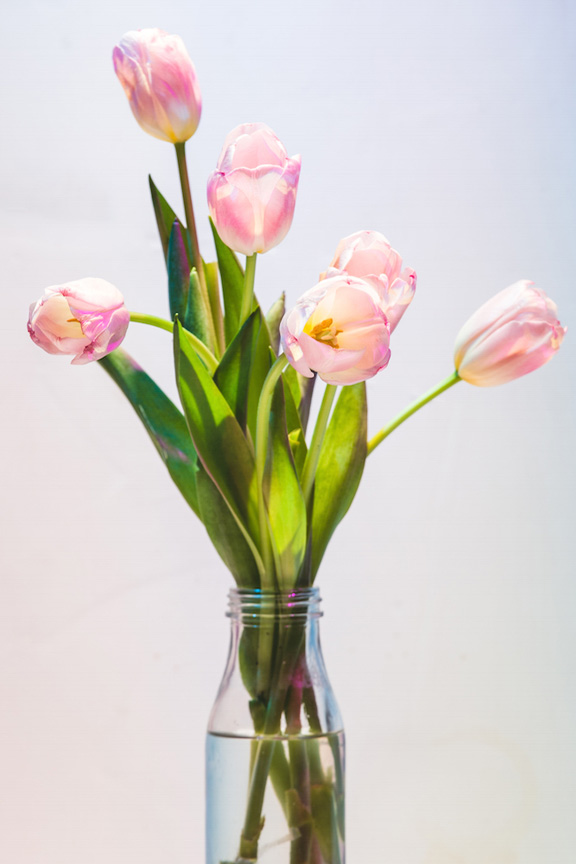
Cyan + Magenta + Yellow = White Light
The cool, unexpected thing that I came from the experiment was the unplanned, happy accidents. I hadn't accounted for the chaos factor. For example, if one flower petal or leaf blocked the yellow strobe from lighting part of the vase, only the cyan and magenta light was illuminating it, resulting in a purple shadow. Likewise, if the magenta light was blocked, only cyan and yellow light was mixing, creating a green shadow. And so on. The layered colors didn't just create white light, but it created a layered, complex light. Compare the previous shot to this shot, lit with un-gelled lights…
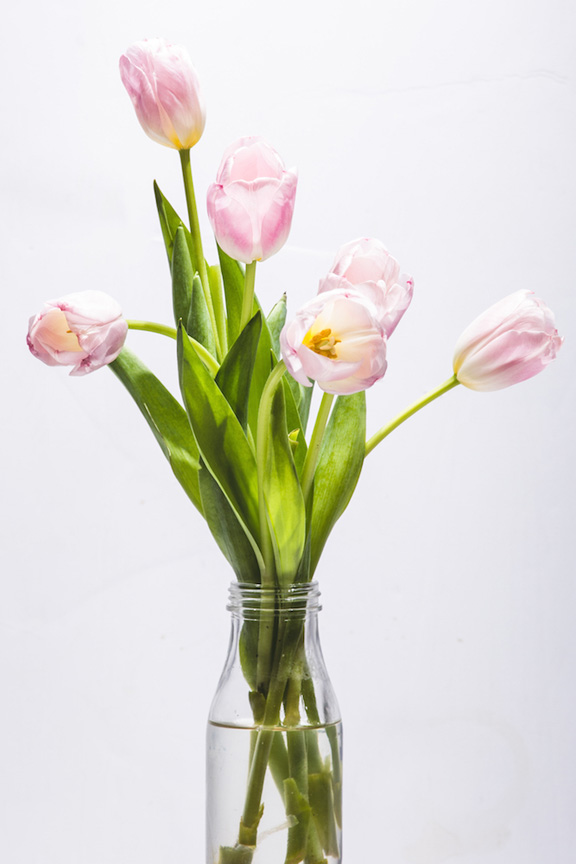
Un-gelled flashes
Kinda bring, right? Now to try with a real life model.
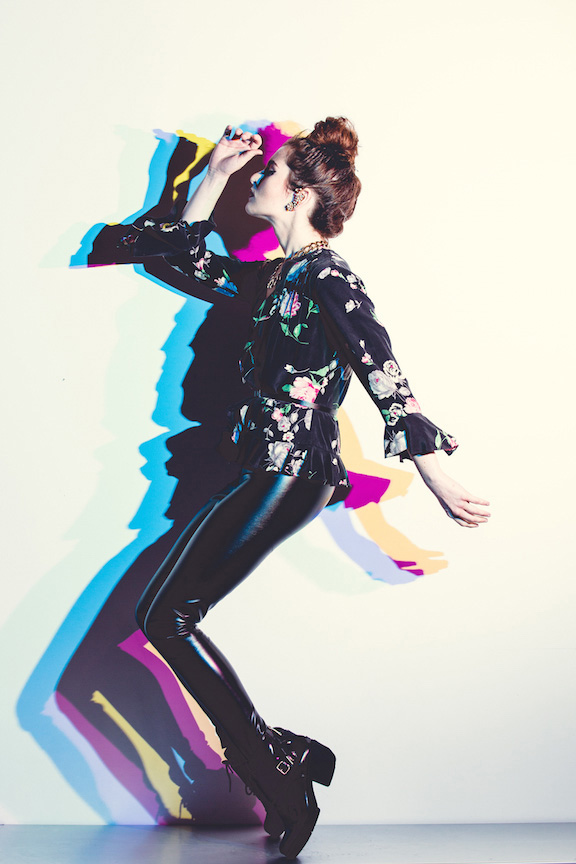
This is when the two experiments came together in my mind. I found myself connecting the dots between the shoot with Stephanie, where I staggered three flashes, and the shoot with the flowers, where I was arranged three, gelled lights. What if I arranged the lights the same way I did with Stephanie, but they were gelled cyan, magenta and yellow? Why wouldn't it work? Well it sure as hell would, and did.

Raw file
As with the flower experimentation, I was figuring out the process as I went. When all three flashes overlapped, white light was created on the model, resulting in a black shadow. Also, like with the flower, when one of the three colors was blocked by part of the model, only two of the colors were able to mix, resulting in multi-colored shadows.
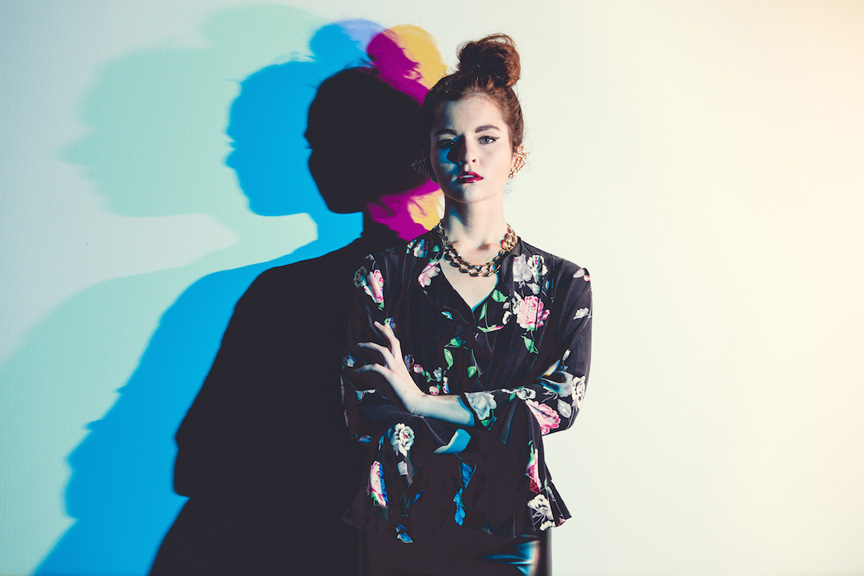
Cyan, magenta, and yellow light overlapped to create white light, resulting in black shadows
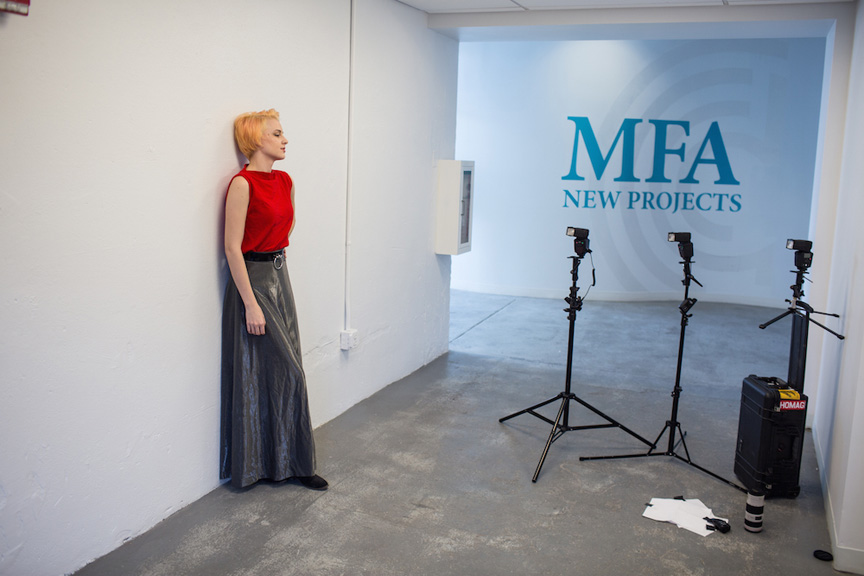
Once I saw the kind of colorful chaos that was created when parts of the body blocked a color, I immediately knew that I needed to photograph a dancer, using this method. So I reached out to my ballerina friend, Kristie Latham, and asked her to come by ASAP. I had her bring a white outfit and a black outfit option. For this shoot, I actually needed to use a white sweep, rather than a wall, since I wanted to capture a seamless shadow (with no floor to wall transition). I prefaced the shoot by directing her to place her arms, hands, legs, whatever, between herself and the flashes as she moved, in order to create multi-colored shadows on her body. It worked splendidly.
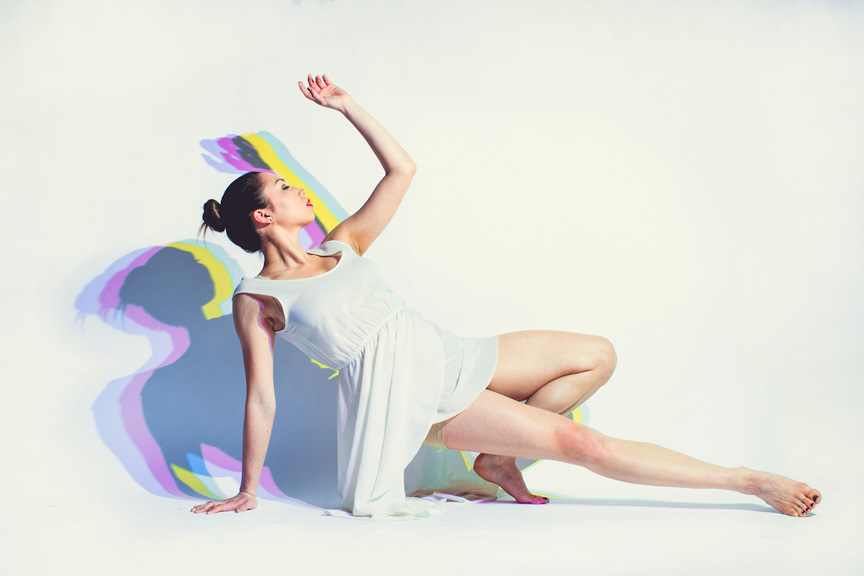
Clean light, multi-colored shadow
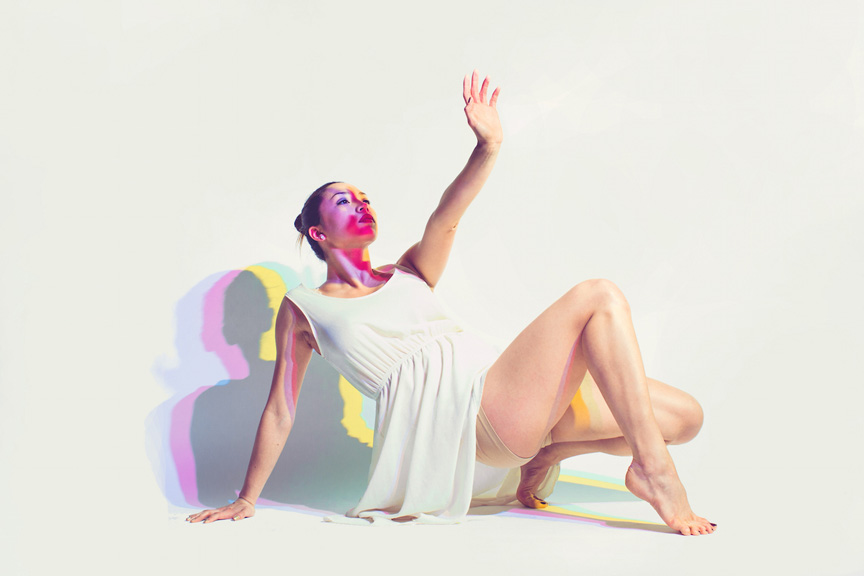
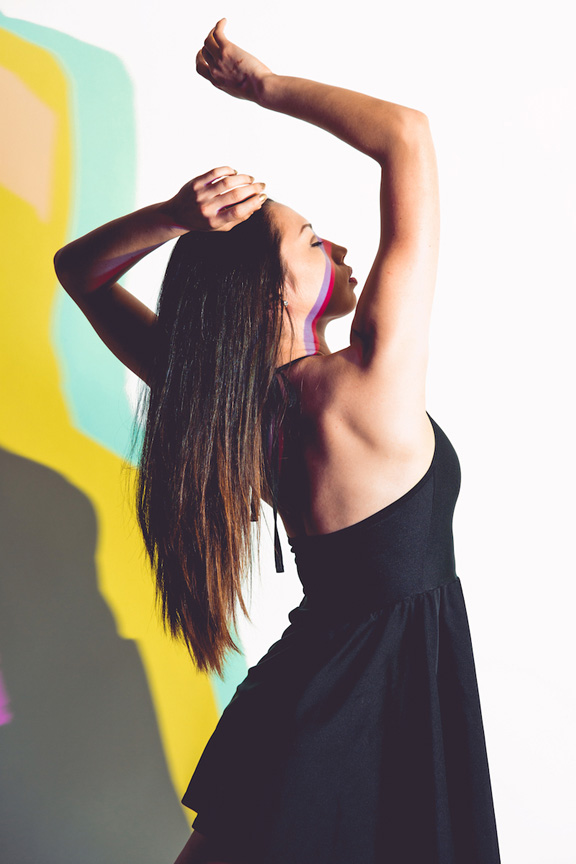
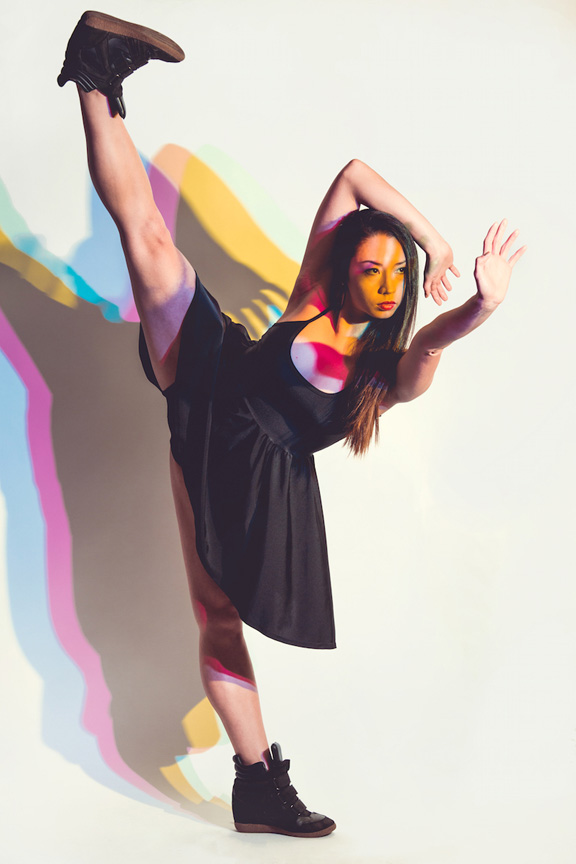
When a body part comes between Kristie and the light, a multi-colored shadow is created
All that to say⦠experiment! If work is slow, try new techniques. Don't have any ideas? Go pick up a magazine and reverse engineer an interesting lighting scenario and try it out. Even if you fail at recreating it exactly, you've learned something in the process, which is a win.
If you enjoyed this experimenting process with me, you may also enjoy my new book, Studio Anywhere: A Photographer's Guide to Shooting in Unconventional Locations.
You can see more of Nick’s work at NickFancher.com, and follow him on Facebook, Twitter, and Instagram, and YouTube.
I am so doing this, this weekend. Awesome sauce.
And so I did it. Shooting this method was a bundle of fun. I initially didn’t think I had the gels, because the cyan and magenta gels weren’t in my box from MagMod.. That’s because they were in the holders already. Doh! I did a load of variations on flash position and gel order to create different effects. Super stuff Nick A+++.
Awesome!
I’ve been shooting loads of gel stuff, and I had been doing color combining, but was never right on the background to notice the shadow effect. Check out Jake Hicks for another variation on gel shots too. I’ll post to twitter later and I’ll tag the post/ you in it. Cheers again Nick.
Coolest shoot I’ve seen in ages – thanks for the info!
Neato, but Guest Blog Friday? I was only gone 2 days :)
I tried to comment on one of your previous reviews about the Apple Watch. But the link to you, from the article, just stalls. You wrote about how it needed to be CHARGED so often, that is why you returned it. Mr. Kelby, you must have received a defective watch. The one I have was delivered (Sport silver aluminum 42mm, white band) on launch day, and it’s never shown less than 45%, when I was playing with it constantly and just seeing what all it can do, the first week or so. Now, just using it normally, it’s always around 60%, after haveing it on, for about 15 hours. I performed my own experiment a few days ago, and kept it on until the battery went to zero. And this was with it being on Bluetooth the entire time, or in range of my wifi. (Not just using it as a standalone watch,) and I got about 30 hours, until it when black. I didn’t switch to any power saving modes. And this was with it paired with an iPhone 6 plus…my phone needed to be put on a charger so many times, that I just kept it on there. Again,you might have been shipped a dud. It happens..and Apple will replace their “lemons,” normally in 2 days. I bet you have a new experience when you/if you try it with another watch.
so trying this!
This can be a guide for me on my way in pursuing my career as digital photography artist. Thank you so much!
Awesome!!! Thank you for sharing! Now… to find 2 more speedlites… ^_^
Very nice shots and good tutorial. Convinced me to buy your book :)
Never ceases to amaze.