First of all I really want to thank Scott and his team for the great opportunity to write here about myself and my work.
I am Calvin Hollywood, Photoshop Artist located in Heidelberg, Germany. My major focus is to take photographs of people with the emphasis on the digital image editing with Photoshop.
And there we are right in the middle of the topic: I am addicted to Photoshop :-)
By the way, you are addicted too if:
– you wake up after a wild night in the bed of someone and you think “STRG + Z”
– you don’t get older, just harder to retouch
– you order the meat in your favourite restaurant “RAW” to adjust it yourself
– your apartments walls have 50% gray color
But what can you do in Photoshop if your starting point material is not really good? I try to get as much done when photographing and only if I can’t get further with photography I start with Photoshop.
I started photography and image editing in 2005, and since then I have continuously worked on my skills. When friends went to parties, I partied with Photoshop. And the great thing is: It was a lot of fun! Because I learned everything by myself I relied on the Internet, books and training DVDs. These media have been very effective for me and I consumed nearly everything on the market.
In 2006 I started to work with the Photopartner and “Lightguide” I am still working with today. Together we form a great team allowing me to focus on the picture and the image editing.
The work for hire I do contains a lot of portraits of artists and musicians. I love to take pictures of people who are (as I am) very passionate and live their passion.
But if you want to reach known artists, you have to have a great portfolio of your work. In the beginning I created my portfolio based on pictures I took of friends and family. For these pictures you don’t have pressure regarding time and success – they allow a lot of experimenting.
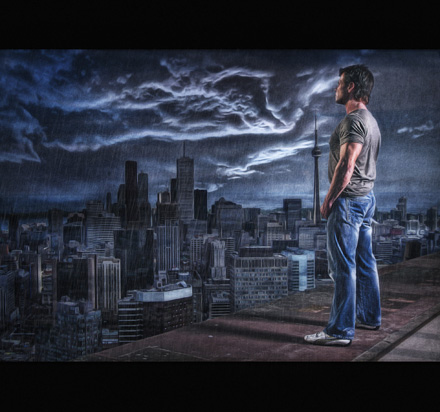
My pictures all have an artificial look. Many people think that my pictures are painted. But I really can’t paint, believe me. I shoot my pictures with the camera and give them “the look” in Photoshop.
Likely this is not what most people mean by „photography“, but it is in fact a big part of my imagination.
The techniques I am using for my work are no secret.
I have published more than 7 video tutorial DVDs on the German market and one on the English market. In these publications I explain my techniques and strategies in detail.
I host more than 50 Seminars each year and I am worldwide on the road for companies like Adobe, Wacom, video2brain, etc.
It would be way to many words for this blog article to explain my entire library of techniques, but I would like to explain some selected ones to you.
If you have and further questions please don’t hesitate to send me an email!
The Double RAW Conversion
Most of the time I am converting my RAW files twice.
For this I am using a very thrilling method which I have explained in this YouTube video.
Colorlooks
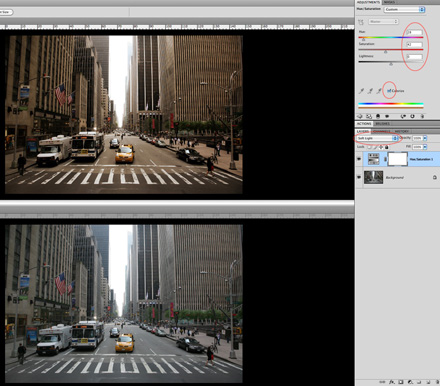
Rarely I am removing color casts, but many times I am adding color casts to my images.
For this I am using in most cases an adjustment layer „Hue/Saturation“ and the layer blending mode „Soft Light“.
Additionally I activate the check box „colorize“ and then give the image a warm color cast.
Freaky Details
In order to get all the fine details out of an image, I am using a very freaky method. I would like to show you a short tutorial for this. It has been created during the production of a video tutorial project.
There are so many easy techniques which have major impact on the picture. I think that it is the many small changes to an image, which create the final picture. In my opinion playing with the pictures it is very important and I really suggest it to everybody.
Combine some filters and blending modes.
Try to understand Photoshop.
Don’t underestimate the basics.
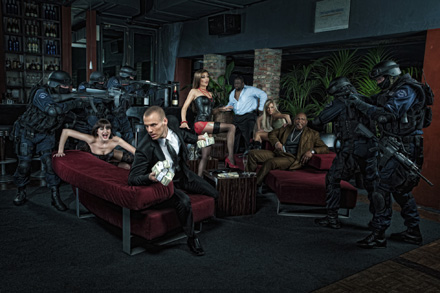
Sometimes I am also editing pictures for other photographers, who love the painted and illustrated look.
Below you can see an example of a retouch I have performed for the photographer Martin Krolop.
My style works especially well if there are a lot of structures and details in the RAW file. That’s why I like to use photos of men a lot :-).
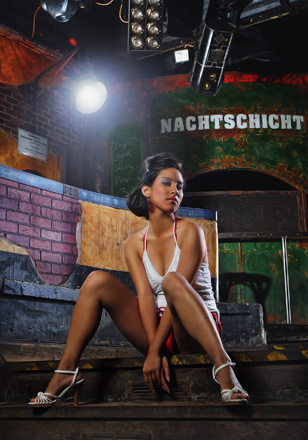
But if I am working on a fashion project, my work-for-hire mainly leads me to female models. But it is also important for me to keep my personal style there.
It is important to edit the pictures in the individual way of your own emotions.
There will always be people who don’t like what you did.
Stick to what you like and have fun doing it!
I believe that especially in the beginning it is really fine to copy techniques from role models or industry leaders.
I did that all the time in the past.
Copying style and techniques gave me a goal to reach and helped me keeping me on track for my target.
The personal style will automatically appear over time.
I also think it is laughable and absurd to try to keep personal techniques secret.
Photoshop is a tool and the perfect picture is not created by Photoshop.
The feel for the image and the experience working with the tools is separating the wheat from the chaff.
Thank you very much indeed for your interest, and remember: if you have questions you can always drop me an email.
Warm regards,
Calvin
You can see more of Calvin’s work on his website. If you’d like to see more of his teaching, be sure to check it out here!





Hi Calvin !!!
Greetings from Austria ;-))
ABSOLUT great that you post here von kelby’s blog !
I’m big fan of you work – awesome !!!
Liebe Grüsse aus dem benachbarten Österreich.
Hannes
Calvin…this is perhaps the best guest post I have seen. Excellent. Thanks so much for sharing your knowledge with us, and Photoshop is a universal language so your English skills don’t matter to me one bit!
Scotty Graham
Jakarta, Indonesia
Wow! Great tutorials and you have a sweet site full of them! I’m going to bookmark your site and check them all out…thanks man!
One of the nice posts I have read from the Guest blogging section. Great read.
Thanks for information and tuts as well. Saw your website as well. Very very nice work.
You got some serious, photoshop talent.
Hi Calvin-
I enjoy your open approach toward educating others on what you have learned and developed into your own methods. You have great creative vision on how to use these techniques to form what the final image is in your mind. Photo manipulation/retouching brings many opinions, but I see it as it’s own art. I recently started following your web site and techniques after your kind and honest review over at RetouchPro of the retouching DVD series that I participated in the development of (you know, the one that caused a huge thread). You helped smooth things out for the skeptics by giving a nice review and helpful insight of the product from a respected professional’s standpoint. Thanks for sharing your own techniques with all of us, and I’ll be purchasing your English version DVD to learn more. By the way, your English is getting very good! -Matt
great guest blog, really useful techniques…. and perfectly good english. thank you for sharing
I just bought Calvin’s latest tutorials, and I stalk him around RetouchPRO, and his methods have been some of favorite to learn. I highly recommend his tutorials, even if you don’t like the illustrated look, there’s a lot of great stuff you can integrate into your own style. I know it’s helped me a lot in developing my work.
Danke schön for guest blogging Calvin.
WOW WOW WOW! One of the best guest blog post ever, I would say. I felt this guy see the photoshop from totally new and different prespective. Here’s my bet: one day Calvin Hollywood will be part of Kelby Media Group.
I vote for Calvin to be part of Kelby Media Group — do we need a fourth Photoshop guy???
Thanks so much – very cool guest blog – awesome stuff Calvin – great work!!!
Fantastic Guest Blog Post Scott; way to go!!!!
Incredible work…incredible instructor…can’t say fairer than that.
Calvin demonstrates in such a clear precise way that maybe buying filter after filter isn’t just the answer; a little knowledge in Photoshop can go a loooonnnggg way :o)
Regards,
Glyn
Great post. Incredible imagery and great instruction. May have to through away all those filters I’ve bought
Thanks for such a great post.
Your pictures are absolutely fantastic.
I am going to check out your techniques from your tutorials and hopefully create some great pictures myself.
Many thanks.
That was a great post, lots of useful info from someone who loves what he does and isn’t following the crowd. Thanks
Calvin,
What an excellent post. I love the effect that you do! One thing I envy in folks like you is the “Imagination” that you have. One thing I feel as if I lack. Can you be taught this, I don’t think so. You either have it or not.
Thanks for a great early morning read.
Scott & Brad thanks for continually finding people like this to post for you.
Mike
I try to do only this kind of jobs where i have fun.
That keeps the fire inside alive.
Maybe i will not get so much money then, but passion is more important then money ;-)
And after some time you will get the jobs, where you will have fun.
lg Calvin
Thanks for the terrific post Calvin (and Scott). Lots of good tips here and I’ll be buying your recent training tutorial as well. I really admire your openness and candor, and your willingness to share your techniques. Enjoyed your sense of humor as well. Keep up the good work. Thanks again.
Hi everybody!
I had the pleasure to join Calvin on a trip to NYC in October last year, and I can say that he is really a great guy! Not only is he an absolute PS expert, what really makes him great is the passion with which he shares his knowledge with others.
He is a real enrichment for the digital artists’ scene not only in Germany, but worldwide!
@Scott: Great idea to give Calvin the chance to post here :-)
Hallo,
This was (for me) the best guest blog I’ve read in the last few months here.
Thank you (Scott and Calvin) very much.
Vielen Dank.
Ralf
Deutschland
Wow, Calvin! Great post! Thank you for sharing your technique … really awesome! You have inspired me to get a little more creative in my work! By the way, your English is fine! I watched both videos and they were excellent! Very nice work! Thanks for taking the time and explaining your techniques, which are fantastic! Hope to see more videos in the future!
Scott, again thanks for having these guest bloggers! What an inspiration they are to us!
Dennis
Scott, this is one of (if not) the best blog you have ever had. I think a lot of us out here want to know how to get that contrasty effect we see in these photos. I usually try to get it with a NIK filter but this video is GREAT! Calvin, I hope you are reading these comments because this is what “we” want. Most bloggers are good and they inspire but you show us how and even leave your e-mail. (I feel like a judge on American Idol). Thank you very much for the tutorial and I hope future “Wed Guests” will do the same.
Scott, what is the best way to flag today’s blog for future reference? (other thatn search by name)
Just tried the “Freaky Details” tutorial on one of my landscapes and it worked great except for some posterization in the sky. I simply used a mask for the sky. The details in the trees for this shot was great.
Sorry for multiple replies. Click on my name above to see the difference in the photo that I changed with Calvin’s method. Notice the contrast in the trees. i love it.
Ken, I just visited your site and I must say your work is terrific. Great pictures, I really enjoyed it.
Calvin
I love the double raw conversion technique. Great post.
tq
Hey Calvin!
Great post right there.
I am so glad we finally have some German guest bloggers here.
I am following Scott’s blog for a long time now and can’t remember a German post.
I hope we’ll see a lot more of you, Calvin, in the next years.
One last thing: rabbit341 (small insider…)
Marvin
Great guest Blog!! I have followed Calvin’s work on Deviantart for a while. His tutorials are outstanding and fairly easy to understand. Truly an inspiration
That was an awesome post! Danke schön!
Scott,
Excellent guest presentation. Would love to see some classes by Calvin at Kelby Training.
Yet another great guest blog entry! Calvin obviously loves sharing his photoshop tricks and has come up with a really cool style of his own. I hope we get a part 2, and 3, and more of this entry!
You’re the man Calvin! Thanks for sharing.
Hi all
First of all: THANK YOU
All your words make me happy and give me much motivation to do more in english language.
And a big thx for all your emails.
I promise i will do more soon. Maybe some free webinars and i will post more tutorials on my youtube account (in english).
Thx to Scott and Brad for the post here.
lg Calvin
Fantastic stuff (and what a bonus, no 3rd party extras to purchase)!
–Wade
Incredible work! Thanks for the info, I see some awesome techniques here that I could definitely work into my own stuff. Looking forward to learning more.
Absolutely the best blog so far. Fantastic work. Thank you so much for sharing your work and techniques.
Andrew
Wow! Thanks so much for an excellent article and sharing those wonderful video lessons. The Freaky Details lesson works in Photoshop Elements, too.
CH,
Thanks for sharing techniques. I loved this post!
Cheers,
bill
Really great article to get the the creative juices flowing. Everyone really seems pumped from their comments. I wish he would accept Pay Pal on his tutorial sales site.
Scott, I had to throw this in, go to Chase’s web sit to see how they made the Old Spice commercial where the guy goes from the boat to the horse. It is great and can be found at: http://blog.chasejarvis.com/blog/
Your videos remind me a bit of Bob Ross. Just awesome.
Phenomenal post Calvin! Love it man! I checked out your site and you have some really nice work! Great video, awesome technique, great guest post!
Thanks for sharing man!
N.
Scott, can we have some of this guys’ video’s added to Kelby Training. I found his techniques amazing and he has some great stuff on youtube……. I think some of his work would be great on Kelby Training……
Calvin, very helpful for a novice like myself, thank you.
Calvin,
Great effect and great tutorial. Thanks for sharing your skills and knowledge!
Cheers,
Rog
Calvin,
Brilliant! Just when I thought I had the world of Photoshop figured out, you go and sharpen an image using blur…haha!! Thanks so much.
I really appreciate your approach to sharing knowledge and I think that Scott Kelby and the people he interacts with on the blog have really proven how giving the creative community can be.
Thanks again to you and Scott!
Thank you so much Calvin for being Scott’s guest blogger today. I just tried both of the techniques you showed in the blog today on some pics I shot over the weekend.
Fantastic!!!!! The results are incredible, and so easy and quick to do. I look at the pictures before this processing and they look soft. I will definitely by seeking out your other tutorials.
Thanks again,
Dan
Nice, thanks for the tips! Thanks for passing them along.
Calvin,
thanks so much for this post! I haven’t been excited this much over Photoshop for a long time – YOU ROCK!
Thanks again for making my day Calvin (& Scott)
Hands down one of the most worthwhile half hour I ever spent. Thanks, Calvin, and thanks, Scott, for introducing us to Calvin. Now, I’ll have to get to work ;-) (I just noticed: only one other woman here. Hmmmm, go figure).
Yay! That was one of the most fun guest posts I’ve read in quite a while.
You really made me laugh. You´re english is just fine. You get your point across.
Great techniques! Keep up the good work!
“…Sh*t, I can´t change the blend mode!…” A classic! :-)
Fantastic guest post, thank you!
Awesome tips on the “freaky detail” portion. Never imagined you could use Photoshop in this way. In the past it was always “unsharp mask” and a lot of color burning and dodging. Thanks for a new perspective!
These were great. I totally enjoyed them. Thank you for the wisdom and inspiration!
Well I’m going to echo what a lot of other commenters have done and say that this is one of the best guest posts Scott has had and the kind of post I would like to see a lot more of.
I freakin’ love your work! Oh my god…
Very cool… so nice to see someone sharing their knowledge and such extremely interesting techniques as well. Calvin, you have another fan.
Thanks a lot man! I think this look is really cool
Wow!! That’s some really cool stuff!! Calvin I love your presentation, no aplologies needed! Thanks for the tutorials.
-Mark
Great post and thank you for your great Tut´s on you tube. I will be sure to keep track of your work. Great photos and great post production.
this was a great post! i do my own designing and printing work at http://www.psprint.com/postcards and this was indeed interesting.
Thank you, enjoyed very much
VERY COOL, Calvin! Thanks.
Sharpening by Bluring!
Cool.
WOW!!, Thanks, Calvin. I have been looking for help on doing effects like these. Awesome job!!
Sick technique man! I checked out some of your tutorials on youtube as well, very cool :)
Hi all
Thanks again.
Every comment of you make me happy
lg Calvin
Superb post — really thought provoking. Your imagery is striking.
Thanks,
Balliolman,
England.
I love the illustrated look in photographs. It’s so interesting to see all the tiny, microscopic details you can pull out of an image to give it an entirely different presentation. Great stuff, Calvin! And thanks for the tuts!
Sweet. You’ve posted some techniques I haven’t seen anywhere else. Thank You for sharing.
Scott, this guy needs his own Training Vid over at KelbyTraining. Think you guys need to spring for a plane ticket to Tampa for Mr. Hollywood. Come on. We know you can… Make it happen. ;-)
–Rich
Calvin, I just bought your Calvinized Video tutorial and I’ve learned so much in just the first 15 minutes! Thank you so much for being so generous in sharing your techniques. You are a genius, Regina
Nice article, i’m following Calvin for a while now, that’s a nice write up.
Just in case anybody is wondering: STRG-Z would be CTRL-Z respectively cmd-Z
Wow, this is really, really cool. I shall certainly be giving this a try.
Many thanks, Calvin.
Really great blog with some wonderful techniques. I’ve been looking for a sharpening technique like this it seems like forever. No halos to get rid of, cool.
Thanks for a great read and a great share of three great techniques.
Thanks a lot for sharing – I learnt some really neat tricks.
Hi Calvin,
That’s a deadly post! Well done and it actually has given me a new perspective on using PS. Also great to see a fellow country man on Scott’s Blog! Gute Arbeit!
Gruss
Henrik
I liked very much the Freaky Details tutorial but also the The Double RAW Conversion. I learned how to use the advantages of the smart layer. Thank you very much!
Thanks Calvin, for this nicce blog i really get al lot of information and techniques that you mentioned and i saw your videos on youtube to, you create an awesome photos in very simple steps.
I like your style and work ( i checked your portifilio and it’s amazing).
Thanks again
Essam
Egyptian lived in Saudi Arabia
I tried that and I loved it!
thanks a lot Calvin!
You gave fantastic honest ideas here. I performed a research on the issue and discovered almost all peoples will agree with your blog.
Nice one… pretty interesting images there
@All
Thank you so much!!!
lg Calvin
Love the tutorial and especially love your work! Love the colors and such great detail. Can someone offer some help. He duplicated the layer,vivid light, and then invert. I don’t get it because after I invert, I don’t get the consistent gray look. My colors are bright and have a neon look. Also, to get the third layer on a pc, what is the shortcut? I can’t find how to add the third layer. Thank you.
Man this is amazing thank you very much!