

Digital Photographers and the iPhone/iPod touch
More and more photographers I know are now carrying around their portfolios in their pockets. The iPhone and iPod touch makes for a perfect portable pocket sized slideshow device. At a minimum you have 8GB’s of space, which is quite a bit for small JPEGs. Also, if you were only showing your best work, you would only need to show your best 20-24 shots anyway. So storage space is not really a concern. Also these devices have really nice large 4″ displays. The color is fantastic and the brightness is great.
I not only use my iPhone to show off my portfolio, but I also don”t hesitate to whip it out (the iPhone of course) when people ask me “how’s the family doing?” I have the latest shots of my two girls on it all times. I also have older photos too so that they can see how much they’ve grown. Although the iPhone integrates quite nicely with Apple’s software products such as iPhoto and Aperture, I’m a Photoshop Lightroom user. I also shoot in RAW almost exclusively. So I need a method to get those RAW files into manageable JPEG files and to get them over to the iPhone.
Luckily, whether you’re on a Mac or a Windows PC, you can use Adobe Photoshop Lightroom to automate the entire process. It’s all in the Export presets. I have several Export presets setup in Lightroom for all the various ways I share photos. I also have one setup specifically to go to iPhoto. Now I realize iPhoto is a Mac only app. Don’t worry PC users, I’ve got you covered too. Hang in there with me. Since the iPhone can sync which ever photos and albums you specify in iTunes from iPhoto, it makes sense to take advantage of this app since it comes with every new Mac.
Let me be clear! I don’t use iPhoto to manage my photos. I use Lightroom. However, I do take my best/favorite shots from LR into iPhoto as JPEGs. Once those shots are in iPhoto I can then sync them to my iPhone, iPod or Apple TV.
Here’s how to set it up:
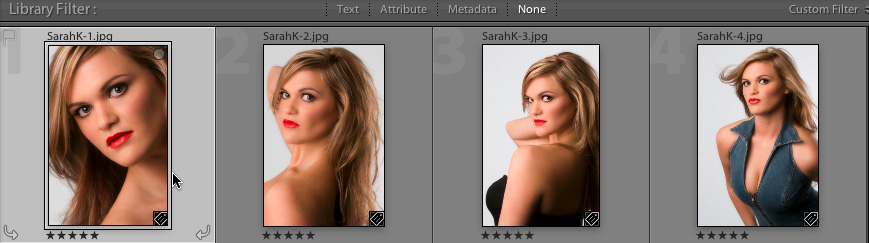
1) Open LR and select one or more photos
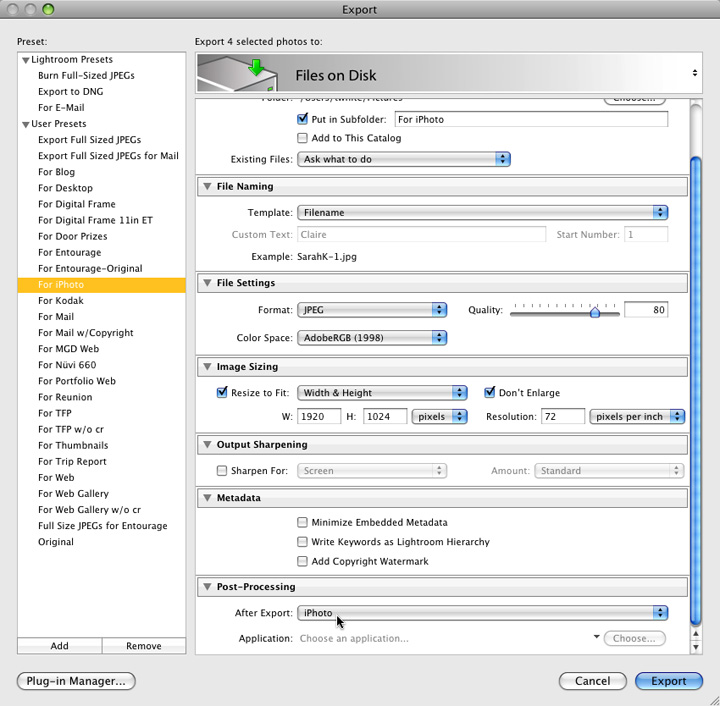
2) Either click the Export button or choose Export from the File menu to bring up the Export dialog box.
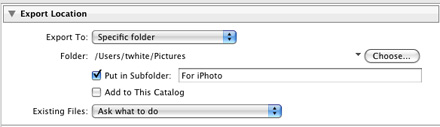
3) Next you’ll need to set up your settings. First you’ll need to choose a folder to export your images to. I’ve created one in my Pictures called “For iPhoto”. You can also setup if your File naming if you want it to be custom. Otherwise it will use your existing file names.

4) The next section is for File Settings. Here is where you set the format to JPEG. Color space to Adobe RGB and quality of 60 or higher. I like 80 personally.

5) In the next section we have Image Sizing. This is where you set the maximum size of the images that are going to be exported. If your images are going to only be shown on an iPhone or iPod touch, then you can set the dimensions to 480 x 480. If your images are going to be shown on an Apple TV or an iPhone/iPod connected to a TV, then make the width 1920 and the height 1024. This is 1080 HD resolution. There’s no need to go any higher than that as the TV won’t show them any bigger than that. I set mine to 1920×1080, which is the most I’ll ever need, and the iPhone and iPod touch will size them appropriately as they sync. As far as the resolution goes, 72 PPI works fine.

6) There’s not much of a need to do anything in Metadata here as these images are just for show and not being seen on a computer. So you can skip down to the Post-Processing section. If you’re a PC user. You’re done. That’s right, your export will go to the folder we setup in step 3 and you can use iTunes to point to that folder to sync your images to your iPhone, iPod or Apple TV. Simply click the Add button to add this as a custom preset and give it a name. Have a nice day. However, if you’re on a Mac, you can take it to the next level by having LR send the photos directly to iPhoto after they’ve been exported. There is an “After Export” popup menu in the Post Processing area. Click it and choose “Go to Export Actions Folder Now”. This will take you back to the Finder and show you your Export Actions Folder.
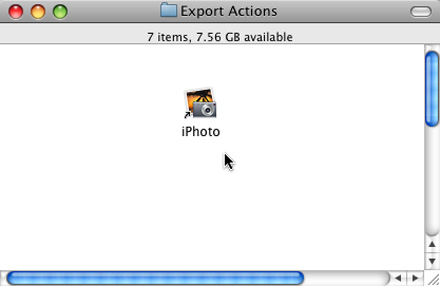
7) Find the iPhoto application icon in your Applications folder. You’re going to make an alias of iPhoto into your Export Actions Folder. The easiest fastest way to do this is to hold down the Command and Option keys and drag the iPhoto icon into your Export Actions Folder. You should see an alias of iPhoto (an icon with a little curved arrow on it) in your Export Actions Folder. Also your iPhoto application should still be in your Applications folder. You can now close these folders and go back to LR.
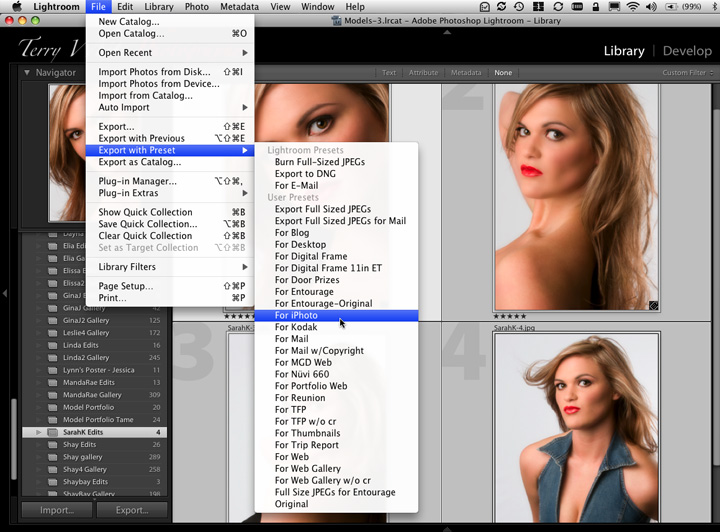
8) Now from the After Export popup, you should be able to choose iPhoto. Once you do, click the Add button on the left to add this custom export preset to your menu. You can click Cancel and give it a spin. Choose Export from the File menu and choose your new “For iPhoto” preset. This will export the JPEGs to a folder that are the right size and resolution and then if you’re on a Mac, it will import them automatically into iPhoto. From there you can arrange them into albums.
Hey, if you want to see me do this whole thing from start to finish, check out this video: