

OK, What’s Going on With This Blog?
I wanted to update you on “the state of the blog.” I’m not sure what to call its current state. Hibernation? Sleeping? Actually, I prefer the term “creative pause.”
For the past 19 years, I’ve had the awesome privilege of connecting with you through this blog and then from my other blog, LightroomKillerTips.com, and it’s been an incredibly fun and fulfilling experience.
However, balancing the demands of writing regularly for two blogs has become really challenging, and neither is getting the attention it deserves, so I’ve made the decision to take a creative pause here on ScottKelby.com so I can focus on LightroomKillerTips.com and give it the attention it deserves.
I don’t want to pull down this blog because it still has a lot of relevant content that people still access daily (in particular, the wonderful Guest Blog Wednesdays archive, the brainchild of photographer and colleague Vincent Versace, and raised carefully from a pup and nurtured for so many years by the awesome Brad Moore).
I also want to be able to interrupt this creative pause if I have something important to share, like the Worldwide Photo Walk winners or important milestones in our industry, so you haven’t seen the last of me here yet.
This pause will help me to refocus and recharge my creative energies. It’s not a goodbye — it’s more like a short intermission in our conversation. During this pause, I’ll dedicate my efforts to LightroomKillerTips.com, where I’ll continue to share all the latest Lightroom techniques, tips, and commentary (essentially stuff that makes Adobe upset with me).
I want to express my deepest gratitude for your support these 19+ years, for all your feedback and encouragement, for all the smiles and laughs along the way, and for having my back when I needed it most. It means more than you know.
In the meantime, I hope we can stay connected via LRKT, and my Twitter, Facebook, and Instagram pages. Thanks for being a part of it all, and I hope to see you here from time to time, and over there, too. I wish you all the very best on your Photoshop, Lightroom, and photography journey.
Warm regards,
-Scott

Here Are The Official Finalists and Winner From This Year’s Worldwide Photo Walk™
Once again, there were so many great images this year that you could make a case for that “should have been the one,” and the photographers themselves keep improving year after year. It all makes the judging process even harder. Narrowing it down to just ten finalists and one winner from entries literally all over the world is very challenging. Especially since there are so many things to consider when looking at an image.
I’m delighted to present to you this year’s ten finalists and our 2023 Worldwide Photo Walk Grand Prize winner (note: these were announced live on the air during last week’s episode of ‘The Grid.”.
NOTE: After the winner is revealed below, I’ll list some honorable mentions: images that didn’t win a prize but deserved some recognition nonetheless.
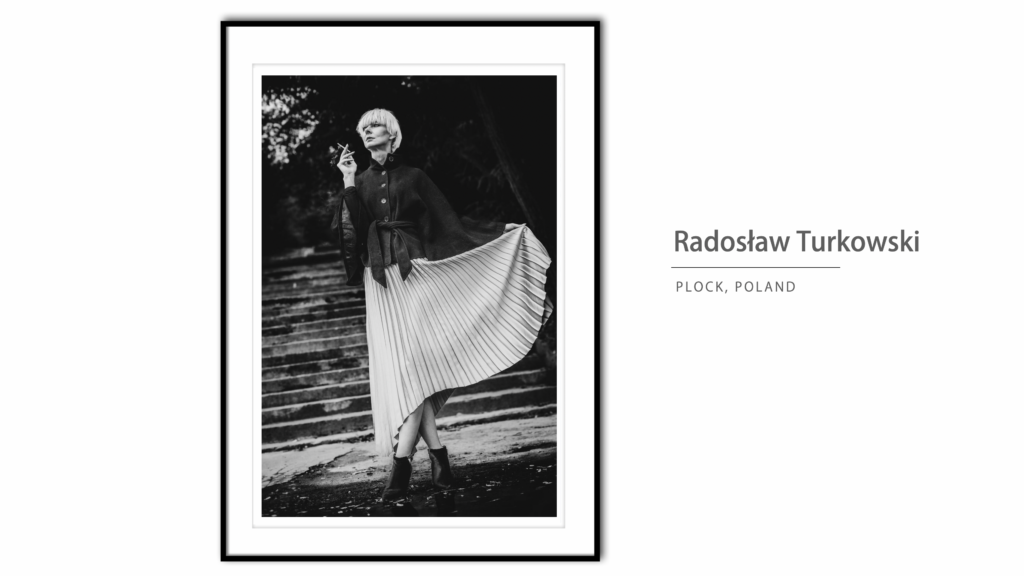
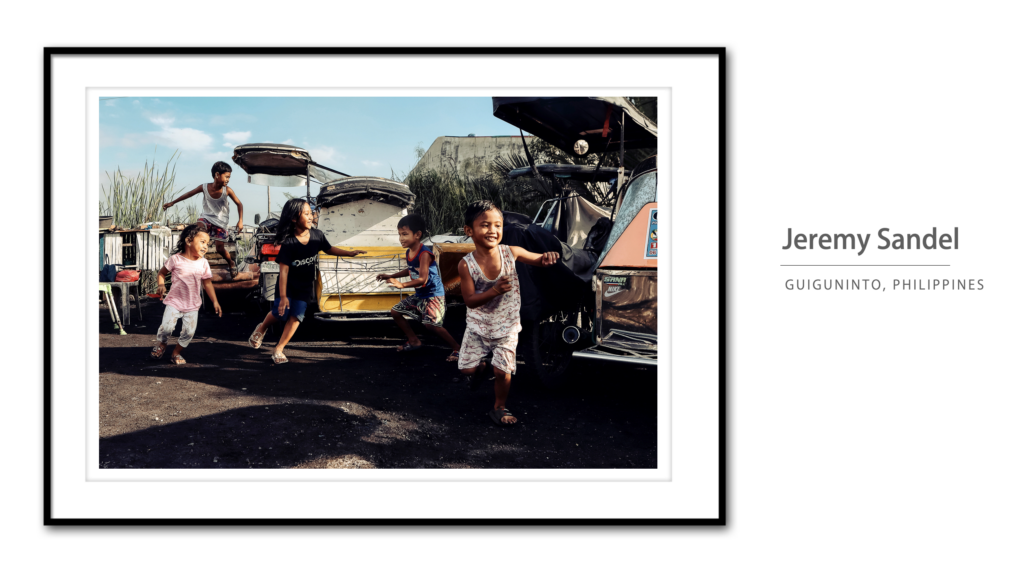
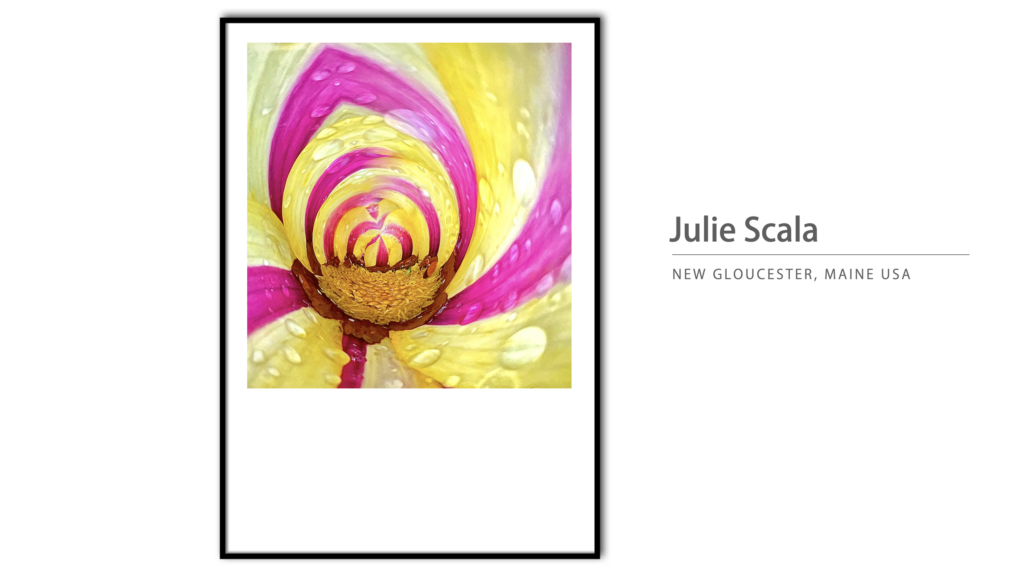
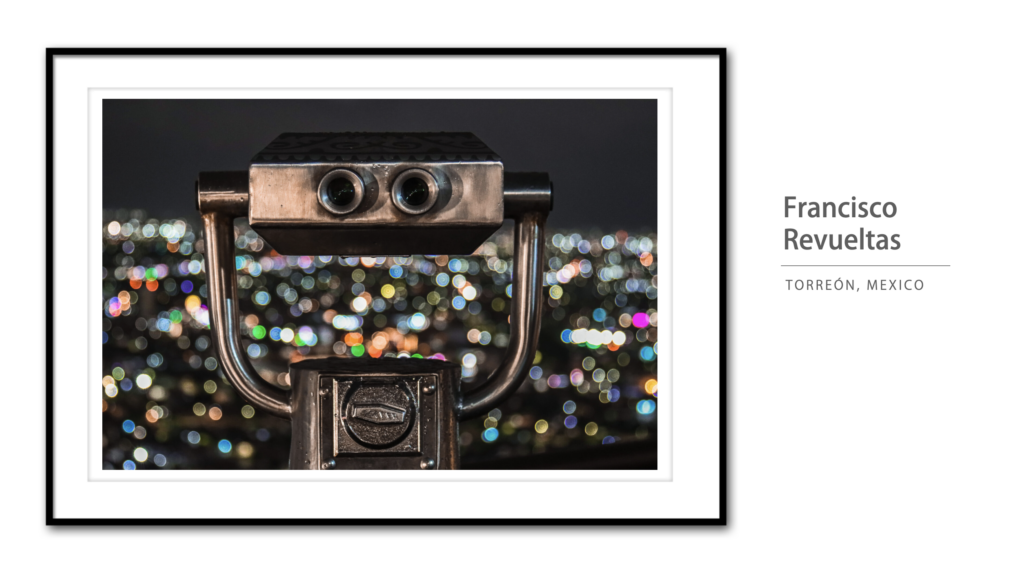
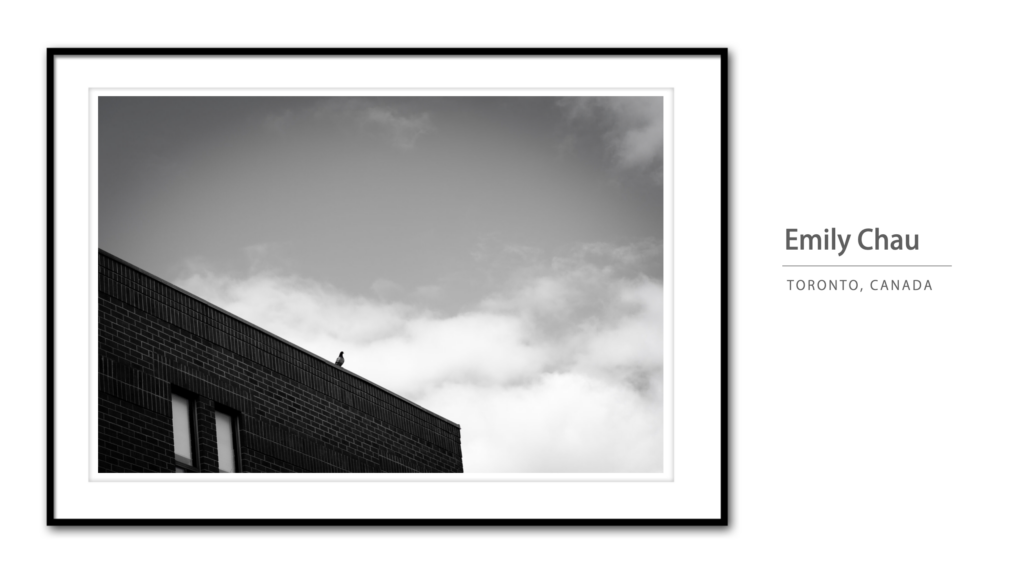
Here are this year’s Top 10 Finalists (in no particular order):
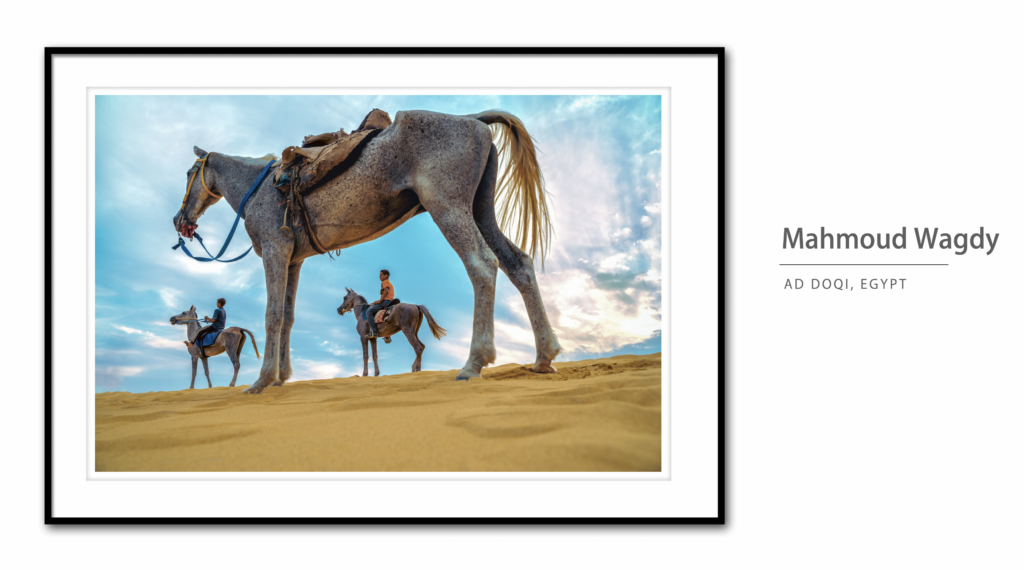
MONA HASSAN | ALEXANDRIA, EGYPT Photo Walk
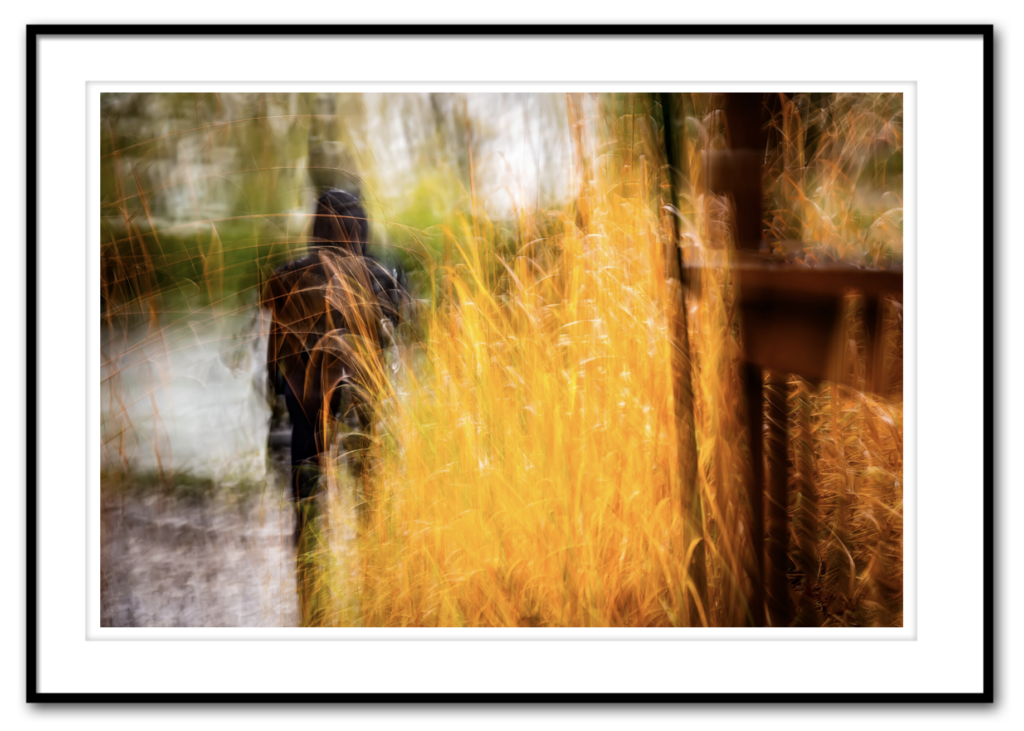
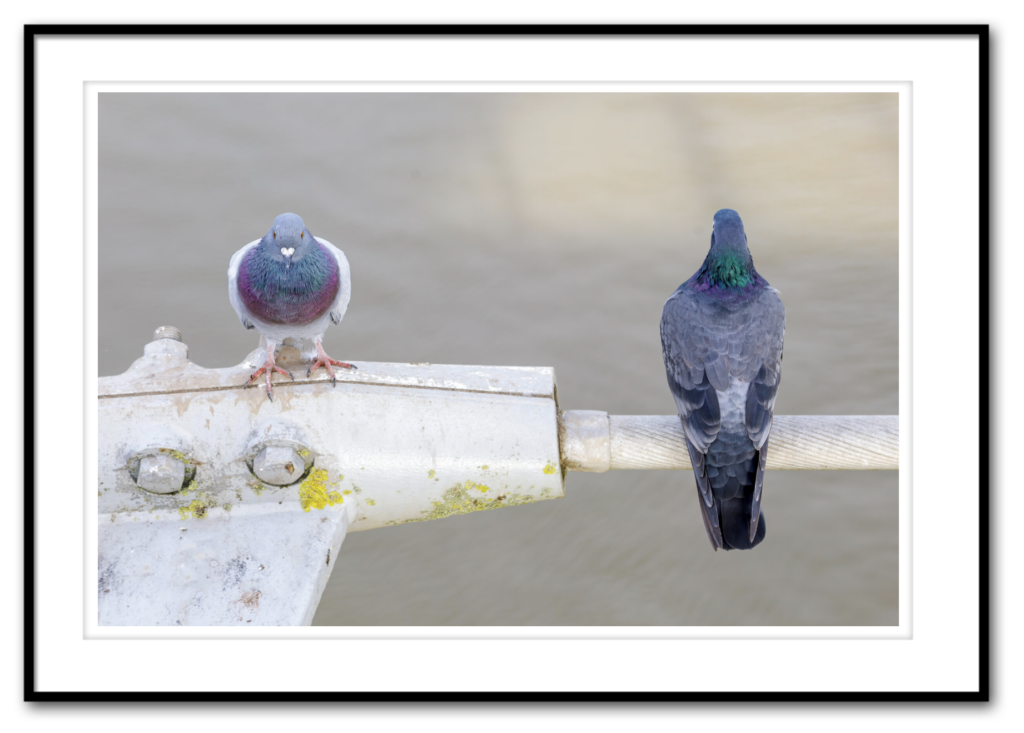
JEANNINE PITRE | LAVAL, CANADA Photo Walk
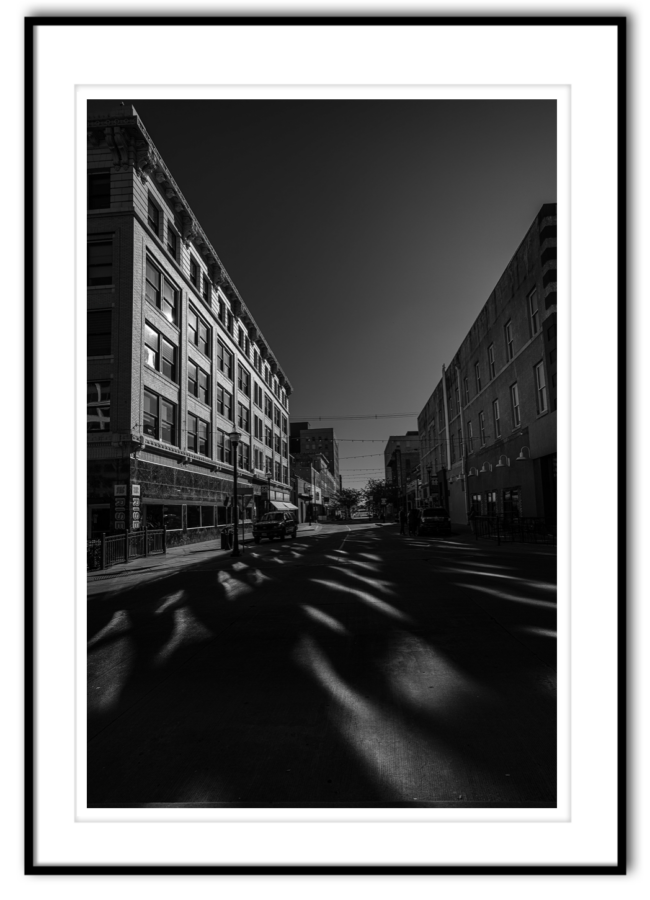
CHUCK BRUTON | SPRINGFIELD, MISSOURI USA Photo Walk
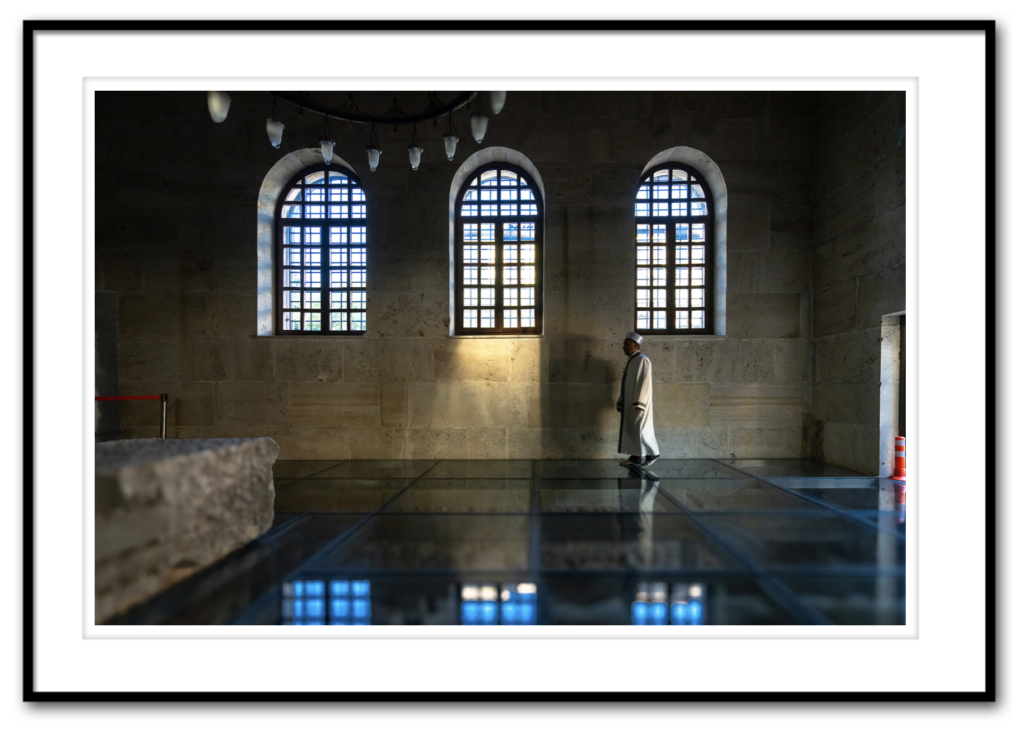
OZGUR SECMEN | MURATPASA, TURKEY Photo Walk
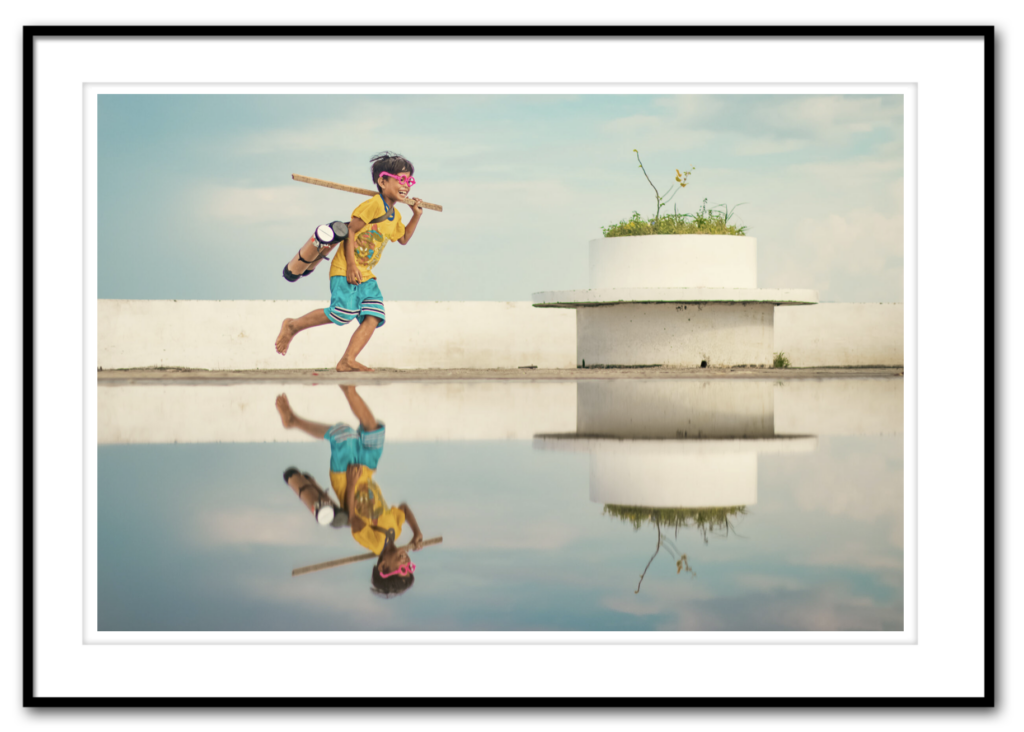
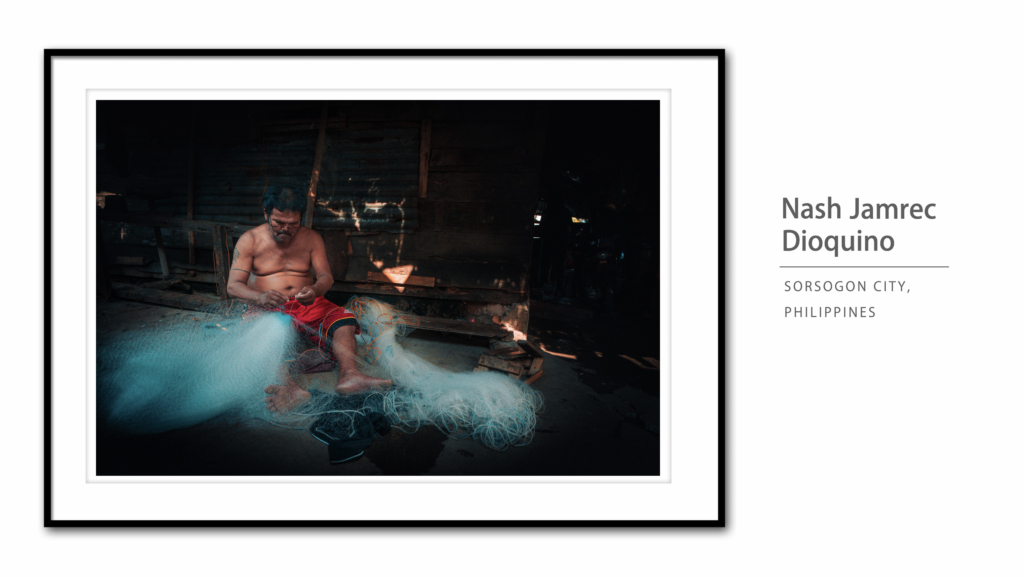
JUSTIN BAJE | SURIGAO, PHILIPPINES Photo Walk
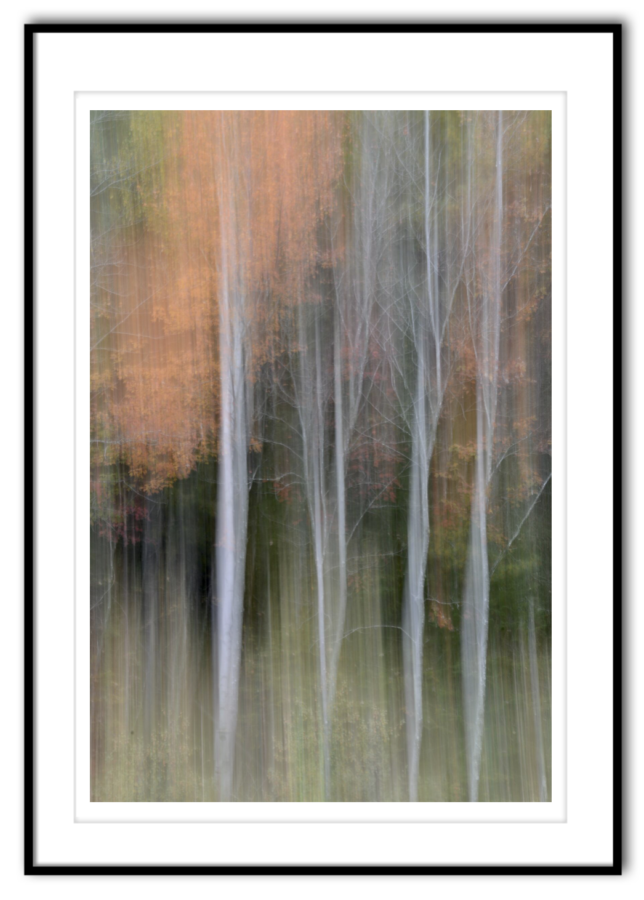
MICHIKO NISHIJIMA | OROMOCTO, CANADA Photo Walk
MOHAMAD AMIN SHARAFIANI | KERMANSHAH, IRAN Photo Walk
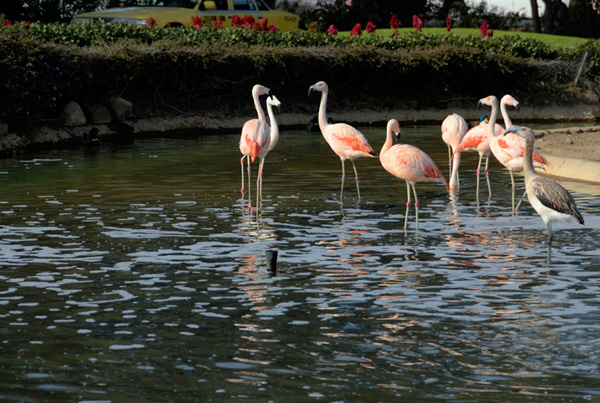
RANDY SEAMAN | ST. AUGUSTINE, FL USA Photo Walk
JAMES NICO GALLARDO | NAHA PHILIPPINES Photo Walk
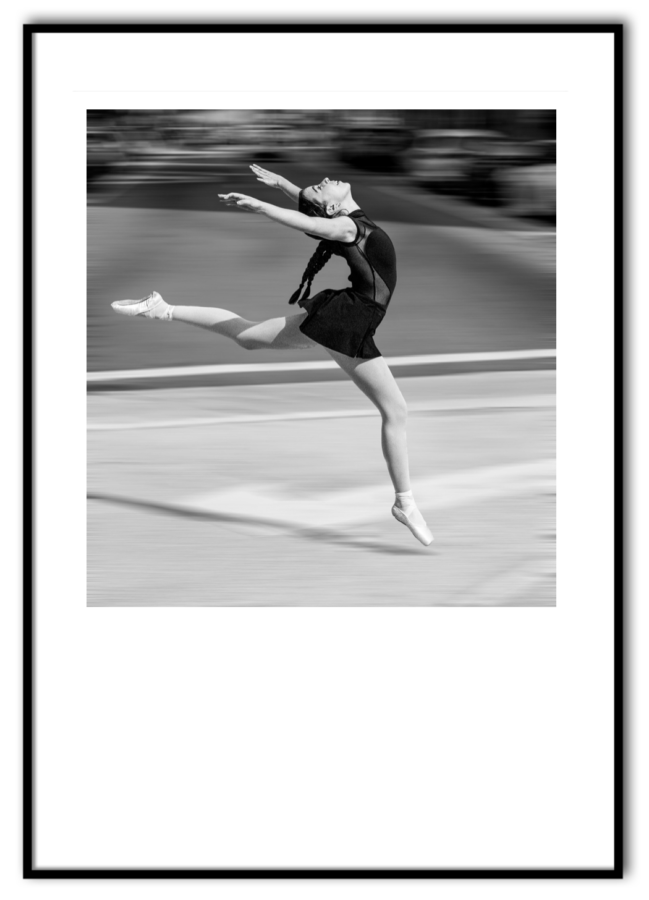
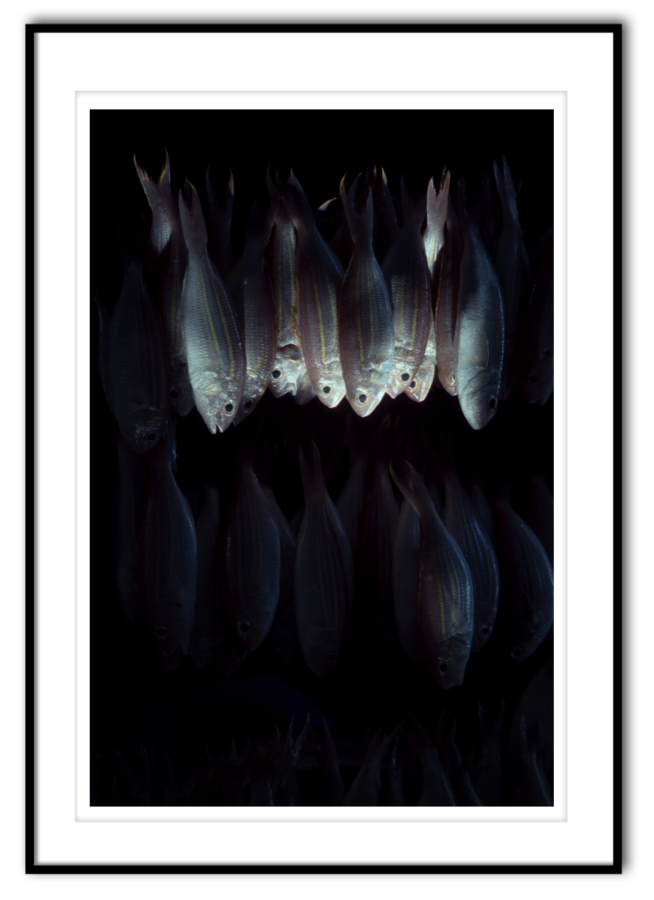
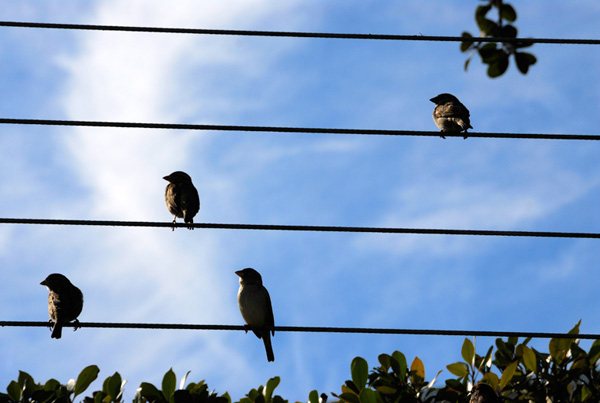
NORMAN LOWE | NEWPORT, UK Photo Walk
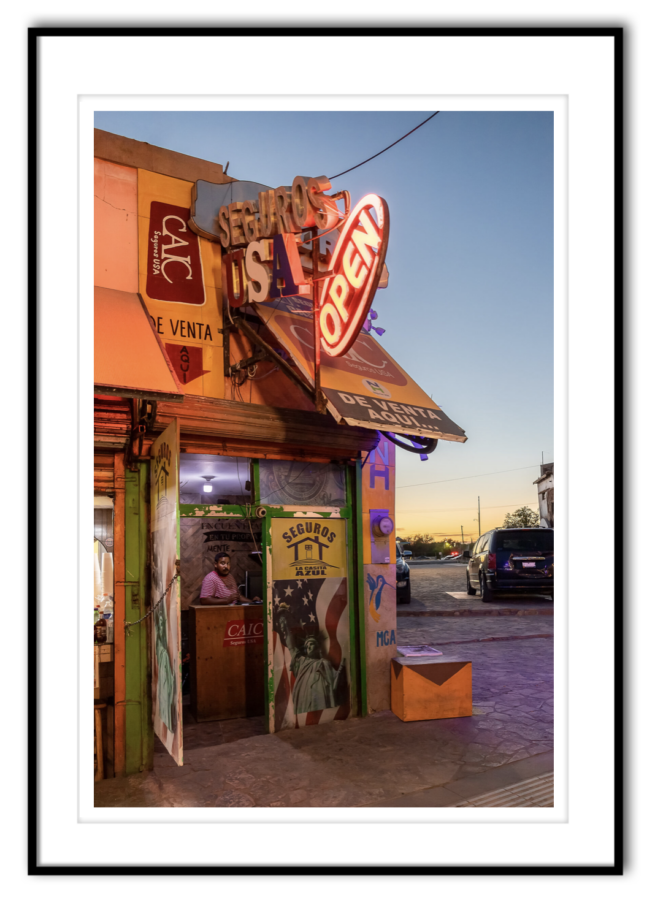
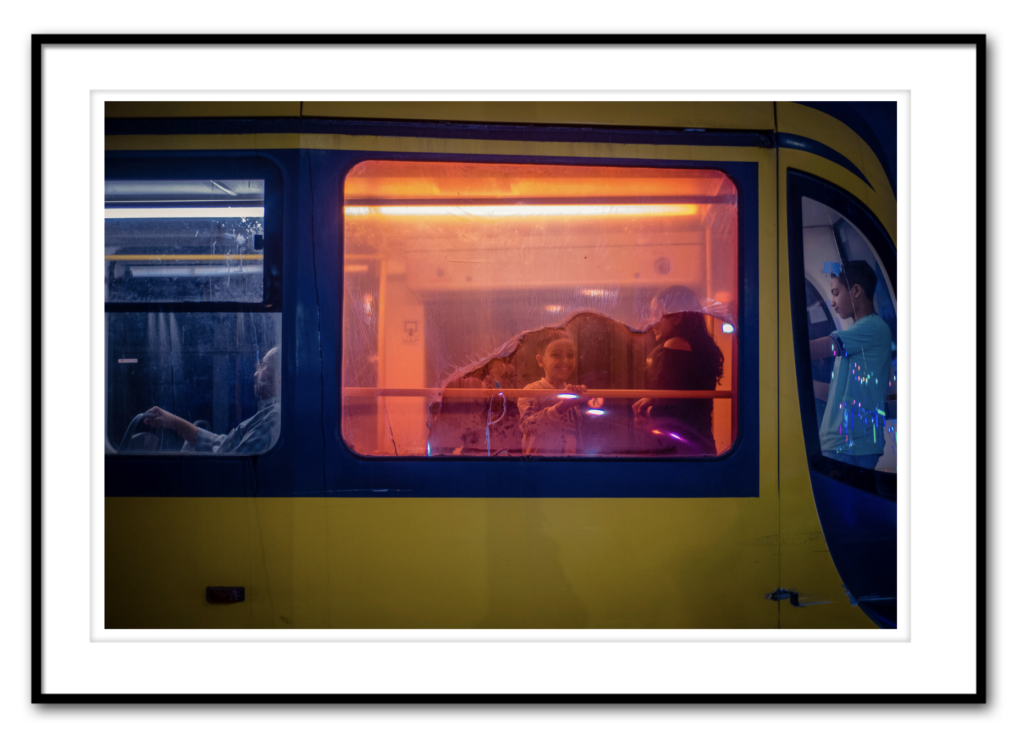
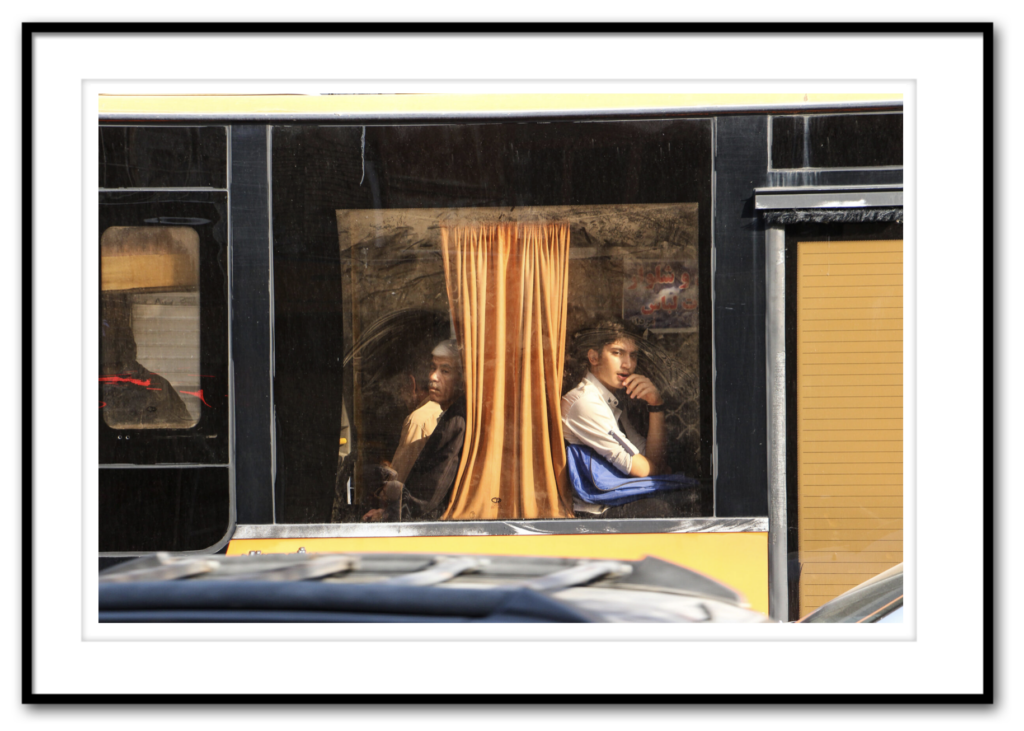
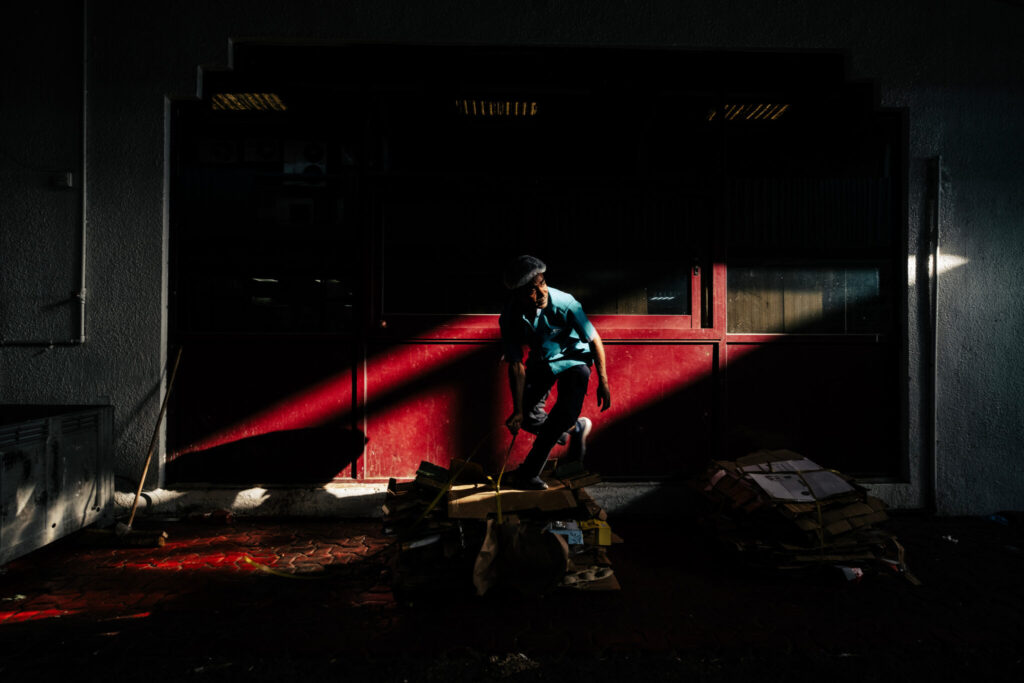
IVONNE VIDANA | CUIDAD JUÁREZ, MEXICO Photo Walk
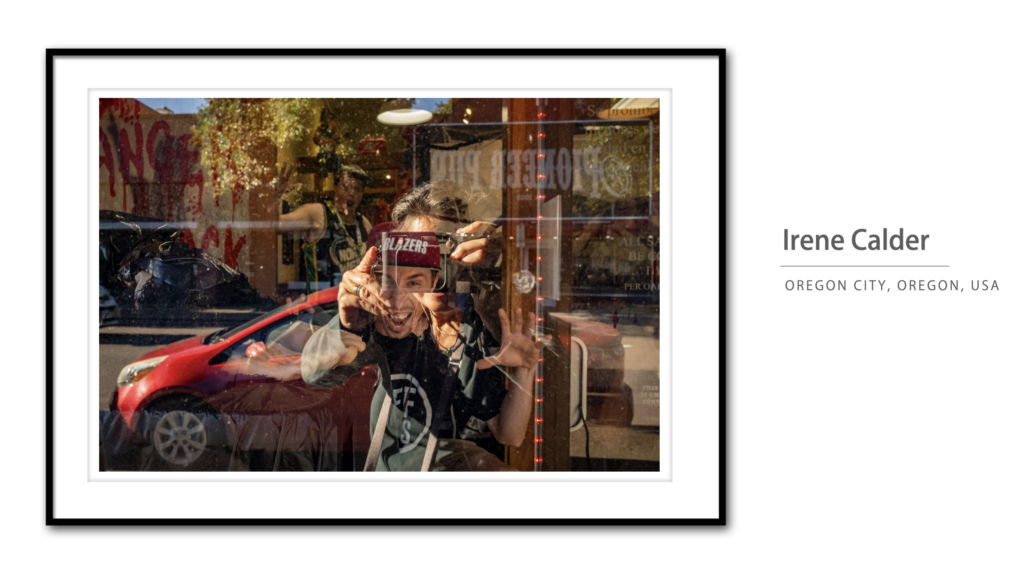
This is one of those images that grabs you from the start, and the more you look at it, the more it reveals. The lighting is great, both inside and out, the color is wonderful, and the expression of the person inside the building really makes the image. Plus, there are so many layers in this image which help draw the viewer into the image, and of course, it’s a storytelling image. It makes you wonder who this person is, what they’re doing, what’s the story here – it’s just so intriguing. It’s one of those images where there’s just “something about it” that makes it special. I don’t think it’s one thing – I think it’s all of those things I listed and more. Very well done. Congratulations, Invonne.
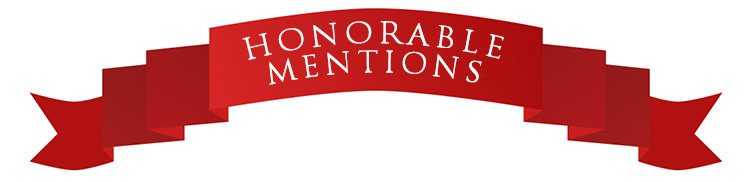
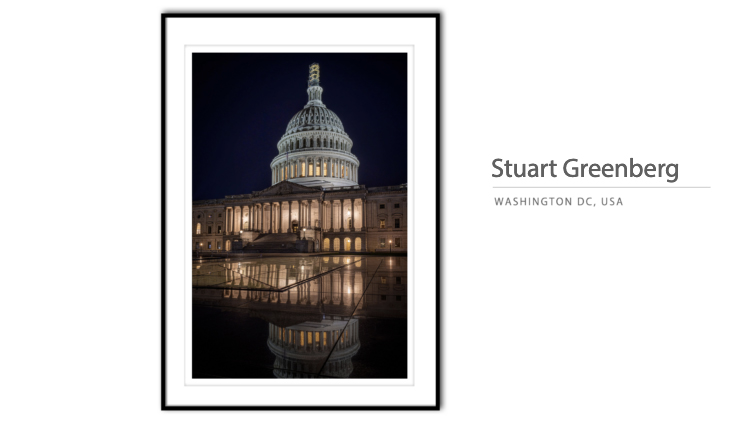
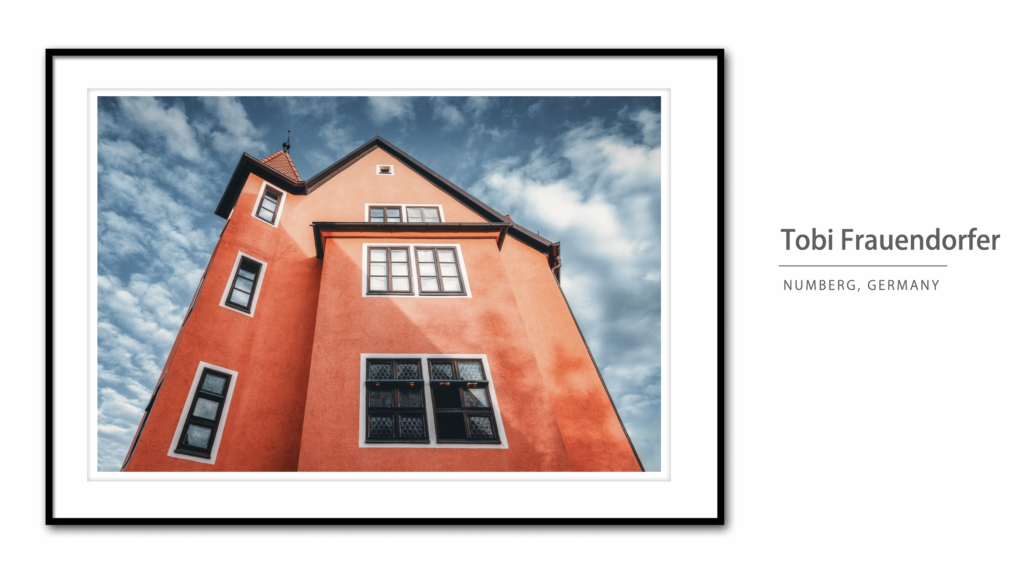
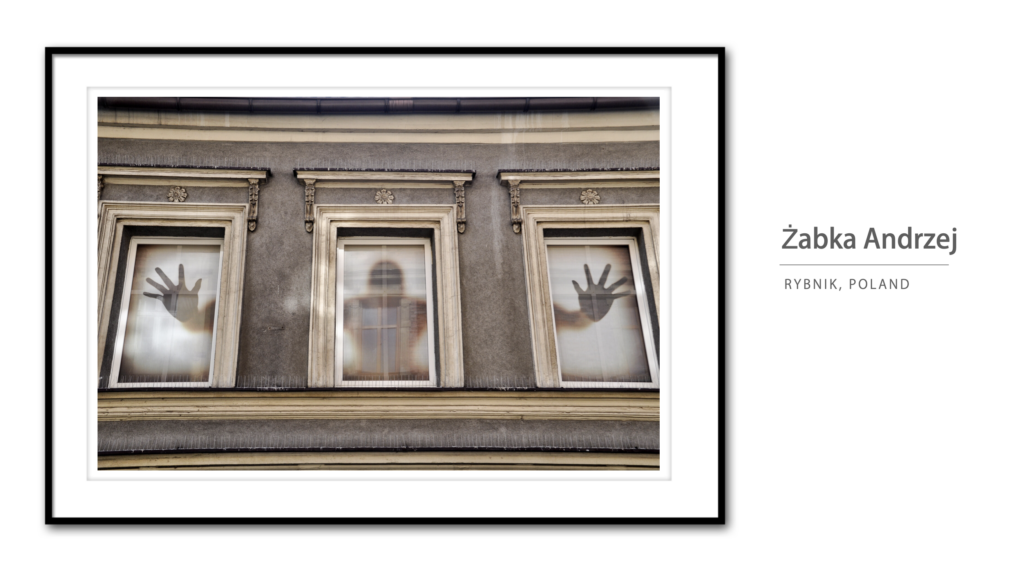
Although there’s only one winner, I felt some images were so good that even though they didn’t win a prize, they still deserved to be recognized, so I present our Photo Walk Competition Honorable Mentions (in no particular order):

Thanks to all our Photo Walk Leaders
It’s an awful lot of work to lead a Photo Walk (ask anyone who has led one), and a thankless job, so let me be the first to say “thanks.” We couldn’t do any of this without our volunteer walk leaders around the world, who do such a great job of creating the walks; working and wrangling their walkers, judging the local contest from their walk, and making the whole thing happen on the local level, and that means a lot.
We’d also like to congratulate to the Leader winner:
Mark Anthony Agtay
Location: Abu Dhabi, United Arab Emirates
Also, a big thanks to all the talented photographers around the world…
…who created such inspiring, creative, and beautiful work, and special thanks to those of you who contributed to the Springs of Hope Orphanage in Kenya — it means more than you know.
Congratulations to all the winners, and honorees. Have a fantastic day, everybody!
-Scott
The Final Guest Blog: Photographer and Mishap-Laden Adventurer Brad Moore
Editor’s Note: After many years of managing the Scott Kelby Guest Blog Series, this will be the final guest post. I wanted to end the series with my first guest post from 2008, the telling of my insane trip to Mexico with Joe McNally. Thankfully I haven’t had any trips as bad as this one since, and I don’t think any of Joe’s other assistants have either! Thanks for reading all these years, and I hope you enjoy this final guest post.
As most of you know, before coming to work with Scott, I was Joe McNally’s assistant. When Scott asked me to be his guest blogger for this week, I thought it might be a good opportunity to both finish the story and share it with a (much) larger audience.
Before you begin, a word of warning. It’s a bit long, so I’ve parsed it into four parts to make it a little easier to get through. As you’re reading, you’ll be thinking, “How can this get any worse??” I assure you, it can and it does. I hope you enjoy!
Part I – Always Double-Check Your Carry-On
The second job that I assisted Joe on was a portrait for AARP in Washington D.C. The subject was a lawyer who had taken up pottery in his retirement. Since it was only the second shoot I’d been on with Joe, I was still getting the hang of packing gear in the Suburban… Still learning the best place for each item to go. Location work being what it is, we had to park about half a block away from the pottery studio and walk the gear over. Of course, it also started pouring the rain.
This meant that I had to walk back and forth from the studio to the truck, in the rain, to retrieve gear that I had forgotten to bring on the initial trip. Multiple times. One of these items was a knife. The cameras have these L-brackets on them that partially cover the USB port, making it difficult to access when shooting tethered, and thus requires a knife to pry it open. “Hence”, Joe informed me, “the knives always travel with the cameras.” Okay, point taken.
The shoot went well, and Joe worked his magic to create what looked like daylight pouring in through the studio screen door when it was anything except sunshine and kitty cats outside.
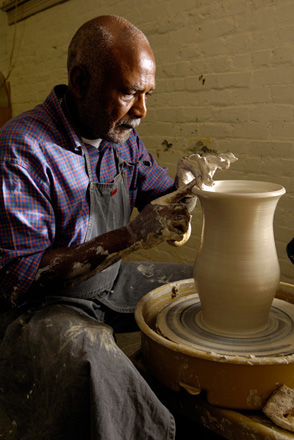
Photo by Joe McNally
From D.C., we continued traveling and began working on the NCAA Basketball preview issue of Sports Illustrated. Seven colleges over the course of about two or three weeks to do portraits of the “big freshmen.”
Fast forward a week or two, and Joe and I are flying to a different city every other day. This was a new experience for me, seeing that I’d flown a total of three times in my life before this trip.
We were going through security at Salt Lake City Airport one early morning, en route to Tucson, when the TSA agent pulls my camera bag (Joe and I each traveled with one) and says he needs to look through it. Sure, whatever. Nothing out of the ordinary…
So, he begins digging through it, and pulls out a knife. A Leatherman to be exact.
TSA Agent: “Sir, did you realize this was in here?”
Me: “Oh, crap. I wasn’t even thinking about it…”
The searching of the bag continues… He pulls another knife. Swiss Army. Suspicious look…
TSA Agent: “Sir, is there anything else in here I should know about?”
Me: “Um… I think there might be one more.”
Yep. Another Leatherman.
Me: “Just a second, let me get my boss. He’s coming through the other line.” I turn around. “Joe…”
TSA Agent: “Sir, is this your bag?”
Joe: “Yeah…?”
TSA Agent presents knives.
Joe: “BRAD!! WHAT ARE YOU THINKING!? YOU CAN’T BRING KNIVES ON A PLANE!!!”
Me: (very sheepishly) “But… You said the knives… always travel… with… the cameras…?”
At this point, I think the TSA Agent realized it was an honest mistake and explained our options. They can either confiscate the knives, or they could allow us to ship them back home via the Hudson News right next to security that happens to sell packaging and stamps and ship things.
So Joe goes over to package them up and ship them home, while I sit down and feebly attempt to tie my shoes with trembling hands. A kind gentleman sitting beside me who saw everything tries to assure me that it’ll be okay.
I finish putting my shoes back on as Joe comes back over, and we begin walking toward our gate. I’m not really sure what to do or say, so I muster up enough courage to glance over and say, “I’m so sorry.”
Joe just begins laughing. LAUGHING! After I almost got arrested.
I’m slightly befuddled as to why he’s laughing instead of yelling at me. He explains that he’s pulled his share of bonehead moves during his career, so he has to have patience and be forgiving. You have to learn from your mistakes and move on.
I finally muster a bit of a smile and we make our way to the gate. Little did I know that before the trip was over, I would test his patience, grace, and forgiveness as much as humanly possible…
Part II – Check and Double-Check Vital Items along the Way
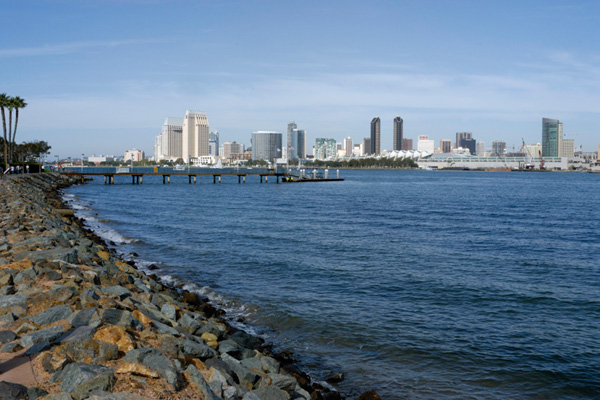
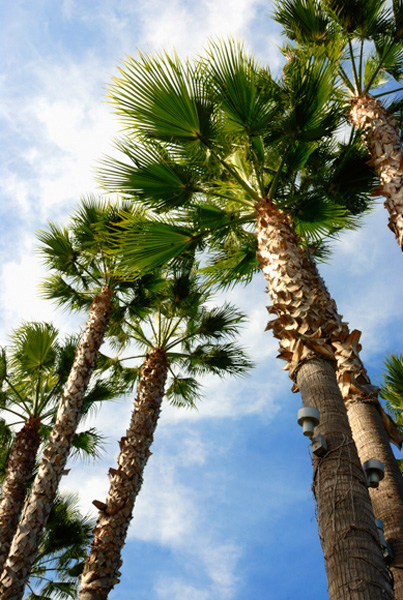
We finished shooting for SI and retreated to Coronado Island, outside of San Diego, for a few days rest before heading south to cover the Baja 1000 for Micron. Needless to say, this differed immensely from the previous job I had in college, working part-time for a mid-size daily newspaper. Joe reminded me of this as we sat having breakfast on the patio one morning, overlooking the harbor and city, surrounded by palm trees and beautiful weather.
I was enjoying my stay on the island, walking around the nearby area snapping pictures, driving down to the village and shopping for flip flops, and visiting the beach at The Del.
Yes, all was going well until the day before crossing the border to Mexico…
As I’m getting things organized, preparing to cross the border, I decide to ahead and pull my passport out of the camera bag pocket I had packed it in. I unzip the pocket, stick my hand in, and don’t feel anything.
What. The. Crap.
I proceed to empty every single pocket of every single bag I have with me. Every zipper unzipped, every pocket emptied, every nook uncrannied. Nothing. It’s official…
I… have lost… my FREAKING PASSPORT!
The passport that I had just gotten for this trip. The passport that had never been outside of the United States. The passport that had no stamps on any of the pages. Gone.
I go down to meet Joe for breakfast, having absolutely no idea what I’m going to do or how he will react. He walks in and greets me, but sees the look on my face and immediately asks what’s wrong.
“I can’t find my passport.”
He looks displeased, to say the least, but gains his composure and immediately begins thinking about how we’re going to pull this off. Luckily, it is 2006, and I can still get into Mexico with a U.S. driver’s license.
Once we figure this out, we breathe a potential sigh of relief (you never know for sure what’s going to happen until it happens). We enjoy the rest of our time in Coronado, then prepare to venture south of the border.
The next morning, we awake, load our rental vehicle, and drive south. We arrive at the border and pull out the instructions that have been emailed to us on how to get our visas (the process involves a lot of going from one office to another and then back to the previous office, and it has to be done in a very particular order).
At one point, I am asked for my passport. I smile and say, “Driver’s license?” as I hand it toward the officer.
“Passport…?”
Big, friendly smile. “Driver’s license…?”
He rolls his eyes and accepts my license, finishes processing the paper work, and we’re on our way.
Sweet! I made it into Mexico without my passport! It was a big moment of joy for me. Unfortunately, it would be short-lived…
Part III – Be Very Careful, But Don’t Always Use Your Head
“I’m okay, I’m okay, I’m okay… Wait. Son of a… Is that blood?! Oh, $%*^! This did not just happen! I did not just crack my head open on a TRACTOR FREAKING TRAILER!! Seriously! This can NOT be happening! Not after all I’ve already been through!”
This, along with a stream of obscenities, is what was going through my head (besides the tractor trailer) at the end of the same day I crossed the border. Let’s rewind a few hours…
When Joe and I arrived in Ensenada a couple of days before the race, we met up with the Micron people we were working with, and they guided us up into the mountains to the Wide Open Horsepower Ranch, where their team was staging. They were getting the cars ready, making sure everything was in order, and it also served as their party grounds. Not like a frat party or anything, but they were definitely having a good time.
We sat down to eat while different people came up on stage and made presentations and speeches, all the usual thank-you-for-everything-we-couldn’t-have-done-this-without-you-yay-for-us kind of stuff. As we were sitting on the folding chairs, my butt started hurting because of my wallet. So I took it out and stuck it in my jacket pocket. The night wore on, Joe snapped some more pictures, then decided to call it a night and get back to the hotel. So we hop in the rental, along with someone to help guide us back down out of the mountains and into Ensenada safely.
We arrive at the hotel and try to check in, but they’re overbooked. As Joe attempts to work his New York, uh, “charm” on the guys behind the desk, I realize that my wallet isn’t in my back pocket. Oh, but I stuck it in my jacket pocket, and I left my jacket in the truck.
“Hey Joe, can I get the keys from you to get my jacket? I forgot it in the truck.”
I go out to the truck, grab my jacket, and feel around in the pockets…
No wallet.
Therefore no driver’s license, no work visa, no debit/credit cards, no cash… nothing. Yet again, crap.
I go back in and hand the keys to Joe, very much unsure of how exactly I’m going to handle this, especially since he’s already tired and still trying to get rooms for the night. He keeps talking to the guys behind the desk, but finally glances over at me and sees the very worried look on my face.
“Brad, what’s wrong?”
“I lost my wallet.”
“You… lost your wallet?? Brad, I can’t get you out of the country without your ID.”
“I know. But I think I know where it’s at! I stuck it in my jacket pocket when we were eating dinner, and it must’ve fallen out right around where we were sitting! I’ll go back and find it, and take him (the guy who guided us to the hotel) back since he has to go anyway! I’ll find it, and everything will be okay!”
I honestly don’t remember what Joe’s reaction was at this point, but he says that he was ready to leave me in Mexico to fend for myself. I can’t blame him.
I made the half-hour drive back up to the ranch and dropped off our guide, then parked the truck. Now, one of the other team sponsors was Monster Energy Drinks, and they had a big tractor trailer with a stage set up between where I parked and where we had eaten dinner. So, I decided that it would be faster and easier to go through a gap between the stage and trailer than to go all the way around it. Wrong.
I ducked down to go underneath the trailer, thought I had made it to the other side, and raised up too early too quickly. My forehead hit the metal edge and knocked me on my rear. I regained my composure, hoping that I was okay. I didn’t feel any pain, other than my neck being jarred from the impact. I thought I was okay, until blood started dripping onto my glasses. Then an internal string of curses started going through my head. As I made it out from under the trailer, a young guy saw me and came over.
“Dude, are you okay??”
“Yeah, I think I’m fine. I just need something to stop the bleeding.”
“No, man, you need stitches! That’s a nasty gash!”
“NO NO NO, I do NOT need stitches. I can’t need stitches!”
“Just sit down over here and let me get the medics…”
Cue examination and questions… Yes, I did actually realize the tractor trailer was parked right there. No, my head doesn’t hurt for some reason (I think I managed to cut through the nerves or something). My neck hurts. Is a neck brace really necessary? Okay, fine. Yes, I have insurance. No, I don’t have proof. I lost my wallet. Yes, I do realize that I am royally screwed, thank you.
This all takes place as a crowd of people gather around to see why an ambulance with flashing lights just pulled up and take pictures of the idiot who just cracked his head open on a tractor trailer. The medics get me onto a stretcher, load me into the back of the ambulance, and off we go down an entirely-too-bumpy road to the hospital. Luckily, the Micron guys were able to make sure I get taken to a private hospital, so that put my mind a little more at ease. I know it’s a half-hour drive back to downtown, so I decide to kill some time and text my old college roommate on the way…
We arrived at the hospital, and it was indeed private; they turned the lights on as we came in. The doctor did x-rays of my neck to see if it was injured, but it wasn’t. Then he began stitching up my head.
Back at the hotel, while this was happening, Joe has finally gotten a room and is settling in for the night when he gets a knock at the door…
“Joe, sorry to disturb you, but your assistant is in the emergency room with a big gash in his head.”
I can only imagine his reaction, and I’m not sure I even want to do that. Thankfully, he didn’t shut the door and leave me to fend for myself… He got dressed and came to the hospital.
Because the gash was so deep (down to the skull), the doctor had to do three stitches inside, then six outside. While he’s working on me, Joe shows up. I’m lying on the gurney and see him come in out of the corner of my eye. The whole time, my biggest fear was how he was going to react. I could’ve given a crap about my head at this point, I was worried about whether or not I was going to have a job after this trip was over!
Joe walks over and asks, “How ya doin’ there, Brad?” He describes this next part as a There’s Something About Mary moment, the scene where Ben Stiller gets, um, “stuck” in his pants zipper and everyone who tries to help says, “Oh, it can’t be that bad…”
Joe leans over to see how my head looks, thinking, “It can’t be too bad… OH MY GOD!! I CAN SEE HIS CRANIUM!” Thankfully, that’s his internal reaction and not his outward reaction, as I had not actually seen the wound at this point. He just says, “Well, you gave yourself a pretty good gash there, Brad.”
This how my head looked about a week after it happened:
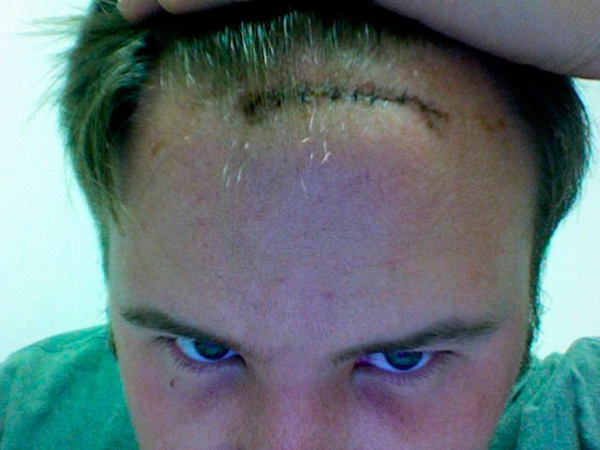
Joe consults the doctor to make sure I can still work in the hot sun over the next few days, and the doctor says it’s okay as long as I take my antibiotics and wear a hat. As they’re talking, I sit up on the gurney and look back at where my head had been for the past hour or two. Blood… Lots and lots of blood. Pretty much the entire top 1/4 of the gurney was red with the former contents of my head.
We wrap things up at the ER, and Joe drops me off at the hotel and goes to the pharmacy to get my prescription filled. I go up to my room and grab a very careful shower. Once I’m cleaned up, I send a text message to my mom back in Tennessee, thinking that she’ll get it when she wakes up in the morning.
“Can you cancel my debit and credit cards for me? I lost my wallet. Also, I have 9 stitches in my head, but I’m okay.”
Unfortunately, this awoke my mother at 3 a.m., and she called as I was lying down to sleep. “Mom, the signal here sucks and I can’t hear anything that you might be saying. But I promise that I’m okay and will call you in the morning. I need to sleep, so please don’t call back. I love you, goodnight.”
Of course, right before my alarm goes off the next morning, my phone rings again. It’s my mom, wondering if I got mugged or something. I explain what happened, what I needed her to do, assured her that I was okay, and got ready to go scout the race course with Joe.
Part IV – Sometimes, It Just Comes Down to Luck
The scouting went well and was pretty uneventful, other than Joe hanging out the side of the truck going down the highway to take pictures of the Micron tractor trailer while it was driving down the road. We figure out that we’re going to have about two or three chances to intersect with the cars since we’re only covering the first day of the race and not the whole thing. Each of those times will come and go very quickly since the cars aren’t exactly slowing down to pose for a picture, so we have to be right on with whatever we shoot.
On race day, we get to our first shooting location, a hill where the cars will get air as they come across, and set up amidst all the drunk and rowdy race fans along the sides of the road. Keep in mind that these are public roads and not closed off. There is minimal police presence to keep things under control, other than a cop at an intersection to stop traffic for the race cars when they come through. As we’re setting up, civilian cars occasionally across the hill and are met with cans, bottles, and even chairs. We do our best to avoid any flying debris, though I think Joe may’ve caught some spray from a not-empty beer can.
Joe goes up the road a short distance to the next hill with a long lens and puts me at the bottom of the jump with a wide lens (this isn’t the ideal situation to set up a literal remote camera, so I acted as a “protective” remote, if you will). As I mentioned before, police presence is quite minimal, and these drunk race fans aren’t being held back by any sort of barricades or anything. Joe and I aren’t the only ones there with cameras, so everyone tries to get as close as they can to get good pictures. One man in particular got too close…
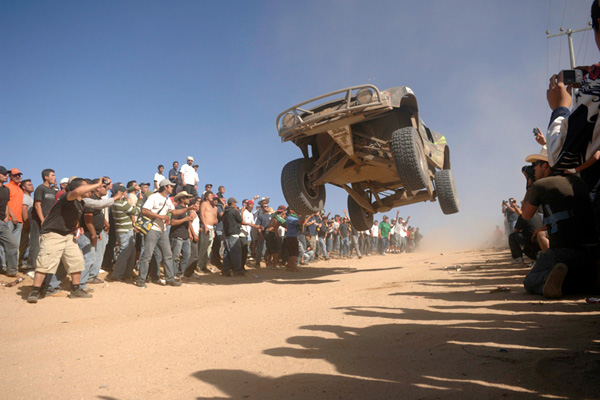
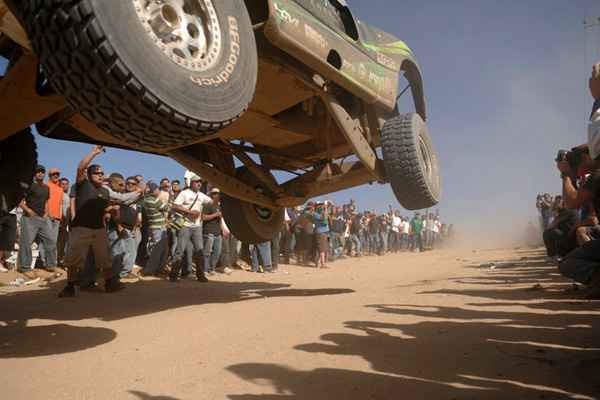
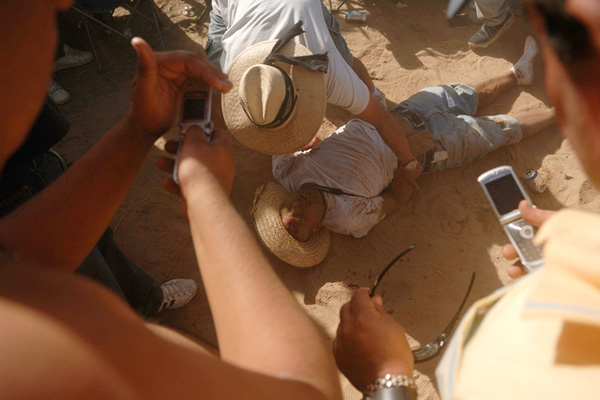
I’m not sure what happened to him, but he was airlifted out by helicopter. After this happened, everyone backed up a few steps.
From here, we loaded up and raced to the next location. I don’t think I’ve ever driven as fast as I drove down that two-lane Mexican highway that day, passing every car I could when I had the chance. We made it to the next location, Joe did his thing, and off we went to the final location.
We didn’t make it in time, though. Joe got out and made some snaps (his personal favorite of the day, actually), and we turned around to head home. As we stopped to get gas, I realized that my face was feeling really weird. Particularly my forehead… I asked Joe if my face looked swollen, and he didn’t even answer.
“Give me the keys, I’m driving.”
See, I had forgotten to bring my antibiotics with me, so my forehead was swollen to the point that I could barely see out of my right eye. But we made it back to the hotel and I took my medicine and went to bed.
We woke up early the next morning, as Joe and I both were ready to get the heck out of Mexico. I drove most of the way back, but pulled over to swap places with Joe so he could drive across the border.
As we got to the border crossing, I started to pull out the police report I had filed for my “stolen” wallet. Joe saw it and told me to put it away immediately as it would cause the border patrol to ask questions unnecessarily. As we got closer, I became more nervous on the inside, but didn’t let it translate into any body language. Finally, our turn came to cross…
Joe rolled down his window and showed the officer his passport.
“Everybody in the vehicle American citizens?”
“Yes sir.”
“What was your purpose for visiting Mexico?”
“We’re photographers who were covering the Baja, sir.”
“Do you have any drugs, alcohol, or firearms in the vehicle?”
“No sir.”
“Alright, you gentleman have a good day.”
“Yes sir, you too.”
And with that, I was back in the United States! Now all I had to do was get on the plane without any form of official ID.
The plan all along was for Joe to take a few days of relaxation in LA when we were done, and for me to fly back home with all the gear. So I dropped him off at Hertz where he got his new rental and drove north, and I went back to take care of the rental then hopped on the shuttle to the airport.
I arrived at the airport and made my way to the Delta counter. As usual, the man behind the counter asks where I’m going and to see my ID.
“Well, I’m going to New York LaGuardia, but, um… I lost my wallet in Mexico. All I have is my pass from the Baja 1000 and a copy of my birth certificate (that my mom and Lynn, Joe’s studio manager had emailed to me)…”

“Oh, no problem. Happens all the time! Here’s your ticket. Have a nice flight!”
“Um… Okay, thanks. But what about security? Won’t they need to see my ID?”
“I’ve got you covered. Come with me.”
We walk over to security, and he says, “This guy lost his wallet in Mexico, but he’s good.”
They shrug and say, “Okay.”
I empty my pockets, go through the metal detector, gather my things, and go to my gate.
Everything was smooth sailing from there. I was very happy to get back to a familiar bed and be able to relax for a few days. My family was also glad to have me home in one piece for Thanksgiving a couple of weeks later.
Over the next two years, I made other mistakes, but never again anything on the level of what happened on this trip. Now I’m working with Scott, and I’m pretty sure that he has his fingers crossed every day, hoping that I got all of my mishaps out of my system when I was with Joe. So far, so good, but I’m sure you’ll hear about it if I do anything royally stupid.
One of Joe’s favorite sayings is something along the lines of, “Don’t run away from your mistakes. Embrace them. Take them out to dinner and become friends so that you can learn from them and grow.” I think I took this idea a few steps further and had little mistake babies on this trip (named ’em Dangit, Darnit, and Jimbob). But I did learn from them, and that is what’s important.
For those who actually read this whole thing, thanks for hanging in there! I hope that you found it was worth it :-) And if you want Joe’s side of the story, you can read it here. Have a great rest of the week!
-Brad
About Me
Scott’s Books