This is one of those things you just kind of stumble upon, and think to yourself, “Hey, that looks kinda cool,” but you’re not sure why (well, now I know why, but I didn’t when I first found it).
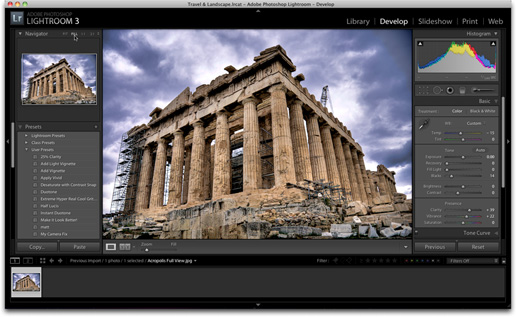
The idea for this came to me while I’m working in Lightroom one day. I normally work in a view called “Fit” which fits your entire image inside the center preview area, with a bit of gray canvas area around it (as seen above).
But for some reason, on this particular day I had my View set to Fill (so your image fills the entire center preview window, as seen above). Probably did it by accident.
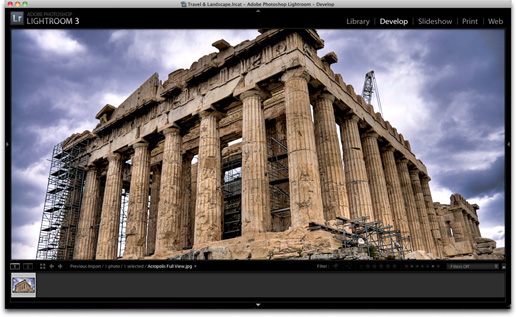
Normally, when I want to focus on just the photo, without all the distractions of Lightroom’s panels, I press Shift-Tab, which hides the top, bottom and side panels from view, so all you see is the photo, but on this particular day, instead I hid just the side panels (as seen above), and I’m looking at the screen and I’m thinking “Man, that wide cropping really looks kind of cool.” I didn’t quite know at the time why, but I went over to Matt Kloskowski’s office and he loved it. Next stop, RC Concepcion’s office and when I showed him this on one of his photos in Lightroom—he loved it.
But it was when RC said, “I kind of makes it look like a widescreen movie,” that it hit me why I liked it so much—it’s got that cinematic movie feel to it. So, he and I spent a while trying to figure out exactly what this wide cropping ratio was, and how we could apply that widescreen crop to our images in Photoshop the easy way. We made some screen captures of the image in Lightroom with that on-screen cropped look, and then starting counting pixels. We even brought Corey Barker over to look at it, since he’s a total movie freak, because we though if anyone would know how this relates to a movie style cropping, he would know.
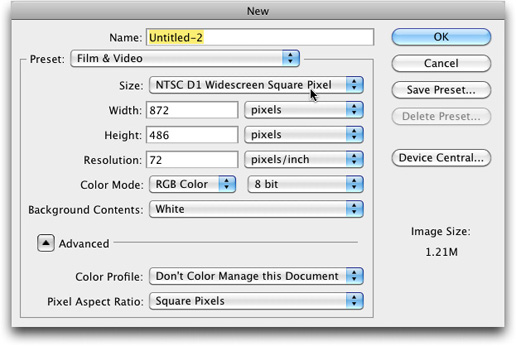
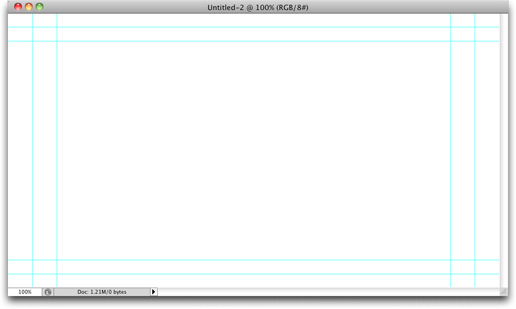
As it turns out, Photoshop has a built-in New Document Preset that was literally within a pixel or two of being the exact same cropping ratio as what we had captured in Lightroom. To find this, press Command-N (PC: Ctrl-N) to bring up the New Document window, then choose Film & Video from the Preset pop-up near the top. Now from the Size Presets choose NTSC D1 Widescreen Square Pixel (as shown above), and it creates a new document with guides already in place for a widescreen image like the one we captured in Lightroom.
However, when you size the image to fill within the inside guides, there’s white space left over on the top and bottom. But, at least now I could drag my image onto this document, size it to fill left to right, then I could crop the document down so just the image is visible, and then I would know in inches (or pixels) how large to make my Custom Crop. That way, I could just create “Cinematic Style Cropping” from here on out, without having to create this new document, and all extra these steps. The cropped size turned out to be a 12.111″ x 5.389″ size at a resolution of 240 ppi (or in pixels, 2907 x 1293).

So, now you can create a custom crop in Photoshop you can apply to any standard digital camera image to give it an instant “Cinematic Style Widescreen Crop” by simply clicking on the Crop Tool, going up to the Options Bar (shown above) and then typing in 12.111 inches as your width and 5.389 inches as your Height, and then set your resolution at 240.
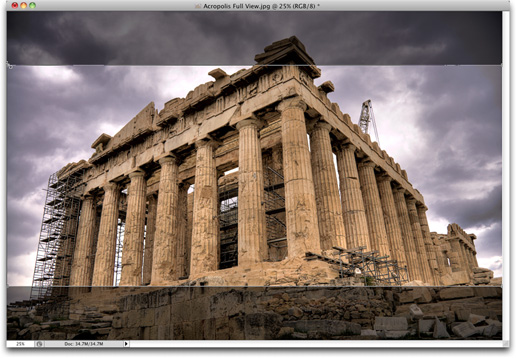
Now, when you drag out the crop tool so it fits side-to-side in your image (as seen above), the area that appears inside that cropping border will get the Cinematic Crop.
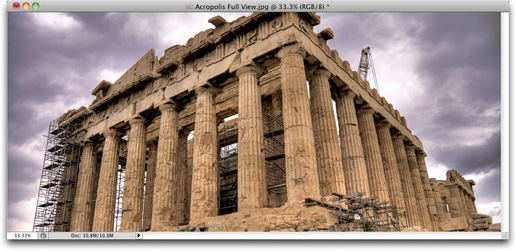
Here’s what it looks like (above) with the crop applied to that image.
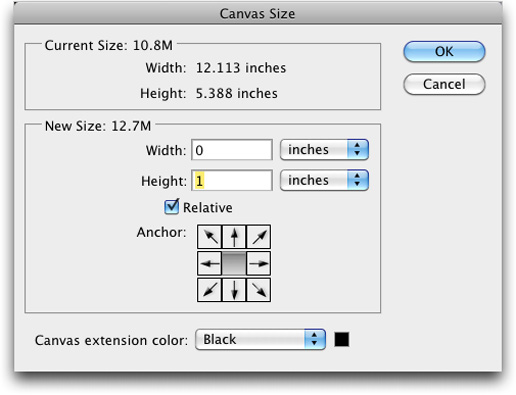
If you want to take it up another notch, and really give it the Cinematic feel, add the letterbox look you get with anamorphic widescreen movies. You do this by going under Photoshop’s Image menu and choosing Canvas Size. When the dialog appears (seen above), turn on the Relative checkbox, then for Height enter 1 inch. Lastly, for Canvas extension color (at the bottom of the window), choose Black from the pop-up menu (as seen above), then click OK.
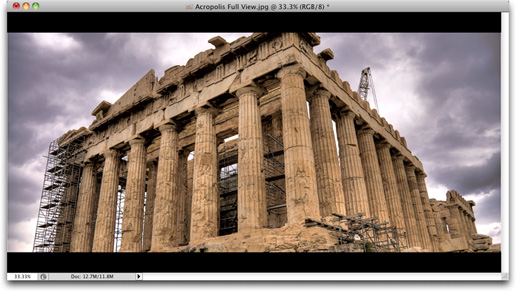
Here’s what it looks like with the black Canvas area added in Photoshop.
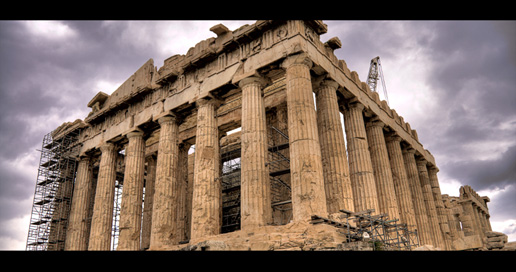
And here’s what the final image looks like, with the Cinematic cropping and letterbox added.
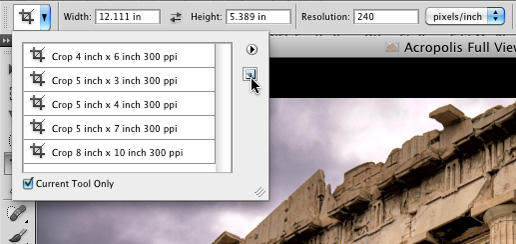
So, at this point, it’s just a simple custom crop, and you can save that custom crop, with those dimensions and resolution as a Tool Preset by clicking on the Tool Preset icon at the top left corner of the Options Bar (as seen here), then click on the New Preset button (shown above). Now, anytime you want this crop, you’re just one click away.
Now, it’s entirely possible that there’s a way easier way to do all this—-to create a Cinematic Cropping inside Photoshop, but I haven’t figured it out. Yet. ;-)
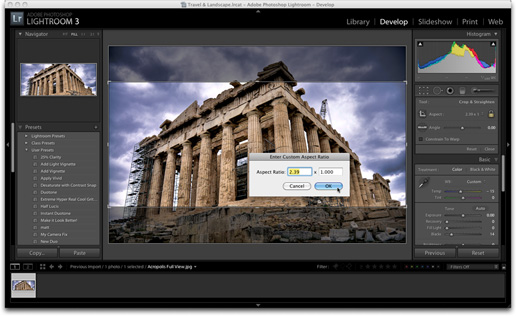
UPDATE: Just learned from @ersphoto (Enrique San Roman, who follows me on Twitter) that you can enter the Crop Ratio 2.39 to 1 in Lightroom’s Crop Tool to get the same cropping. Just click on the Crop tool, then click on the pop-up menu to the immediate left of the lock icon and choose “Enter Custom” then type in 2.39 and 1.00 in the Aspect Ratio pop-up menu (as seen above), and you’ve got that crop. Enrique noted that the crop ratio is based on Panavision film. Thanks Enrique, and I’m sending you a signed copy of my Lightroom 3 book today for helping me out! :-) Also, thanks to Mike Reeves who pointed out that this also works with Camera Raw’s Crop tool as well.
Anyway, give this a try on some of your photos and see what you think. Of course, if you have Lightroom, just open any image, set the View to Fill (in the Navigator panel), and then just hide the left and right panels from view (press F7 and F8 to hide them), and there you have it—Cinematic Style Widescreen Cropping (without having to actually crop).


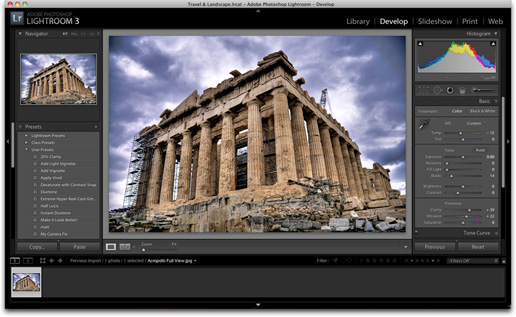
“Of course, if you have Lightroom, just open any image, set the View to Fill (in the Navigator panel), and then just hide the left and right panels from view (press F7 and F8 to hide them)”.
That of course depends on the aspect ratio of your display.
I believe cinema typically uses 16:9 or 2.39:1 ratios. This is easy to setup in Lightroom by setting the crop tool’s custom aspect to 16 x 9 (or 2.39 x 1). The crop is then constrained to that ratio. Couldn’t be easier!
I found this elsewhere on the ‘net, and it is much simpler and exactly what we were looking for.
Roger Allison-JonesCrop Tool locked to an Aspect RatioSubmitted by jfrancis on 27 October 2009 – 2:19am.One thing I just learned is the crop tool can be locked to an aspect ratio.Enter 16 in x 9 in and DISREGARD dpi (leave blank) for your crop and crop a tiny [or any size] area. The tool will be constrained to 16:9 but the crop will neither enlarge nor reduce the active area.credit to http://www.deke.com/content/photoshop-top-40-feature-27-the-crop-tool
https://www.youtube.com/watch?v=iExjh97IjKE
It looks like you’ve stumbled very close to the mean of Phidias (Phi), also known as a Golden Ratio. Very appropriate that you would show it here with the Parthenon, since it was designed to fit the same ratio.
http://en.wikipedia.org/wiki/Golden_ratio
Love it, Scott! I’ve been doing something similar with a lot of my Flickr posts for a couple of years now, but my cinematic crops have been more random and less of a “science” than you’ve taken it to here. Like every type of crop, some images lend themselves to this look better than others (your photo is an example that works big time!). The only problem I found is that once you start applying this crop, it’s hard to stop. :-) They look so darned good.
Thanks for taking the time to “do the math.”
Hey Scott,
I too, love it. I don’t use lightroom, but the 2.39 to 1 works just fine in Camera Raw. I’m sure you knew that, but some of the readers might not.
Have a great day!
Mike
Scott,
I know this works really well from experience as about a year ago I bought a Panasonic 42 inch Full HD Plasma TV which will view photos via an SD card slot. When I viewed it the results were OK but a lot of screen was lost due to aspect ratio differences between DSLR crop sensor and the approx 1900×1080 ratio of the TV. Anyway one rainy day (we get our share in the UK) I got to thinking in a similar way to you with this post so got the TV manual out and looked up the screen pixel ratio and then created a crop preset in Lightroom. I then created virtual copies of photos from a recent trip my wife and I had made to Arches / Monument Valley and cropped the lot, exported to the SD card I think at 72ppi so the files are reasonably small.
If you’ve been to Arches and Monument Valley you will know just how stunning the shots look when viewed on a 42 inch high def picture frame, words can’t describe it, it feels as though you could just walk into the scene on screen. If you have a TV with this functionality give it a try, you will be blown away. Obviously it doesn’t work with portrait orientation shots (unless you can rotate your plazma 90 degrees!
Cheers,
Sometime last winter I realised that one of the things I love about Chinese wuxia movies is their 2.35:1 aspect ratio. Since then, 2.35:1 and 1.85:1 became my most used crop ratios in Lightroom, when I’m exporting for web, not prints. Actually, the newest post in my blog (click my name above) is a sample from a recent wedding shoot also in 1.85:1 :)
I once shot an entire concert in 2.35:1, a sample from that can be seen on Wikipedia’s “happysad” article.
Thank you Scott that will book will come in very handy! Now that the comments are working I can post my original comment.
From what I understand you can put in the crop ratio directly into lightroom’s crop tool custom sizes 2.39:1 for cinematic like Panavision. 1.85:1 which is the other film industry standard, and 1.78:1 which is 16×9. I wish lightroom would let me add custom sizes premaritally. I suppose that using the print module in a 4:3 ratio size paper would give you the desired letter-boxing on export. Either way, trying out film ratios into standard paper and frame sizes makes for some very small prints and wasted paper. For online sharing it does have its uses, as well as creating stills that match your video slide shows or film productions. for more useful crop ratio #’s go to
http://en.wikipedia.org/wiki/Aspect_ratio_(image)
Thanks again
-E
I find myself now cropping a lot with a ratio of 2 x .97 as a crop preset in Lightroom or as a fixed ratio size in Photoshop’s Marquee tool.
RC
As chuck statet cropping to “Cinemascope” in LR ist quite easy. Additionally you can add borders with Mogrify.
Very nice blog post… thank you !
2.40:1 is commonly referenced for scope aspect ratio. As is 2.35:1. If you want go Spartacus wide hit 2.70:1. Crazy wide aspect ratio on that classic film. A more casual widescreen format is 1.85:1.
But regardless of the AR used this speaks to an important creative aspect of photography: we shouldn’t feel compelled to stick with what the camera’s sensor (or film stock) give us. Nor the paper we use or off-the-shelf mattes. Different subjects can take on new life with different crops. Compare a bunch using LR’s snapshot feature or virtual copies. Or in real time with Scott’s classic “lights out cropping” trick. .
Scott,
I love this ratio, I actually use it quite a bit myself in my own work. On top of being a photographer I also work in an architecture firm and do a lot of the firms rendering visualization and animation. I always do that in the wide aspect ratios so I have to try to match site photos that may be used as background in the same way. It’s become second nature to think in this aspect ratio I guess.
Time for you to update your blog post about why don’t store bought frames come in digital sizes to include movie aspect ratios now too!!!
My website template requires me to crop my images to 16:9 if I don’t want blank space around the images. I do find myself cropping images to 16:9 just to see how they look at times.
Also, some of the Sony DSLR’s allow you to change the aspect ration in camera to shoot 16:9.
Off topic, I had a customer purchase a print of my Nashville pano I did at Dave Cross seminar about 1 1/2 years ago. When I went to reprint I ended up reprocessing it via what I have learned in just last year and it looks much better! Thanks guys!
Ken
Just tried it on couple of my images and i love it! Thanks for and idea Scott !
Strange coincidence that I was doing the same thing this past week- I stumbled upon an ultra-wide crop that looks like a wide-screen movie . I found a couple of added ingredients to help the effect look more “movie like”. Uncheck the lens correction box in the Effects panel (it’s usually already unchecked) to give the edges just a little “pull” for a wide screen-ish look. Or even better, add a touch of lens distortion. Also, the crop works great on images shot with wide/short focal lengths, with a subject in the foreground and off to one side of the frame. Just a couple of things that I thought make shot look like a movie still also. Try it out! :-)
I think this is a good idea, and lots of fun too. But for printing purposes, I don’t see it being too much fun at all because of the lack of frames, and for the fact that you need to print it much wider to get the same height on the picture. Framing and printing make this a pricey method of getting pictures into people’s physical hands.
Good tip, though.
Nice one Scott. This is sooo close to 9:4.
Now what size frame are you going to buy for the print :-)
Thanx! Thats pretty cool dude!
This is the most confusing article I have ever read.
What’s confusing on the crop presets?
That’s exactly what I was thinking. Especially considering Scott walks you through the entire process….
o.0 *crickets chirping*
Neat idea Scott, good discovery, Ill try that one
Sweet! Thanks for the tip, Scott.
Thank you!
This is such a great idea, pretty cool too.
Thanks for the blog post.
Thanks, I got it!
I Love the technique… Just turned an old black and white wedding picture I had into an artistic masterpiece.
THANKS!!!!!
oh yeah i forgot to say that for some reason my backgroud color in the crop menu wasnt active. so i did everthing without the background color. the selected the image>did an inverse to select the 1″ transperant portion>then did a fill to black… Same results and again i love the tips.
Such a cool posting, Scott. It is amazing how that crop, when used on the right shots, can totally change to whole image. I totally went overboard trying it out on some of my shots. It worked wonders on some and on others it didn’t work at all. But I sure love the crop. Now, somebody please convince the frame makers of this world to catch up ;-).
thank you for the support, i used this for the website http://www.lumenlicht.nl check it out.
Scott what do you find is the best large size print to use with this ratio?
Scott, you have no idea how much time and effort the letterbox trick saved me. Reasonable shot+ Widescreen= happy filmmaker. Wrote an article about getting the cinematic look without any editing a while ago http://thevrincent.blogspot.ro/2013/09/how-to-get-cinematic-shots-on-regular.html
You have to adjust for the crop during shooting though or it fucks up your composition.