I’ve been wanting to try out Lastolite’s new Kickerlite ever since I read about it back around the Photokina time frame, and while doing some shoots for my Digital Photography book, Volume 3 , I finally got a chance to use it, and I have to say, it’s surprisingly sweet (and a lot better than I thought it was going to be by just looking at it and reading the description of what it’s supposed to do).
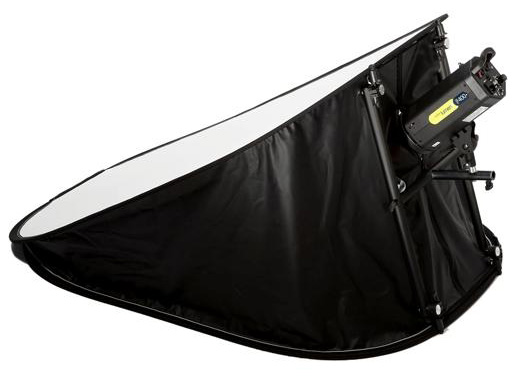
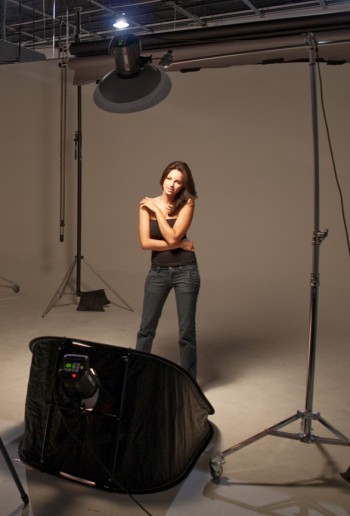
So, here’s how it works: it sits on the floor in front of your subject (as seen above—photo by Brad Moore) and it’s in the shape of a wedge aiming up at your subject (kind of like a vocal monitor for all you rock heads out there) and it kind of looks like a softbox.
There’s a horizontal H-shaped pole and flash bracket in the back where you mount one of your existing strobes on it. Then you aim the strobe down into the kicker light wedge at a 45° angle, and that light hits an angled reflector inside and that light is bounced back up toward your subject, and it creates a wide, soft, flattering fill light on your subject (it diffuses the light from the strobe by two stops).
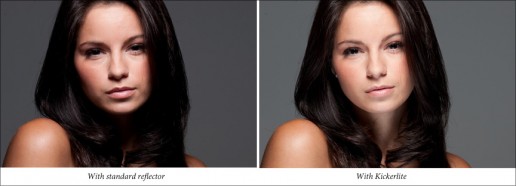
What makes this different than a standard reflector is that a standard reflector can only reflect light coming from another strobe. The Kickerlite actually has a light inside it (well, you add a light to the back and it aims inside) so you have full control over the amount of light that it creates. This does an amazing job of evenly lighting your subject, minimizing shadows under the chin, eyes, and hair, and it almost gives your subject’s face a glow (as seen in the image below).
Here’s the shot (above) I took using the set-up you see above (the main light is an Elinchrom RX-600 strobe with a Beauty Dish Attachment on it, and the strobe on the kicker light is an Elinchrom BXRI-500. However, you could also attach an off-camera flash like an SB-800 or a Canon 580EX II there instead.
I thought I’d show a quick comparison of the difference between using a reflector, and the same set-up using a Kickerlite instead (see the images below), and that pretty much tells the story right there.
The Bottomline
I initially thought this thing might be a bit gimmicky, but after trying it we were not only pleasantly surprised at how easy it was to set-up and use, it had a bigger effect than we thought it would. It was a little weird using it at first because I’m not used to having much control over the light from what would normally be just a reflector, so I never had to make a decision about how much light should come from the reflector. I guess having that option of how much light you want from where a reflector would normally be is actually a good thing. It works well for lighting everything from beauty-style portraits to full length shots because of the large soft wrapping flow of light.
It does seems a tad expensive since you have to add your own light (I would think the pricing sweet spot for something like this would be in the $150 range, where it would be a no-brainer). I also think the name “Kickerlite” may cause some confusion because at the end of the day, its not a light; it’s a softbox (well, at least until you add a light inside it). Those two minor quibbles aside, it’s pretty a pretty clever unit all the way around and you can’t argue with the results.
The 3′ x 4′ Kickerlite comes with the softbox, the flash bracket, and a carrying case (it folds down to about 1/3 its size) for around $207 over at B&H Photo (here’s the link). You can learn more about it over at Lastolite.com.


