

Hi everybody – good to see ya here!
I flew up to Nashville yesterday, just for the day, for the Imaging USA Conference & Expo, where I did a presentation on sports photography in Canon’s booth (excellent show by the way â” lots of buzz and really engaged photographers up there).
Anyway, I was standing beside the KelbyOne booth on the Expo Floor and a photographer from Colorado named Scott Yakel came up (nice guy), and we started talking. He was complaining that he looked thoroughly in my “Photoshop Book for Digital Photographers” and couldn’t find anything in there about how to prepare images for entering into a Print Competition (he’s a PPA member and he and his friends enter images into the local PPA chapter’s print competition). In particular, there was nothing in there on how to add a black border around your image as required by the Print Competition rules.
Anyway, I agreed that there was not a dang thing in my book about that topic, but then, he mentioned that he’d like to take it a bit farther and add a thin stroke inside that border using a color pulled from the image itself. He and his friends were really struggling with a simple way to do this, so I pulled out my laptop there at the booth, and I showed him what I’m going to share here with you now (I figured if he and his friends were struggling with this, they’re not probably not the only ones, and honestly unless you’ve been using Photoshop for a while, it’s not super-obvious how to do this).
Anyway, here ya go Scott (and friends), a recap of what I showed you on my laptop about how to prepare images for entering into Print Competitions (Well, at least the ones at PPA in Colorado, where the first prize is a really huge bag of pot. Totally kidding â” I’m sorry â” I just couldn’t help myself. It’s my first Colorado pot joke â” everybody should be allowed at least one, especially when they have the munchies. Whoops, that’s two).
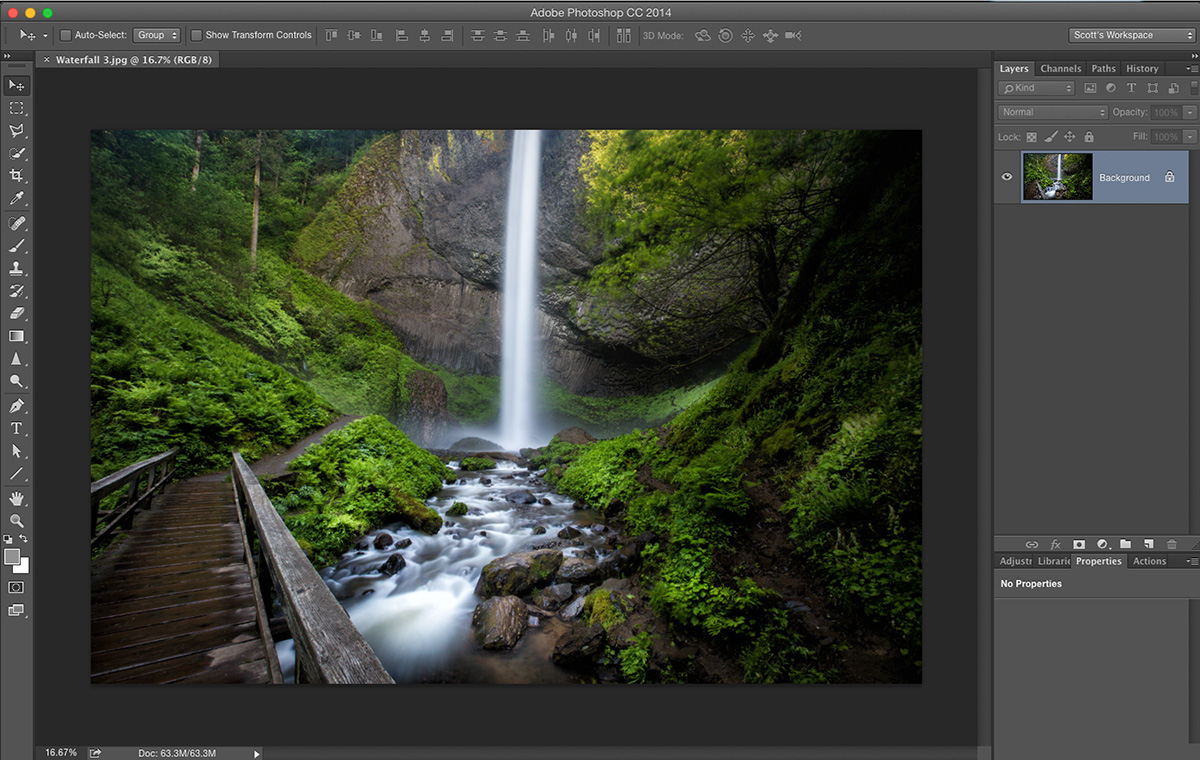
STEP ONE: Here’s the original image opened in Photoshop. We want to add a 4-inch black border and a stroke inside that border.

STEP TWO: Go under the Image menu and choose Canvas Size to bring up the window you see above. At the bottom, for Canvas extension color choose Black (as seen here) from the pop-up menu. Now enter the number of inches of black border you want surrounding your image (in this case, he wanted to add 4-inches on all sides, so enter 4 inches for Width; 4 for Height and click OK.

STEP THREE: When you click OK, it adds that 4-inch black border around the image, as seen above. Some folks will end the process right there â” short and sweet â” but Scott wanted to add a thin stroke inside that black border (I’m not talking about myself in the third person here, like “Shaq likes his fries spicy” â” I’m referring to Scott Yakel, who asked about this technique.)

STEP FOUR: Now, go to the Layers panel and click the New Layer button to add a new blank layer above your background layer. Now get the Rectangular Marquee tool and drag out a selection that fits inside the black border we added (as seen here).
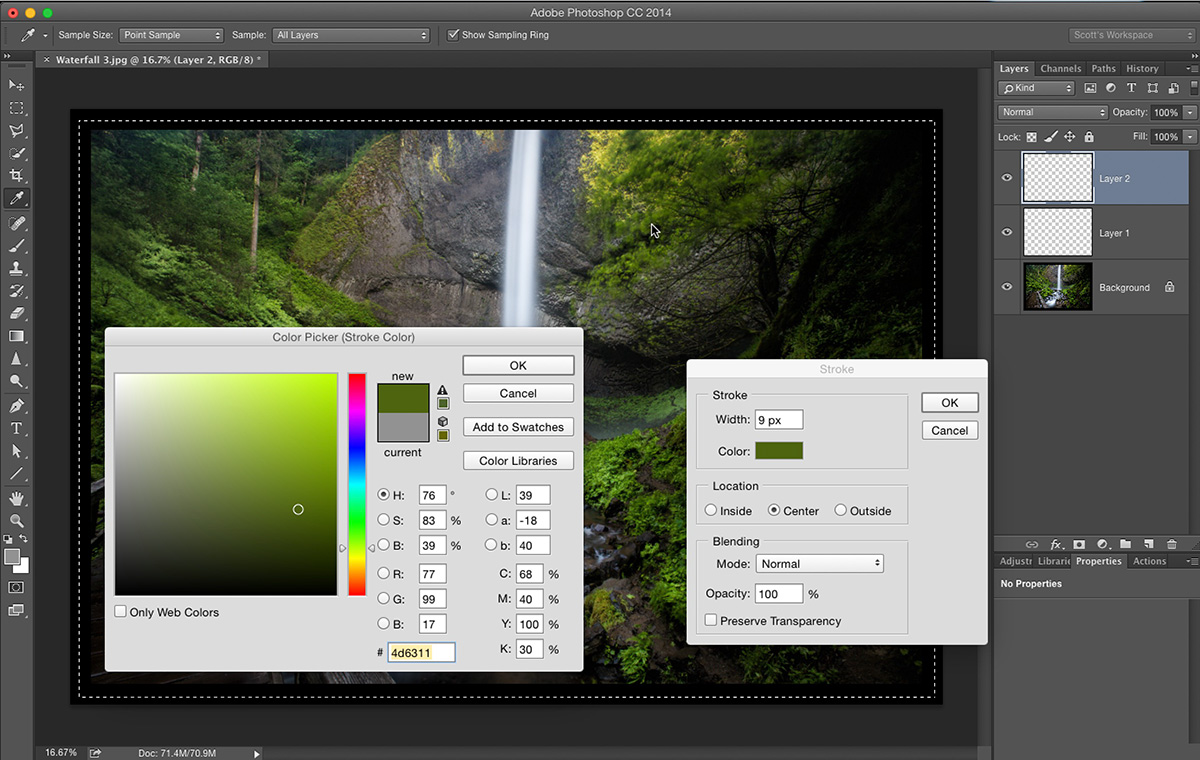
STEP FIVE: Now let’s add a stroke around that selection. Go under the Edit menu and choose Stroke. When the Stroke dialog appears, choose your stroke width (in this case, Scott wanted 9-pixels [Scott likes his pixels thick] and then I clicked on the Color Swatch to bring up the Color Picker (seen at left here), and then I dragged my cursor outside the Color Picker and out over my image (it appears over my image as the Eyedropper tool), then I clicked in the trees to sample the color of those trees to use as my stroke color. Click OK to close the Color Picker now, then click OK in the Stroke dialog to add a green 9-pixel stroke to your layer. Now you can Deselect your selection by pressing Command-D (PC: Ctrl-D).

STEP SIX: Here’s the final image, with the black border and the thin green stroke inside it (click on the image to see a much larger size).
OK, that’s it. Scott’s going to head to bed now (now that actually is me speaking about myself in the third person). Scott’s tired. Scott took two flights today on Southwest. That tires Scott out. Scott doesn’t like coach. Scott misses Delta and his free upgrades. Scott likes frequent flyer programs. Scott likes TSA Pre. Scott’s out. Peace. :)
-Scott
P.S. Don’t forget to catch me and RC on “The Grid” tomorrow at 4pm. Scott will be on the air. Scott likes air.
Nice and easy. Thanks. Hope you had time to go out – Nashville has become quite a good foodie city. And not just BBQ.
Thanks for the tip but it brings up an issue I always have when doing something like this and that’s, for example, making sure the line inside the border is exactly equal on all sides. I noticed yours is not. I think it should be. That’s just me being me. Is there an easy way of doing that?
Wouldn’t the canvas size increase need to be 8-inches in both height and width to create a 4-inch border on all sides? Entering 4-inches in each box only adds 2-inches in my version of Photoshop (CC 2014).
Also, if a new layer was created before extending the canvas, then an inaccurate marque selection would not need to be attempted to make the border around the original photo. Instead, the original photo would be on a separate layer, and one could then Command- (or Control-) click the original photo’s layer to make an exact selection—without the guesswork.
In addition to that, another layer could be created—above the photo layer—to put the stroke on, in case the chosen color was not correct. (Yes, at the time of creating the stroke, an Undo could be made—but only at the time of creating the stroke—not later on.)
KC,
Scott forgot to say to check the “Relative Box” (See his first view capture) With that checked it does a proportionality … 4-inches on each side (all around the photo). I do this all the time so I know it works. In fact, I have a action that does this all automatically.
Dennis
Thanks, Dennis!
I just tried it again, double-checking that I had ‘Relative’ checked. Two-inches on each side is the result. If ‘Relative’ is not checked, it just resizes the canvas to 4-inches by 4-inches, instead of adding to the canvas.
Couldn’t you just repeat step 1-3 two more times in the size and colors you want?
Nice idea.
Hi Scott. I think the title of the article needs to be changed. Is it Colorado Scott’s intent to “print” this image (I don’t think so) or to display it as a “projected image”? Obviously if you were physically printing it you’d achieve all of the above using a mat(s). I presume the Colorado PPA chapter are using a white or gray background when displaying the images. I went through the effort to use this technique once at my photo club and the whole effect was lost once it was shown on a black background. :-P
Just like the book, with the joke pages…..you may need a special Colorado book with chips :)
Tips in Comments!
Nobody explored the option of perfectly aligned ScotchBlue painters tape on your monitor and carefully outline with a pastel green CrayPas!
Scott – you just saved me a ton of time; the PPA and other image competition directions are much more time consuming! Thanks for putting together.