Behind the Scenes From a One Light Portrait Shoot
Hi everybody and happy Friday. I was taping a segment to a new class I’m doing — a follow-up to my “Just One Flash” called (wait for it…wait for it…) “Just one more flash.”
Anyway, when the taping was over, I wanted to try something a little different portrait wise (well for me anyway), so I did a very simple portrait where the goal was to try and give it a window light look, and I thought I’d share the final image, some behind-the-scenes shots, and talk a little about camera settings and post processing. I’ll do that all in the captions below.


Above: Here’s the final image.
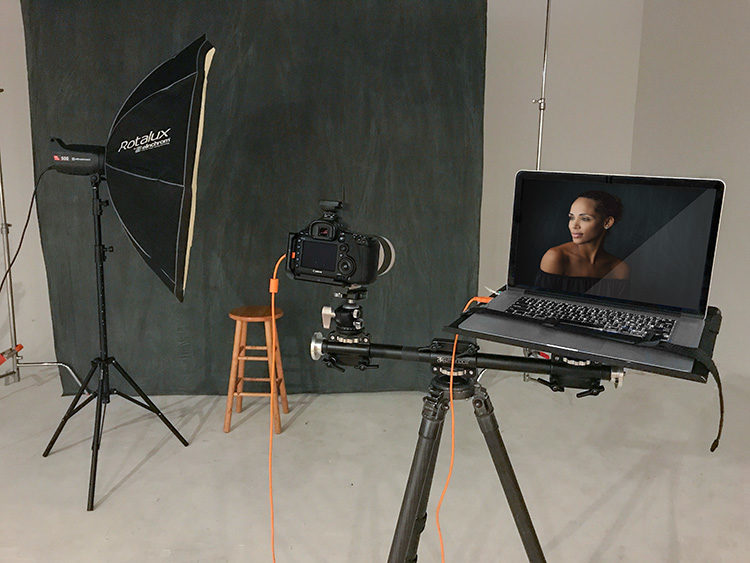

Above: Here’s an over the shoulder view of my shooting rig. I’m using a Canon 5D Mark III with a 70-200mm f/2.8 lens (my go-to lens for portraits). My camera is tethered into Lightroom CC on my laptop using a 15′ TetherPro USB cable from Tethertools. It’s supported on a Really Right Stuff tripod with a Tethertools Rock Solid Tripod Crossbar; an Aero Table, and the strap that keeps my laptop from sliding around is an “Aero Secure Strap” and you can’t see it in this photo, but my tripod is on a rolling rig that is designed to let you easily roll the whole thing called a Rock Solid Tripod Roller.
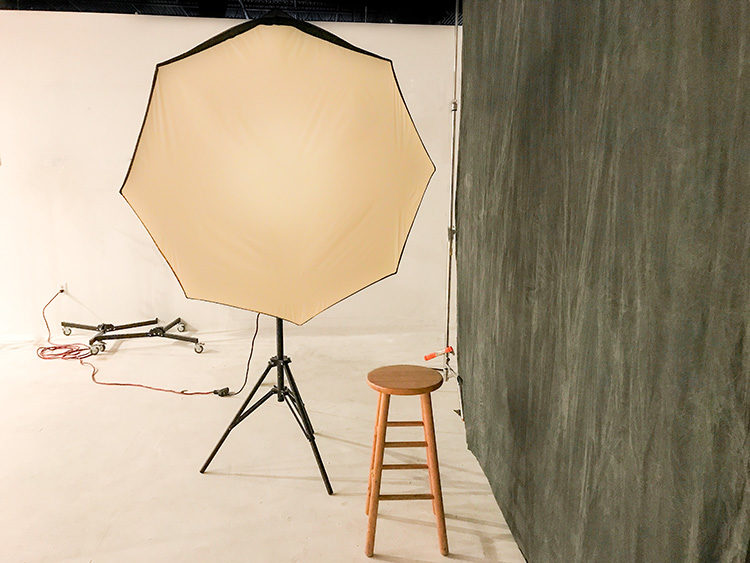
Above: Here’s a clean view of the lighting set-up. I used just one Elinchrom ELC 500, and put it close enough to the cloth backdrop that some of the light would spill onto the backdrop. I didn’t want a bunch of light because I wanted kind of a dramatic portrait, but I needed a little spill. You can see from the shot above that my subject is seated way at the back of the softbox (a technique called feathering where your subject is far away from the hotspot in the center of the light).
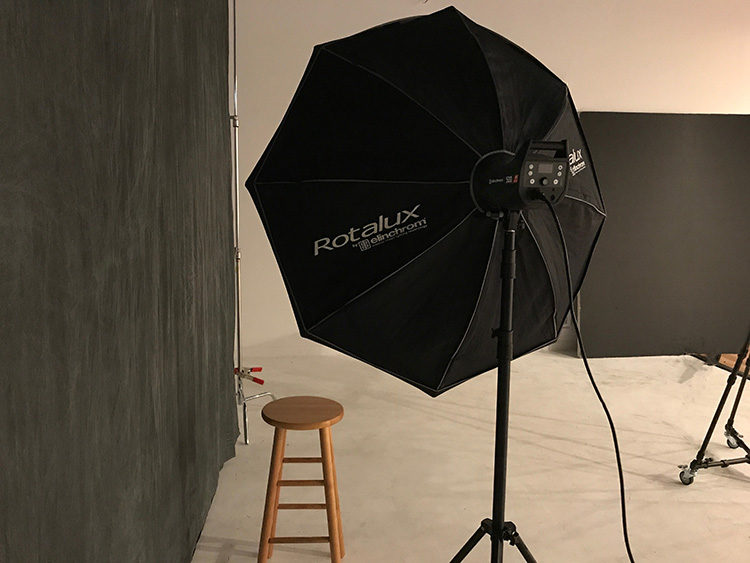
Above: The softbox I used was an Elinchrom 53″ midi-octa, which is kind of my go-to big octa for portraits (and it’s not too expensive considering how awesome it is. B&H Photo has ’em for $324).
SETTINGS:
I had the power of the Strobe pretty low because it was so close to my subject (less than 18-inches and at times less a foot). My camera was in Manual mode, with my shutter speed at that nice happy 1/125 of a second; my f/stop was f/9; and my ISO at 100 (the cleanest native ISO for my camera). Just one single light, and some simple very repeatable settings for a set-up like this.
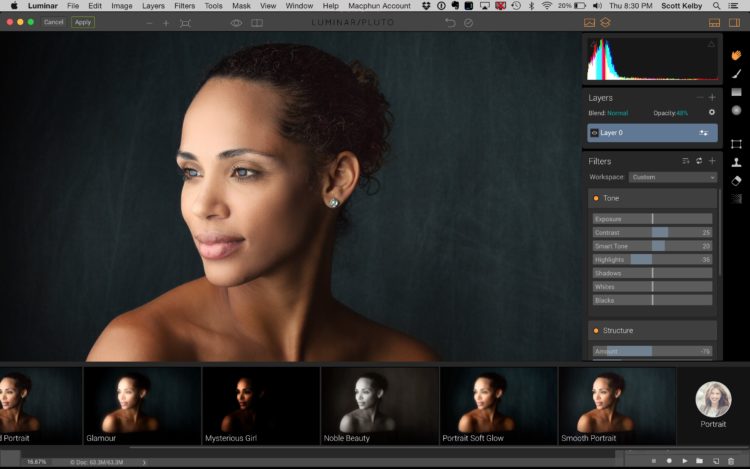

Above: I started in Photoshop doing some standard portrait retouching stuff (removing blemishes, some skin work, a little work on the whites of her eyes and her iris – pretty minor stuff overall).
I’m embarrassed to tell you how easy the rest was — I opened MacPhun’s Luminar plug-in; I went to their Presets (I have my own set-up presets you can get from MacPhun), but I actually wound up going with one of their built-in Portrait Presets called Smooth Portrait. I like the glow and the color grading it gave, but once I applied the preset, I backed off the amount to 48% strength. I also pulled back the highlights a bit and increased the amount of edge vignetting. That’s it. Easy peasy. I clicked OK, and that’s what you see at the top of the page as the final image.
Hope you found some of that helpful. :)
Have a great weekend everybody! I’ll be working on my new book all weekend — almost done (a brand new one!).
Best,
-Scott
P.S. Next Friday I’m in Minneapolis with my Lightroom On Tour full-day seminar. Hope you can come join me if you’re up that way. :)