Behind The Scenes Shots: Athlete Portrait Shoot
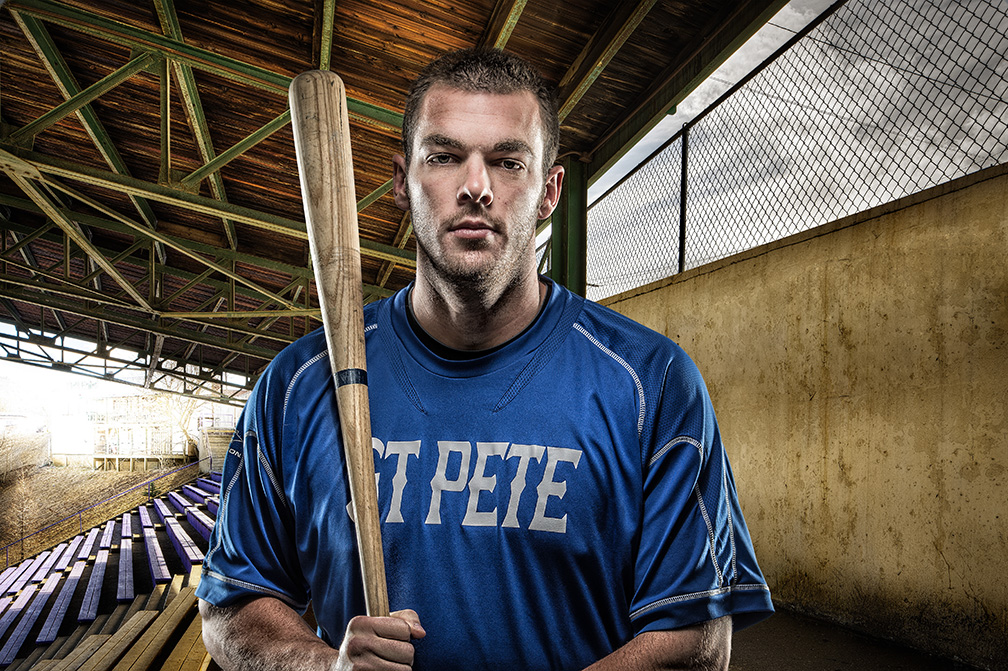
On Friday I did a series of promo shots for Performance Compound, a training facility where a lot of pro athletes train, everyone from NFL players to Major League Baseball, and did about 14 portraits that day assisted by Brad Moore and crew (that’s Third Baseman Sean Buckley above) and I thought I’d share a couple of finals here, along with the behind-the-scenes photos and the post-processed and unprocessed images.
This entire process is the same as what I showed on my Light it, Shoot it, Retouch it tour, with the addition of one extra back light on the subject (as you’ll see in a moment). Here goes:
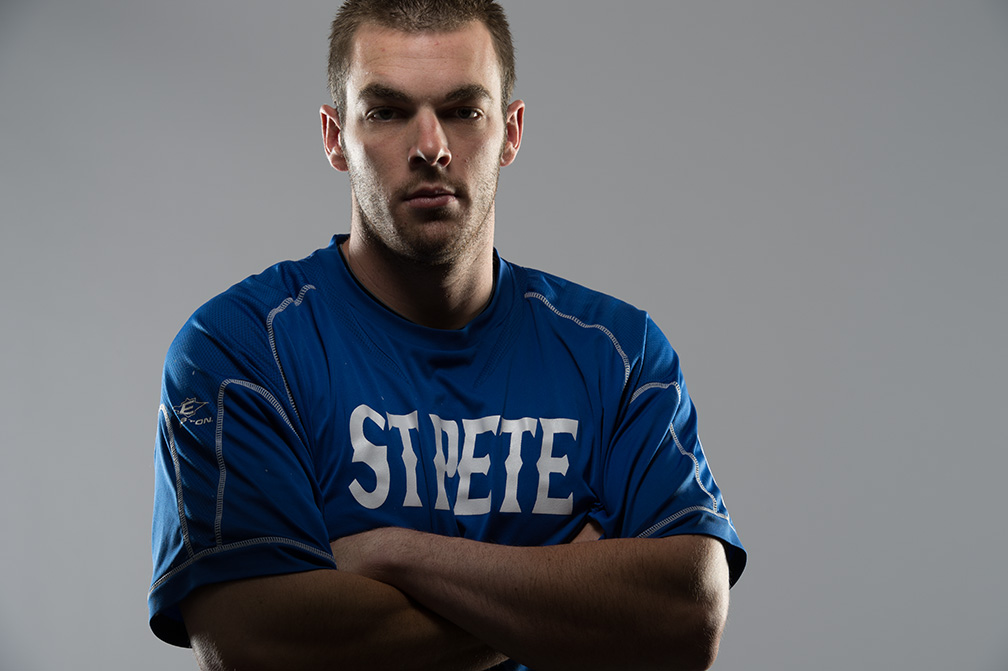
1. Above: here’s the shot as it came out of the camera. I used a Grid on the beauty dish above his head to get a quick fall-off on the light. My main concern here is the side lighting from the back, and that part looks good. His face is supposed to be darker.

2. Above: Here’s the shot with some simple, quick adjustments in Lightroom’s Basic Panel (if you don’t have Lightroom, it would be exactly the same settings in Photoshop’s Camera Raw). The settings are below.

3. Above: I wasn’t kidding about simple adjustments: Just increased the Whites a bit, plus lots of Clarity and I lowered the Vibrance a bit to desaturate his skin. I also took the Adjustment Brush, increased the Exposure slider a little bit (dragging to the right) and painted over his face to brighten it (It’s supposed to be a lot darker than the sides, but I thought it was a bit too dark). The white balance was set to Auto in my camera and look fine in this case.
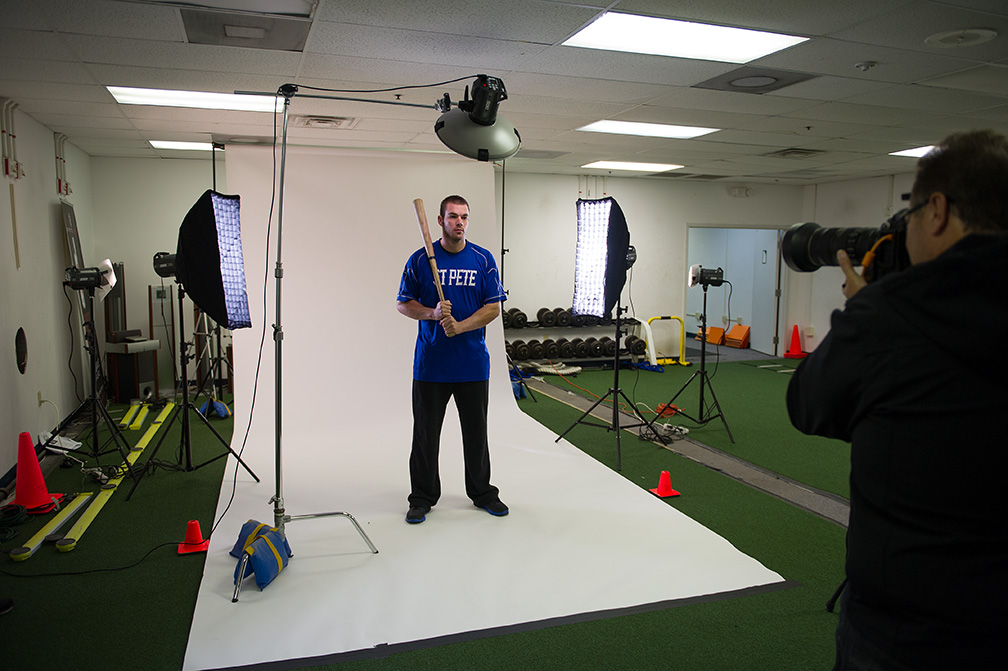
4. Above: Here’s a behind-the-scenes shot of the lighting set-up: 17″ beauty dish with a grid: two strip banks in back on the sides with fabric grids. We have a tiny bit of light on the white background to make it a very light gray (if we turned the power up, it would turn solid white). Production photo by Brad Moore.
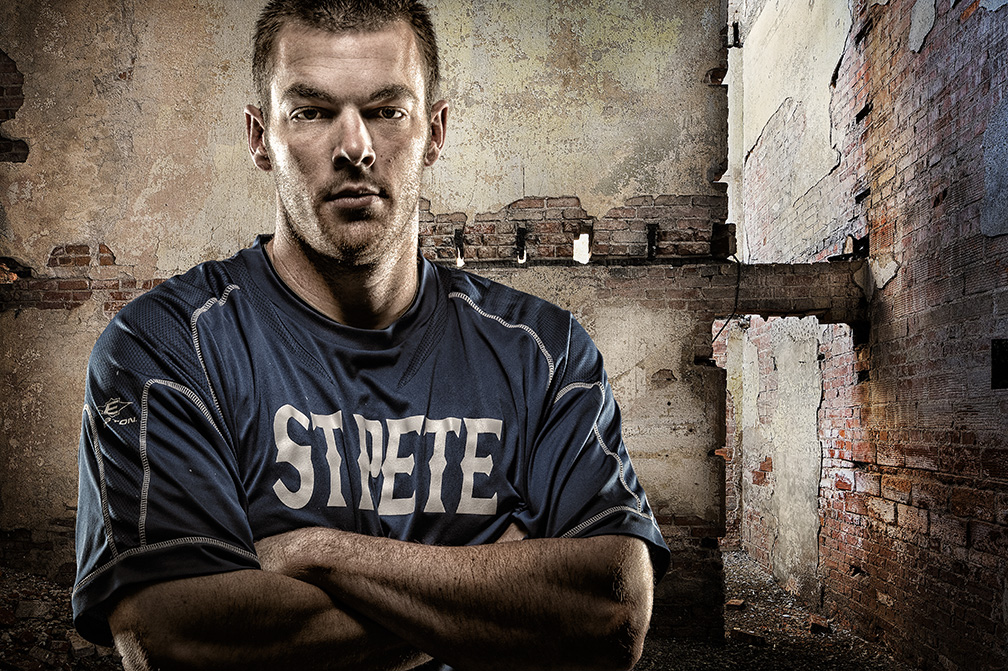
5. Above: Here’s a composite from the exact shot you see in #4. The two backgrounds (here and at the top) are from an awesome company called “Photo Art Streetscapes” (link). Their stuff costs a bit more, but it’s totally worth it.
As for matching him to his surroundings: I showed the techniques of how to match the overall color and tone of the composited image on my live “Light it, Shoot it, Retouch It” tour, and in my “Light it, Shoot it, Retouch it “ book as well (Amazon or Barnes & Noble), and Matt covers all of this in his Compositing Secrets book, too! (Amazon or Barnes & Noble).
Well, there ya have it —- short and sweet. Hope you all have a fantastic Tuesday! :-)