Bridal Shoot (with behind-the-scenes shots and camera settings)


Hey, it’s Photoshop World week, and to celebrate, today I thought I’d share some shots from a recent bridal shoot I did for a project I’m working on.
The shoot took place at Casa Bella – a beautiful 9,000 sq ft. luxury home/venue for weddings and events in our area. I teamed up with my awesome wife Kalebra who did all the styling and art direction for the shoot (she’s just a blast to be on a shoot with — she brings an energy, and fun to the shoot that’s contagious. Also, seeing how she sees things, and how she works with our subjects is really something to see — she should do a class on it).
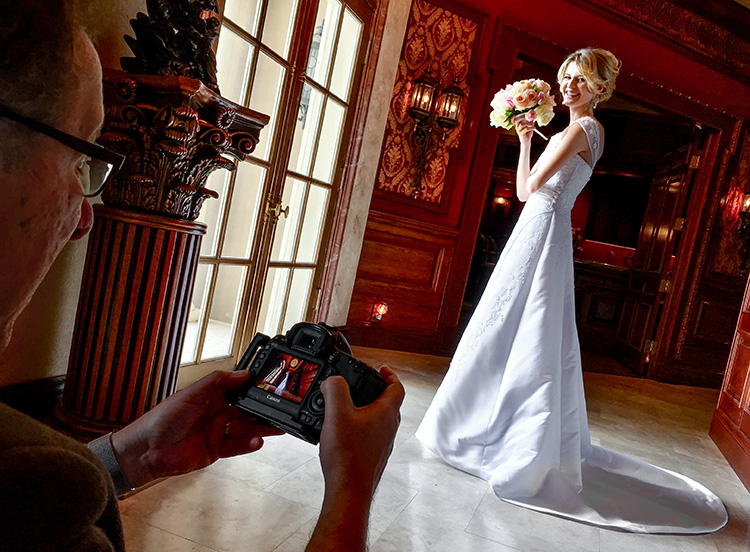

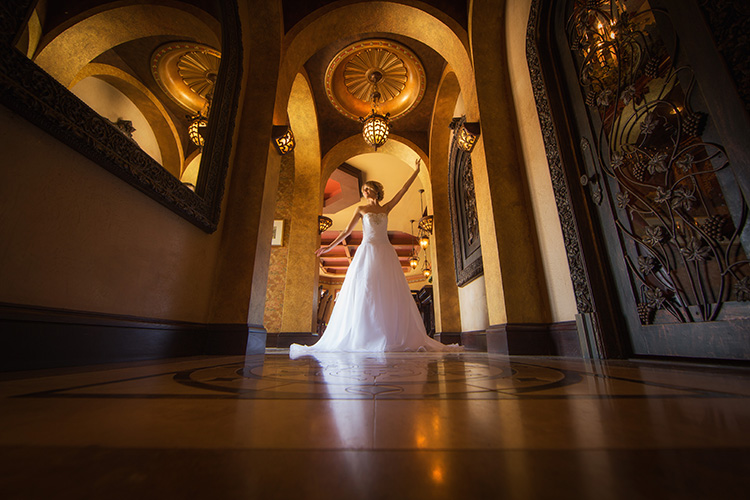
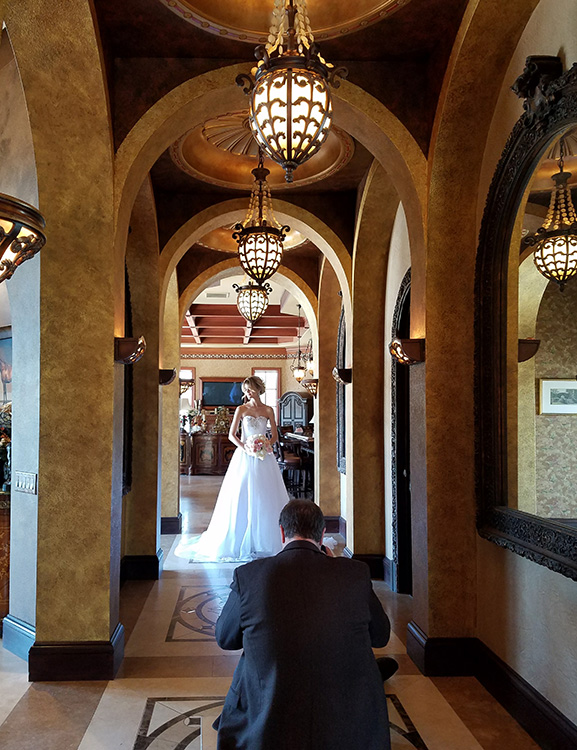
Above: Here’s the behind-the-scenes shot (photo by Juan Alfonso) of me taking the image at the top of the page. I’m sitting on an Apple box (see below) so I’m not quite on the floor (maybe 6″ up from it) but I put my camera (a Canon 5D Mark III) directly on the ground in front of me, tilted up at the bride, using a Canon 14mm super wide-angle lens. You can see I’m pretty close to where the bride is standing, but look how much farther away she looks in the image up top.


Above: These Matthews Apple Boxes come in really handy. This is a half box (just 4″ high), but in a lot of cases, it’s a whole lot better than sitting on the ground. They are sturdy as anything, and you can stack ’em, too! We have them in different sizes, and use them mostly in the studio, either to get a higher angle or a much lower one.
Two things that super wide angle does:
(1) When you put it on the floor like this, it makes the entire scene have more of an epic sprawling look — even in small spaces like this.
(2) Putting it on the floor like this, makes the floor appear MUCH more reflective than it really is, and you get a shine and reflection that you won’t get standing up, or even shooting on your knees. I can’t tell you exactly why it works like that…but it sure does.
Above: Shooting w inith our bride the same spot— I just stood up, backed way up, and used my 70-200mm f/2.8 zoomed in to 140mm.

Camera Settings:
I’m at 200 ISO at 1/400 of a second at f/2.8. I shot at f/2.8 for two reasons: (1) To get the background behind her a bit soft and out of focus, and because believe it or not, even though she was standing in front of a door with glass panes, the door is inset from the front of the house by quite a bit (there’s a large covered entryway), so the light wasn’t that bright. That’s also why I had to increase my ISO to 200 — there’s not as much light there, at that time of day, then you’d think.
Above: A third look with her in the exact same spot — I just walked closer, and then zoomed into 142mm.
Lighting
When we first walked in, I asked Kathy (who was assisting me on the shoot), to rig up a flash with a Westcott 26″ Rapid box octa mounted to the end of a monopod, but as it turned out — we were able to just go with natural light the entire 4-hour shoot, and we never used it once. That’s pretty rare, but the lighting throughout was pretty good, even though a few times I had to raise my ISO to 200 or 400 here and there.
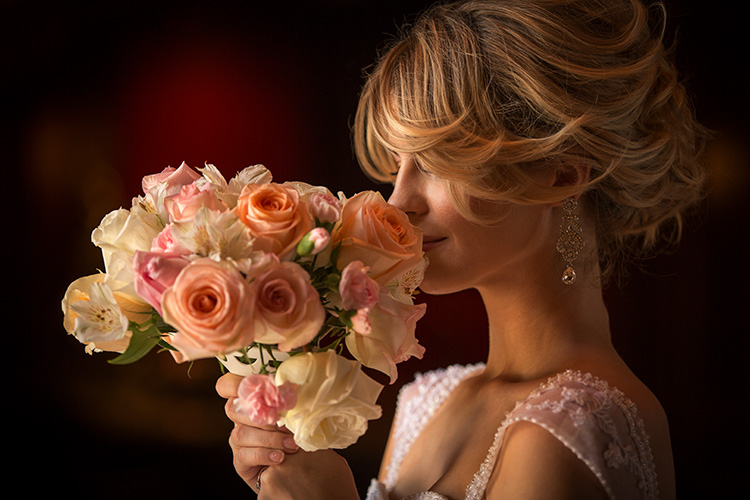
Above: More of an editorial look for this shot taken in the bride’s dressing suite, just using the light from the windows. f/2.8 at 1/80 of a second at 200 ISO. Again, not as much light as you’d think, which is why I had a slower shutter speed and higher ISO, even at f/2.8.

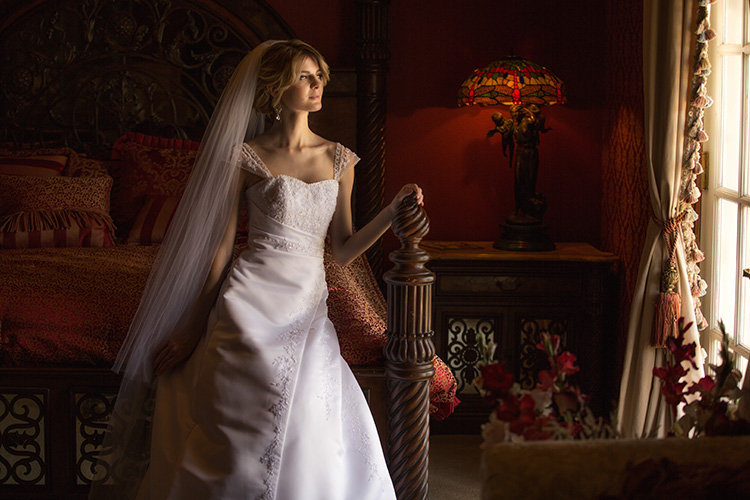
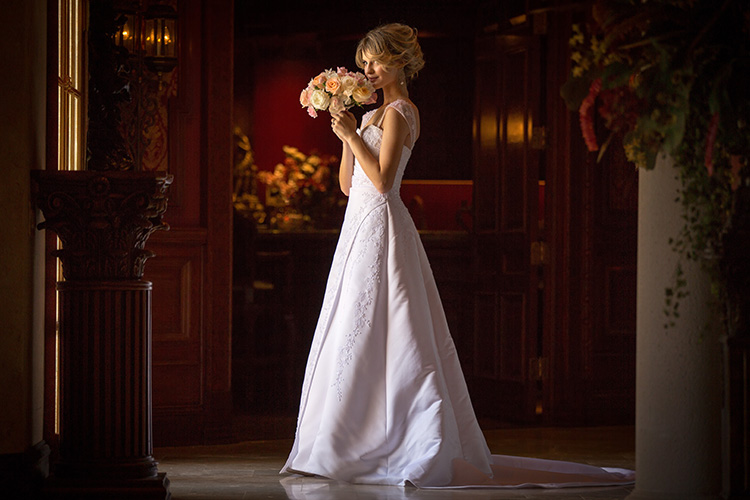
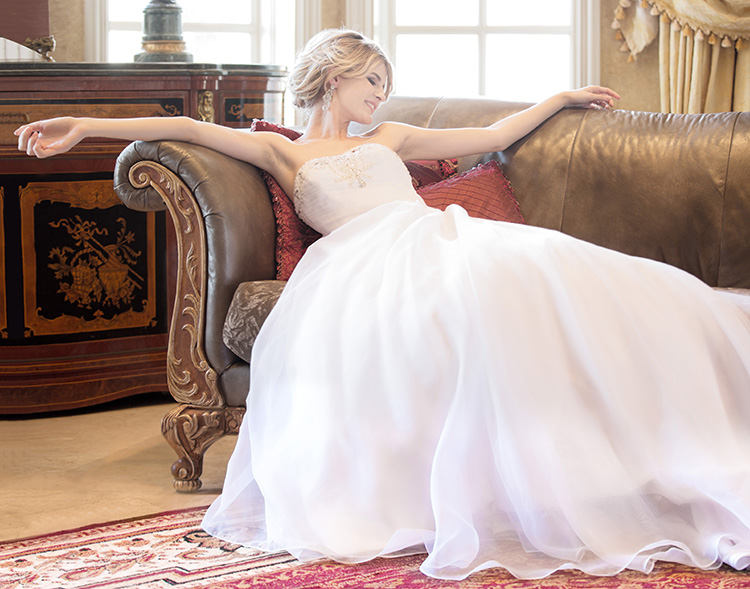
Above: This is one of my favorites from the shoot, taken in the bridal suite. I switched to the 70-200mm for this one, and I’m at 70mm (I would have liked to have gotten back farther and shoot at 150mm or so, but my back was against the wall, so I couldn’t go back any farther, and didn’t want to switch to a wide angle — I wanted the look that the 70-200mm gives. I’m at f/2.8 at 1/250 of a second shutter at ISO 200).
She’s far enough away from the window that the lighting is very soft and subtle, which I really like.
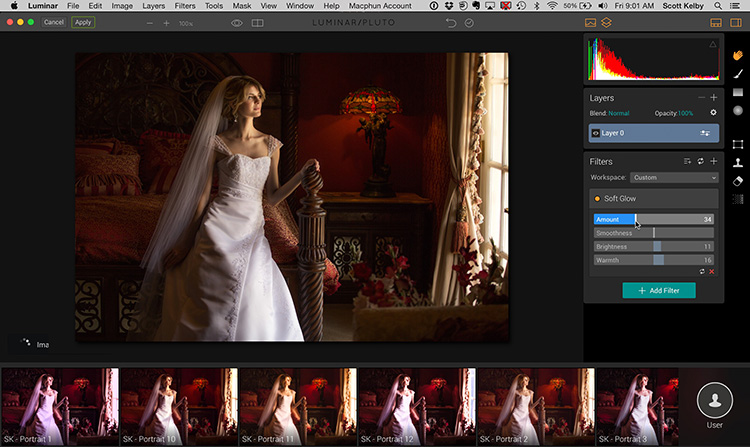

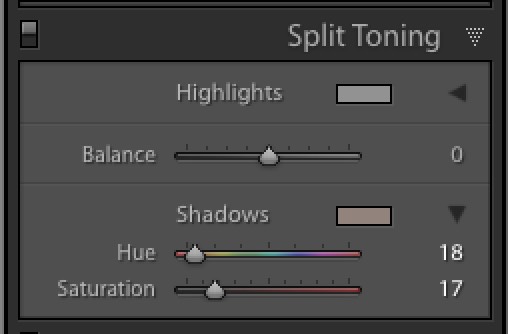
Above: The “dream-like” quality is provided with a soft glow in post. While you can get a glow effect in Lightroom, it’s not awesome, so I usually use a plug-in. I’ve been using Luminar a lot more lately (a plug-in from Macphun that’s gotten really popular in the past few months), and they have a great built-in glow effect. I also have a bunch of presets that I made (that MacPhun is giving way with a promotion they’re doing), but in this case, I’m not using one of my presets — just the Soft Glow filter.
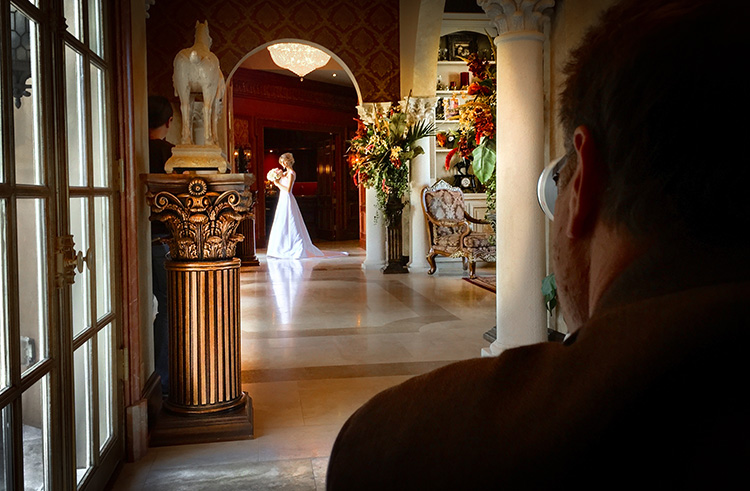
Above: I loved this hallway, and since our bride had been in ballet, she was cool with doing some dramatic poses. All natural light coming in from a nearby door.

Above: That’s me, sitting on a 1/2 height Apple box again, with the camera directly in front of me, right on the tile floor, with the 14mm lens aiming up. Once again, note the reflection on the floor.

Above: Finally, a shot with lots of light — I let the windows totally blow out again, and I intentionally overexposed the whole image for a bright, airy look. I had to go down to 1/30 of a second shutter speed to let this much light in, at f/2.8 at 200 ISO and I’m at 85mm on my 70-200mm. Again, my back is up against another wall. Would have liked to have gotten back further, and zoomed in tighter, but it’s still one of my favorites from the shoot.
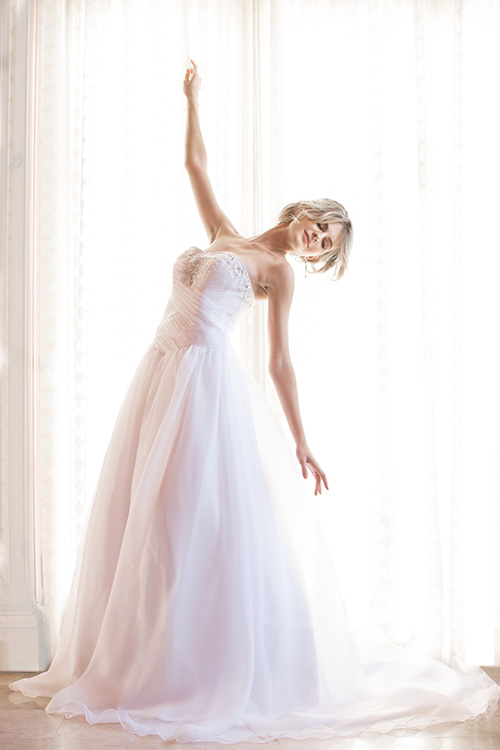

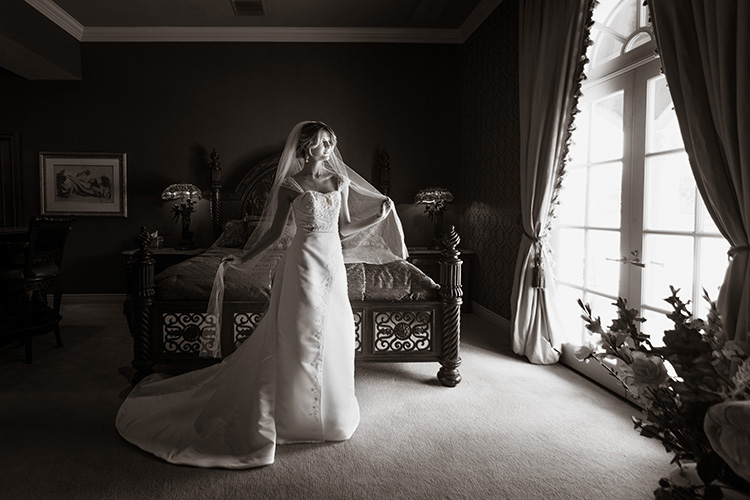
Above: Taking advantage of our subject having been a ballerina, Kalebra had her strike this pose, with her positioned in front of one of the French Doors in the estate. We pulled the sheers to cover the window and somewhat control the light, but we wanted that blown out, over-exposed look — we just wanted it soft.
Hope you found any/some/part of that helpful. Can’t wait to share the whole project with you when it’s done. :)
A big thanks and shoutout to Kalebra for the styling and art direction, and for being my partner in this production from the start, and to Jen Coffin for helping with the production side big time. Thanks to Kathy Porupski for assisting on the gig, keeping things moving, and helping all the way around, and to our bride Julianna for being so patient, and easy to work with. :)
Have a great start to your week, and see ya back here tomorrow for Guest Blog Wednesday.
Best,
-Scott