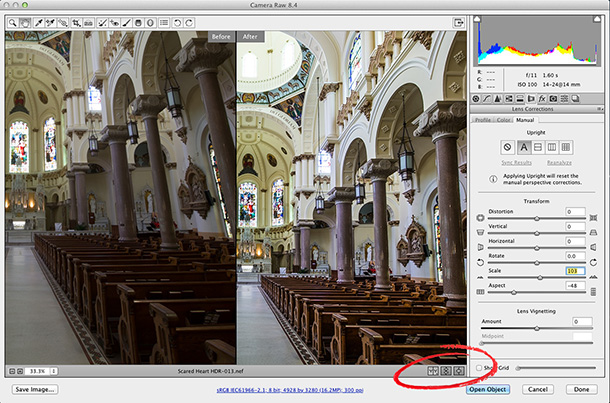
Finally, Before/After Previews Come to Camera Raw
OK, well I guess “technically” you could see a before/after in Camera Raw but it could not have been clunkier (just turning on/off the Preview checkbox wouldn’t do it â” that only showed you a before/after of the particular panel you were currently using). But this is way beyond that as Adobe took the awesome before/after side-by-side, top-and-bottom, split-view and related stuff from Lightroom and finally (finally!) brought them over to the current version of Camera Raw (Adobe snuck these in the latest update for Photoshop CC subscribers).
You access these before/after views from right below the preview window (I circled it in red above). Better yet, although the Preview Checkbox is now gone from the Camera Raw interface, pressing the “P” key now actually does what you always thought it should â” now it shows you a real before/after of ALL the changes you made in to the image anywhere in Camera Raw.
Hats off to Adobe who has been sneaking lots of new little features into Camera Raw in the past year, stuff like: Export Option Presets, Auto Levels (automatically setting your white and black points for you), Auto White Balance, Visualizing Spots (from Lightroom), ACR-toning for 32-bit HDR images and a whole bunch more (I did a whole class on it on KelbyOne â” if you’re a subscriber make sure you check it out â” even I was surprised how much has been added since Adobe doesn’t make a big fanfare about it anymore â” they just release ’em when they’re ready).
Anyway, that’s just a quickie for today in case you missed the new feature add — hope you all have a great start to your week!
Best,
-Scott
P.S. Happy Cinco de Mayo!
