It’s Guest Blog Wednesday featuring Donna Dotan and Brian Podnos!

My name is Brian Podnos and my wife Donna and I run an architectural and interiors photography company based in NYC called Donna Dotan Photography. I wanted to share the interesting process by which we recently created a 60 foot photo for a client.
(Click here for a MUCH higher resolution view)
Before I get into the making of this photo, here is a bit of context surrounding the job:
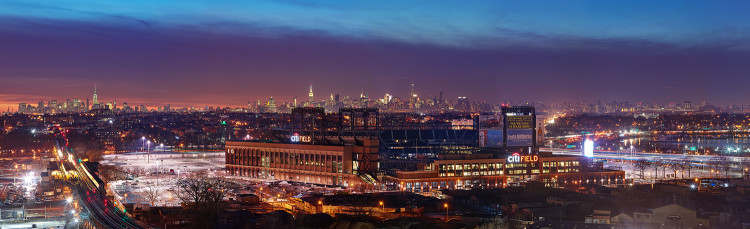
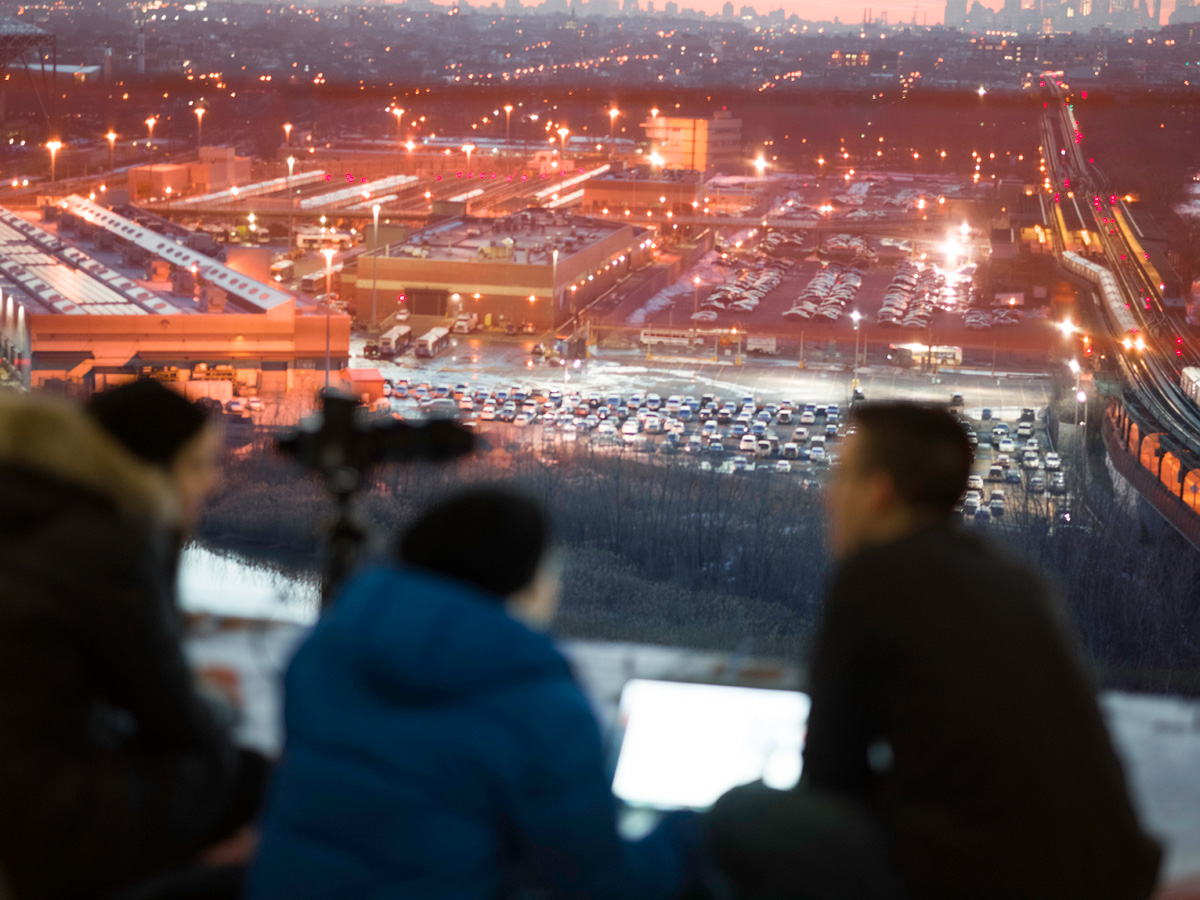
- While doing a photoshoot of model units for a new development, the client asked Donna and I to photograph the view from on top of the construction site for a print. We happily obliged and got a great shot at sunset. The view was NYC with Citi Field in the foreground.
- For the shot, we used a Canon 5D Mark III with a 24-70 zoom lens.
- After delivering the image, the client told us the resolution wasn’t high enough. They wanted the image to be printed as wallpaper to cover their sales gallery wall of 60 ft by 9 ft.
- They asked us to redo the shot. However, in order for everything to be ready for an upcoming event in the sales gallery the following week, we only had three days to deliver the image.

Okay, so lots of pressure, not a lot of time to figure out the best way to approach the project. One thing we knew was that we wanted a medium format camera system in order to get that kind of image quality. People were going to be looking at this photo from less than a foot away, so we wanted to make sure we had the best resolution possible. Going medium format would be a risk because we only had one opportunity to do it right, it’s a very expensive system to rent, and it was something we had never done before! However, Donna and I felt that the reward outweighed the risk, and this way we would ensure that the resolution was the best it could possibly be.
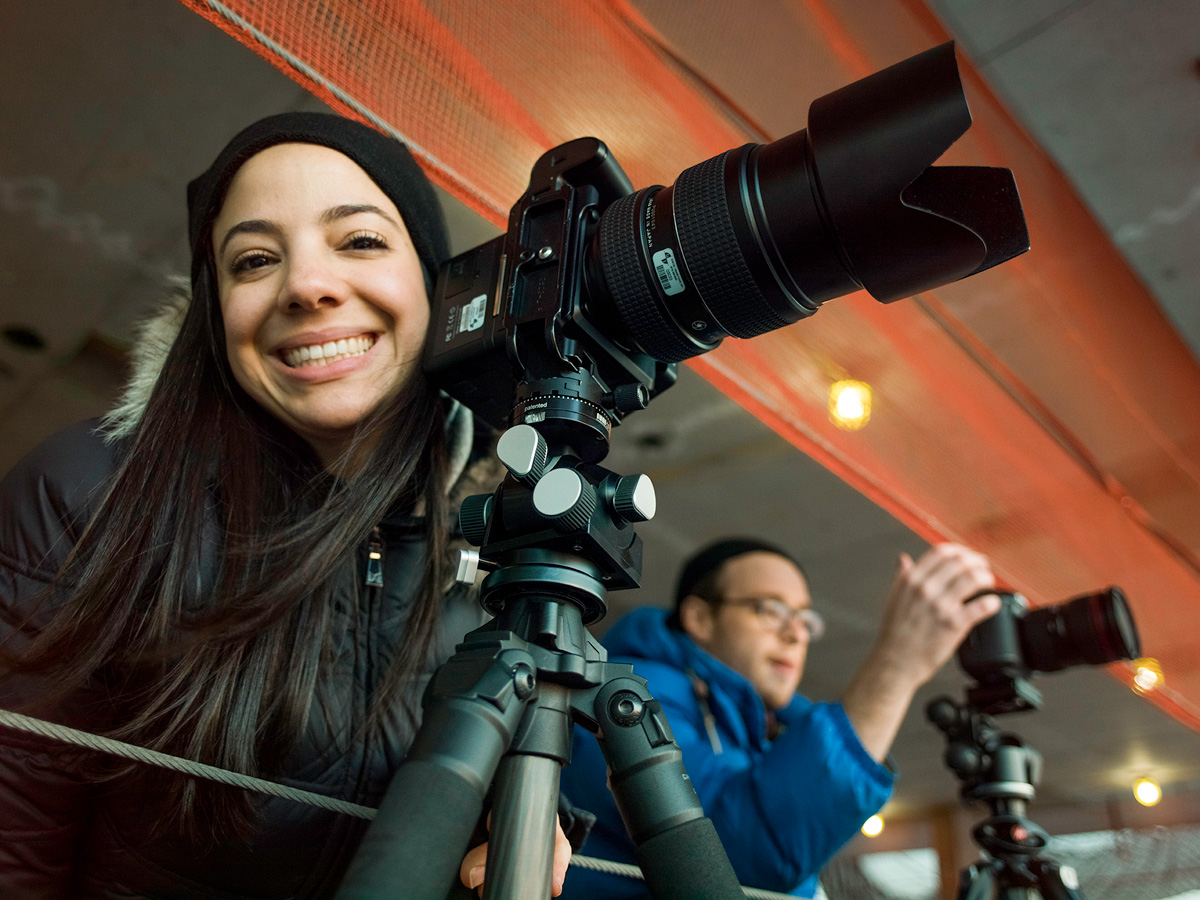
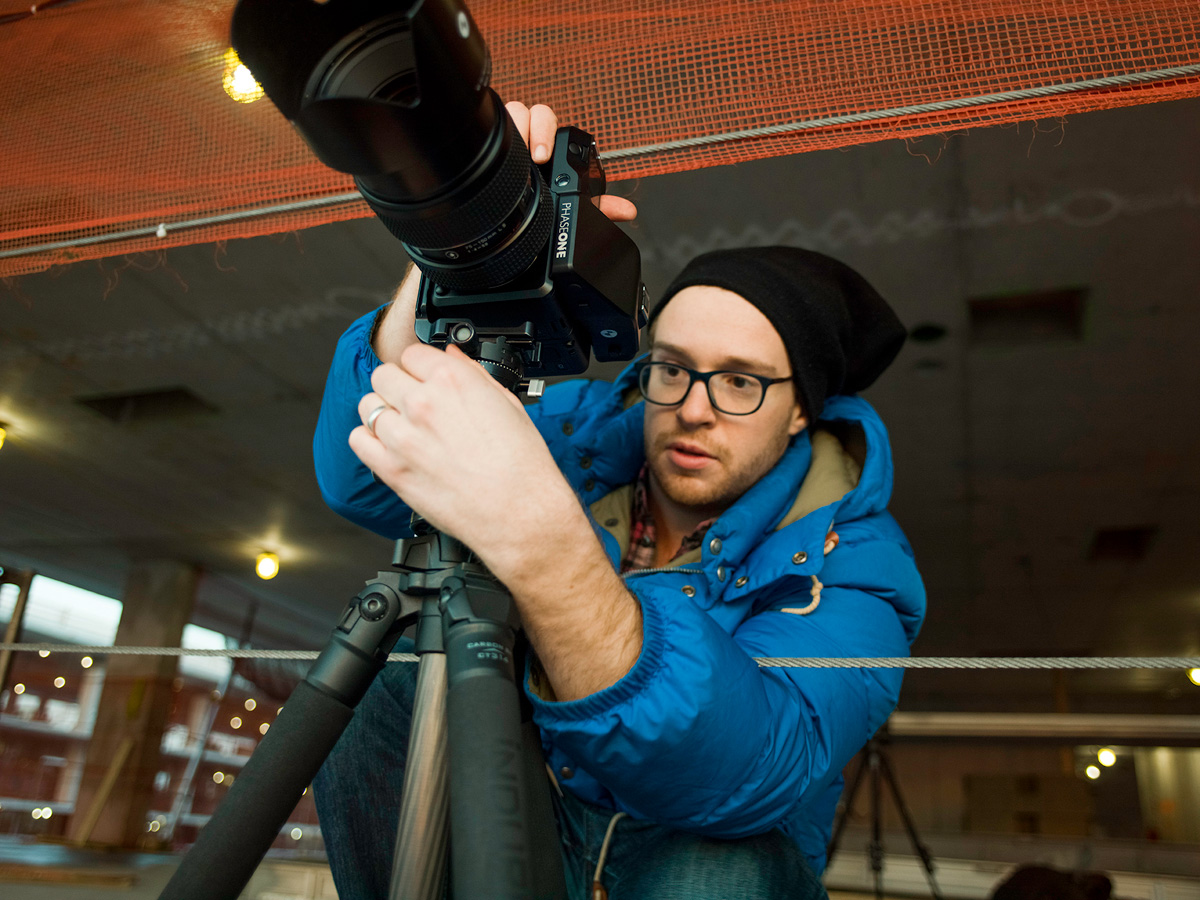
The Phase One IQ3 100MP system had just been released, and we really wanted to utilize the latest and greatest sensor on the market (100MP!). After some adversity (you’ll see in the video) we were able to rent the camera. At this point we were left with only one day to get the shot, edit the file and deliver it to the printers!
Everything had to go according to plan. The weather had to cooperate, we had to learn the mechanics behind the camera system the day of the project, and we had to figure out exactly by what method we would create the photo. Since the wall was 60 feet wide, we figured we would have to shoot multiple panels and stitch them together in post (even with a medium format system and 100MP sensor, a single shot wouldn’t be sufficient), but we weren’t sure if we should use a rail or a tripod. We also didn’t know if we should photograph in the horizontal or vertical orientation, or if we should capture the panels top-down or left-right (or both!). Lastly, we weren’t sure which lens would be most appropriate. Lots of questions, not a lot of time to spare.
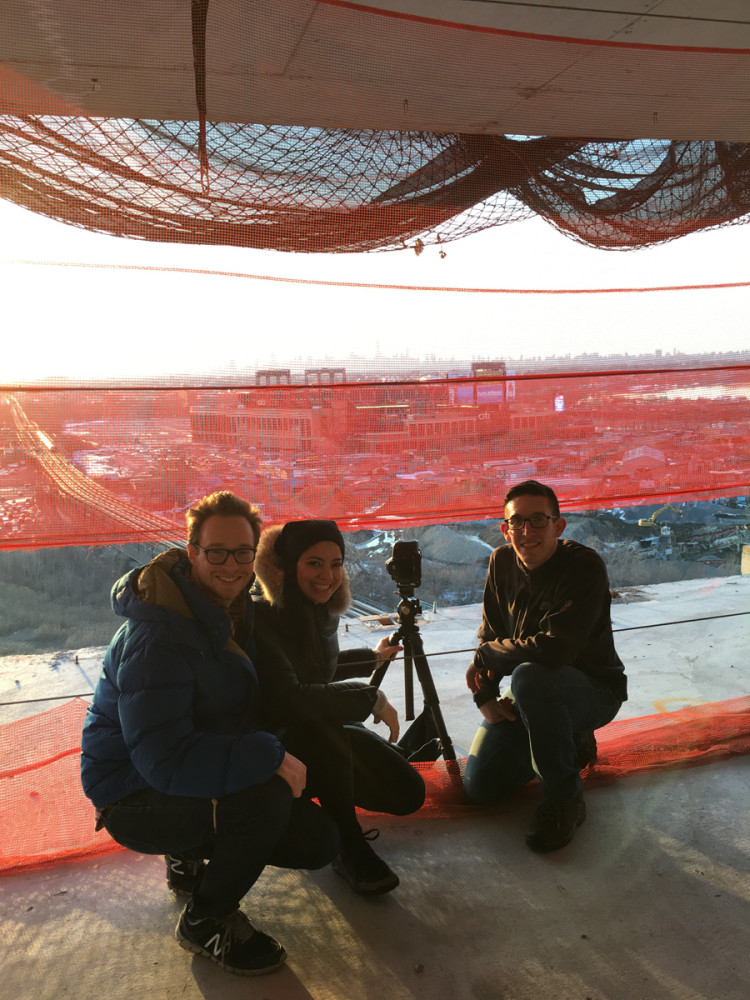
After much deliberation, we decided to take multiple lenses and figure the rest out on site. Thankfully, the weather was on our side that day. We rented the camera from Digital Transitions in NYC and they were amazing in teaching us how to operate it. They also assured us they would always be around should something arise on site. That comforted us to say the least.
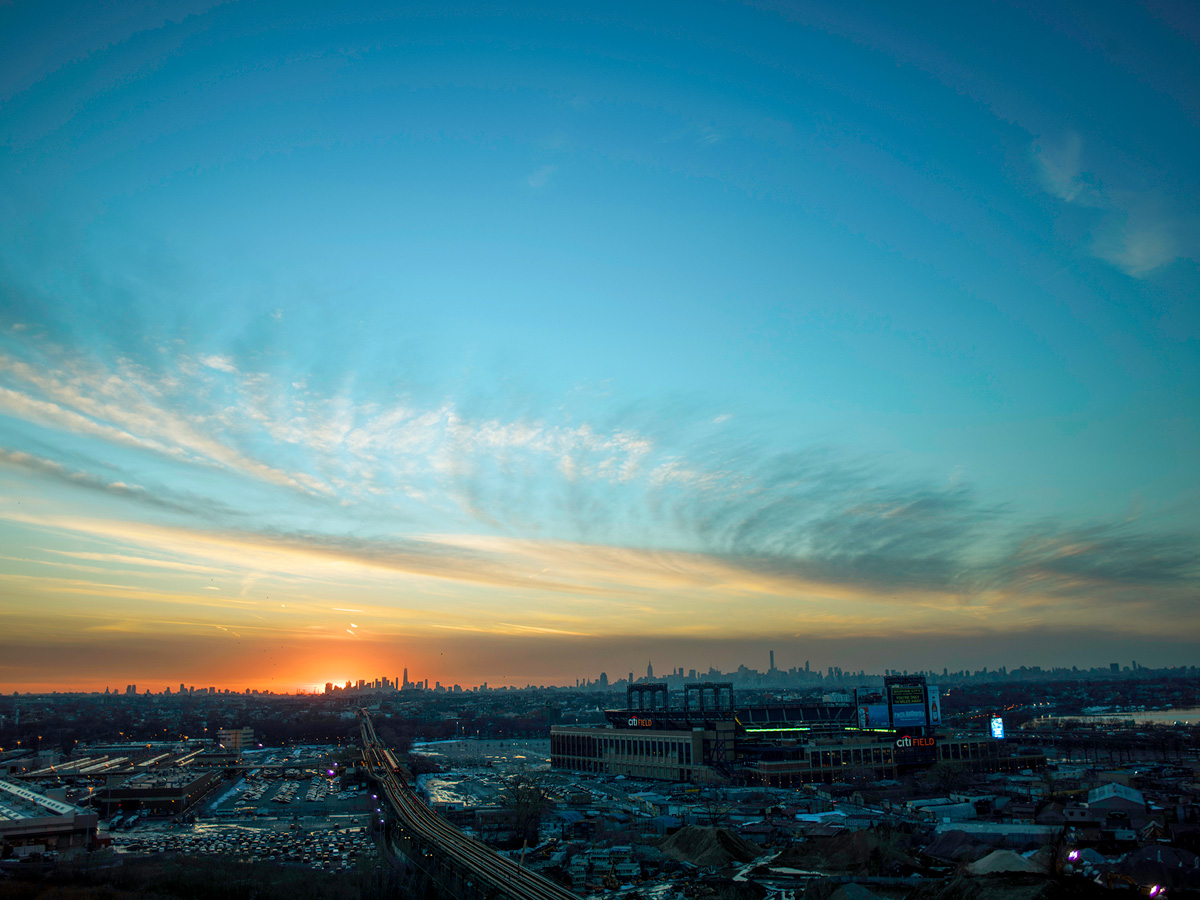
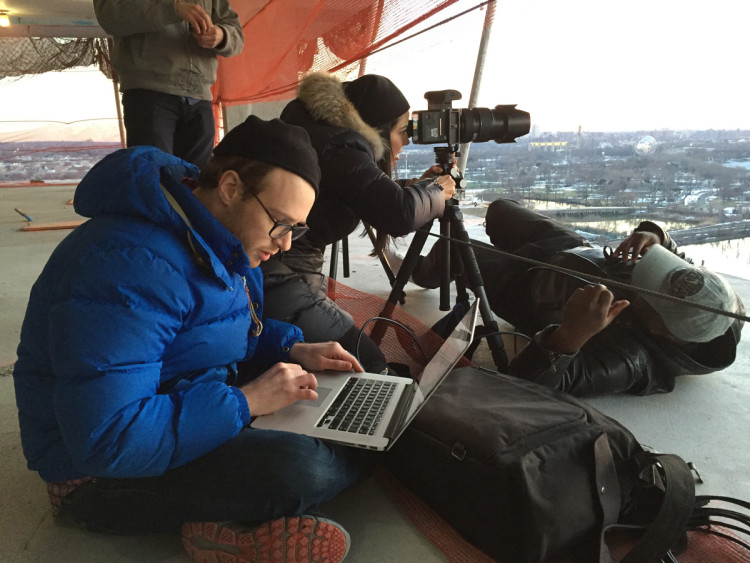
Sunset was around 5:15, so we arrived at 4 and made our way up the construction site to the 15th floor. It was already so beautiful as the sun was setting behind the Manhattan skyline. Quickly, we were able to eliminate the rail system we had brought. Our photo subject was so far away that we could easily photograph the needed panels using our Arca-Swiss D4 tripod head. Next, we decided that the Schneider 150mm was the lens to use. It gave us exactly the frame we were hoping to get with minimal cropping needed in post. We elected to orient the camera vertically and shoot 7 panels from left to right.
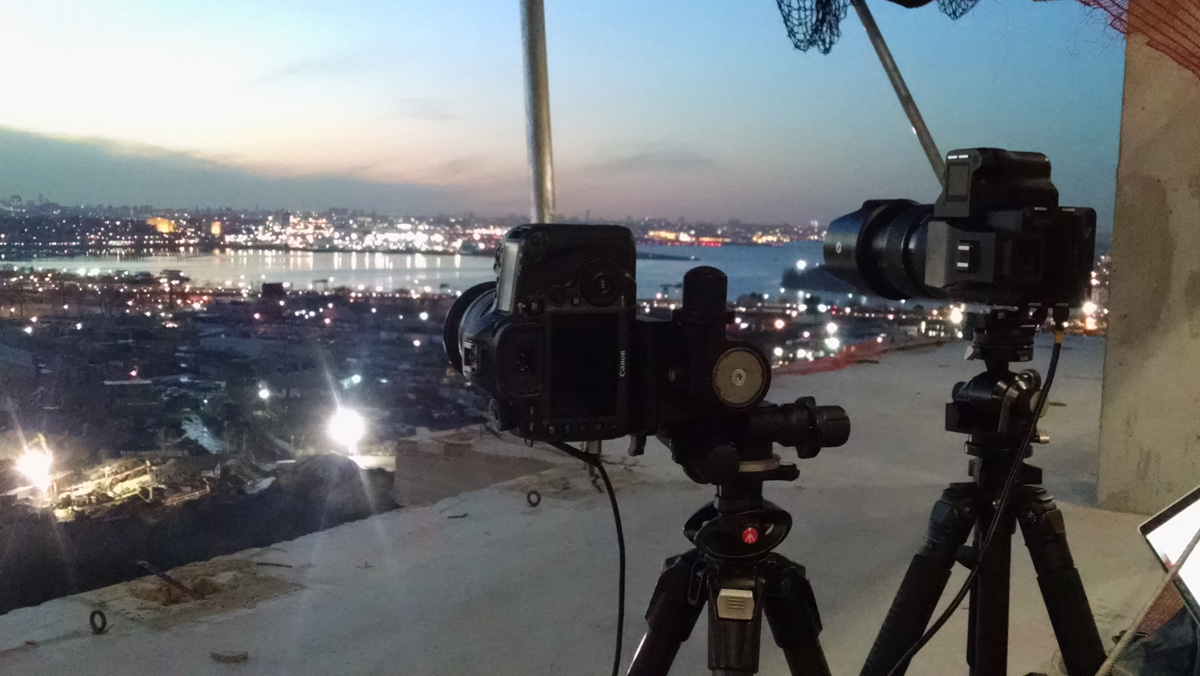
One additional element we worried over was the fear that the construction site would be too active. Any camera shake would cause our long exposure capture to be blurry. Luckily we were able to select a floor where no construction workers were working and thus were free to begin.
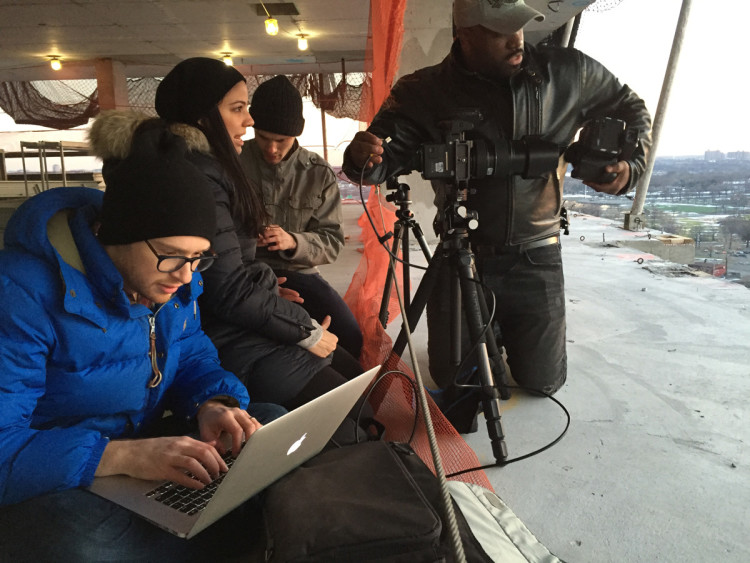
Once the camera was set up, we ran a test by tethering to a computer and taking a look at how the panels stacked up next to each other. The raw files looked really good. We were zooming in and able to read traffic signs that were miles away!
Finally, we were confident that we would be able to create the image the way we wanted to. Now we just had to wait for the buildings to light up during twilight…
The next day we imported all the files to our office computers and spent the rest of the day editing the shot. It literally took all day to stitch the panels seamlessly, get the color correction on point, and pull out all the details we wanted to showcase. Each shot was a 15 second exposure, and since the sky gets dark so quickly there was a noticeable gradient in color with each panel. Smoothing out the sky was quite a challenge!
We finally submitted the panoramic photo and shortly after heard from the printer that the file was going to work. We all breathed a sigh of relief.
Donna and I got to see the photo in person a week later, and it was incredible. Inspecting the wall up close we really got to see how sharp every detail was. Considering this was our first time using a medium format system, and considering all the external pressures to get the job done right, I feel like we really succeeded in what we set out to do.
Reflecting on the experience, the whole process was pretty wild. There were so many question marks in the air, but it all worked out in the end. We created an amazing final product and made an important client very happy.
-Brian Podnos
Donna Dotan Photography
Special thanks to Onex Real Estate Partners, Modern Spaces, Digital Transitions, Ken Jones, and Pitra Media!
You can see more of Donna and Brian’s work at DonnaDotan.com, and follow them on Instagram, Twitter, and Facebook.