How to Create Realistic Shallow Depth-of-Field Backgrounds for Compositing

Mornin’ everybody. I wanted to wrap up the week with a quick trick for creating realistic backgrounds for compositing, so here goes:
When I was in Seattle for my “Shoot Like a Pro” Tour, before the seminar kicked off in the morning, Brad and I went just outside the convention center so I could create some real shallow depth-of-field backgrounds I could use in Compositing. I did this mostly because I hate how it looks when you take an in-focus background and try and “fake it” by adding a massive Gaussian Blur or Lens Blur filter in Photoshop.
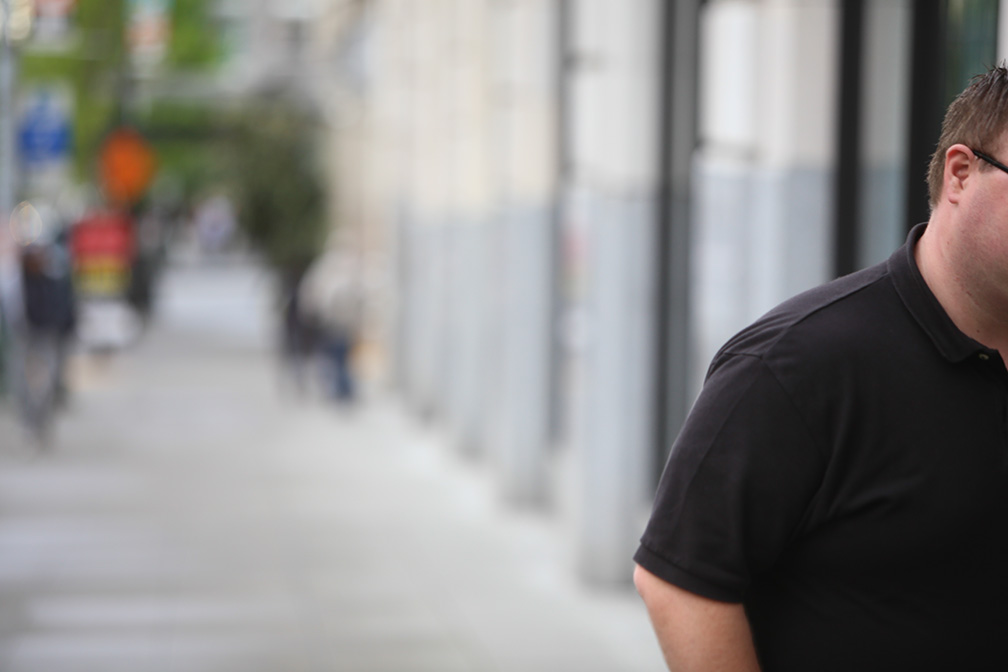
Above: I had Brad stand in the street, and I zoomed-in fairly tight on him with a 70-200mm f/2.8 lens, at f/2.8 so the background would be way out of focus (as seen here). Once I was focused on Brad, I would hold the shutter button half-way down to lock the focus on Brad, then I would give Brad a signal and he would walk out of the frame (that’s Brad walking out of the frame above).

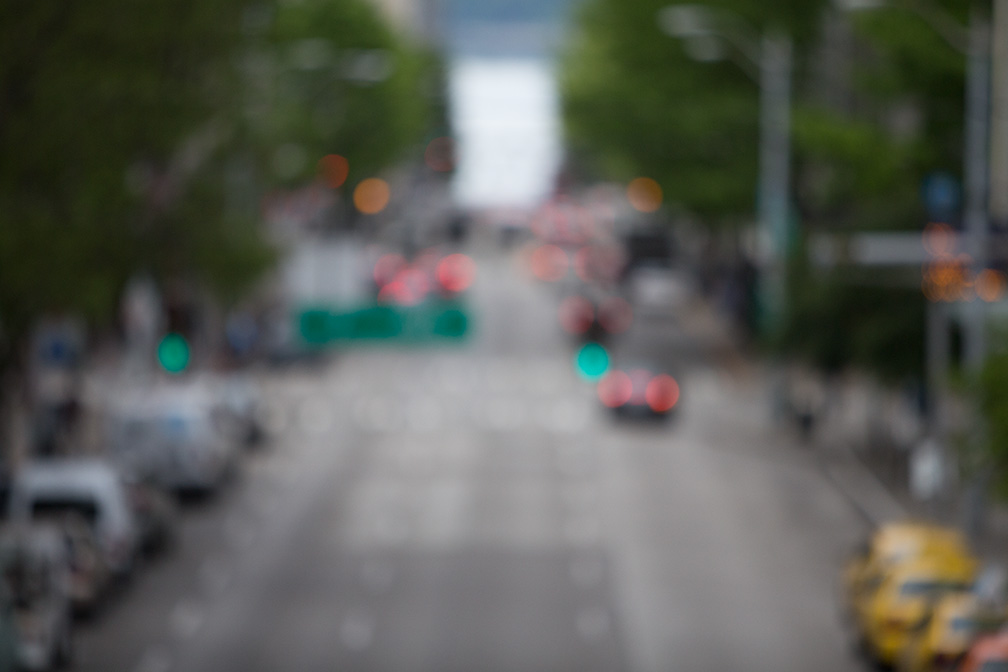
Above: Once Brad was fully out of the frame, I’d just press the shutter button the rest of the way down and take the shot. Mission accomplished — a realistic shallow depth-0f-field background.
Above: Since this technique literally took less than 30-seconds, we shot a handful of different backgrounds, at different angles and on nearby streets, and every time the technique was the same: Brad stands in place: I focus on him at f.2/8; hold the shutter button half-way down; I give him the signal; he walks out of the frame; then “click.” I had 20 or so background in just 10 minutes.
Above: Here’s the image at the top again — it was my first test of the concept. I didn’t crop our subject here as tightly as I had actually shot Brad, so it would be more realistic if I had matched her size relative to the frame, but at least I can see that it worked — now I just have to find the right image for the foreground.
My subject was shot on a light gray background in my studio, and then I used Photoshop’s Quick Select tool along with the Refine Edge feature to remove her from that background and then I copy and pasted her onto the out-of-focus background. Once there, I matched her overall color-tone to the background, and then lastly I put a slight tint over the entire image (to help visually unify the two) and I added a soft glow effect as well (a 50-pixel Gaussian Blur, and then I changed the blend mode to Soft Light and lowered the opacity to 50%).
Anyway, just a quickie for Friday, and maybe something you’ll consider next time you’re out shooting with a friend who can act as an “in-focus” stand-in to create some out-of-focus backgrounds.
Back to Football
This weekend I’m shooting the Bucs vs. Cardinals NFL game with the Buc’s new starting quarterback Mike Glennon. That should keep me busy during the first quarter, eh? Also, trying some new techniques I picked up from the just-released book, “Peter Read Miller on Sports Photography.”
I’ll share some shots next week, but next week is also Worldwide Photo Walk week (the actual walk is next Saturday, and we have 1.200 walks organized in cities all over the world, with more than 22,000 walkers so far. Hope you’ll join us next Saturday.
Here’s to a great weekend. Hope it’s a safe and fun one. :)