Just Tried a Different Source for Photo Books and It’s Pretty Darn Sweet!
If you’ve followed me here or on social, you know I’m kind of an evangelist for making photo books. In fact, today at my sold-out seminar in Washington DC, it’s one of the topics I discuss during the day — why making photo books are important, and the effect they can have on you and your career as a photographer. So, when I got the chance to try out the latest Photo Books from MPIX, I jumped at it.
I’ve been creating my photo books in Lightroom up to this point, and before that I was using Apple’s Aperture and iPhoto, which both did a great job of creating books — but my photos weren’t in those apps (especially now that both have been discontinued). My images are in Lightroom, and since Lightroom introduced their Books module, I’ve been doing them all there, but it definitely has its limitations (and a very tight structure. It’s a little bit customizable, but not to any major extent), so I’m always “on the hunt” for something that will give me more control over my layout, and that’s why this interested me.
No software — you create it all online
You make photo books at MPIX.com just by using a standard Web browser (no other software required) using their built-in online photo book layout feature. Here’s a quick look at how that looks and works.
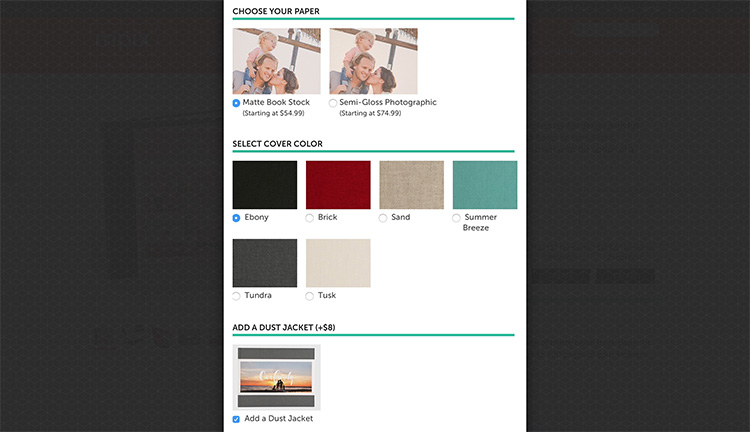

You start by uploading the photos to MPIX (I sent high-res JPEGs, saved at a quality setting of 8, which is my standard setting); then you enter their book layout software where you choose which type of paper (I actually went with the fancy-dancy semi-glossy paper), and I chose an Ebony cover with a Dust Jacket wrap, and I chose a wide Panoramic 11×8″ book layout.
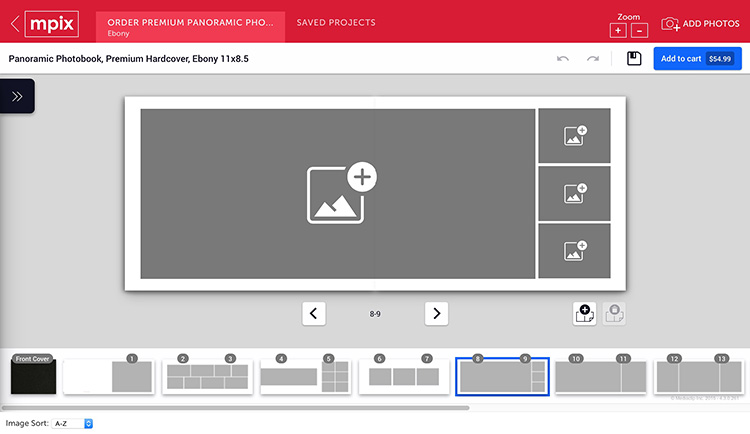

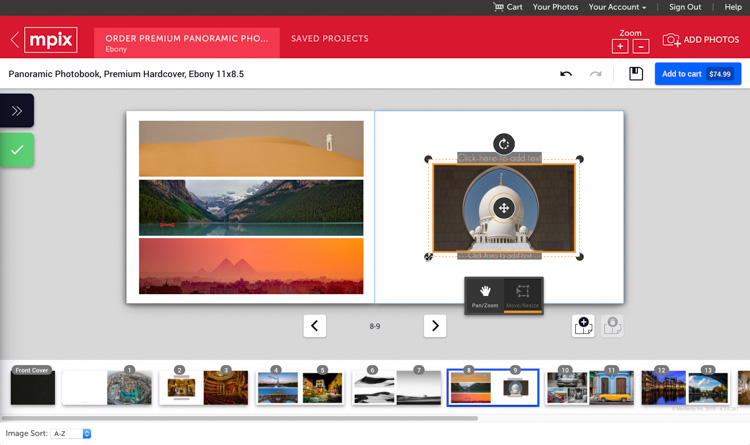
Above: Once you’ve made those choices, now you can choose if you want to work on two-page spreads (that’s what I chose), or individual pages, or just start from scratch with our own designs page by page (but you can use their built-in templates as a shortcut at any time).
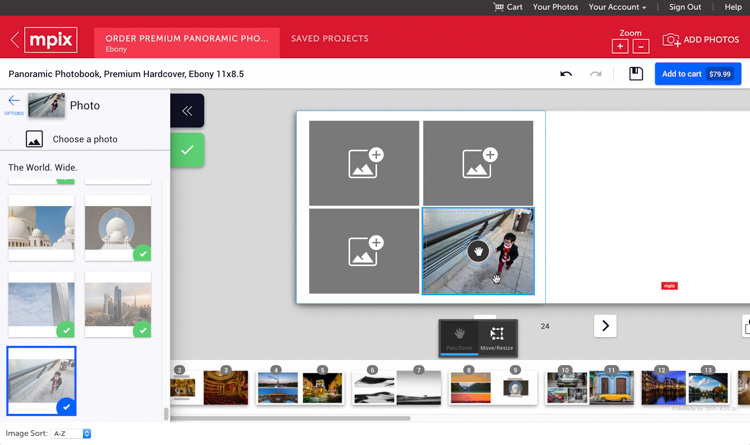

Above: It pretty much works like this — you click on a gray photo square; a little panel pops out from the left where all your photos are, and you just choose which one you want and it appears on your page, as shown above. Do, it’s not “drag and drop” it’s “click and its there.” Once it’s “there” you can reposition it by dragging. Pretty standard stuff.
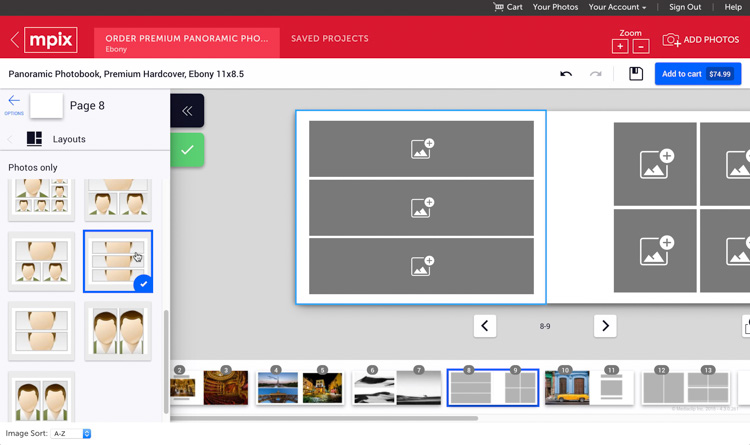
Above: Putting together a book is pretty much just that, except for the fact that you can change the layout for any page (as I did here) by choosing a different layout from the their collection of layouts (they have layouts with photos or text).

In short order, it looks like this (but with your photos, of course).
Where this rocks!
What I liked best about the layout software was that everything was easily adjustable (kind of reminded me of Apple’s Aperture book module, which is really quite good — too bad it’s gone). You just click on a gray photo placeholder (or a photo itself); then click the Move/Crop icon and you can make that photo any size, any shape, and put it anywhere you want it including crossing page spreads. You really feel like there’s no limits and that’s very freeing (and man what I would give for Lightroom to have this level of freedom when it comes to layout). More on this later, but this alone just rocks!

But how does the printed book look?
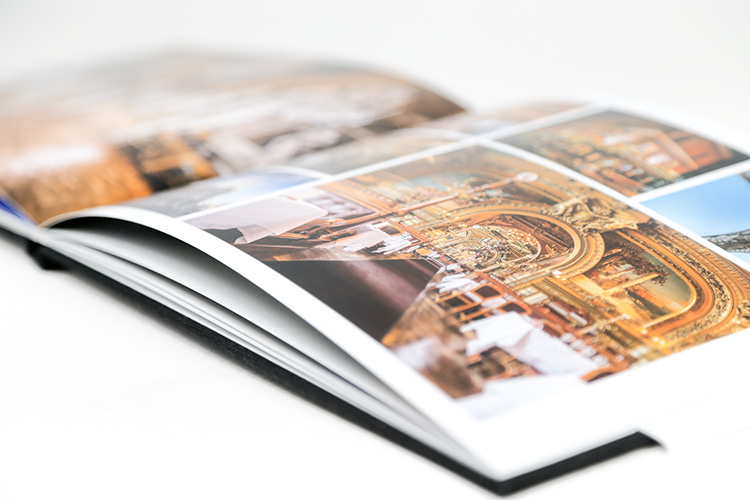
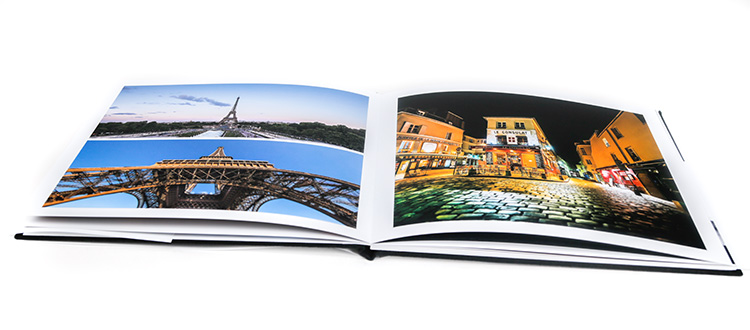
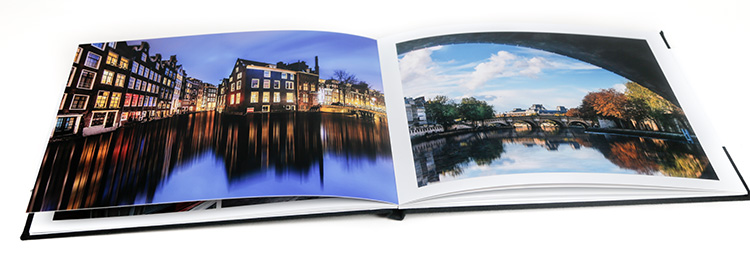
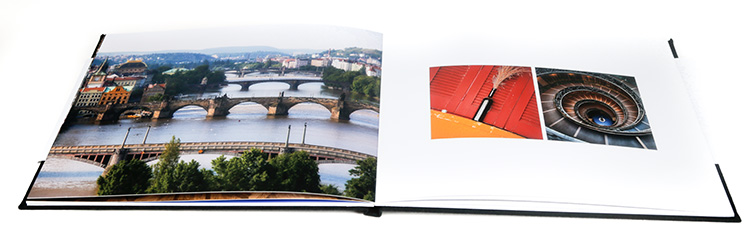
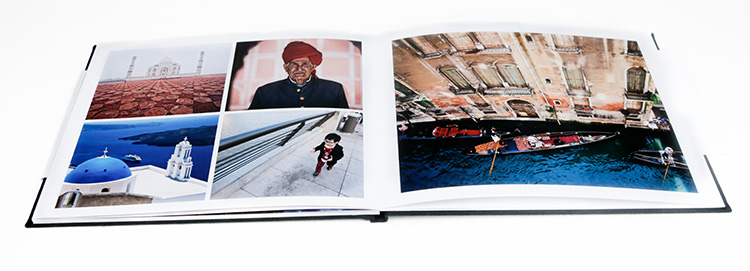
Beautiful! The printing is really gorgeous. I use MPIX for lots of large prints during the year so I was expecting it to be really good, but I guess I’ve been printing books from other sources for a while now, and seeing their print quality in books was really a treat. Here’s some of the spreads:


So, what doesn’t “rock” about it?
The book is beautiful, the printing is beautiful, it was easy to put together, but of course there are a few things I’d love to see tweaked:
(1) The thickness of the paper
It’s not what you think — the paper is not too thin. I think it may be too thick.
Now, some folks thought it was awesome, and made an instant mention of how thick the pages were (a positive), but when you hand someone a photo book you want them talking about the images, not how thick the paper is (a negative).
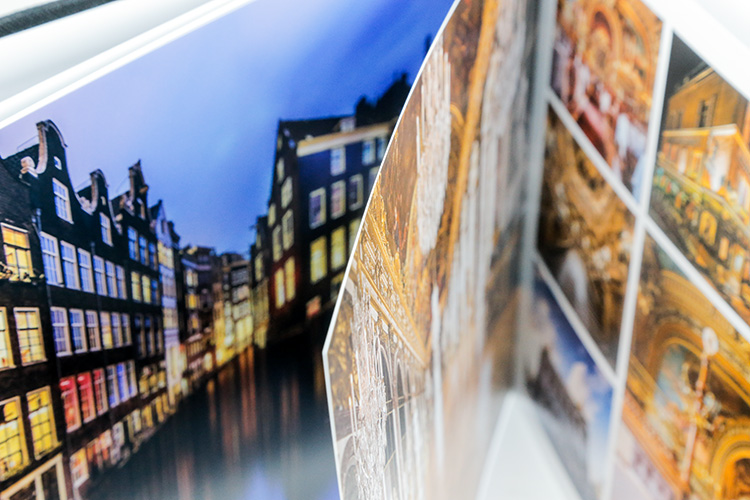
ABOVE: Brad said it best when he first saw the book — it feels like the thickness of two 8x10s back-to-back and perfectly aligned into one single sheet. It’s thick! Take a look at the image above which gives you some idea of the thickness. So, I’m not sure whether the thickness is a good thing, or a bad thing, but either way I thought you’d want to know — they are thick!
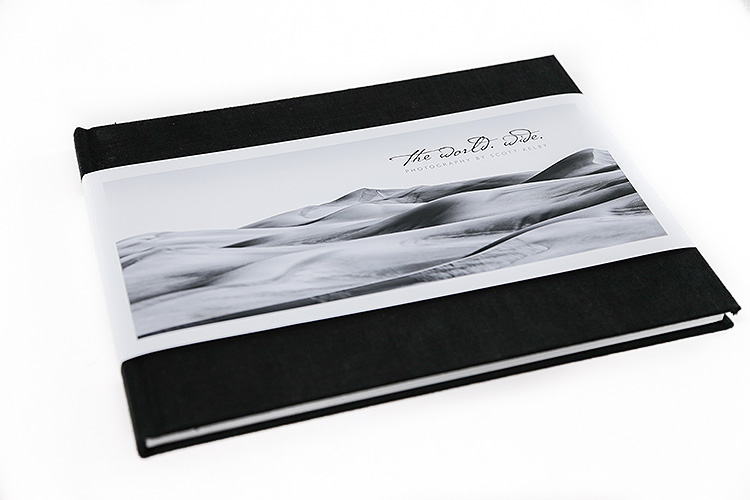
(2) The front dust jacket wrap doesn’t cover the entire cover
It’s more like a “panorama” cover wrap — it’s an 8-1/2″ tall book, but I think the dust jacket wrap is probably only 5-1/2″” tall (take a look at the cover above and you’ll see what I mean). I personally would prefer it covered the entire cover of the book, but again, some people thought it was really cool looking. It is pretty cool looking, but I would still like the option of a full wrap.
Outside of that, it’s back to “It rocks!”
The software is easy to use, but if you’ve never used it before, it’ll take you a minute to get acclimated to how it works, but once you’ve got it, it not only a breeze — it’s fun. The quality of the printing is really great — the colors are really vibrant and the overall impact of the book is really nice, and I’m not sure there’s a company on earth whose customer service stands behind their stuff like MPIX does, so I have a high level of comfort on that end. In fact, I’ll be sending my next photo book there from my trip to Australia / New Zealand.
The timing is right!
If you’ve always wanted to create a photo book, but never have, I hope this inspired you to just go make one. Make a photo book once — one time, and you’ll fall desperately in love with the process because you get to play photo editor. You get to choose which images “make the cut”; which page it appears on; how big it will be; how many images will be on which page — it’s a really fun, really creative process, but unlike a full time photo editor, you’ll be working with your own images, instead of somebody else, and that right there takes it all to another level. After you make one of their book, let me know what you think.
If you’re going to do this, why not get a 40% discount in the process? Use the code scottkelby40 to get a 40% discount on Premium Panoramic Photo Books now through October 20! (This code is good for one time use and isn’t valid with any other promotions).
I’m up here in DC with my seminar today – looking forward to meeting a bunch of you here — make sure you come up and say howdy.
Best,
-Scott
P.S. I’ll be at Photo Plus Expo in NYC next week — teaching a Master Class on lighting and retouching, and then I’ll be speaking Thursday in Canon’s booth on the main stage teaching travel photography. Hope I’ll see you there! :)