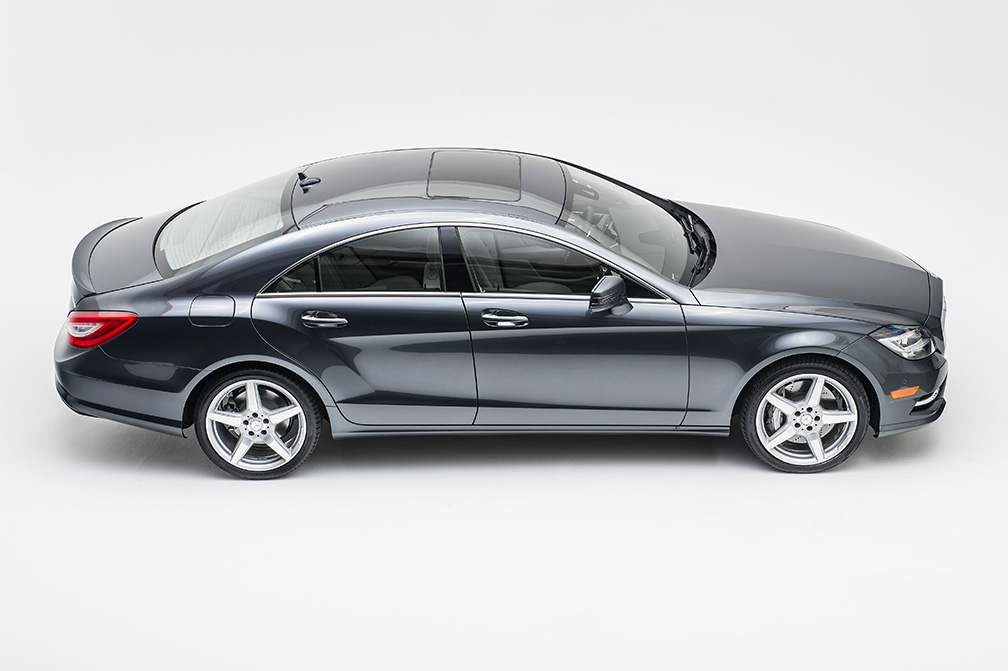
My First Studio Car Shoot (plus behind-the-scenes)
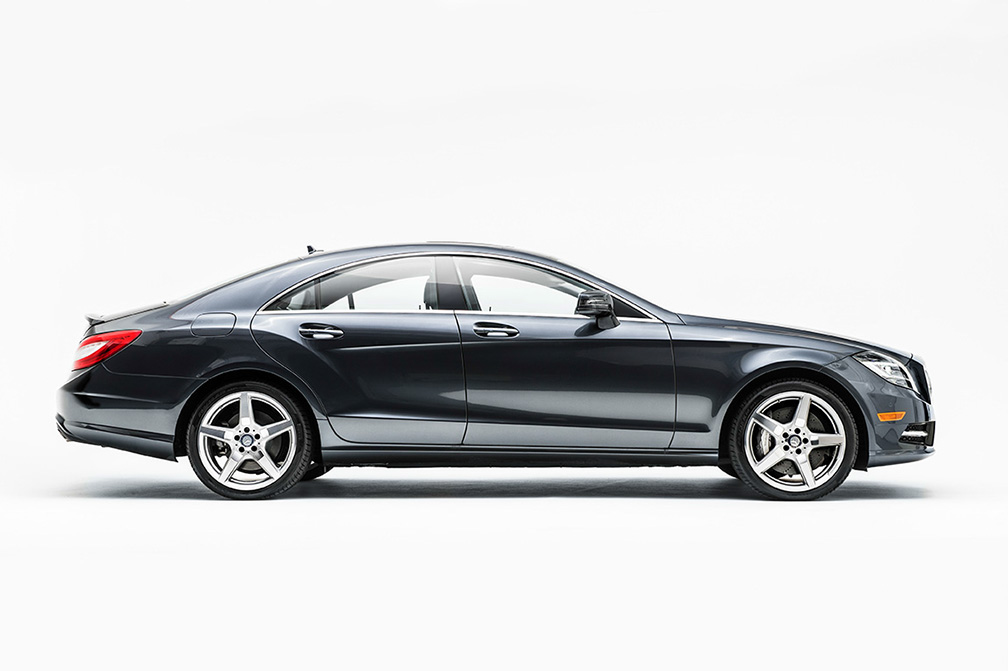
(Above: a 2014 Mercedes Benz CLS 550, in a dark grey with a hint of blue. Thanks to Tony Pinero for the car).
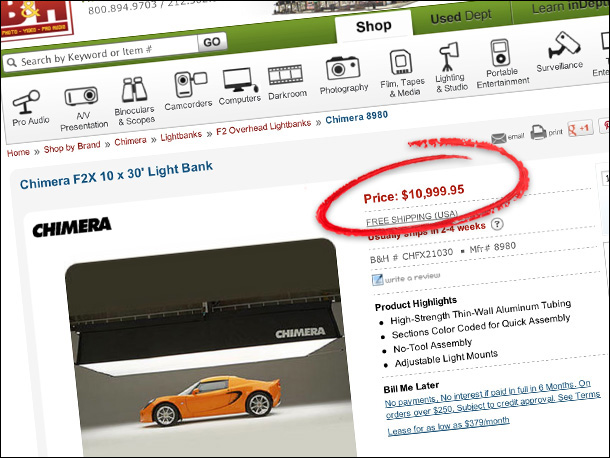
Ever since I started shooting cars, I’ve wanted to shoot one in a studio, but there have been a couple of obstacles. One being finding a studio with a really large white cove that’s big enough to drive a car into, but the really big obstacle is to find one that has a giant car-sized softbox overhead (like the 10-foot x 30-foot F2X from Chimera, but the price is……the price is…well….see below).

That gives you some idea of why, outside of Detroit, finding a studio with one of these with an affordable rental rate is pretty challenging. Well, it would be for a regular guy, but not for the amazing Brad Moore, who found Studio 75, a commercial rental studio set up for automotive photography, that’s only about 25-minutes from our offices. It’s affordable, the guy seemed really easy to work with, and although they didn’t have the Chimera, they did have a home-made rig that works, so we booked it.
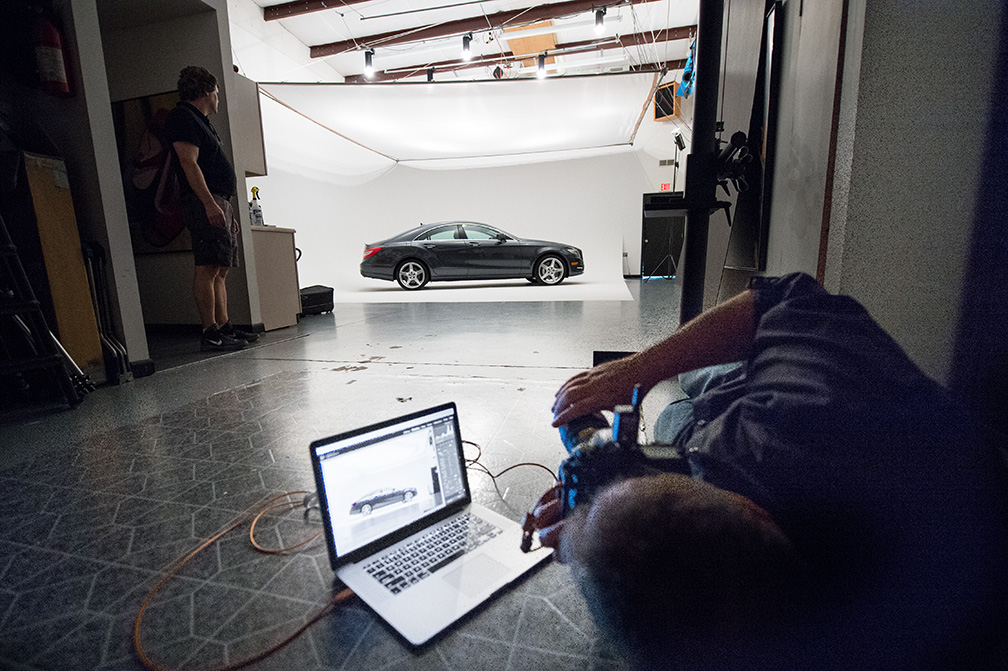
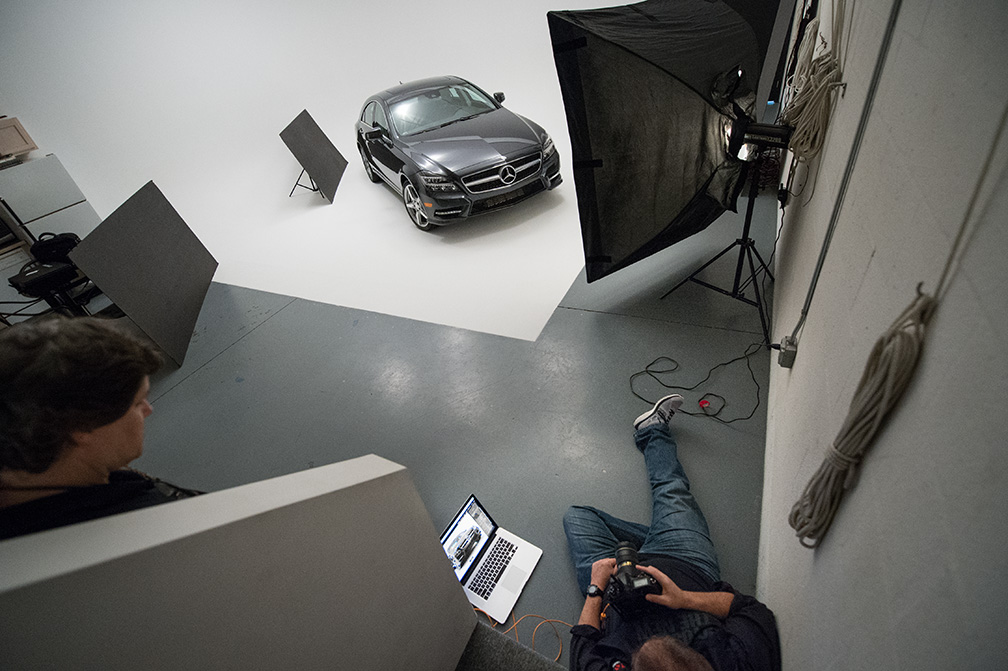
Above: In this behind-the-scenes shot, you can see the cost-effective lighting rig Dan created himself. It’s five 1,000 watt White Lightning strobe heads (bare bulbs), mounted on two long poles, hoisted up with a pulley-system, and then firing through a large 20’x20′ Matthews overhead silk diffusion panel (around $700) mounted to aluminum fence top-rail (you can buy a Matthews 20’x20′ collapsable frame for around $975, but the fence top-rail DIY route would be much cheaper at around $88 for the tubing (Eight 10′ x- 1-3/8″ round inter-connecting rails at Lowes for around $11 each. Then you’d need four 1-3/8″ corner connectors at around $4 or so each).
OK, back to the production still above: To get the right look, I’m nearly at the back of the studio. To get the perspective right, I’m laying down on the floor (not a big fan of that part), and I’m tethered directly into Lightroom so I can see the shots at a very large size as I’m taking them.
Once the lights are in place, you set them to full-power and adjust the f/stop until it looks right, so it’s a pretty straight ahead set-up from above.
Welcome to my World
While you could get a car in the studio without any trouble, maneuvering once inside is quite tricky, but luckily this particular car had a backup camera, which made things easier. However, having Brad Moore giving you directions in that back-up camera…well…just watch the video below (shot by Dan as I was backing the car) and you’ll see what I mean. Welcome to my world.

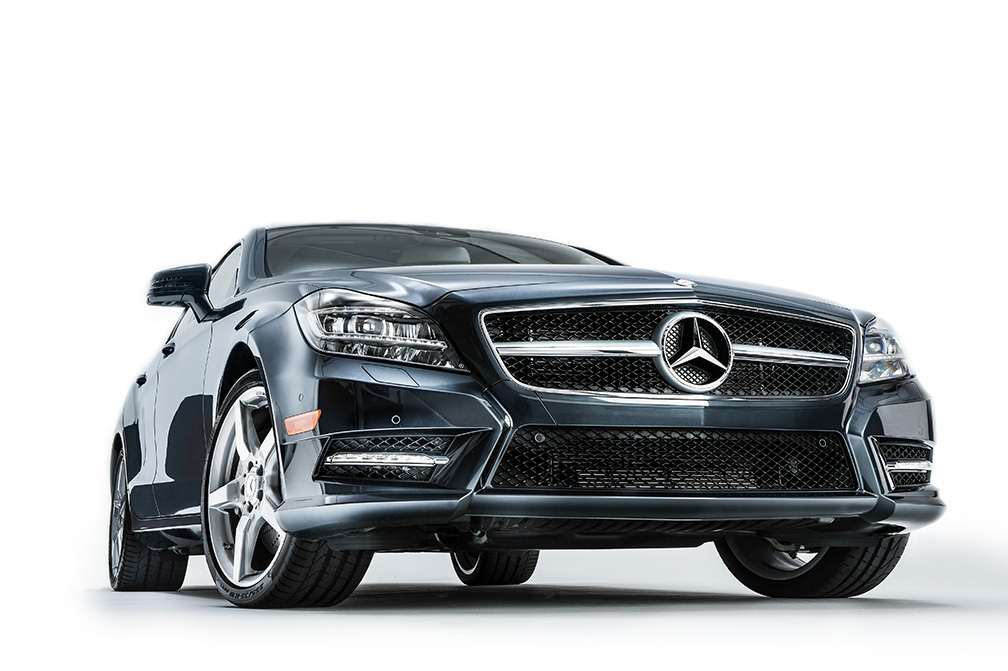
Above: For shots where the front of the car is visible (like the one you just saw), we used a large softbox to fill-in the shadows. We also used a large black bounce card to help create some shadow areas on the car (more on this in a moment). You can see my low shooting position here (production shots by Brad Moore). It was a bit more comfortable here — sitting on the floor and laying back on the first step of the stairs leading to the studio’s loft.
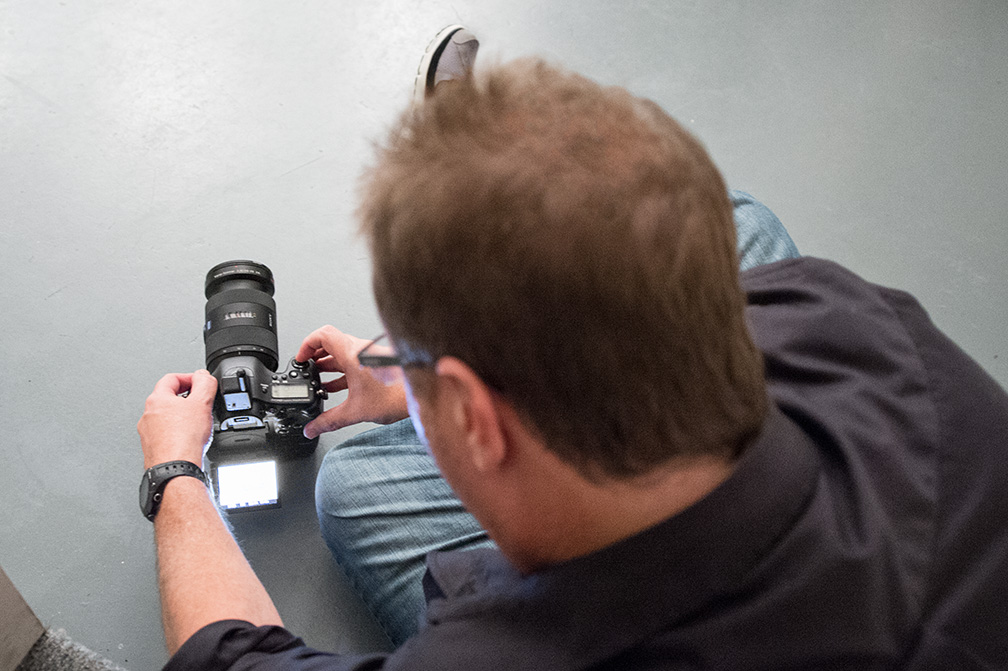
Above: Sony had loaned me some of their DSLR gear to try out, and I thought this would be a great opportunity since the Sony A99 had a swivel-out LCD monitor, so I could place the camera on the floor (for the lowest possible perspective —- one where the photo would clearly show the rear tire on the far side) and then I could just angle it up a bit and do all the composition using the tilt-up display. This sounds easy, but try it with a sneaker coming out of the front of your head (see above)
It worked even better than I thought (though the electronic viewfinder is kind of…well…kinda weird when you work in a studio environment. It has a special mode for it, and perhaps you would eventually get used to it, but seeing something on screen that looks so different from what you’re going to create really threw me. Maybe it’s just my inexperience with the Sony, so I don’t want to totally trash it, because I know a lot of folks love it, but it would definitely take some getting used to (for me, anyway). So, I shot both my Nikon D4 and the Sony A99 during the four-hour shoot in the studio.
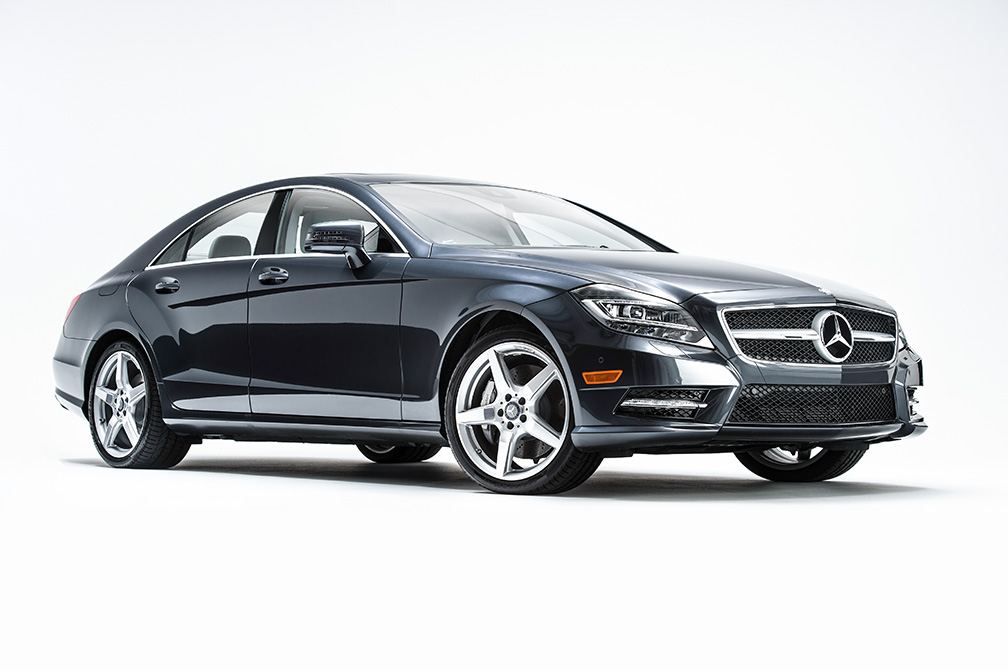
Above: Here’s a two-thirds view, where you can see the side the front. It was the first shot we tried that day. You can really see the black bounce card in the bottom half of the doors. That really made a huge difference.
Above: Here’s the production shot. I’m lying on the floor again, but I did mount the Nikon on my Gitzo tripod but we splayed the legs way out so I could get it just a few inches above the ground. I kind of leaned on my elbow to compose the shot, then I’d lock down the ballhead.
Above: When we were all done, I thought I’d take a shot from up above, from the loft (where the studio’s office is), and I kinda like the angle. Plus, it was a LOT easier because at this high angle, we didn’t have to deal with many reflections that appear on the car (which is what turned out to be the challenge of the day for the rest of the shots).
The Tip of the Day
Before we left the studio, the studio owner, commercial photographer Dan Gaye, told Brad to bring a circular polarizer, and man did that thing absolutely work wonders!!! The lighting part of this is actually pretty straightforward — it’s a bunch of lights aiming straight down from directly above through some material that softens and diffuses them. If you need a fill for one part or another, just add one more strobe with a soft box. That part was surprisingly easy. The real challenge is eliminating reflections in the car.
First, the Polarizer helps darken scene, but more importantly it helps you nearly eliminate the hot-spots and reflections from the strobes above in the windshield and side windows. Without that polarizer, you’d have a serious retouching nightmare. You just rotate the circular polarizer and you can literally see the reflections in the windows disappear. I told Brad — learning that was worth the studio rental right there!

Above: Of course, since I had the car there, I couldn’t help but do a few detail shots, using the standard set-up: a single large strip-bank (we turned the overhead lights off), and shooting at f/22 (hat tip to Tim Wallace), just like always.
It’s not the Lighting that’s hard. It’s managing the reflections
Dan said something that really stuck with me. He said “Cars are like giant mirrors. You see anything in front of it like you’re aiming at a mirror” and he wasn’t just-a-kiddin’. It was amazing to see this in person, because you could see everything from the kitchen in the studio, to Brad’s head, to a blue Kayak mounted up near the ceiling, to beams in the ceiling, light stands, me, paintings on the wall, cables on the floor — EVERYTHING!
I have to give Dan big credit and major love here, because he is a master of hiding all these things using black drop clothes, black seamless paper (we had to bring out a 15-foot wide roll), black 8-foot ball bounce cards, and more. You had to take a shot — zoom in tight and you can’t believe all the stuff you’d see — just like you were looking at a big mirror aiming back at the studio. It took 5 minutes to get the lighting right for the very first shot I posted at the top of the page, and about 50 minutes to minimize the reflections.
Now that I’ve seen the process of dealing with all these reflections, it really is just a trial-and-error case of being a “Reflection Detective” but I could not have pulled this off without Dan’s experience and help (and he was incredibly helpful throughout. Since it’s his studio, he knows every trick in the book).
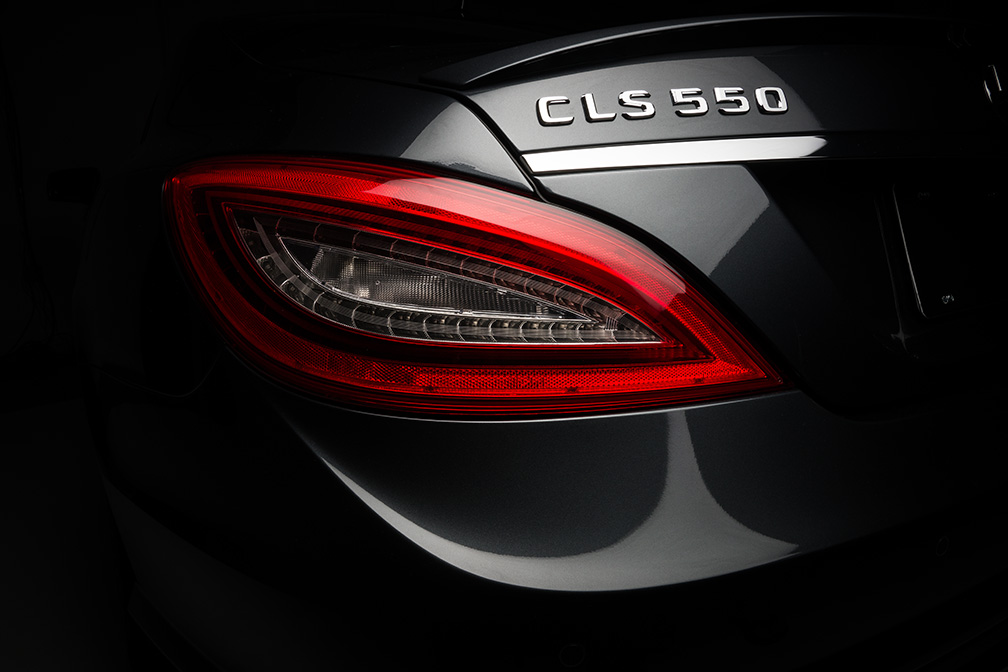
Above: Here’s another detail shot; this one of the rear of the car, with the name plate and tail light sections.

Above: Here’s the emblem on the trunk, lit with that same single strip bank, held diligently by Mr. Moore.
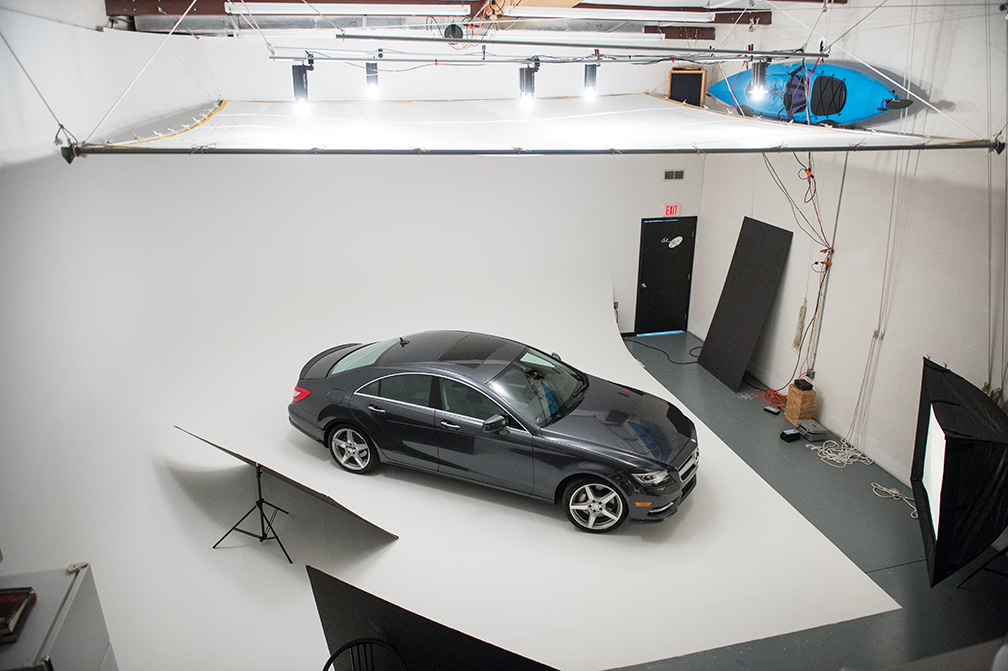
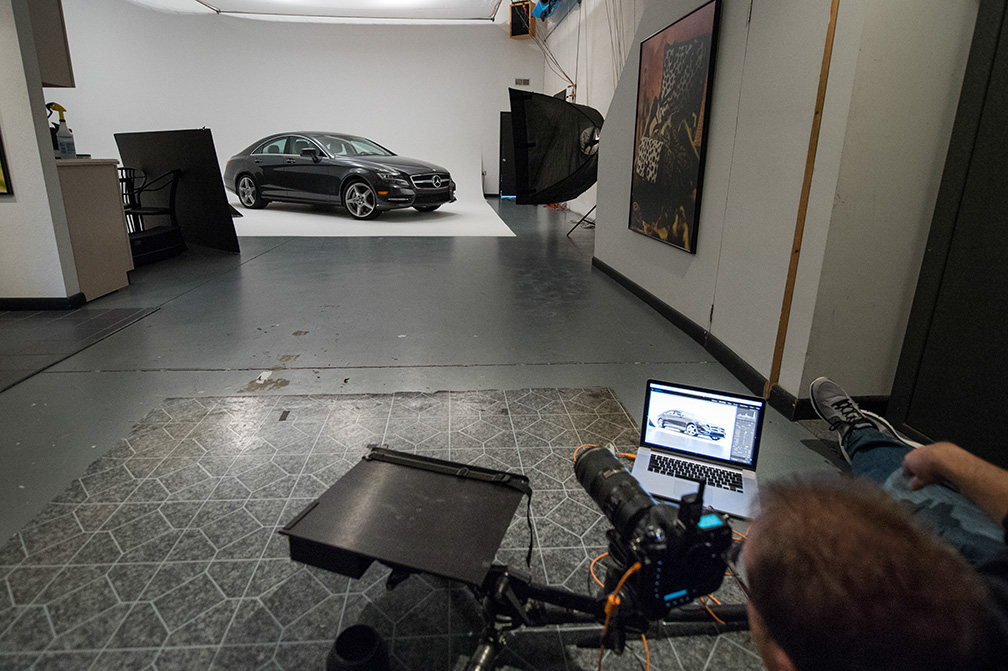
Above: Thought I’d give you one more look at the overall full-car lighting set-up (and the blue kayak which had to be cloned out of just aobut every shot). This one gives you a great view of the White Lighting strobes and the diffusion silk.
Above: I wanted to include a shot of studio owner and photographer Dan Gaye because he was just an incredible help all day. He designed this inexpensive overhead lighting rig back in 1995 and it still works really well to this day. His system of ropes and pulleys lets him raise/lower/angle the lights and diffusion panel pretty much however you want it.
He was super-helpful and really made me understand the challenges of minimizing reflections and the techniques to hide distracting stuff, which is somewhat of an art unto itself. Needless to say, I learned a lot. So, a big thanks and high-five to Dan, but also thanks to Brad for finding Dan and his studio, and for all his hard work that day, and for all the production stills. Way to go Braddo!
Of course, me being me, I see all sorts of stuff I’d do differently next time
That next time will hopefully be in just a few weeks from now, because I’ve already found another cool car that needs shootin’ and I surely need the practice, but I’m totally OK with that. It was just my first studio automative shoot, but hopefully it’s just the first of many, and you know what they say about practice. :)