Shooting Tethered From Your Camera Into Lightroom (in Lightroom 2)
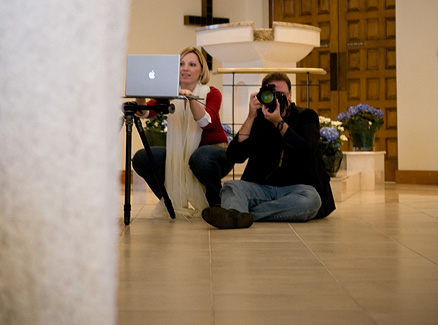

I had a number of comments on my “Wedding Shoot” blog post yesterday, asking how to set up Lightroom and your camera to shoot tethered (where the images aren’t written onto your memory card—they go straight from the camera onto your laptop, so you can see them full size on screen). So, I thought I’d go ahead and show that today, so here ya go. The shot above, taken by RC, shows me shooting (along side makeup artist Shelly Giard) but I’m tethered very close to my laptop, because I forgot to bring my USB extender cable (I highly recommend picking up a USB extender cable. It’s really helpful, if you actually remember to bring it to the shoot).
Step One: To connect your camera to your laptop (or desktop machine), you need to use that little USB connector cable that came with your camera (the same cable that some people use to connect their camera to their computer to download photos as slowly as humanly possible). So, connect one end to your DSLR’s USB input, and then the other end into your laptop’s USB port.
Step Two: You will need a piece of software that goes between your camera, and Lightroom. If you’re a Canon shooter, you already have that software—it’s called “Canon EOS Viewer” and it comes free with your Canon digital camera. If you’re a Nikon shooter, you need Camera Control Pro 2, which sells for $160 at B&H, but you can download a fully working trial-version for 30-days from Nikons’ site (here’s the link).
Step Three: Make a folder somewhere on your computer (I put mine on my desktop), and name it “Watched.” Note: Since I’m shooting Nikon, I’m going to show how to set up Camera Control Pro 2 for Nikon shooters.


Step Four: Make sure your camera and laptop are connected, your camera is turned on, then launch Camera Control Pro 2. When the software launches, go under the Tools menu and choose Download options. When the dialog appears (shown above), click the Choose button (as shown here), and then find the “Watched Folder” you created in Step Three and choose it. That’s all you do in Camera Control Pro 2. On to Lightroom.

Step Five: Now you’re going to go to Lightroom, and set it up Go under Lightroom’s File menu, under Auto Import, and first choose “Enable Auto Import” (to turn it on) and then choose Auto Import Settings. When the dialog appears (shown above), at the top where it says “Watched Folder” click on the Choose button, find your watched folder, and choose it (now, any photo that goes into that Watched folder will get automatically imported into Lightroom, and that’s exactly where Nikon Camera Control Pro 2 is putting them). The rest of the dialog is pretty much like Lightroom’s normal import dialog, where you choose where the files are saved, what they’re named, and you add keywords.
That’s it—when you shoot now, the images go seamlessly through Nikon Camera Control Pro 2, and right into that folder in Lightroom. I select that folder in Lightroom, switch to the Grid view, double-click on the first photo so it zooms up to Loupe view size, and I start-a-shooin’. Hope that helps. :-)