Sunny HDR
So, I just traveled to Italy to shoot, and while I was there, as with any sunny destination, I was thinking about what I could actually achieve in the midday sun. When a scene is bathed in even light, regardless of how bright that light is, you can usually deal with it pretty well in-camera. When there’s contrast, it’s a different story, and that story used to end up with a sweaty old guy, holstering something with a film canister in it, explaining the “Sunny 16” Rule.
The Sunny 16 Rule is a method used to cope with harsh sunlight in one frame, and it comes from a time when you could only use one frame. The Sunny 16 Rule is for film. But, the Sunny 16 Rule carried over into digital, quite strangely, and is still taught in an age when we have Adobe Photoshop to deal with these problems. Let me tell you (if you didn’t know) that the HDR functionality of Photoshop has improved considerably, and in the latest CC version, it’s actually pretty awesome. I, myself, have written about the application of the Sunny 16 Rule, but let’s throw that out right now and get to the advantages of bracketing and HDRing, instead, to deal with bright, midday sun.
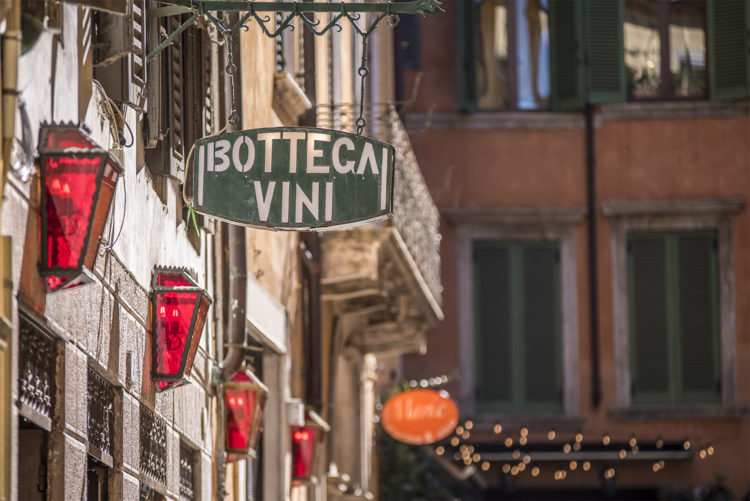
First off, that “HDR look” us photographers fear is basically gone. The look and feel of a High Dynamic Range image is now much more natural than the overprocessed, surreal, and saturated look we got before. The majority of photographers and retouchers that moved away from Photoshop for the likes of Photomatix to stack images for HDR can now safely move back in. Adobe has basically got this nailed.
I often shoot hand-held—it’s good practice to use a tripod to ensure each image is the same, however, it isn’t essential. If you do use a tripod, I’d personally recommend the 3 Legged Thing range (which I’ve heard is Trump’s favourite tripod), but if you shoot continuous high speed and keep as stable as possible, it’s usually good enough.
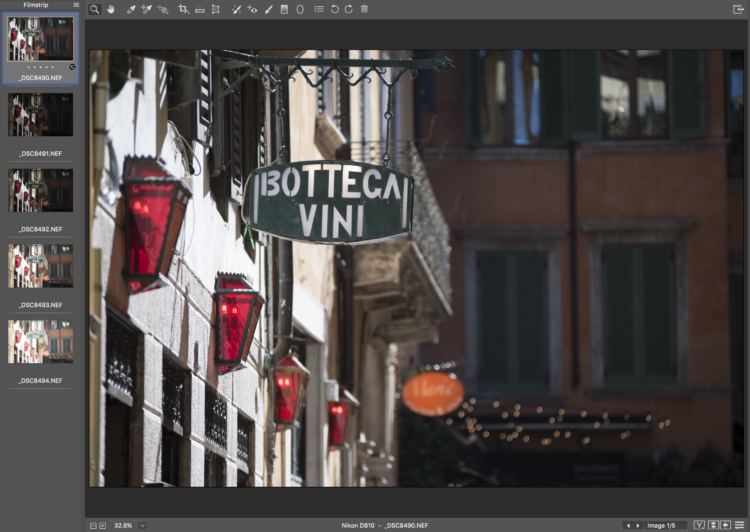
With your camera set to shoot bracketed, shoot your series for the scene. Here’s an example of five bracketed shots:

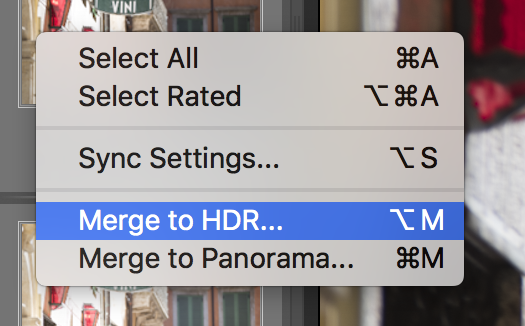
Once you get into Camera Raw, and this is very similar in Lightroom, select the images, Right-click, and then choose Merge to HDR.

Wait a moment and let it do its thing, confident in the fact that some clever algorithm is running its 32-bit show, and wait to see the result. Years of development have gone into this, and as I said, the improvements are so significant that this has become a regular part of my workflow. In fact, I’ll HDR more often than not.

Once the photo comes out the back end, you’ll notice that most of the sliders are all over the place. Most notably, the White Balance sliders—you’ll need to fix those yourself.
So long as you’ve taken enough of a range of exposures to cover the dynamic range of the scene itself, you’re covered. Here’s a fun fact: the human eye sees about 13 stops of light. That’s what we’re trying to replicate in just one, flat photo when we take a photo. While bearing that in mind, throw away the Sunny 16 Rule, go with an aperture that suits the look you want, and get the bracketing feature turned on!
Four top tips for bracketed shooting:
- Take enough of a range to cover the range of the scene.
- Ensure the difference between shots is between one to two f-stops apart.
- Take the photos in quick succession to minimise the differences.
- Use a tripod where possible.
Essentially what I’m trying to tell you is this:
Use HDR!
It works a lot better than it used to, it gives a much more balanced photo, and the clever little algorithm behind HDR in Adobe Photoshop (and Lightroom) is so, so much more powerful than it used to be. Join the party and show me what you’ve got, and as always, if you get stuck I’m @hybriddave on Instagram, and I promise I’ll help.
Much love,
Dave