Thursday News Stuff
Hi folks. How ’bout a big round of applause for Andrew Kornylak for his excellent Guest Blog post yesterday! Besides his very cool adventure photography, I loved what he did with this videos, and I know it got a lot of people thinking about ways to extend what they’re already doing, and that’s one of the things I love best about Guest Blog Wednesday; it gets us thinking and seeing things in a new way. Thanks Andrew for an inspiring and informative post! Now, onto the news:
- One from The Outer Banks
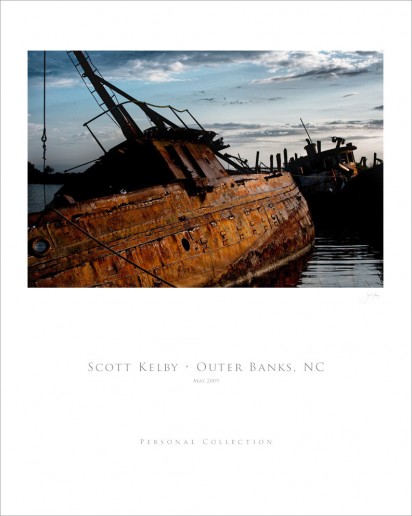
The image above is another one from my trip to DLWS Workshop in North Carolina’s Outer Banks and this one is from Tuesday morning’s dawn shoot at the commercial pier (click on it for a larger view). These rusty abandoned old boats made some really great subjects for the class to shoot, and although the sun went in and out of the clouds, I did manage to get this image I kinda like. Thanks again to Moose & Co. for letting me be a part of their creative world for a couple of days. I totally had a blast! - Off to DC!
Today I’m on my way up to Washington, DC for tomorrow’s Photoshop Down & Dirty Tricks special effects workshop and I am so excited!!!! Corey Barker, who worked with me to help develop the tour, is coming up with me for the kick-off of the tour (He’s teaching the day himself in Richmond at the end of the month), and I’m hooking up with some buddies for dinner, so it’s going to be a great trip all the way around! If you’re going to be at the DC Seminar (like Stacie), make sure you stop me and say “hi.” It’s always a lot of fun for me to meet people who follow this blog.
- Making Poster Layouts (like the one you see above)
I had a number of questions from readers, and even from other students at the DLWS workshop who read this blog about how I made the poster border I put around the image shown above, and those shown on Tuesday. It’s easier than it looks, because all you’re really doing is adding some Canvas side to the left and right; a little more to the top, a bunch at the bottom, and then adding some text. Here’s how it’s done:
STEP FOUR: Now add your text, centered horizontally below your image. I used the font Trajan Pro (which comes with Photoshop CS3 and higher), and increase the Tracking Amount (the space between the letters) to 120, as shown in Photoshop’s Character panel above.
OK, that’s all there is to it.
- Join me in Denver or Portland For A Lightroom Lovefest!
We’re just a few weeks away from my first time ever bringing my Lightroom 2 Tour to Denver, Colorado and Portland, Oregon, and I hope you’re coming out to join me (hundreds of photographers are already signed up in both cities, so don’t wait until the last minute; we have less room than we do in DC). The Denver seminar is on Wednesday, May 20th, and Portland is on Friday May 22nd (hey, that leaves me a day to go shooting with Laurie Excell, who’s based in Portland, on Thursday. Whoo Hoo!!). Anyway, you’re invited to come join me at either workshop, and I hope you’ll be there, because Lightroom (where I now do 80% of my work) will change the way you work and manage your images forever! Here’s the link.
That’s all for today, folks. Hope I’ll be seeing you in DC tomorrow—we’re going have one heck of a great time!
