To Correct Or Not To Correct?
I forgot to post this fisheye shot from the game in Miami last week, but when I was getting ready to post it, I thought, “I wonder if I should correct the fisheye distortion?” So, I gave it a shot.
In Photoshop CS5, it’s an automated process—just open the image in Camera Raw, go to the Lens Correction panel, and turn on the Profile correction and it does the rest in all of two-seconds flat. Here are the results:

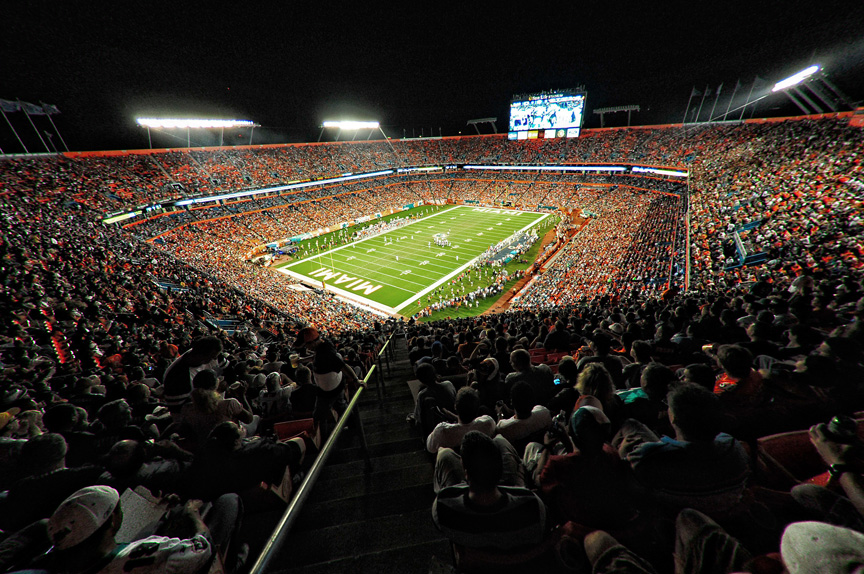
(Above: Here’s the original uncorrected photo, taken with a Nikon 10.5mm fisheye—a DX cropped lens on a FX full-frame body. I love how this DX lens looks on the Full frame body—it’s not too over the top).
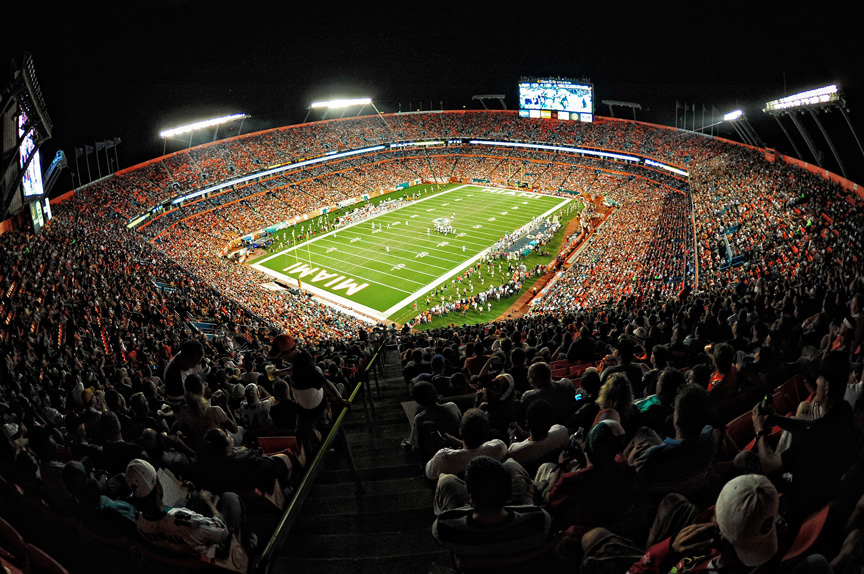
(Above: Here’s the fisheye effect corrected, removing all the roundness that comes with shooting a fisheye lens, using the Photoshop technique I mentioned above).
The top one looks more “classic fisheye” but then when I look at the bottom one, I think, “Well, this looks a lot more like what it really looked like in the stadium that night” but I’m not really sure I like it better.
What do you guys think? Uncorrected (and round) or Corrected and flat? I’m really curious to see what you guys think.
I’ve got one more for you, but this one was taken by my buddy Mike McCaskey (who was shooting along side me that night). He sent me a bunch of his images from the game, and I just fell in love with this one, of Chicago Bears Linebacker Lance Briggs, and I asked Mike if it was OK if I shared it with you guys. That’s the kind of smile that says “We’re winning this one!” And, of course, they did. And the next one, too! Go Bears! (8-3).


In looking at the two fisheye images now posted on the blog (I looked at a preview before the final post went live), I think I need to darken the handrail going down the stairs. I think it’s kind of distracting. A 15-second fix in Photoshop:
#1. Add a Levels Adjustment Layer and drag the center Midtone slider to the right to darken the midtones
#2 Drag the far right Output slider to the Left to darken the overall image (as shown below);


Then press Command-I (PC: Ctrl-I) to invert the Adjustment Layer Mask. Get the Brush tool. Make your brush size very small. Set your Foreground color to white, and paint right along the railing to darken it. The final result is shown below.
(Above: The final image with the rail darkened. Why didn’t I try that on the corrected version? Just bein’ lazy.). ;-)