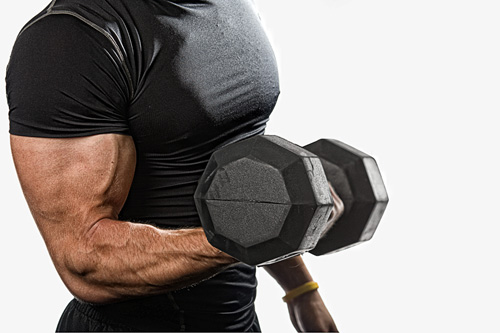
Wrap Up of My Shoot at Fight Factory
Above: Here’s the last set from my shoot at Fight Factory, and that’s Mo (you remember Mo from Monday and Tuesday’s posts) doing some curls. When he was done, he handed the dumbell to me, and I was pinned to the floor for 40 minutes.
Above: Here’s the production shot (photo by Brad Moore). Pretty simple set-up, but it’s the only one where we actually used all three flashes. The main light is to the left of me, and that’s powered by the Ranger RX pack. The kicker light behind him is a bare bulb flash with a metal Grid attached to the front to focus the beam. Then, on the floor right behind Mo, you see the third flash, positioned down low, aiming upward to light the white seamless paper. But, there’s a problem. And I caused it.
Above: When I first got there, I did a few test shots using just the available light in the gym, so I set my f/stop to around f/4. But then when we set up the strobes, I never switched back to an f/stop that would give me focus throughout the image, like f/8 or f/11. Of course, I didn’t realize this until I opened the images hours later in Photoshop and realized that only part of each image was in focus. Uggh!
Above: In this shot, the dumbell is out of focus, but his body is in focus. Although I hate having to use Photoshop to fix mistakes I should have gotten right in the camera, in this case I was thrilled to be able to use Photoshop to fix my mistake. My plan was to combine the in-focus parts of the two images, into one image where everything was in focus.
Photoshop To The Rescue!
I used the Pen tool to select the in-focus version of the dumbells, and dragged it over to the photo where Mo’s body was in focus, and positioned it over the out-of-focus dumbells. It took all of two minutes to get the size right (they were taken at different focal lengths) and the proper position, but it worked and created the shot you see at the top of this post. Whew! That was a close one.
MY LOCATION LIGHTING GEAR
I had some questions after Monday and Tuesdays post about my location lighting gear, and I posted some photos of it packed up in its travel case so you can see how small it all breaks down to. Those images are on my Facebook page at facebook.com/skelby
Above: Here’s another shot of Mo on the rings. I showed the production photo of this shot on Tuesday (link), but I noted that the flash with the softbox was turned off—that other shot was just lit with the bare flash and reflector with grid. Here’s what it looks like when the softbox is on, adding a little fill light.
B&W Conversion
I converted this to Black & White using Nik Software’s just released Silver Efex Pro 2.0, which I have to say is absolutely amazing. Every pro I know was already using Silver Efex Pro 1.0—but 2.0 kicks so much @#$, I can’t imagine they all won’t upgrade as soon as they try it. Seriously great upgrade. Way to go Nik! BTW: I just used one of their built-in presets. Also, you can download a 15-day free trail copy of the plug-in right here.
Above: The gym arranged to have Dallas, a model and friend of the gym, do a few shots inside the boxing ring that’s the center piece of the gym (real fighters train here, too). They wanted a shot where Dallas looked exhausted between rounds, with her arms “on the ropes” and I got the capture you see here.
Above: Here’s the production shot for that image (thanks Brad) and I’m just using two lights: The main light up right and to my left, and the same bare bulb flash with a metal grid that we’ve been using all day coming in behind Dallas and to the right. We had to put the stand up on some workout pads to get it up high enough. I’m shooting with a 70-200mm f/2.8 lens.
Now, when you look at the production image versus the final image, you might be wondering why my final image is so dark. I intentionally underexposed the shot by at least two stops, so my subject would be mostly lit with the just the strobe, and not the flat even boring ambient light in the gym. If I hadn’t, the shots would pretty much look like the production shots you see above (no offense to Brad whatsoever—the production shots looks exactly as they should—they’re exposed for the ambient light).
Above: Here’s another shot, but this time I’m outside the ring, down low shooting upward (as seen below).
Above: Here’s the production shot for that image. Same two lights, same modifiers, positioned the same way (each facing each other diagonally), we’re just shooting from a different position. You can clearly see the workout mats we stacked up to get the main light high enough.
Above: Here’s Mo again (he had quite a workout that day) in a dramatic lighting look, as he gets ready to sprint. I added the text (at the client’s request). The large faded text in the background is the font Futura Extra Bold and the smaller text is Helvetica Condensed Bold Oblique (Oblique is a type geek word for “Italic”).
Above: This is just a one-light shoot–the light on the left side isn’t turned on. That’s the Ranger Quadra, with one bare-bulb flash and a reflector, aiming straight at Mo. You can see how small the Quadra battery pack is in this shot—that’s it hanging on the light stand.
That wraps up this shoot. A funny thing just happened: as I’m writing this, a commercial for Fight Factory: Tampa just came on TV. Too cool!
