

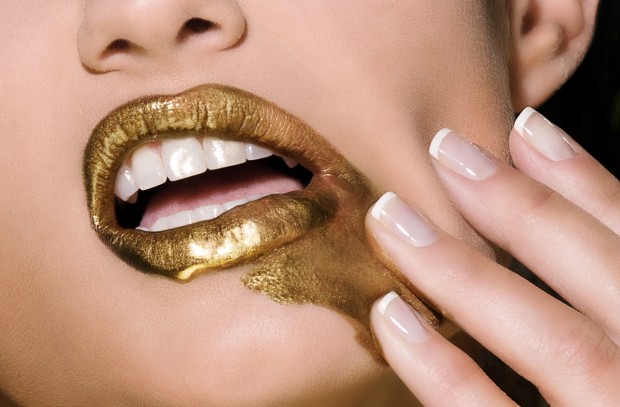
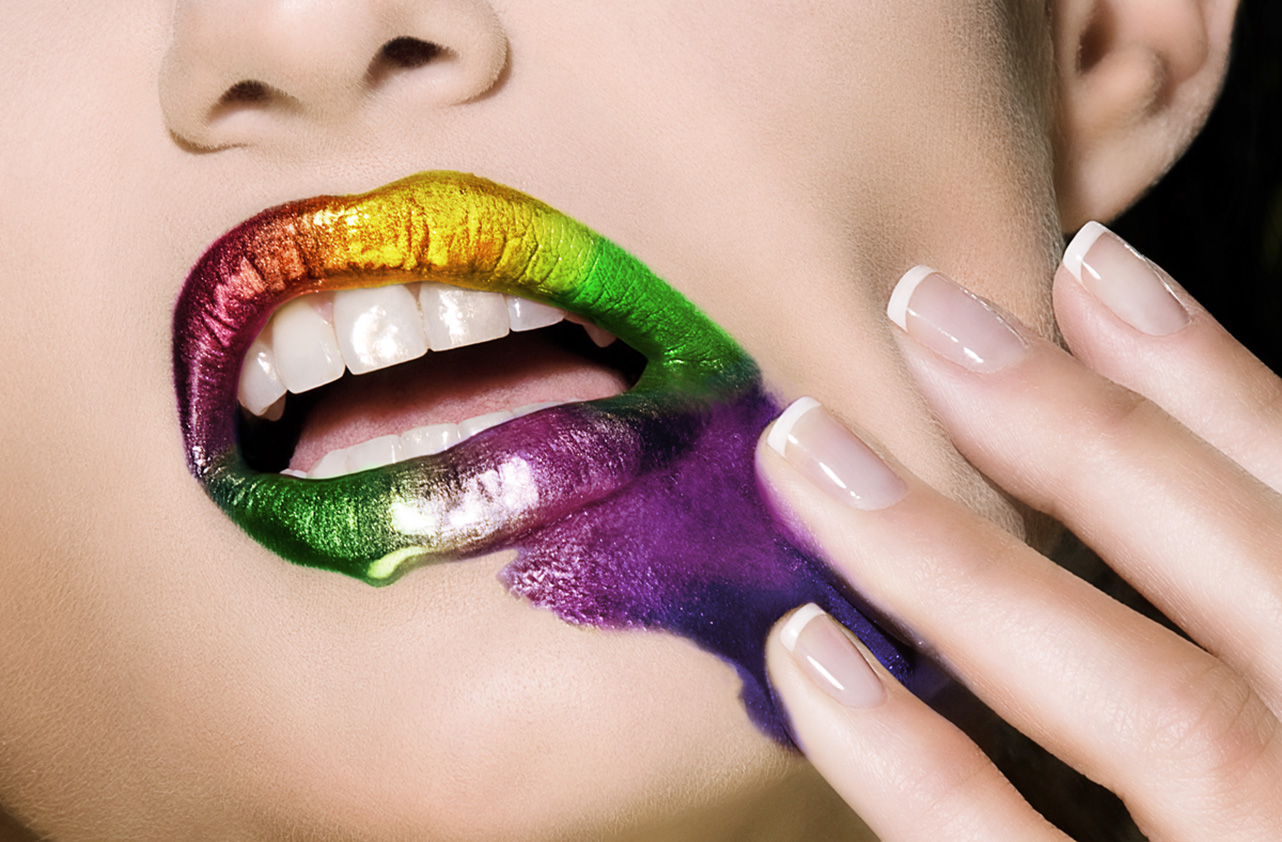
Alright folks, let’s get girlie! Every so often I have people come up to me and ask me about the featured image on my website’s home screen. They say “I love the rainbow lips image! How in the world did you create the rainbow effect from scratch?”


My response: I'd shrug, and say “Honestly? I just played around with blend modes.” But to level with you, I honestly created the piece so long ago, that I don’t quite remember the actual steps I took to produce it. So I thought it might be time to do some detective work and dive back into my past to see if I can decode the steps I took to get this look. In this post, I’ll expose all the secret steps I took to get this effect.
As with any macro beauty image, the first thing I did was some general clean-up like skin smoothing, frequency separation, and fixing the color and tone of the original lip color; gold. (If you'd like to download my free portrait-in-a-pinch retouching action, then check out SharkPixel.com/store and scroll to the bottom to download it!)

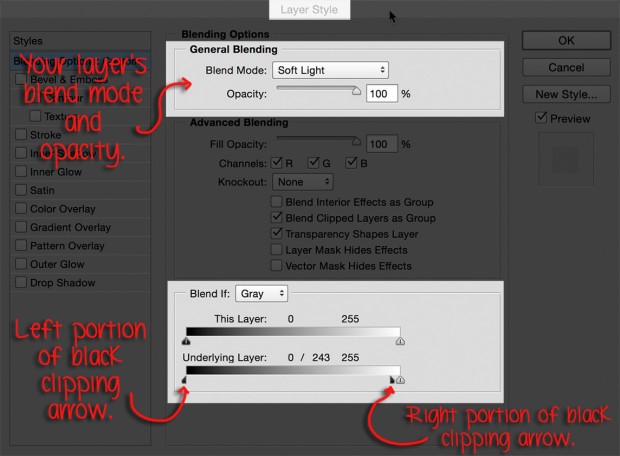
Then, I played around with the skin-tones because I was trying to get the skin to look like porcelain. I did this by creating three new fill layers, filling two of them with white and the last one with aqua. I changed all of their blend modes to soft light, and then placed them in a layer group. For each of the three layers, I opened up the layer style dialog box and inside the blend if section, I split the black clipping arrow for the underlying layer slider into two parts (hold down option or alt to divide the arrow) and then I dragged the right portion of the arrow all the way so that it sat just next to the white arrow of the same slider.
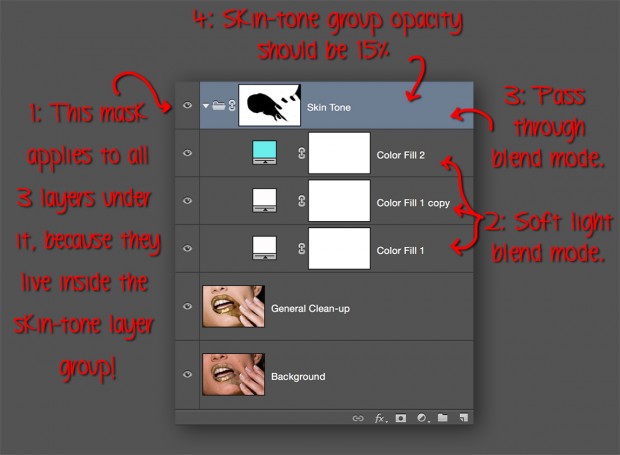
To finish up, I used my brush tool to paint with black over the areas where I didn’t want the skin effect to show. I did this on the layer group mask in order to have one single mask apply to three different layers. This is a huge time-saver since you’re only painting one mask, instead of three! Lastly, I decreased the opacity of my skin tone layer group to 15%.
My next step was adding some 3D depth to the model’s fingers using dodge and burn. Here’s a preview of my dodge and burn layer, I switched the layers blend mode from soft light to normal to show this preview. (For more on dodge and burn, stay tuned to KelbyOne for my soon-to-be-released class on skin! Coming soon to a computer screen near you!)
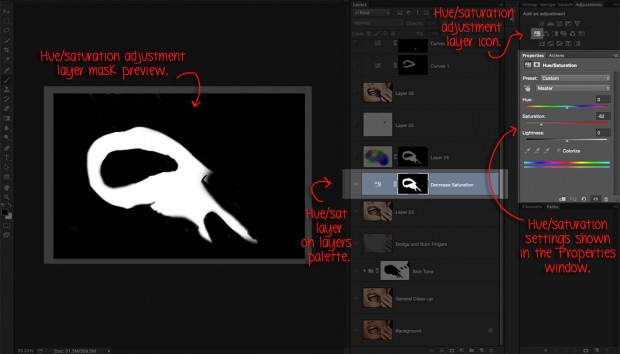
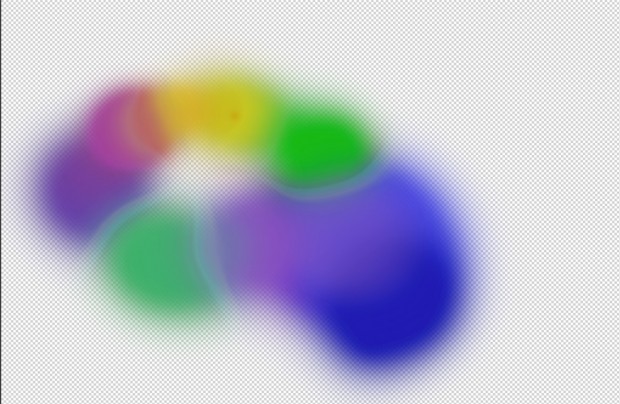
Now comes the fun part! To add the rainbow colors to the lips, I first decreased the saturation of the lips using a hue/saturation adjustment layer, by dragging the saturation slider from 0 to -62. Then I created an empty new layer, and used my brush tool to pick out some funky, fun colors, and sloppily painted them over the lips area. Here’s what the layer looks like with everything else in the document hidden.
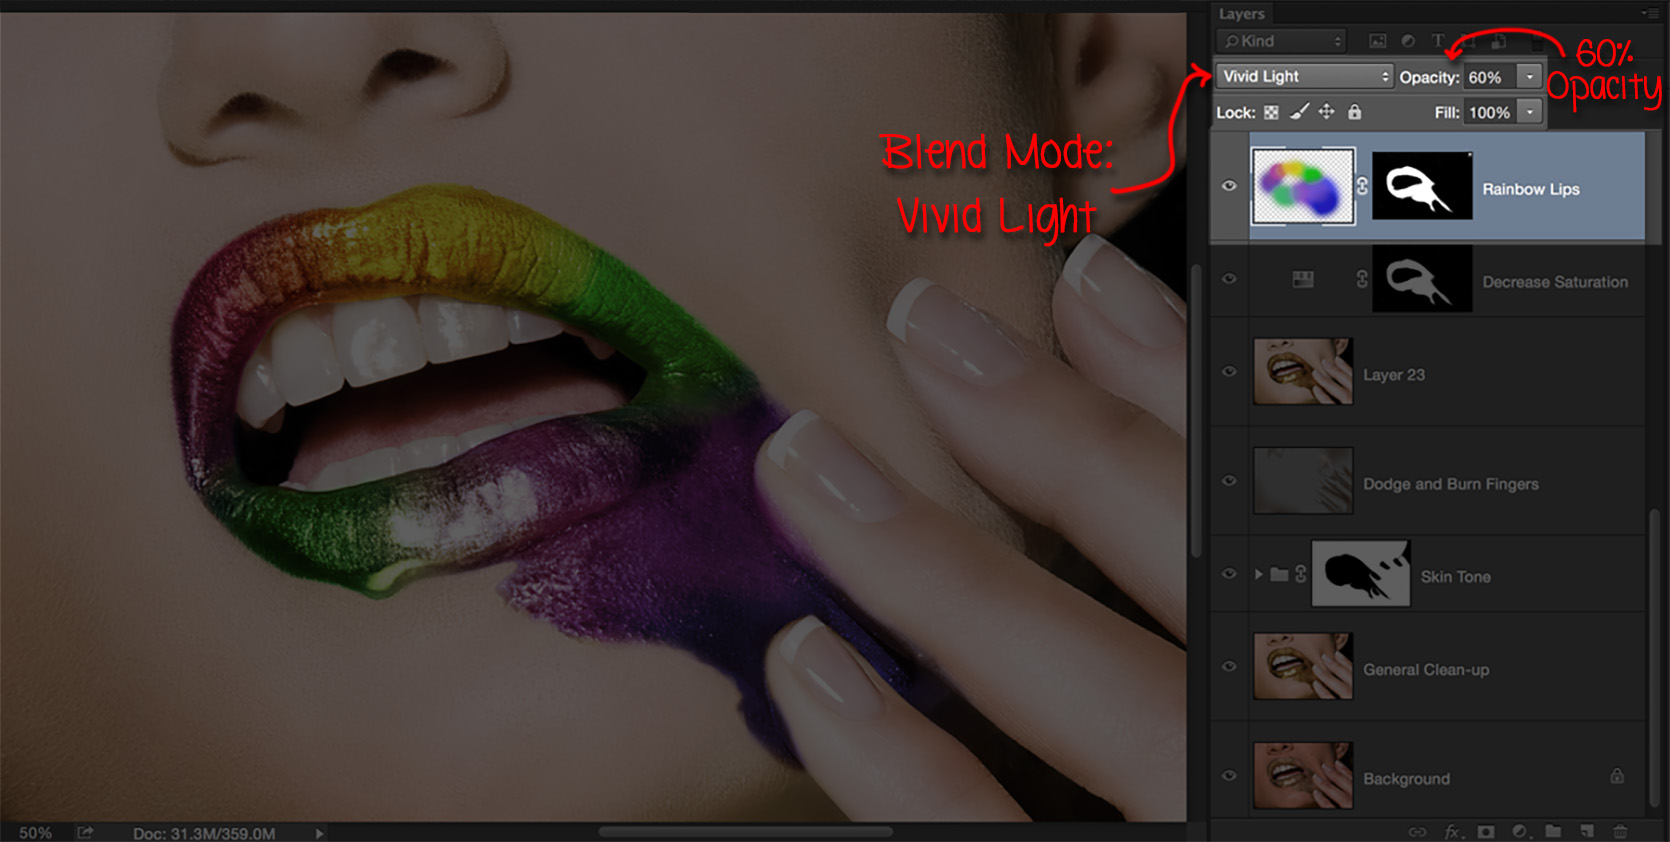
Next, I added a black mask to the rainbow color layer, and proceeded to paint with white over the lips area so the color would only show through where I wanted it to. I ended this step by decreasing the opacity of this layer to 60% and changed the blend mode to vivid light.
To finish up, I used a few curves adjustment layers to try and accentuate the highlights and shadows on the lips, thus giving them a more 3 dimensional appearance. And then added a high-pass layer on soft light blend mode to sharpen. And voila! I was finished!
In closing I hope this quick blog post helps to illustrate the importance of playing around and trying new things in Photoshop. If it weren’t for this, I would have never created such an out-of-the-box piece. And can anyone guess the extremely valuable added benefit I gained from this experience? I learned a ton!
Whether you’re new to Photoshop or an old, seasoned pro, you can always learn more by exploring tools you haven’t used before. Don’t be afraid to fail! It’s how we grow and continuously become better at our craft!
â˜Your challenge; should you choose to accept it:' is to choose one new tool a day that you've never used before and explore it! At the end of one week, you'll have seven new tools to add to your skill-set!
You can see more of Kristina’s work at KristinaSherk.com and SharkPixel.com, and follow her on Facebook, Twitter, and Flickr.
This is AWESOME! Thanks for sharing something girlie and wonderful!
Thanks, Alyssa! #Girlpower!
Cool steps to get the effect of this lip-slosh. ;)
Have seen your site before – really beautiful work…
Love your interactive website!!
Kristina,
I enjoyed your blog post! I could read your joyful energy if that makes any sense :)
Nice example and an awesome edit!
Keep up the awesomeness!
TUCKER