I’m Dave Williams, a.k.a., Hybrid Dave, and I’m here every Tuesday for #HybridDaveTuesdays at ScottKelby.com. Some of you know my friend Dodge, but some don’t. So, let’s talk about Dodge.
Dodge and Burn tools are commonly used among Photoshop professionals—the world of design and retouching holds them as basics—yet many hobbyist photographers and retouchers don’t quite get it. But, not getting it isn’t a problem—you may know what a spark plug does, but wouldn’t be expected to understand its inner workings, right? So, why should you be expected to understand the Dodge tool if you’ve never sat in a design class? If you’ve never used it, then this post is an introduction for you, and to be honest, I wouldn’t be surprised if you hadn’t because the Dodge and Burn tools haven’t always been as good as they are in the Creative Cloud version of Photoshop. I know I keep talking about them, but it’s those Adobe boffins, again! They’re good!
So, let me get back on track and introduce you to Dodge. If you select the Dodge tool, you’re going to use it to brighten areas of your image. You use the tool as a brush and paint into those areas with it.
It’s named after an old darkroom technique, which has been carried into the age of the lightroom. The term “dodge” derives from blocking a part of your negative to block it from the light, resulting in a lighter exposure. It may seem a bit counter-intuitive, and you may have re-read that sentence to check you got it right, so try not to overthink it, but look at it this way:
In a darkroom, you start with a negative slide and a white piece of paper. As you expose your paper to light, the developing image gradually becomes darker. So, to create areas which are lighter in the post-process technique, you block (or dodge) the light so that the white paper remains and doesn’t darken.
Crystal clear? It’s upside down thinking because it’s a technique originating from the world of negatives. Let’s not overthink that, though! Just remember: dodge = brighten.
So, here’s a little example: I shot this image in Arizona, somewhere in the Sonoran Desert National Monument area, whilst waiting for the sun to dip towards the horizon to get some drama on the cacti dotting the landscape. The light is pretty balanced, resulting in an evenly exposed shot, but I want to tweak it a little and add some highlights by dodging the main chunk of cactus on the right.

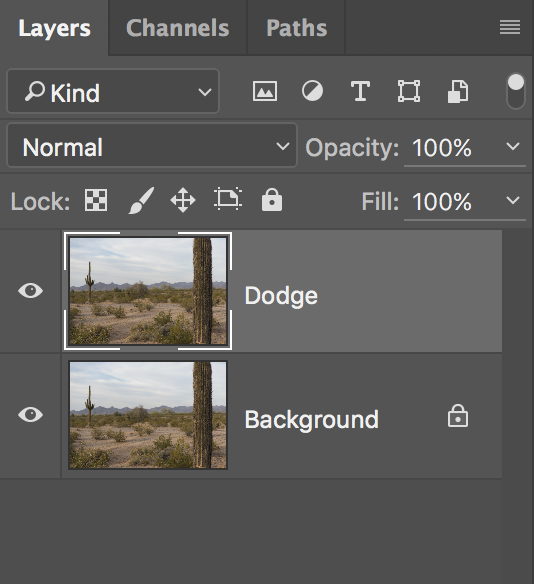
To do this, with the image open in Adobe Photoshop, we should work non-destructively and create a new layer to work on. With this layer selected, press Command-Option-J (PC: Ctrl-Alt-J), and it will replicate with a dialogue box opening giving the option to name it. Name this new layer “Dodge” and hit Return (PC: Enter).

Next up, open up the Dodge tool by tapping the O key or selecting it from the Toolbox. If you hit O and landed on the Burn tool or Sponge tool, hit Shift-O to cycle through to the Dodge tool. You’ll see this Options Bar appear up top:
![]()
If you look around, you’ll see there’s a drop-down menu labeled “Range,” which allows us to target either Shadows, Midtones, or Highlights with our adjustment. In this example, I’ll tackle the Shadows and Midtones, brightening them but leaving the Highlights as they are. The Exposure field is expressed as a percentage, and as a general rule of thumb when adjusting a landscape, you should set it at around 50%, but for a portrait, go down to around 15%. It really is done “by eye,” after painting a stroke and seeing what effect it has, then making adjustments to your settings as necessary.
What’s worth noting when using this tool is that every time you let go of that mouse button, or every time you pick up your pen from your tablet, it starts again. To add one layer at 15%, paint once; to add another layer at another 15%, paint again. I’ve painted over the entire cactus stalk here at 15% on Shadows and 15% on Midtones and this is my result:

The result is subtle, but it’s there. We can use this tool to draw attention where we want it—the stats show that the viewer’s eye is drawn to the brightest parts of our images. In terms of portraits, we can brighten facial features where we need to. It’s a multi-use tool, and a great one to have in our box.
So that’s Dodge. Have you met my friend, Burn? He’s just like Dodge turned upside down, darkening the bright areas ;).
Much Love,
Dave


Awesome blog and article! Would like to thank you for sharing your views with us and here is some more information about everything in general, you might like too.
Best Deodorants for Men
Hair Growth Home Remedies
Custard Apple Benefits
Top Natural Antibiotics
Best Superhero Movie
….