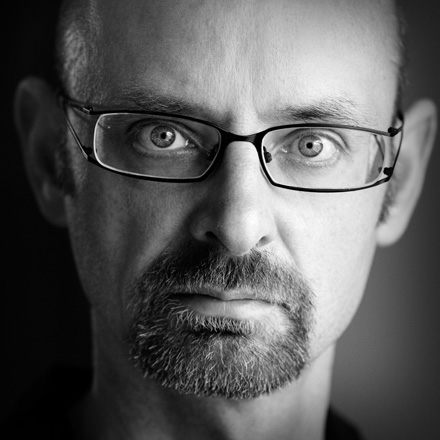
David J. Nightingale © Bobbi Lane
Before I begin I’d like to thank both Scott and Brad for inviting me to be a guest blogger – it’s truly an honour, and I’m delighted to be appearing alongside the many other wonderful photographers that have contributed to Guest Blog Wednesday. So thanks again to Scott and Brad, and hello to everyone else.
Seeing the Light
One of the hardest things I find about writing is starting – not because I procrastinate, which I do – but because there are always so many different and interesting topics that can be discussed in relation to photography. In this case, after spending a couple of weeks trying to narrow it down, I went back and reread (and re-watched) many of the guest blogs that have been posted this year in search of inspiration. After realising that I had a lot to live up to – there have been some really inspiring posts in recent months – I was struck by a point that Eddie Tapp made:
“Learning to ‘see the light’ is perhaps the single, most exciting experience in one’s imaging life.”
Eddie went on to discuss this point in terms of the nature of light – how to recognise different types of light, how to modify and shape the light falling onto a subject, and so on – but his key point was that being able to “see the light” is one of the most significant skills we need to develop. And he’s right.
But exactly which light is it that we need to learn to see?
On the face of it, this sounds like a dumb question – we need to be able to see the light that’s there, and when we can appreciate and understand its nature we can photograph it, modify it, and so on – but there are two things that complicate this process.
The first complication is obvious, and was implied in Eddie’s post: the light that we need to learn to see is the light that our camera sees, not what we see. Whether you’re shooting film or digital you will know that what you see is not always what your camera sees; i.e. the human eye/brain combo can perceive a much larger dynamic range than your camera’s sensor or your film. For example, while a digital sensor is limited to around 6-9 EV, the human eye can perceive a dynamic range of approximately 14 EV without any adaptation, and up to around 24 EV when you take into account the facts that it can also adjust to very dark scenes and that the pupil can change size to accommodate varying levels of brightness.
The net result of this is that we learn to either not shoot scenes with a massively large dynamic range, or we find ways to modify the light within such scenes to decrease the contrast ratio between the darkest and brightest areas, or we shoot a sequence of photographs and convert them to an HDR image. In this instance, the only viable option was to produce an HDR image.
Whichever strategy we adopt though, all are based on the fact that we develop a better understanding of how our camera sees the world in a different way than us.
At this stage I can imagine you saying something like “yes, sure, but don’t we all know that?” My reason for mentioning it is because it leads on to the second point I want to make. But before I can explain that one I need to backtrack a little.
In early 2004, when I’d been blogging for a little over six months, and posting a handful of images each month, I came across Sam Javanrouh’s blog: Daily Dose of Imagery. One of the things that impressed me the most about Sam’s blog, other than the consistently high quality of his work, was that he was posting a new image each day, and I can clearly remember thinking two things. First, what a great idea, and second, it can’t be that hard to post 365 shots a year, can it? Well, for the remainder of 2004, 2005, and most of 2006, I attempted to do the same, and discovered that it was harder than I could possibly have imagined.
Now, if I’d had nothing else to do – like eating, sleeping, working as a full-time lecturer in a UK university, helping to bring up my young family, and everything else that goes along with being a human being – it would have been a piece of cake… Surely almost anyone can take one reasonable shot every 24 hours? But, in and amongst everything else, there were many days when I really didn’t have anything even halfway decent to blog, nor any time to shoot any new material. On those days I would sit at my computer and decide which was the least useless shot from a fairly bad bunch, drag it into Photoshop, and attempt to turn it into something more interesting.
In terms of learning the craft of photography, or learning to ‘see the light’, this wasn’t an especially good strategy. In fact, in some ways, it was counterproductive; i.e. the better I got at using Photoshop, the better I got at hiding the flaws in less than perfect photographs. And while I’m not a purist – I’m a firm believer that it’s the final image that counts, the steps along the way are incidental – I would agree that nailing the shot in camera is a much better strategy, not least because it’s much easier when you get things right from the outset.
But while this might not have been the best way to improve my photographic skills, it was an invaluable experience in terms of learning the intricacies of post-production: I learned how far you could push an image, how best to repair one that had been pushed too far, how to process RAW files to accommodate a variety of exposure and shooting errors, and so on; i.e. I discovered how to use Photoshop as an extremely sophisticated and powerful repair and enhancement tool.
The key point here, and the one that leads into the next point I want to make, is one regarding workflow, i.e. the steps I was going through were as follows:
1. Evaluate the scene.
2. Take the best shot you can (i.e. ‘see the light’, or modify the light, and shoot accordingly).
3. Check the LCD display and histogram for any gross exposure errors.
4. Reshoot as necessary.
5. Post-produce the shot.
At some point during these early years of blogging though, I started to look at this process in a different way; i.e. rather than thinking about post-production as a necessary evil – to be carried out after a shot was taken – I started thinking about it in terms of something that could inform the shooting process, not just something you do afterward.
For example, as I’m sure many of you know, a digital sensor records considerably more data in the highlight areas of a scene than it does in the shadows. As such, if you want to maximise the data in a RAW image then it makes sense to push the exposure as far to the right as possible without clipping the highlights.
On some occasions this strategy will produce an image that closely matches the original scene, i.e. the highlight detail reflects the quality of the light in the original scene, but on other occasions it might mean that the captured image appears overexposed. In these cases though, you can ‘correct’ the exposure during post-production, confident that you have captured the maximum amount of data possible. To put this in more concrete terms: if you underexpose an image by one stop, you discard 50% of the data you could have captured, while if you underexpose by two stops you discard a massive 75% of the data. As such, ‘exposing to the right’ then readjusting the exposure during the RAW conversion is a technically better strategy.
| Brightness levels recorded | |
| 1:Highlight areas | 2048 |
| 2: Bright areas | 1024 |
| 3: Mid-tones | 512 |
| 4: Dark areas | 256 |
| 5: Shadow areas | 128 |
| 12 bit RAW file | |
From an aesthetic point of view though this doesn’t sound like a good strategy – i.e. setting out to shoot images that you know will look bad – but I’m mentioning it now because it was precisely this point that led me to start to re-evaluate my own photography.
Seeing the Light’s Potential
What I realised, by going through the same post-production sequences – time and time again – was that some of my favourite images were those that seemed to have the least potential from the outset. Some of these were shot under dull, flat light, with little or no clearly defined highlight or shadow detail, others had quite a restricted tonal range, e.g. lots of highlight detail, less mid-tone detail, and very little shadow detail, while others just looked plain bad. In short, some of my best work, in my opinion at least, was being crafted from images that I probably wouldn’t have taken if I’d been more skilled at ‘seeing the light’ and understanding how it would translate when photographed.
After going through this process several hundred times I realised that while ‘seeing the light’ was clearly an important skill, and one that I needed to work on, being able to see its potential was equally significant, i.e. being able to envisage how to transform an otherwise dull and lifeless scene into something considerably more interesting. As I mentioned above, this realisation took me a while to develop, and a lot of the earlier shots on my blog are more happy accidents than carefully considered images. But in recent years I have found that I will shoot images that I know won’t look great, confident in the fact that they will provide exactly the right raw material for something a lot more interesting.
At this stage you would be forgiven for thinking that surely it would be better to just get the shot right from the outset, rather than messing about in Photoshop, but there is a major reason that I think that this is an approach you should consider as it allows you to produce images that would either be much more difficult, if not impossible to shoot.
Take the following example. It’s a shot of my youngest daughter, taken as she was playing a rather intricate game that involved the plastic cups she was carrying and the rather large piece of paper she had stuck in her pocket. It was taken in our lounge, against a plain white wall, and the very diffuse light came from two large windows: one to her right (facing east) and another in front of her (which is north facing). As you can see, the original is rather dull and flat.
The final version, on the other hand, has considerably more impact.
Now, I could have lit this shot to produce much the same result, but by the time I had done so the moment that prompted me to take the photograph in the first place would have long gone: two year olds, as I have discovered, are not the most patient of models. In this case though, by grabbing the shot and then adding a few masked curves, I was able to produce the shot I envisioned.
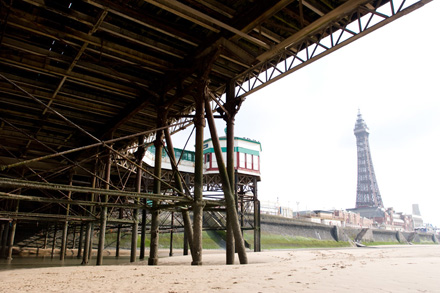
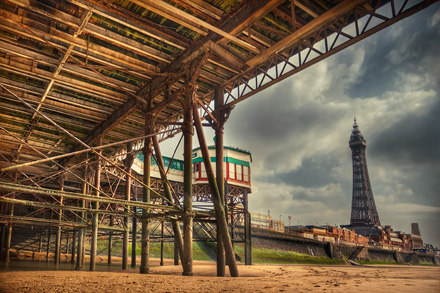
By the same token, some of my favourite landscape shots have been taken on dull flat days, when I might easily have decided to leave the camera at home. The following example – a shot of Blackpool’s South Pier – was deliberately overexposed (i.e. exposed to the right), but was then processed to add both contrast, shadow detail, and tone. As I write this, it’s the sixth most commented entry on my blog, which now contains over 1600 images, but as with the previous example I mentioned, the original appears to have relatively little aesthetic merit.
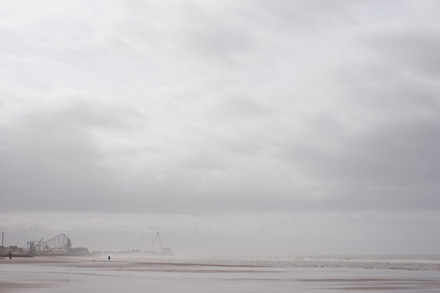
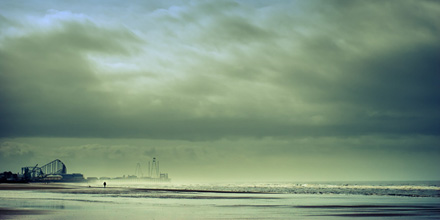
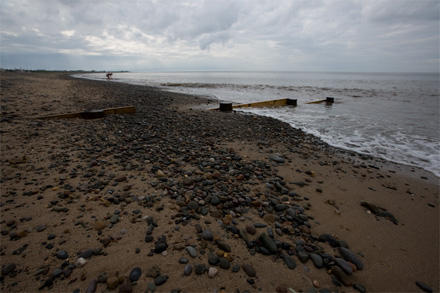
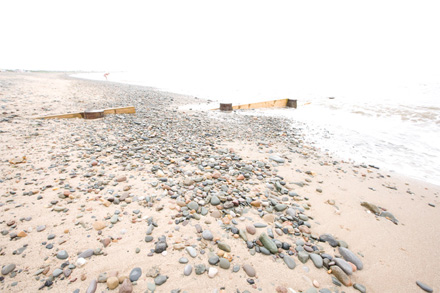
While the above two examples were constructed from a single image, there are occasions when the lighting is such that a single image simply won’t work, at least not without compromise. For example, if you take a look at the following two exposures, you will see what I mean: the first was exposed for the sky, the second for the foreground.
As you can see, the sky looks great, but the foreground is far too dark, and while this could be brought up in Photoshop, to do so would introduce a noticeable amount of noise into the final image.
The shot exposed for the foreground, as single shots go, is even worse; i.e. there’s plenty of good quality data in the sand and shingle, but nearly all the detail in the sky and sea has been completely blown.
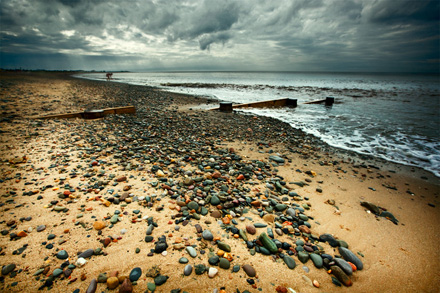
Now, if I had used a 2 or 3 stop graduated neutral density filter, I could have produced a balanced image from the outset. At the time though, I didn’t have mine with me, and only had a couple of seconds to grab the exact shot I wanted, i.e. the young girl bending down to examine something in the surf. Arguably, the shot would have worked as a simple landscape, but her presence – posed against the drama of a dark and threatening sky – added a human element to the scene that, in my opinion, makes this a much stronger image.
As with the previous two examples, this shot was all about seeing and capitalising on the potential of the original scene.
For me, though he was a psychologist rather than a photographer, Jean Piaget summed this up quite nicely when he said “What we see changes what we know. What we know changes what we see”. In this context, once you begin to understand the possibilities contained within an otherwise dull scene, and can work out how to transform it into something more compelling, you will start to see the possibilities in other scenes too: ones that you might well overlook if you concentrate solely on ‘seeing the light’ at the expense of its potential.
In Conclusion
There are many factors that contribute to the making of a good photograph – knowledge of the craft, timing, composition, an appreciation of light and form, and a whole host of other equally important factors – but what I hope I have shown today is that even everyday scenes, that you might normally overlook, contain the potential to be great. In other words, there are some awesome images hiding out there, all you have to do is find them.
A Bit About Me
I’m a photographer, educator, writer and blogger, and you can see more of my work on chromasia.com. A good place to start would be the galleries or blog, but you might also want to take a look at our online tutorials too.
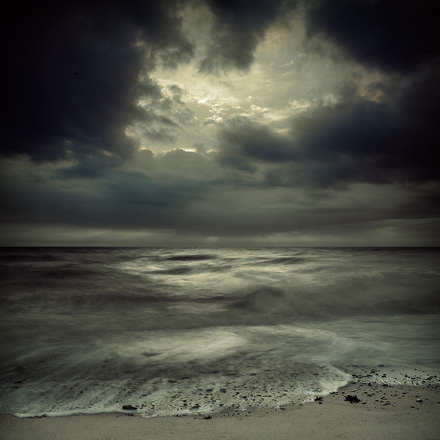
Below are more beautiful images from David…


