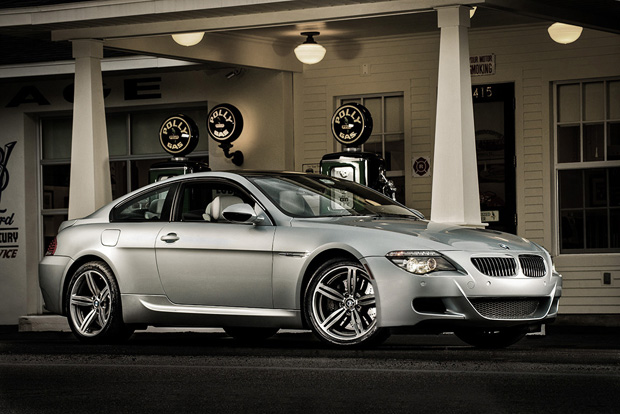
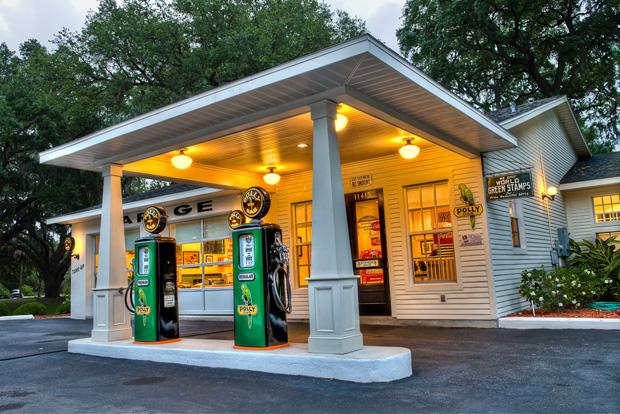
I needed some shots for an upcoming project, and when my friends (and fellow photographers) Kathy Porupski and Jim Sykes heard that I needed a cool location for the shoot, they told me about a local advertising agency that had remodeled a 1950’s gas station for their new offices. They make a few calls and the next day I was there shooting. Here’s one of the shots from the shoot (above), my first with three lights for an automotive shoot.
Not only did I follow the tips from Tim Wallace’s Kelby Training online classes on car photography, I actually pulled out my laptop during the middle of the shoot to make sure I had the lights set up correctly (see below). I never would have tried this without having seen Tim’s class. In fact, it was Tim’s class that made me want to do it in the first place.
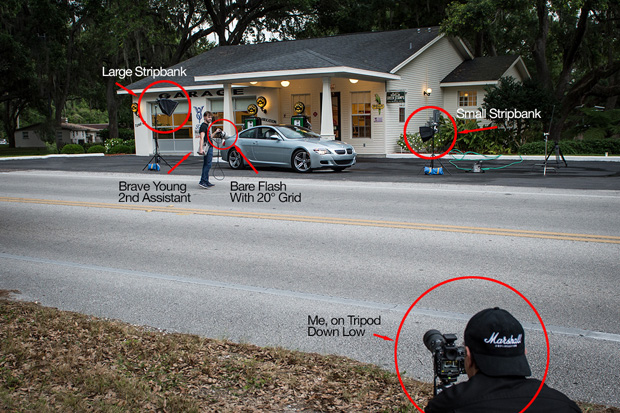
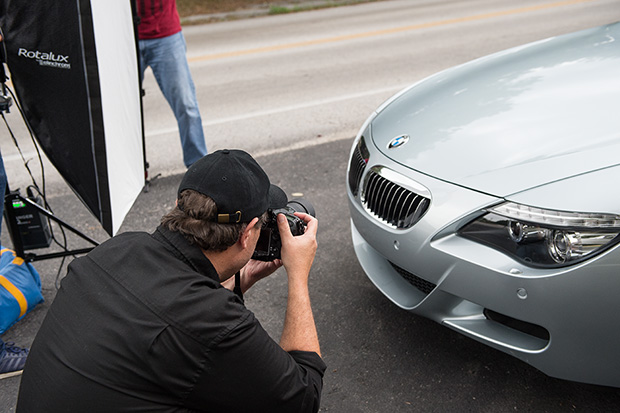
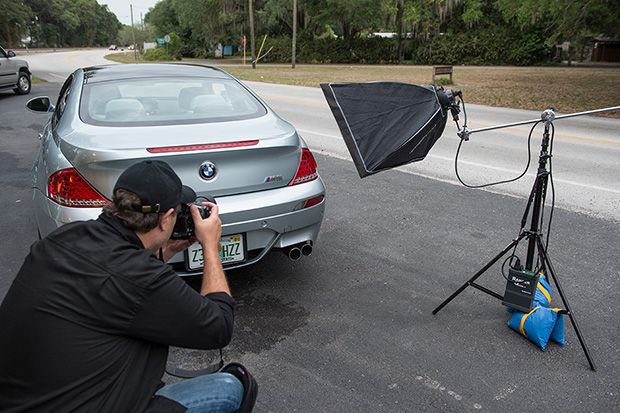
This is taken from the shooting position (photo by Brad Moore), and you can see the three lights and their position. Rob, our brave 2nd assistant on the shoot, had to dodge traffic like you can’t believe (you can’t tell what a busy road this was). Not having that third light (lighting the front wheel), on a light stand made this a lot more challenging because after every shot, the wheel light was in a different position, but because of all the traffic, we didn’t have a choice. Lucky he’s young, and can run fast. ;-)
Gear and Lighting Info
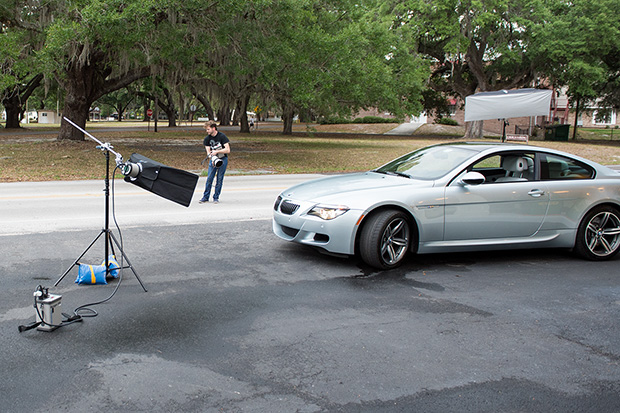
This was my first shoot with the Nikon D800 (more on this in a minute), and I used my go-to lens for my outdoor shots was my 70-200 f/2.8 VR II lens. I shot in Manual mode (since I was using strobes), and I used three lights: 2 Elinchrom Ranger Packs, and 1 Ranger Quadra (so three flashes total). One the light in the back of the car, I used a large Stripbank soft box (like 18″x50″ or something close to that). On the front of the car, I used a small Stripbank (like 12″ x 36″), and the third light was a bare strobe with a 20° metal grid.
For my close-up detail shots (shown further down this post), I used an old 70.0-180.0 mm f/4.5-5.6 Macro lens I bought from Moose Peterson a few years ago. Great lens by the way (thanks Moose).
(Above: Here’s a reverse view of the lighting set-up. Look how nervous Rob looks out there in the street).
The Nikon D800 — be careful what you wish for!
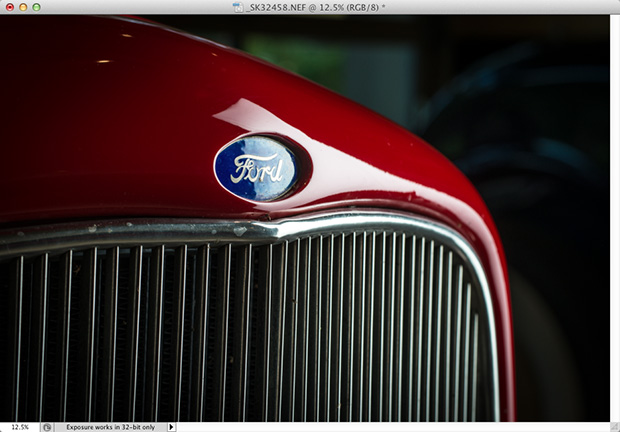
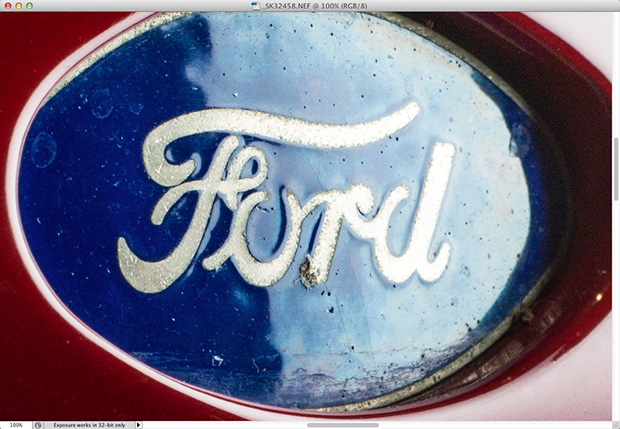
I was really looking forward to seeing all the extra detail I heard the D800 would bring (I had actually seen samples my buddy Matt Kloskowski had taken on a trip to Oregon with my D800, and it was just incredible), but this was my first shoot, and I couldn’t wait to see how it pulled detail. Well, you know that saying, “Be careful what you wish you?” Well, it smacked me in the head, because with all that added detail (and there is plenty), comes all that extra retouching to remove some unwanted detail my other cameras didn’t bring out (everything from fingerprints, to tiny spots, specs, reflections and other stuff that was usually soft enough it wasn’t worth messing with).
It reminded of when HTDV took off and all the TV news anchors had to use way more make-up because the HD brought out every little detail and flaw that nobody notice before. Same kinda thing here. Take a look at the sample’s below and you’ll see what I mean.
(Above: When you’re zoomed out, it pretty much looks like my old camera captured images. This is the out-of-camera shot as is).
(Above: But when you zoom-in to 100% full size, you realize your retouching work has just begun. However, I’m not complaining — I’ll take the amazing detail any time — it worth the extra retouching!)
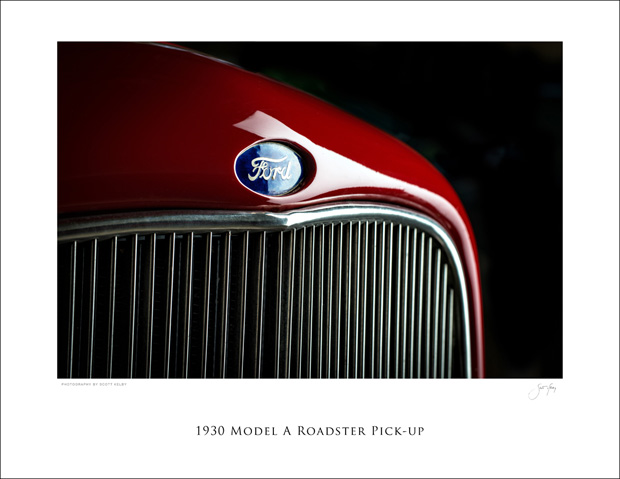
(Above: Here’s a version that’s cleaned up a bit).
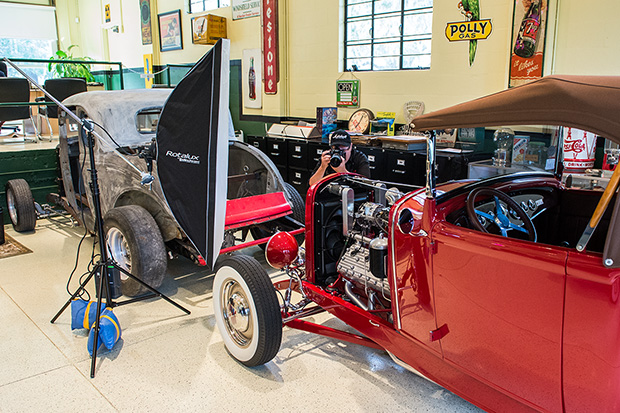
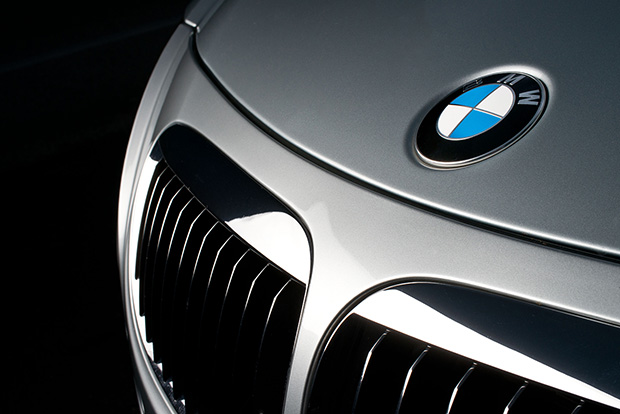
(Above: Here’s a production shot of the detail shot. Yes, we shot with all that ambient light and still got a solid black background. I learned that in Tim’s class, too!).
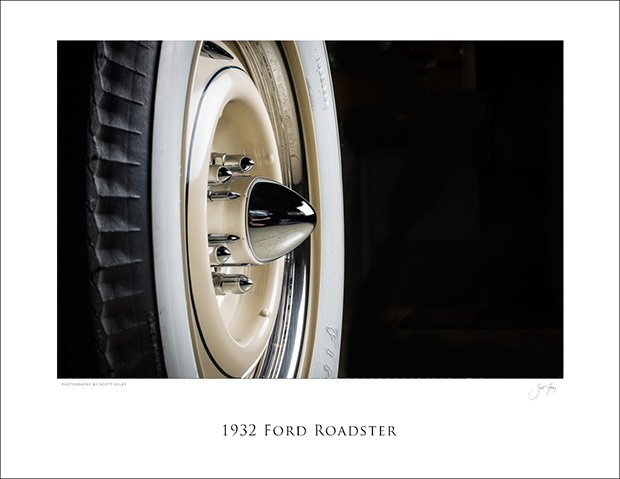
(Above: Here’s a detail shot of the owner’s blue ’32 Ford Roadster. I loved the wheels — classic!)
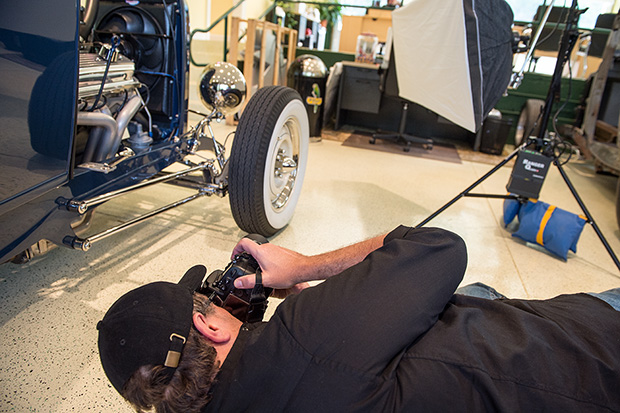
(Above: Here’s me, lying on the ground, to get the lighting and perspective I wanted for the shot you just saw of the tire and wheel. How did I know that was where the shot was? I didn’t. I just kept trying different angles — they all looks pretty lame, until one finally found this one that looked good. Tip: it’s usually the one with the most uncomfortable shooting position).
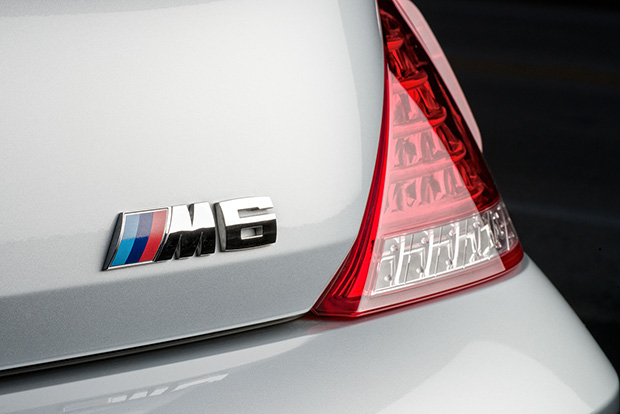
(Above: Here’s a close-up detail shot of the M6 taken right after we did the full body shots from across the street).
(Above: Just one light — a strip bank, and again, the previous shot was taken in daylight).
(Above: Another detail shot, this one taken from the back).
(Above: Here’s a production shot of the shot you just saw above).
(Above: I couldn’t resist shooting at least one HDR of the gas station once the shoot was over and the place was closed up).
While we had a great time, and wrapped the whole thing up in right around three hours, of course there are things I would do much differently next time (like watch Tim’s class again, and pay even closer attention, because I missed a couple of things that I could do a lot better lighting wise), but I sure learned a lot from Tim’s class.
He really makes everything so clear, and I just really enjoy his wonderful, laid-back, yet straight to the point teaching style. He doesn’t hold anything back, and that’s not only just the kind of guy I want training for me, apparently it’s just the kind of guy I want training me, too!


I don’t have a D800 (yet), but I know what you mean about that fine detail.  I tried something from Tim’s course on one of my Harley-Davidson motorcycles.  Thinking back to the course, I polished the gas tank before going in for the detail shot.  It looked fine to me.  Once I saw it on the screen, there were all these  little imperfections in the tank badge that I just never saw while shooting. Splatters, smudges and that sort of thing.
You blame the D800. Â I blame my Elinchrom lights. Â They show everything.
CAKB, I just did a group shot of about 200 law enforcement guys and the 800 rocks (I still prefer shooting D4). Love that last shot!
I can’t get enough of Tim Classes. I would love to get them on some sort of download for my iPad because the number of times I watch them, I am getting close to my Verizon dl limit per month. They are truly spectacular and I would love to see him come to the states and do a workshop. I would be first in line for that. Yes, he is a photographic idol of mine as a number of Kelby instructors. Excellent shots Scott!
You had a very productive shoot! Looks like I need to take in Tim Wallace’s class ASAP.
Nice !
Scott, I’d love to hear your review of the D800.
Flash is fantastic, but constant light is even better. Take a big, or actually a huge studio, and all the lighting gear in the world and you would get something like this!
http://www.patriklindgren.se/2012/04/15/join-me-on-a-shoot-of-a-very-cool-concept-car/
Nice shots Patrik. Downside is the car’s in a white room instead of the real world where it belongs.
Do you think you could you do that outdoors with constant lighting?
I should of course say that this is not something that i do everyday, but the point was that with constant light you can see how the light falls with your bare eye. Which means that you can adjust on the fly.
I love constant light because when you have set everything up, you can just fire away. :)
The problem with taking this outside is the following:
– Power, you need tons of power
Oops, my iPhone failed on me.
As i was typing, you need a lot of power for these big lights.
Constant light is used on a regular basis in movies but they often times have very big productions.
That is why this is best used indoor in a controlled environment where weather and wind isn´t a factor to deal with.
I agree with you, a car in a beautiful environment is always a good thing. Although i tend to like moving shots more, because that´s what they are meant for.
I use flash as well when i´m out in the field, both of the ways of lighting has it own advantages and downsides.
Hi Patrick: I agree — continuous lighting on a car would be great — if you watch Tim’s class, you’ll see how much easier things are when you can use the modeling lights for positioning your strip banks, but the modeling lights on battery pack units (a) Only stay on a few seconds at a time, and (b) can’t even be seen outdoors in the day, which is the problem with continuous lighting on location — it probably wouldn’t have worked for what I did with the car outside, or the detail shots outside. Inside in a studio, like you showed, they would be great, but outside, they wouldn’t’ be nearly bright enough to do anything at all, unless you’re shooting 5-minutes before a rain storm. That’s the limitation of continuous lighting outdoors in daylight.Â
Yeah i know, i have Ranger units myself and the light bulb is a bit weak for this kind of lighting. My point was more of a “if you ever get the chance to try out constant lighting in a studio you should” kind of point. :)
I´m gonna do a follow up post with a few BTS images which explains how it works. If you´re interested i´ll get back to you when it´s done.
Studios are fine when the client demands it or the car cannot be out in public yet. Â I shoot everything from Quadras to sb900’s in the field, and its just how dedicated you are to your subject and gettting the perfect image…..There are ways to doing everything.Â
 Everything has its place studio images are cool, but its hard to be different and have a style. I prefer location, and do whatever I can to capture that moment. Just my opinion,but Studio stuff just gets boring after awhile
Patrick just checked out your blog, and the pics of the snow racers in natural light are better than anything else on your website……..keep up the great workJohn Jacksonwww.NotStockPhotography.com
Of course there is a way for everything, as is taste and preferences is always gonna differ. I should have rephrased my initial post a bit. :)
The point was not that constant light is the best thing in the world everytime and i totally agree with you that natural light is, when at it´s best, a beautiful thing. And you can work with it or against it.
Bottomline was that if Scott ever get the chance to try out constant light in a studio, he should definitely try it out.
Those old cars in the snow is actually a bunch of old Saab cars, i shoot new cars almost every day so this was a bit different and a lot of fun.
Great shot, Scott! Tim’s classes are filled with helpful techniques, but the thing I like best is that he shows us how he approaches shooting a car. Tim’s personal vision of simplicity is just as important as the individual techniques. Those four classes alone are worth the price of a year’s subscription of Kelby Training.I spent most of my over 30 years in advertising as an art director and creative director on national car accounts. Tim’s approach is remarkably simple and uses a minimum of equipment. He even has a natural light class, so the only equipment needed for that is a camera. In the ’70s, ’80s & ’90s we were required to shoot photos for national ads and catalogs with 8×10 view cameras, using transparency film one sheet at a time. We used everything from natural sweet light (just before sunrise and just after sunset) a 12 foot by 40 foot strobe box hanging from crane with a 90 foot arm to freeze the motion of a moving car while panning the big 8×10 camera. We shot car to car with the 8×10 mounted in a stedi-cam gyro rig. Bleach and dye retouching was done on huge dye-transfer prints. Then digital changed everything, starting in the ’80s with Dycomed’s digital retouching system (costing over $500,000) and finally to Photoshop on a Mac in the ’90s. We made the transition to digital in the 2001 with a Phase-1 H20 camera back on a Hasselblad 500, then Canon & Nikon DSLRs. I was lucky to work with the best photographers in the world at some of the most beautiful locations in the world. Like Tim Wallace, they each had their own approach to an assignment and brought their own creative point of view to our collaboration on the assignment. I was truly blessed to have a career that never seemed like work. It was more like hanging out with really talented friends and getting paid for solving fun problems together.Again, I really like your shot.
Nice work! I’m glad to see the Quadra in action. I was wondering if it had enough power to get the job done out doors.
Scott, do you think the Quadra’s have enough power to do the first shot or did you need the extra power of the Ranger?
Thanks in advance for any info you can provide :)
Hi Adam: I haven’t had a situation yet where the Ranger Quadra by itself wasn’t enough power outdoors, but we only have one of them, and I have two regular Rangers, so if I need more than the two heads (which have to be fairly close to each other), then I pull out the Rangers.Â
Great post Scott, hope you had a good trip home from London, it was great to meet you. I remember jumping from a Canon 40D to the 1DSiii, oh my, how the retouching increased & the Mac slowed down with the file sizes.
You got some stunning shots, I too enjoyed Tim’s classes, I’ve been very lucky to attend a seminar at the Morgan factory over here. I have a couple of strip softboxes I want to buy, probably the Lastolite ones for Speedlites, it’ll be interesting if I can get enough light from a Speedlite to drop the background to solid black & get enough light onto the car.
Will need to also go back & re-watch Tim’s classes, hey lucky I’m a NAPP member I can do that as many times as I like ;0)
Cheers
JT Â
I think you can absolutely do this with speed lights (and the Lastolite strip banks for speed lights would be perfect!). However, I would do what we did here — shoot later in the day when the sun isn’t as bright, or shoot in the shade, because you’re going to be shooting at f/22 or so to get the background to fall off to black. Your power setting on the flash will probably be a full power, but it’ll work. Good luck (try it once and you’ll be hooked).Â
What if you use a variable ND filter. Â Will that help or cause more issues
I haven’t tried it, but I would think it would help. :)
Nice work! I’ve watched that class yesterday. Unfortunately i haven’t any gear to create such pictures $)
Hi Dmitry: All of this — except the first shot — was all done with just one flash and a strip bank. If can be an in-expensive off-camera hot-shoe flash, and a cheap strip-bank (the Westcott 1′ x 3′ is only around $115). You don’t need a bunch of expensive gear to do these detail shots.Â
I”m absolutely impressed. So cool, I dig your D800 comment. Looking forward to having one too. Cheers! Kelby…
Great shots!! I need to check out that class. In the shot of the old 1932 wheel, from your reflection in the chrome its pretty obvious the shooting position was uncomfortable. But the results are stunning.
Thanks Jan. It was funny — it was such a great-looking wheel, but the first shots of it looked so boring until I got way over to the angle you see me shooting at in the production shot above, and all of sudden it looked great. Glad I didn’t give up and move on. “Working the Shot” makes a big difference when you know you’ve got an interesting subject.Â
Enough about the D800….the BMW is quite the car! Is that your daily driver, Scott, or is it the Ford roadster? :-)
Great post. Tim’s classes are so informative. You need to invite him to PSW Vegas this year!
–John
Hi John: Sadly, neither is my daily driver. :(
 Only kidding about the car, Scott. I know you’re too frugal and still drive that ’78 Ford Pinto……….. :-)
–John
Scott,
I wonder if you might comment as to which model and size soft boxes you used for this shoot? Thnaks
The size is in the blog post.
You can see from the pictures that they’re Rotalux boxes.
Thanks Adam, I guess I missed that. Too early in the morning or just blown away by the great photos.
Love. Love. Love these shots, Scott. It amazes me that you get such mood out of what looks like a pretty drab and lifeless scene, as viewed in the production shot. How much, if any, of that is attributable to post processing?
Trev J.
Hi Trev: I’d love to take credit for some cool post processing, but outside of a vignette on some adding contrast, that’s pretty much it for all the detail shots. For the shot at the top: I had to fix some areas on the car and on the ground and clone out spots, specs and other junk. I sharpened and added contrast, too. Also, to get the tinted look the first shot has, I duplicated the background layer; converted the background layer to black to white, then I changed the top layer’s blend mode to “Color” and lowered the opacity to where just a tint of color came back. So, the top shot had a decent amount the post. The rest were just spot clean-up, vignette on a few, contrast and sharpening. Hope that helps.Â
Thanks Scott. It was primarily the first image I was referring to so, yeah, to say that “helps” would be an understatement. Nicely done, all round.
Great pictures, now I know what I’m going to watch next on KelbyTraining.com ;)
As an amateur – I remember shooting my first car & trying to make it look good… I think I’ll sign back up for the Kelby training just to watch Tim’s class – sounds pretty sweet.
You’re right about Tim’s classes, they’re great. Â I’m going to try my shoot with speedlights. Â
Those are some great shots. We have a big car show up here this weekend. I am going to have to go now and see if I can get some cool car shots.Â
Sweet shots! I still have to watch Tim’s brand new class. I’m sure it’ll be even better than the first two. Thanks for sharing, Scott!
Its about time you gave us car photographers some props its not as easy as everyone thinks lol. Tim is awesome and you could’nt have picked a better instructor for the course.
John Jackson
http://www.NotStockPhotography.com
Nice work! Knee pads? :)
I wound up shooting on the concrete a lot, and that does a number on your knees. Brad thought to bring the knee pads I usually use for shooting sports and I wound up needed them. :)
Which knee pads do you use Scott? Â Which ones would you recommend or not recommend?
Love it all, Scott…great stuff!
In Vietnam does not seem to have  this those vehicle
Very good
One of my favorite posts yet Scott, great stuff!
Scott, the car shot in front of the gas station front/office is excellent. As a non-photographer, I was wondering just how difficult would it have been to replicate this shot in Camera Raw and PS without the lighting setup you employed? (Assuming, of course, you had a decent shot to begin with using your new camera plus the fact you already know what lighting contributes to a great effect.)
I can tell you from times where the flashes didn’t fire (for one reason or another), it didn’t look good, and Camera Raw wasn’t going to save it.Â
Can you tell me where this vintage service station is? I have not seen/heard this one before. I have been to one in the Signal Gas Station (Portland, OR area), Conoco Gas Station (Brighton, CO), Magnolia Station and Tower Conoco (Shamrock, TX) and Assoc. Gas (San Jose, CA).
Always have my eye out for more on my travels. Caught the bug after seeing some shots from Ben Willmore from his Rt. 66 series.
For others interested here is a list of restored stations I found online. http://www.oldgas.com/visit.htm
I drive by there every day. I stopped several years ago before it was prettied, up and the guys that owned it at the time chased me away. Glad to see that the current owners are more photo friendly.
Great location and a beautiful car, excellent.
Love these shots, Scott. Â I agree with Jerry….would love a review of the D800!
Great shoot, I learn so much from you, thankyou.
I’m with Jerry too, would love to hear your thoughts on the D800, I’ve one on Pre-Order, just waiting for it to come in.
I haven’t shot it enough to uncover all the features yet, but the image quality is absolutely off the charts!Â
Do you plan on doing a review of the D800 in a future post or maybe it be on D-town?
Scott, Interesting post; loved the detail shots. What were you using to trigger the lights in the top shot?
A Skyport Wireless transmitter. Kind of like a PocketWizard but made by Elinchrom.Â
Gee, I wonder if I can get cool images like this with my ’94 Suburban…
It might take more than three lights. LOL!!! ;-)
You’re a quick learner! – those shots particularly the top one looks superb!
Scott,
I think this is the most compelling automotive shot I’ve seen you take! Very cool man! Great lighting, location and of course, awesome car! I really want to take Tim’s Class on KT! Any chance you might run a promo price on Kelby Training for NAPP members any time soon? I missed my chance to re-subcribe for the year on the last Black Friday promo….Hope all is well!
Hi Scott,
Great article, really inspiring to test some car shooting!
However, did you noticed yourself in wheel production image of ’32 Ford Roadster :)
Great to see and learn from all the behind the scenes info
Great work. Can I nitpick? For me the one unsuccessful part of this photo is the double-shadows of the light in the ceiling. It makes the shot feel “lit” and not natural. So: a) am I the only one who feels this way? b) could anything have been done on location to prevent it?
No, you’re not the only one. And yes, a couple of small flags would kill the double shadows but leave the ceiling dark(er). More lights pointing straight up at the light fixtures from ground level could light the ceiling, I think. Again, they’d need to be flagged to kill shadows from the light fixtures.
Another option would be to take a natural light exposure with no added flash and then blend it in post.
I like how you rolled down the windows to show the interior better
Don’t ever put someone’s safety at risk for a photography shoot. It was an idiotic risk.
What a great post. I’m going to have to bookmark this for a future project. Thank you!
Hallo Scott!
Thank you for your articles. It is a pity but you have a broken link to this article on exposure.so
Hi Scott,
Great article! However i have a small question.
I am planning to buy ELC HD 500 ( the new version in this 2014 ) and want to use them outdoor with the GODOX LP-750. I dont know if you have heard about Godox, they are Chinese based but i have heard many good talks about them. They also have strobe head such as QT-600 which many reviews gave it positive comment.
As a newbie, i think it would be best for me to ask the pros first before investing a long-term equipment for my photography career.
Thank you