


Hello there, my name is Alex Koloskov, I am a studio product and advertisement photographer.
When started to work as a commercial photographer many years ago, I was trying everything: from portraiture to architecture, but very soon I realized that I can be successful and “the best” only where is my passion, doing things where I can use my full potential.
It appears that such place is a quiet studio, a place where I feel extremely comfortable working with still life and motion subjects.
I love to perform technically challenging shots, where I have to engineer the lighting and light modifiers, creating custom solutions for each shot.
Today I’ll show you how I work with one of my favorite type of shots: a combination of liquid and product subjects in one composition. “Sculpting” unpredictable shape of moving liquid and adding still subject to the composition is very interesting and challenging task, and outcome is unusual and eye-catching.
The idea was this: get a white iPhone and wrap it with white milk-like liquid splash, all around, like it would happen if stream of milk would hit a phone from behind. iPhone from a few smartphones available in white, and showing with the milky splash will look really cool :-)
Here is what I mean… the shot we did:

Looks quite unusual, doesn’t it? Almost like 3D rendering, which is a great accomplishment for a photographer: it is hard to get a real shot to look as clean as it could be done in 3D.
Let me show how we did it, step by step.
First step: The Phone Shot
Usually, shots like this are a composite. Meaning we do separate shots for each piece and then assemble everything in Photoshop.
So, the first shots was a phone alone.
This supposed to be a straight catalog-like product shot, with phone screen on. Because of the shape of the iPhone, this is quite simple task, with one little trick. Because I shoot with strobes, camera is usually set to X-sync speed (1/200sec for Canon 5d mkII) and I do not care about ambient (in-studio) lighting.
With strobes, effective exposure (I mean amount of light which will hit camera’s sensor) determined by power output of the strobe and lens aperture. Shutter speed does not affect the exposure as long as it longer than a flash duration and short enough to prevent in-studio ambient light to affect the shot.
The only issue with such approach is that we can’t capture weak continues lights, such as modeling lights or.. a smartphone’s screen.
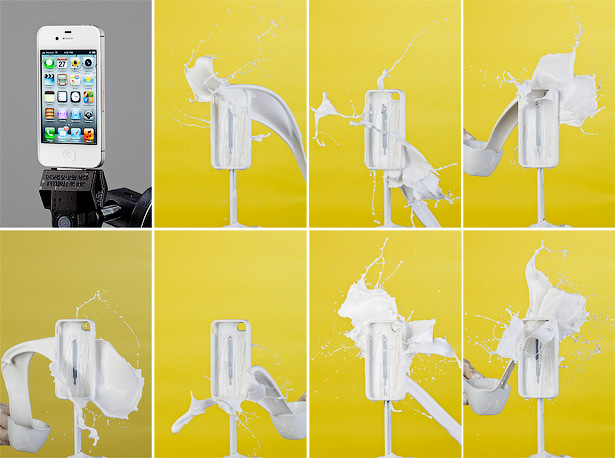
Below is the phone with screen “ON” and 1/200sec shutter speed @ F16:
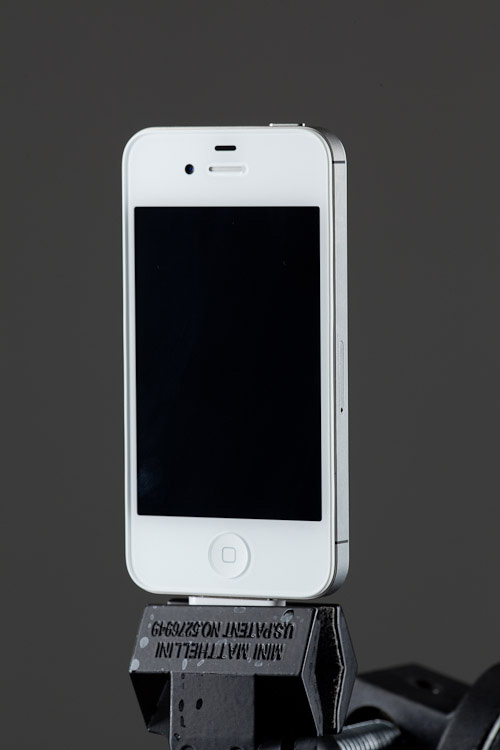
Despite the brightness of the iPhone screen, it appears completely black, as given exposure time was too short to let camera to capture it.
So, how to get it right? You probably already know what should be done to get the screen exposed correctly: lower the shutter speed. Which means that any other lights should be turned off: studio light, modeling light and even the monitors (I always shoot tethered in studio). There should be no other lights affecting exposure now, only strobe impulse and phone’s screen light.
This time we had shutter set to 1/5sec @ F16:
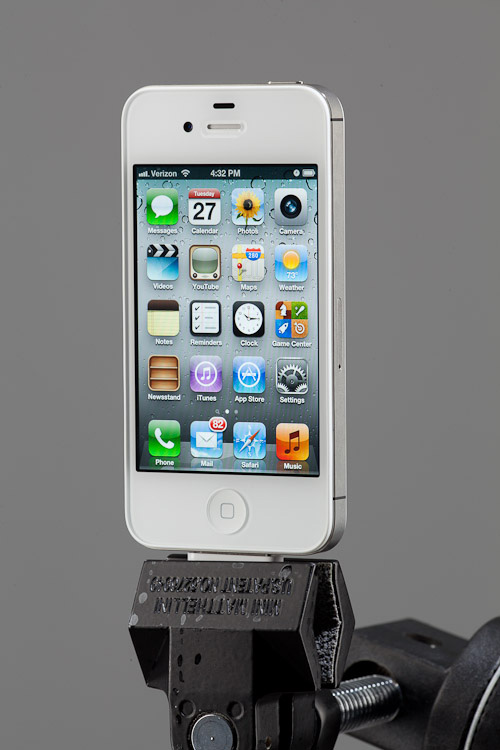
I often call such shot is “in-studio HDR” because in one shot we are getting like a double exposure: one from the strobe at effective “shutter speed” of about 1/2000 sec (determined by a flash duration measured t.1) and a second one from the phone’s display at effective duration of 1/5 sec, determined by a camera actual shutter speed. In one shot we have captured a huge dynamic range: strobe light and thousand times less brighter phone’s display light.
The lighting setup for the shot is quite simple:
One stripbox from the left, about 45 degree from the phone, and another stripbox on the right, slightly behind the phone. Because the phone face surface is completely flat and sides are non- glossy brushed metal, there was no issues to deal with unwanted reflections often found on glossy spherical subjects.
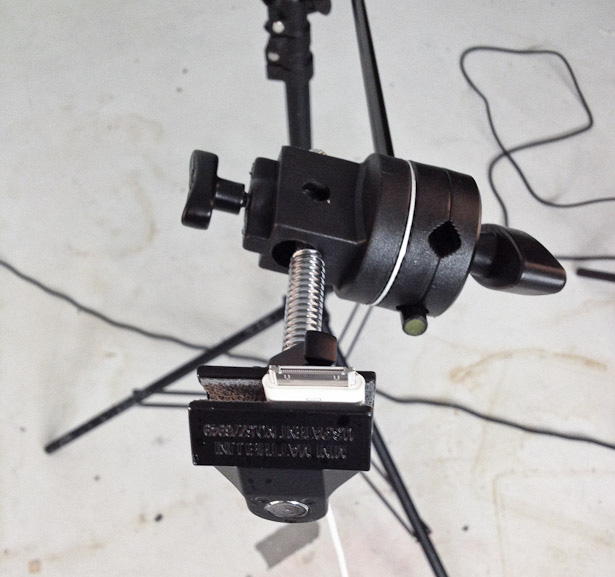
I used a Matthews Minigrip clamp mounted to a lighting stand and iPhone cable with connector to attach the phone to it.
After we were done with phone, it was time to do some mess:
Step Two: Splash Creation
The plan was to use iPhone more than just for this shot, so we did a trick: glued iPhone case to a rod and mounted it exactly the same way as the phone was.
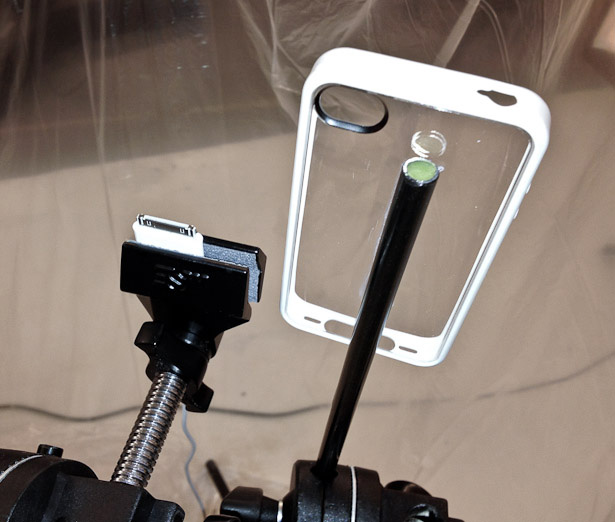
Clear backpanel iPhone case mounted on the rod to replicate the phone position.
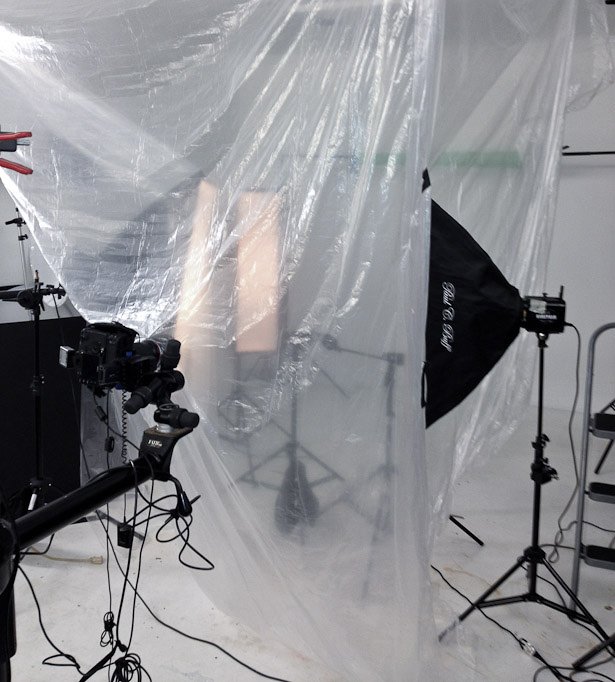
We also covered with plastic the whole shooting area. We were going to use latex paint and it was necessary to protect equipment and studio from it. All the lighting was covered as well. Here is how studio looked like after such waterproofing:
Camera view: plastic screen was fixed around lens hood
Back view
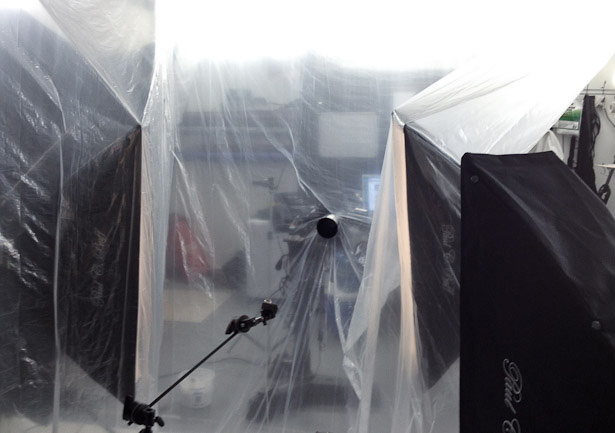
I have also adjusted the lighting accordingly to a new requirements: because latex paint is not transparent, there was no reason to have stripbox on the right behind the subject, so I moved it to be front-right. More frontal light is needed for white liquid to keep it white. To smooth the shadows even more, I’ve replaced narrow stripbox with square softbox.
One more softbox was added on the left, far from behind, just to create a slight edge on the splashes from that side. Oh yes, the background lights were added as well. We did not care about background when shooting the phone, as phone will be clipped out anyway.
For the splash part, we needed the real background. We got yellow seamless roll of paper hung about 5 feet behind the “splash area,” it was lit by 2 strobes with standard PCB reflectors.
After everything was set, the very first shot I did was a shot of the color checker card:
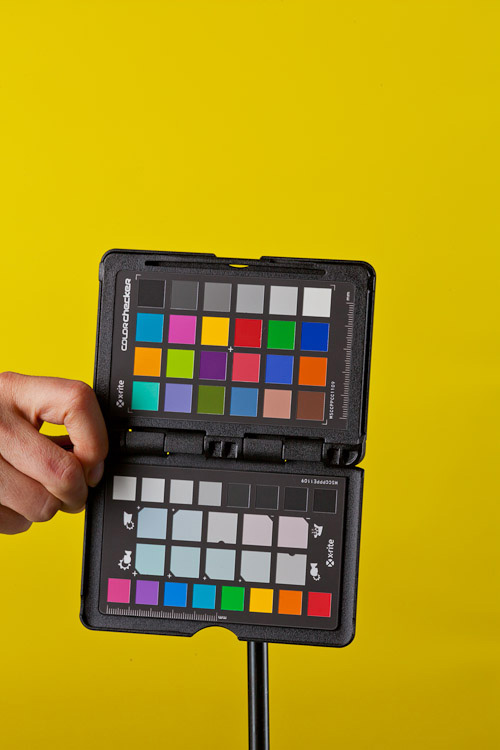
This is a very important part of each shot to have a correct color profile. Especially when shooting on such colorful background: without a color profile it won’t be possible to get a right white balance and correct colors for the subject and background.
Even if we are going to tweak colors during a post-production, I always have to have a way to revert to correct colors when needed.
When everything was ready, we started to throw the liquid. As mentioned before, we used latex white paint, and mixed it with water to 1:1 ratio. It gave us the thickness we were looking for.
The Lighting:
I use Paul C Buff Einstein strobes, as they have great stopping power in action mode. Typical power range I use is 100-150Ws, and flash duration is 1/6000 -1/4000 of a second. Such short light impulse is what freezes the action, not a fast shutter speed.
Back to the shot:
We got as many shots as we felt that would be needed to get a set of cool looking splashes to be combined into that flower-like splash around the phone.
Here is a short “behind the splash” video, it will show you how it was happening in realtime:
The Final Composition
Hope it was interesting. If you want to learn more about stuff I do check out Photigy.com, this is a place where I share everything what happens in our studio: behind the scenes videos, tutorials, tips & tricks and much more.
Every Wednesday at 10 PM EST I run Studio Photography Insights, a Google+ hangout: we discuss and critique submissions for the weekly assignments, talk about lighting, gear and secrets of studio product photography shared by amazing photographers like Dave Nitsche and Bill Cahill. Join us if you love working at studio, it will be fun!
You can see more of Alex’s work at Koloskov.com, find him on Google+ and Twitter, and come see him live at the Google+ Photographer’s Conference!
Awesome! I’ve seen that pic before and wondered how it was done. Now all we need is some Oreo cookies. :)
Excellent work and very interesting post!
That was intriguing! Thank you so much for sharing. You are an artist for certain!
Huge fan of Alex, his work is very inspiring.
That’s crazy. The first time I saw that I was sure it’s 3d. Cause what takes hours in a real shoot, 3d // plugins can manage it easily. But this is fantastic. What an effort to get that final look. Thanks for sharing the workflow.
Very nice
Always good work from Alex
Круто. вÑегда хотел узнать в Ñто делаетÑÑ.Â
Cool. I always wondered how they do it.Â
I have been a huge fan of Alex for a while now. Â Alex always explains his shoots so well.
Very eye catching image Alex, it looks like there was quite a bit of work involved (and what about the cleaning at the end of the shooting)! Great result though, thanks for sharing.
Сертаки идеально подходит к видеорÑду :)
Love it. Was this from an actual Apple ad?
Alex, Ð’Ñ‹ отличный пример к чему ÑтремитÑÑ.
Fascinating work – thank you!
Impressive to see the kind of work that goes in to doing this for real and not using CGI. Really cool.
Amazing, Thanks for tip and post.
Great Post!
Phenomenal behind the scenes… it was very inspiring and gave me a few ideas to try out! :-)
Ogh dude this is just bad ass!
Alex the great :)