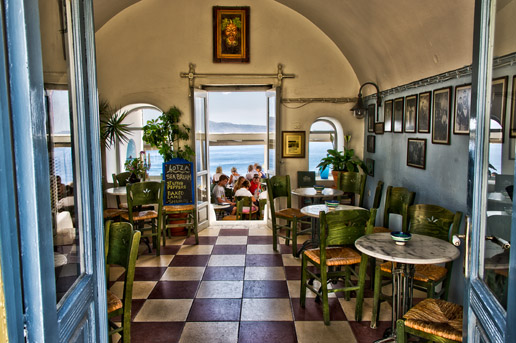
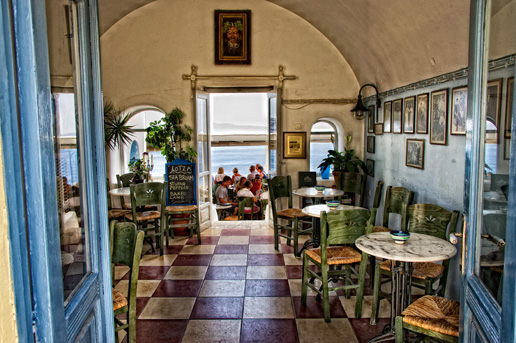
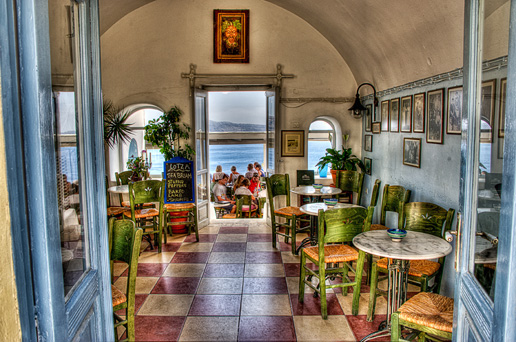
…..back in the original post (it shows the percentage that voted for each). It doesn’t matter which one you voted for, because since this is art it’s all personal opinion and there is no wrong answer. What I did want to do is tell you how each one was processed as a post-processing learning exercise:
#1) If you chose the first image (shown above) it was created using 5-bracketed images and then all 5 were compiled into a single HDR image using Photoshop CS5’s built-in HDR Pro feature. After it was compiled (using the “Scott 5” setting from my Photoshop CS5 Book for Digital Photographers), I applied the Glamor Glow filter from Nik Software’s Color Efex Pro 3 (using the default settings) to a duplicate of the background layer, then I lowered the Opacity of that layer to 50%. I probably should have gone down to 30%.
#2) If you chose this one, it’s actually not an HDR image at all. It’s a single image—I took just one of the 5 bracketed images, and then I ran the Tonal Contrast preset of Nik Software’s Color Efex Pro 3.0 plug-in for Photoshop with the amount set to 50% (the default is just 30%). Then I ran the Glamor glow filter as well, at 50%.
#3) If you chose this third image, this too was created using 5-bracketed images and then all 5 were compiled into a single HDR image using Photomatix Pro. I took these shots with my 28-300mm f/3.5 to f/5.6 lens, and I was out at the 28mm wide end, so the doors bowed out a little bit in each of the three photos, so when I was done with each, I use Photoshop CS5’s built-in Lens Correction filter to straighten them out a bit.
Anyway, the reason I was showing you these is so you could see how each of the HDR, or “HDR-like” treatments compare, and how close to the HDR look you can get with a single image and a few filters (as seen in image #2).
Well, I’m off to Toronto for my sold out “Light It, Shoot It, Retouch It” seminar tomorrow. If you read the blog, I hope you’ll come up and say hi. Have a great Tuesday everybody. :)


I hope your workshop goes perfectly!
Can I pick the top half of #3 and the bottom of #1?
WOW! I was way off on my gues!
I read the blog, but will have to wait with the hand-shaking-hi till Amsterdam (a bit closer to Denmark).
Btw… what will it take to get you to Denmark/Copenhagen for a class? We’re a lot of fans and admirers here. I have some interesting contacts if you could be tempted.
I thought maybe you tried different HDR software or different ways to process them.
Hi Scott,
I will be at the seminar tomorrow, I will definitely be saying hi.
Will there be all sorts of cool Kelby training stuff available? Any of the new NAPP wear?
I hope you have a safe and comfortable trip.
Take care,
Clive
Ahh…but the real question is: Which one do you like, Scott?
Very cool, Scott. Thanx.
I’m with Brian Wong……. which one Scott? You only get to use one!
Im suprized how good of results you get from the HDR Pro in Photoshop. I cant make anything i like with it. BTW that was the one I liked. Im sure you already have but if for some reason you haven’t try out that Nik HDR Efex pro. ( http://www.niksoftware.com/hdrefexpro/usa/entry.php ) I dropped Photomatix and have been using Nik since it came out. Im loving that one. I even have went back and redone the old HDR images I made with Photomatix in Nik HDR Efex Pro. :-)
Hi Scott,
Thanks for the tutorial. I realize you will be very busy with the tour, but I would be great if you could post one more version of this… The best (Correct) exposure of the bracket processed just with LR3.
I would really be interested in seeing what you could do if you took the RAW exposure that is closest to the right of the histogram where you can use Recovery to get back the highlights and then with just LR process the image to get it to as close to perfect as possible ( Adjustment Brush is fair game).
I realize that there is a fairly large dynamic range you are dealing with here, but I think sometimes that we run to HDR too quickly when there is a lot of data in the Raw file that if exposed properly could produce a really usable image. I would be interested in seeing if this was the case or if it is just an impossible scene to do without HDR processing or faux HDR using plugins.
Thanks.
I liked your learning exercise. What was the total vote count?
My dear Scott Hi,
Great, with useful information :)
Hope you will have a successful Workshop in Toronto. :) …..
Best Wishes
– Ali
Very interesting comparison! I’ve been coming to the conclusion myself that I really like what Photoshop does (after I initially struggled to get anything better than a grey mush, and it has taken quite of bit of playing around). And more and more I’m not liking the more extreme look from Photomatix. And it was very interesting to see how good the single image ‘HDR’ image looked.
So, Scott, did you do anything in Lightroom or ACR before applying the filters? I’m with Mark above … I can’t believe how good the CS 5 HDR looks. I can never get results like that with CS 5 HDR.
Thanks for sharing and Tutorial! Have a Blast in Toronto! I’ll see you in Denver in September!
Dennis
I hate the look of HDR. Which make me glad I Picked #2.
Great teaching tool here, Scott. I chose #3 because of the color “pop”, but the #1 was a close second. Interesting that Photoshop did such a nice job, when a lot of people lambast it.
Hope you have a great time in the Great White North! Did you bring your mittens? 8)
–John
I would like to know what settings you had in Photomatix Pro when you processed #3. It looks a bit like what the “Painterly” preset would give you to me.
I wish I could have made it to Toronto! (since they’re is no love for Mtl…)
Fun stuff! I want to visit that cafe :)