

Happy Monday everybody! I’m out doing my Lightroom seminar tour this year (I’ll be in Chicago and the Detroit area with my seminar next Monday and Tuesday respectively), and I get lots of questions about the tethering rig I use, so I thought I’d share a few Behind-the-Scenes shots from a studio shoot I did a few weeks ago (shots for an upcoming book), where I can break down the set-up (and the lighting while we’re there, right?).
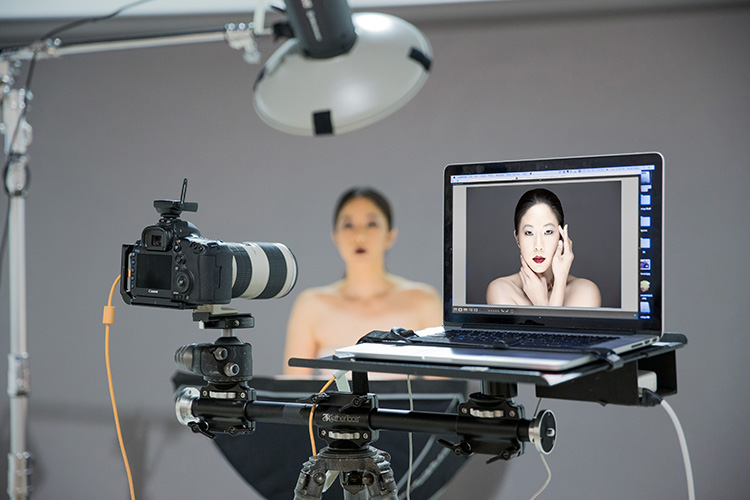
Here’s the basic set-up:
The Cable:
The long orange cable is the essential thing you need to connect your DSLR to your computer (and into Lightroom). It’s from a company called Tethertools, and their entire company is dedicated to making stuff for tethering (so, with the exception of the tripod and ballhead and lights, all of which I mention shortly, all the tethering gear itself is from Tethertools (btw: great company, great people behind it, great products, and awesome customer service – I totally dig them!). Anyway, the cables come in different lengths and different connectors to fit your particular make and model of camera (USB 2.0, USB 3, Firewire, Micro-B, Mini-B, etc.). The bright orange color is to help you see the cable in a dark studio environment so you don’t trip on it. Prices vary based on length and ends chosen, but figure around $32 to $55.
The Bar:
It’s all sitting on a tripod (in this case, it’s a heavy duty Really Right Stuff tripod I believe), and the crossbar attached to it is the ‘Rock Solid Tripod Cross Bar’ from Tethertools (it holds a laptop table on the right, and my Really Right Stuff BH-55 Ballhead on the left, which gives me a place to put my camera between frames, while I’m tweaking the lights, or looking at the images in Lightroom). It’s $129.95 at B&H Photo.
The Laptop stand (and safety strap):
It’s called the Tethertools ‘Aero Table’. NOTE: If you get this Aero Table, I would strongly (in the strongest most strongly of strong terms) suggest that you get the optional SecureStrap that keeps your Laptop from sliding off the table, which is most likely to happen when you and a friend/assistant pick up the rig to move it). It has saved me countless times. Get the strap. It’s a must. It’s optional, but shouldn’t be. It’s strap time. Strap it on. The Aero Table is $195 for a 15″ MacBookPro, and the SecureStrap is around $18 (btw: all the prices shown are what they’re selling for today at B&H Photo).
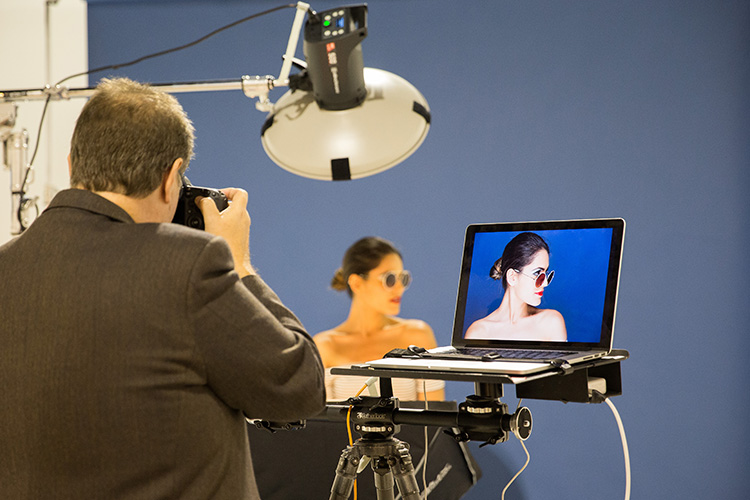
External Hard Drive Holder:
The little box under the right the side (seen more clearly in the shot above, taken from another shoot that same day), which is currently holding the “brick” for my Apple charging cable, usually is holding an external hard drive (that’s what it’s really designed for). That little external drive holder is called the ‘Aero XDC‘ and they make ones that hold one drive or two drives. Super handy because if you don’t have one, then your hard drive is just kinda sitting there leaning against your computer, waiting to fall off during the shoot (said from experience). Around $54.
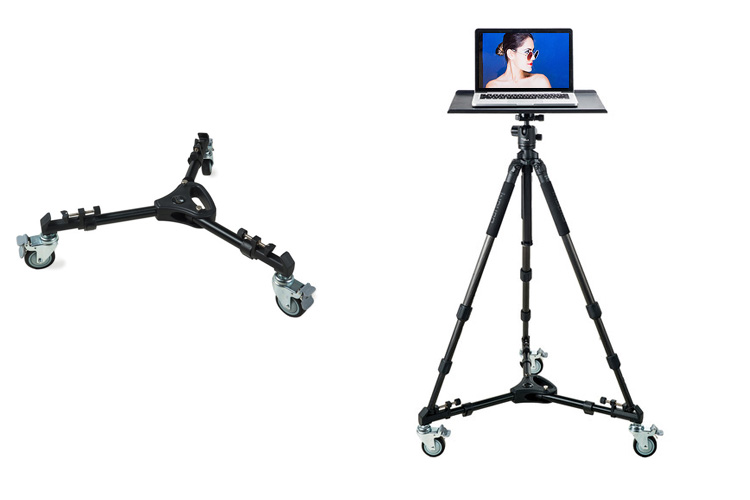
Rolling Base For Your Tripod
The accessory to this system that I just started using in the past few months, and one in which I have deeply fallen in love with is their Rock Solid Tripod Roller, (seen above) which lets you easily roll the entire rig around, rather than having two people pick it up and carefully move it around the studio, which I often have to do a dozen or so times during a shoot. This way, your tripod sits right in special mounts on the roller, and it just glides around. Much safer, faster, and you don’t need a 2nd person to wheel it around (nor do you have to worry about your laptop falling off when it’s just gliding across the floor, much like Belle in Beauty and the Beast. But I digress). It’s around $79. Can’t recommend it enough.
Not Seen, But Felt…
You can’t see it in this photo, but it’s super awesome is their optional Aero Cup Holder accessory, which slides under the Aero Table and you slide-it-out when you need it. It can hold a water bottle, coffee cup, but it’s also awesome for holding your phone during the shoot, or extra batteries, or whatever you need handy during the shoot. It’s $29.95. Totally worth it.
My Entire Kit
The folks at Tethertools are putting together an entire kit of all the stuff I use, and doing a bundle deal for all of it. I don’t have all the specifics, but one day, it will be available, somewhere, somehow. How’s that for specific info? ;-) BTW: When it does come out, I don’t get a commission or kickback (sadly), it’s just for the convenience of folks who come to my seminar and want the same rig. I’ll share the details here on the blog when it’s available.
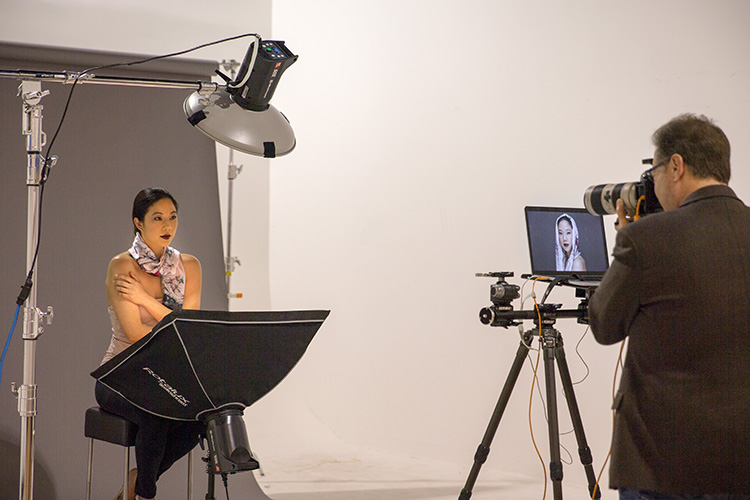
Now, let’s look at the lighting
Since we brought all this up, we have to take a quick look at the lighting, right? It’s simple Clamshell lighting with both lights directly in front of our subject. The top light is an Elinchrom 17″ beauty dish (no diffuser — you can get away without using a diffuser if your subject has really clear skin), and the bottom light is a 24″ square Elinchrom Rotalux softbox. Both strobes are Elinchrom ELC 500-watt strobes, and I’m triggering them with a Skyport Transmitter sitting in my camera’s hot shoe.
Hope you found that helpful. :)
Pop Quiz: what happens one week from today?
I’m in Chicago with my brand new Lightroom OnTour full-day seminar. Guess what happens the next day? That’s right — I’m in the Detroit area (Livonia, Michigan to be exact) with the same seminar. Two days. Two seminars. What could go wrong? ;-) – Hope you can come out and spend the day with me (you can still grab a ticket right here).
Hope today is the start of a great week for you, and we’ll catch ya here tomorrow for a slick little Photoshop tip I’ve got fer ya! :)
Best,
-Scott


I have most of this rig, but I didn’t know about the rolling base. Now that’s a nice option. I already have a different rig in the house that rolls, but it’s too big to transport when I shoot at another location. Looks like it’s time to spend another $80 or so.
Do you load photos straight to Lightroom or via other software?
How do you integrate the external hard disk into your workflow?
I don’t understand why Lightroom doesn’t allow a second copy to an external hard drive when tethering, yet it does when importing.
Great and amazing setup; http://architecture.uonbi.ac.ke/
Thanks as always for sharing your setup.
I’m disappointed you won’t be coming to St Louis for your Lightroom 2017 Tour.
So how do you manage shooting to a laptop but editing on a desktop without an external drive?
Great post, I shoot teathered most of the time and found it very useful, thanks