Hello there! It’s #TravelTuesday again so it’s that time of the week that I, Dave Williams, jump in right here on Scott Kelby’s Photoshop Insider to share something that will hopefully fill in a gap somewhere in your creative flow! Today, as I head off on a mission to Iceland, I want to tell you about something that I’ve found valuable in the field of drone photography and videography. I want to tell you how to pull a still from a video so that you can retouch it as if it were a photo in Adobe Photoshop – something I do when I shoot with my drone quite regularly.
First up, load the video you want to pull a frame from in Adobe Premiere Pro. In this example I’m using Premiere Pro CC 2018.
Now move the Playhead to the position within the video from which you want to pull the still image.
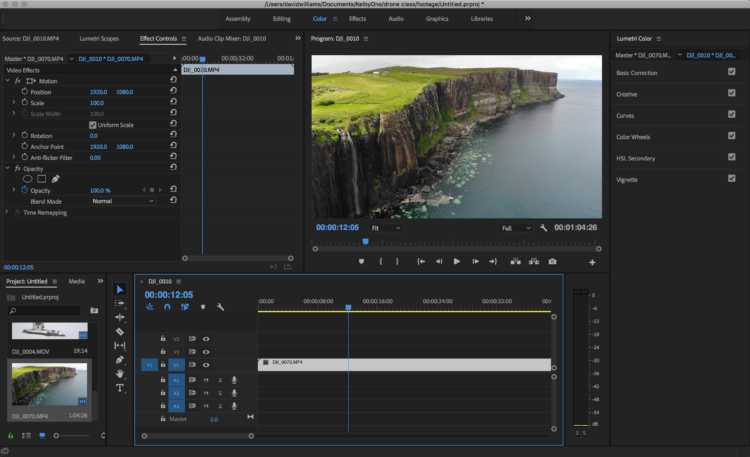
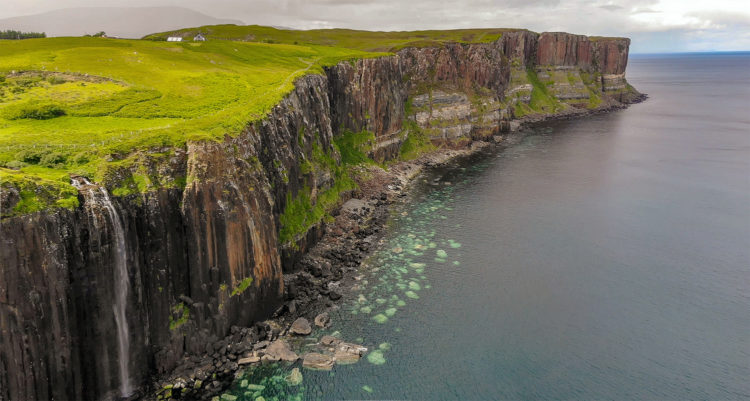
In this example I’m taking a still from a video I made at Kilt Rock during my trip to the Isle of Skye in Scotland last week. Gushing over the cliff at Kilt Rock is Mealt Falls landing straight into the sea. I caught a composition of the two on video and I want to make something of it, so I’ve set my Playhead to the right point and I’m ready to pull out the still.
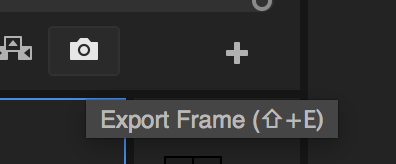
Next up, hit the Export Frame button. When you do this you’re presented with a dialogue box which gives you a couple of options.
First up is the File Name. We can change this name to whatever suits. Further underneath that is the Path option, the destination of which we can change using the Browse button. The option that’s rather more important to us here is the Format field. Once we change this it remains selected as that format each time we do this until we change it. There are a few options here, one of which as a photographer we may not be so familiar with, and that one is DPX. This stands for Digital Picture Exchange and it’s the format used when scanning film which records colour density and in fact records a lot of data relating to the frame. The more common formats we’ll see here are TIFF and PNG. Personally I choose PNG, however it all comes down to your preference and your intentions.
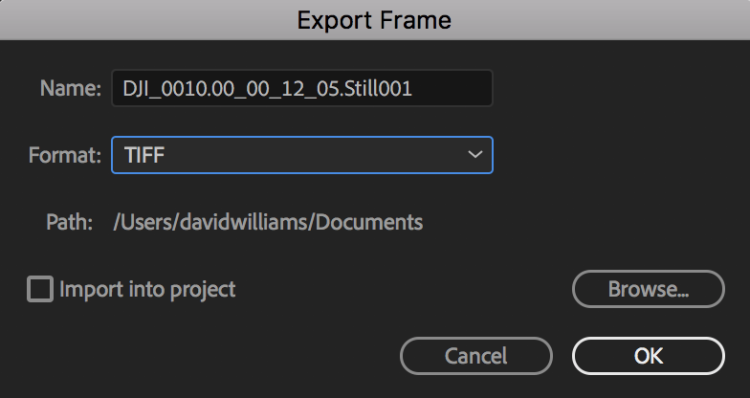
Once we’ve hit OK after selecting the format and destination of the file we can go ahead and take it from our folder straight into Adobe Photoshop or Lightroom to make the adjustments we’d make to any other photo. It’s that simple, yet surprisingly often overlooked.
I hope that little nugget was useful for you! As always, do let me know how you get on, and you can show myself or KelbyOne on Instagram if you want, we love to see! You can keep track of my Iceland adventure right on my Instagram too!
Much love
Dave