


Get Your First Commercial Client with Social Media Video: 9 Simplified Steps to Shooting and Editing Your First Stop Motion Video
A few years ago I started sending some sweaty emails. What’s a sweaty email you ask?
The ones that make you sweat when you press send because you know what it means for your career if your recipient responds with interest.

The first client email I sent was to Levi’s. I wanted to shoot a campaign, so I sent an email that was most likely very embarrassing. I never heard back. Fast forward a few years, I’m assisting another filmmaker on a commercial shoot in California and I give a soft elevator pitch to the company saying, “Hey, I also create social media content, check out my work.”
I got the gig, then they sent a shot list of images. A part of this shot list they wanted was some “boomerangs.”
Educating the client is an important part of establishing credibility as an artist.
Clearly, you know creating a boomerang from scratch isn’t just a thing we do on our phones.
I informed the client that in order to produce a professional quality “boomerang” it’s actually a series of individually edited images which are then stitched together into a video. Mind you, I had never created one of these for a client before, but I knew it was possible and that this was a new way to make more money.
The first stop-motion video I created took me at least two hours to shoot and eight hours to edit. I really struggled with how to put it all together. But I’ve got it down now, and I think you can too if you start somewhere.
How to shoot and edit your first stop motion video:
1. Conceptualize
What is the storyline, what message are you trying to convey, what is your subject?
2. Plan the Production
Assemble the resources: do you need props, models, back drops, space, lighting?
3. Light the Scene
Bounce a strobe off of a white ceiling for the most consistent lighting or use LED continuous to create consistent lighting on your subject.
4. Stage the Scene
Imagine you’re creating a miniature movie. If you’re using props, find a way to secure them to the backdrop. If I’m shooting top down for a flat lay scene, I will tape down non-moving elements.
5. Set your Camera
First, use a tripod. This is important. Bring the subject of the image into focus, then set your camera to manual mode and don’t mess with it. Here are my most recent camera/lighting settings:
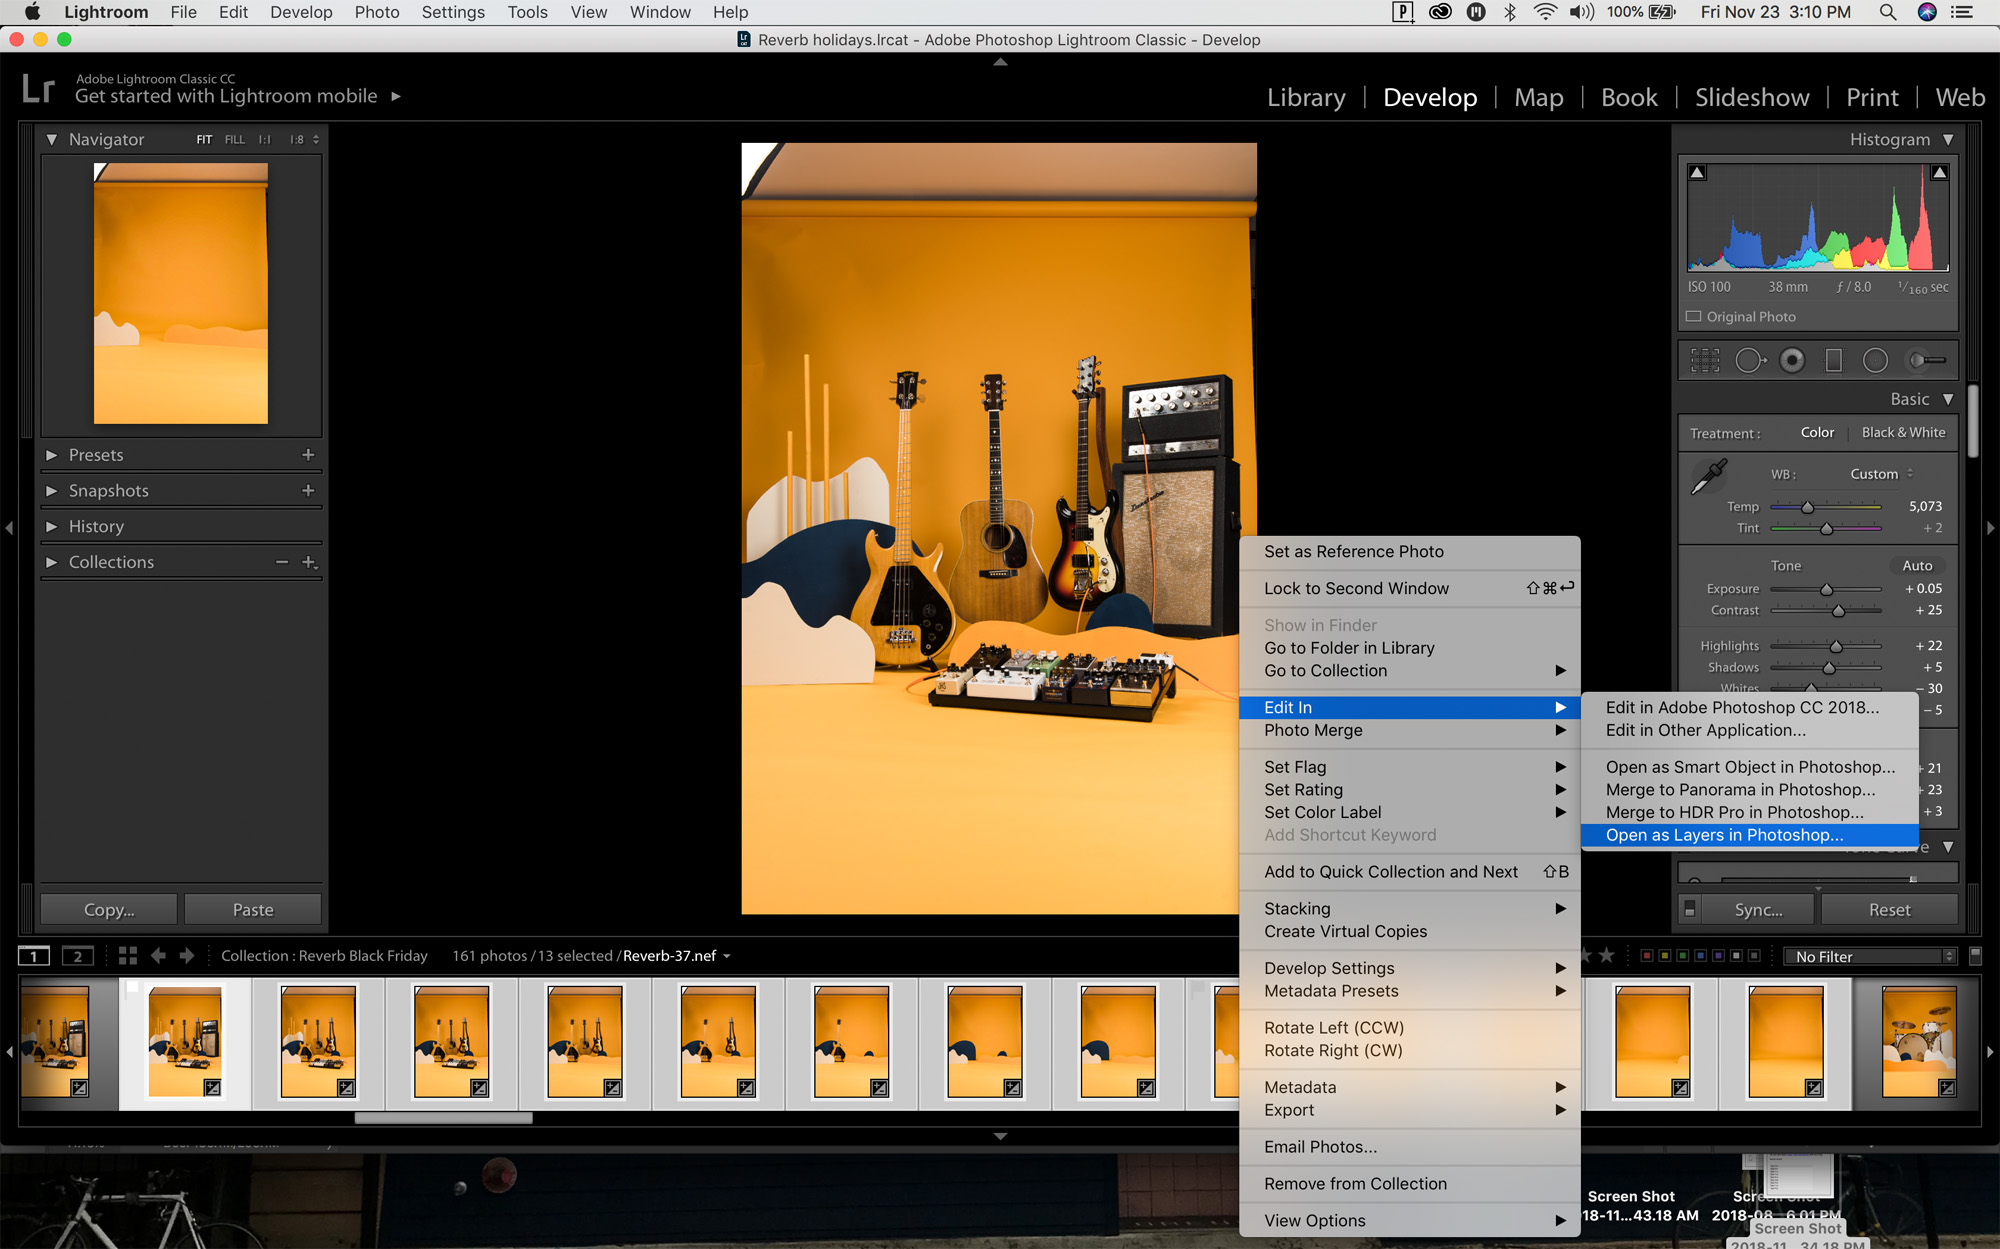
- Alien Bee strobe at 1/2 power pointed at a white ceiling. Nikon D750 with a 24-70mm f/2.8 set at 1/160th shutter, 100 ISO, f/5.0
- The best way to guarantee consistency is to literally not touch your camera. I use the Nikon D750’s wifi paired with the WMU mobile app via my iPad to trigger my camera. I also use the Tether Tools tethering cable connected to my computer and utilize Lightroom’s tethering capabilities to trigger the camera. This automatically imports images so I can review any subtle changes on set.

6. Action
Take the subject of the scene and move it 1-2 inches with each frame captured. Pro tip: don’t breathe. Ok, maybe I’m half joking. This part is the hardest part of the process because any small accidental movement will be noticeable in the final product. Stop motion is a meticulous process. For a simple stop motion I will only shoot about 12-16 images. With this number of images, your final animation will be about 3 seconds. If you want to create a boomerang, you only need 2-3 images to be duplicated multiple times in post-production.
7. Edit your Images
Import your photos into Lightroom. Make sure everything is edited consistently. Here’s a quick tip. Once you get your perfect edit on one of the photos. Copy that preset, and paste onto the whole set of images.
8. Edit your Stop Motion Video
I take all of my selected photos from Lightroom, right click, open as layers in Photoshop.
Once the photos are in Photoshop, I go to the motion workspace and then click create frame animation, then go to the right tab and click make frames from layers.
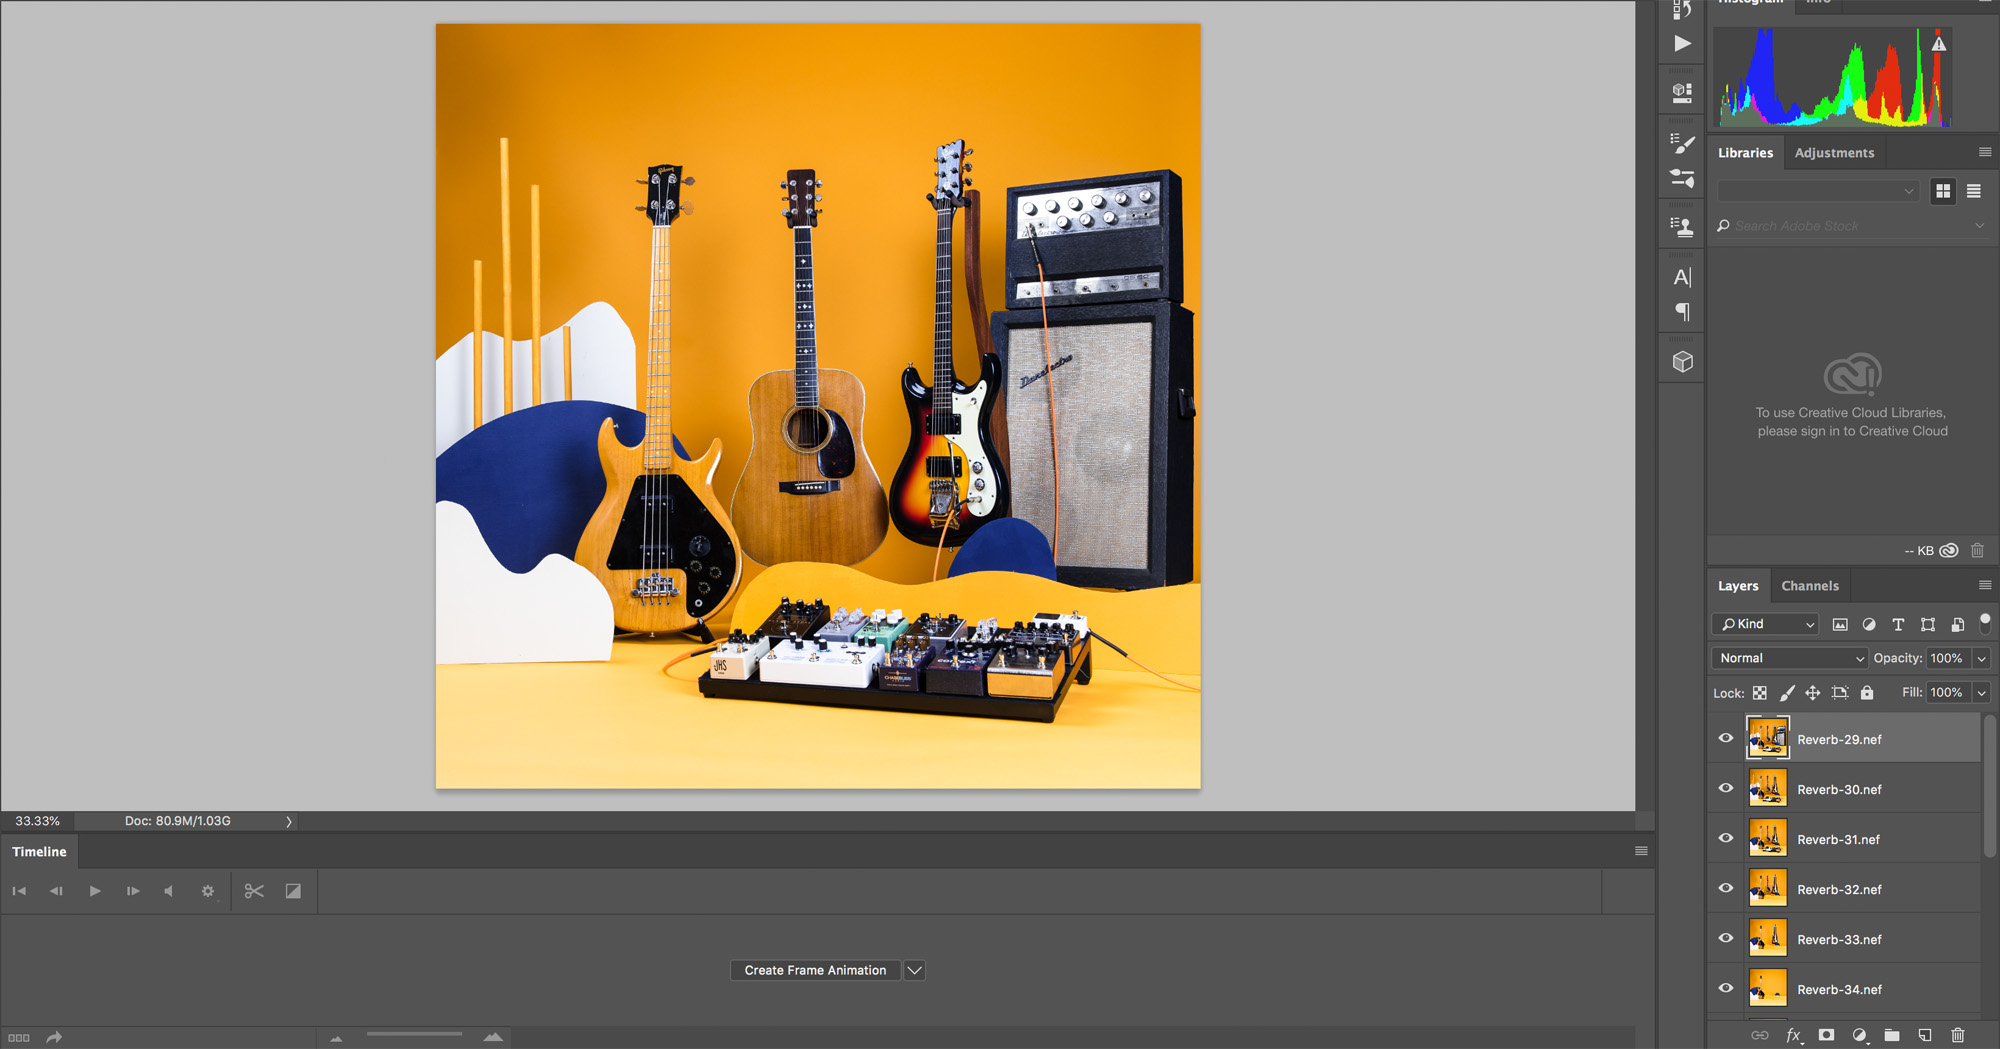

Your photos will appear into a timeline. Now you can choose how long you want each frame to appear. On average I choose between 0.1 and 0.2 seconds per frame.

Depending on if you shot your stop motion from beginning to end or started at the end and removed elements from the frame, you may need to reverse your frames. Now, press play and watch your stop motion come to life!
Once you create a frame animation, you have to convert this to a video timeline and export as a video, because social media platforms like Facebook and Instagram don’t allow actual GIF uploads yet. So, although you made a GIF, you will be uploading a video.

Lazy stop motion shortcut: export all of your images from Lightroom and open them in your preferred video editing software. Create a compound clip (Final Cut Pro) or nested sequence (Adobe Premiere Pro) and speed up the entire clip to wherever it feels right, then export as a video and call yourself a pro.
9. Upload and Start Conceptualizing your Next Stop Motion
You did it!

Using Stop Motion Video for Social Media Marketing
According to a Nielsen study, Social Media usage and Video Content are becoming pertinent in reaching today’s audiences. The chances that consumers are going to engage with content is 100x more likely if the content is visual over text. Video content gets more engagement than photo. So as a brand or a marketer, just knowing that consumers are spending any percentage more time interacting with video content should be a cue to get on that bandwagon and get creative with social media video advertising.
With the direction of social media marketing, your time is now; and by now, I mean yesterday. As an artist wanting to step into commercial work, the time to start is now. Start anywhere. To practice, help a friend with a small business take photos of their product. The versatility of how stop motion video can be used is a perfect reason to start adding it to either your social media marking strategy or to your service offering.
I hope this simple how-to has inspired and motivated you to pick up your camera and create your first stop motion video.
If you’re a creative and you enjoyed reading this, you may like this article, too.
McKenzie Hanson is a commercial photographer and stop motion artist based out of Chicago, Illinois. She juggles a camera in her hand and a toddler on her hip. Keep up with her on social @itskenziejean and check out more of her work at McKenzieHanson.com.

2 comments