My Top 5 Tips for Safari Photography
Good Morning Everybody,
I have to say, I was thrilled when I received a note from Brad inviting me to do a Guest Blog Post for Scott’s blog as a run-up to Photoshop World Las Vegas just a few days from now. It’s been a while and I’m happy to be back in the “blogging” saddle again.
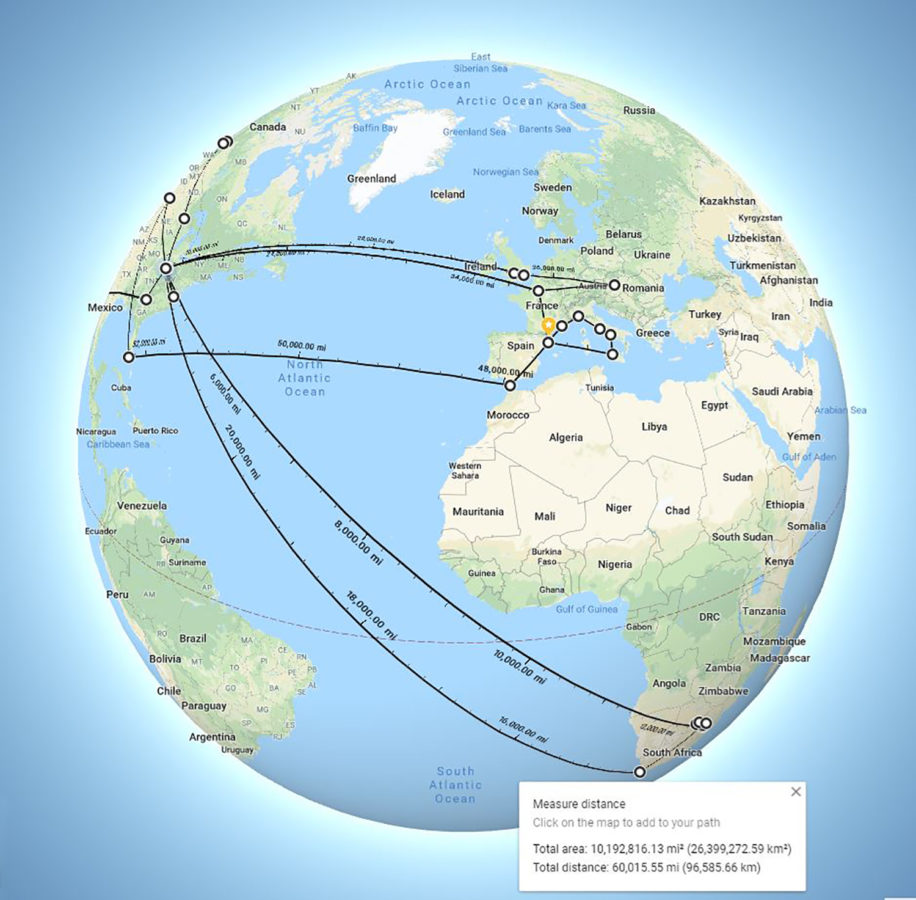
As many of you know, my wife LaDawn and I have ramped up our world travels these last several years. To put that in perspective, we now travel worldwide about 7 months of the year – last year we crossed the Atlantic Ocean 8 times, the Equator twice, and the Arctic Circle twice covering about 65,000 miles in the process, whew!!!
Now all that travel does not mean I’m slowing things down photography-wise, not at all! Each year, I’m shooting about 60,000 – 70,000 images. In fact, Canon’s Service Department just told me I wore out the shutter on my Canon 7D Mark II. Happily, I just received it back from their repair department. But now the subject matter isn’t brides and grooms. Up until last year most of my images have been travel and landscape related – I’m still inspired by the culture, history, beauty, and people of all the countries we visit. It’s just a thrill to photograph everything we encounter in our travels.
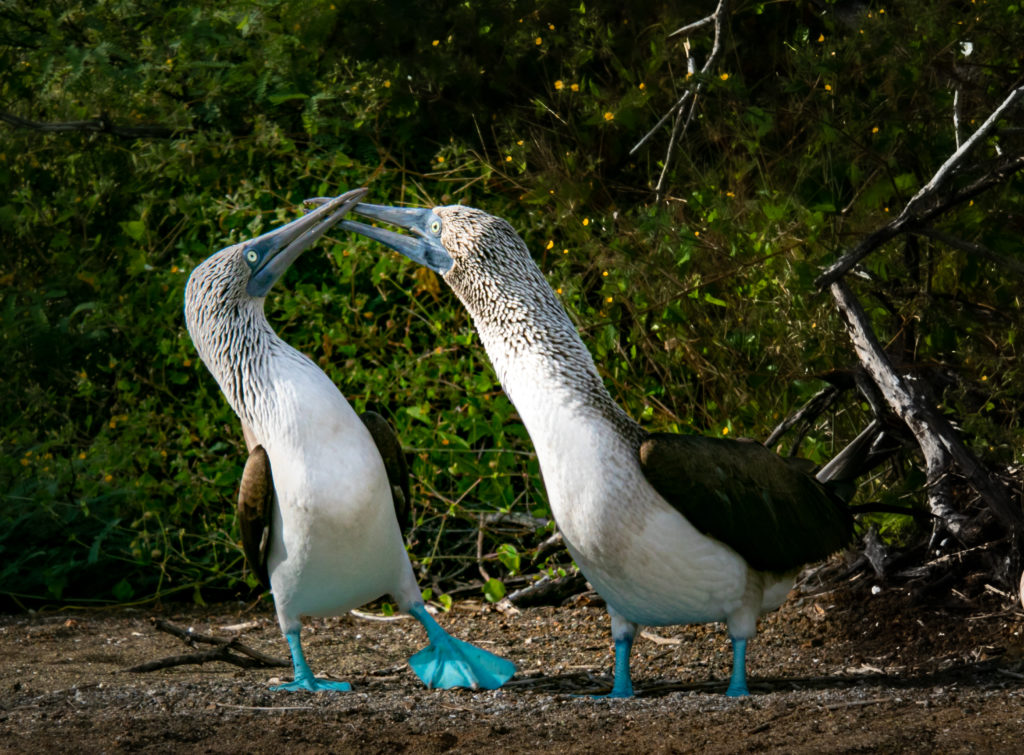
Then last year, I co-hosted two photo safaris in South Africa shooting over 45,000 images in just five weeks. You’re right, that was quite an edit job. And just recently, we returned from nearly 6 weeks in South America climbing up to Machu Picchu and dancing with the Blue Footed Boobies in the Galapagos Islands shooting a grand total of 31,000 images. The Africa and Galapagos experiences have really energized my wildlife photography aspirations.
That being said, I hope you’ll join me at Photoshop World where I will be presenting two completely new programs: Landscape Photography Between 9 a.m. to 5 p.m. (Because I’m too darn lazy to wake up earlier than that and I usually have an adult beverage in my hand after 5 p.m.) and my second program – How I Became a World Famous (OK, reasonably decent) Wildlife Photographer in Only Three Weeks.
Ok, I know my program titles are a little “tongue-in-cheek,” but the cool thing is that I really did learn a lot of new photography techniques and tips from all our world travels and experiences these last several years. I want to share some of that info, particularly Safari info, in this blog post and then more thoroughly in my two programs I’ll be presenting at Photoshop World in the next few days.
BTW, I’m leading two safaris again to Africa next year and a third to India to photograph Bengal tigers, but more on that at the end of this post.
In this post I’m going to hit on a few tips and tricks that I think could really help any aspiring wildlife photographers out there. So, let’s get to it…
Tip #1: Gear Considerations:
Just like anyone going on their first Safari, I was worried about want kind of gear to pack. I wanted to pack lean and mean but still be adequately equipped to capture great images. Here was my first pass at the gear list:
- Canon 5D Mark III
- Canon 7D Mark II
- Canon SX60 for LaDawn
- Sigma 150-600mm lens
- Sigma 100-400mm lens
- Sigma 1.4x tele-extender
- Canon 24 -105 lens
- Canon 18-200mm lens (specifically as a travel lens on the 7D Mk2)
- Sigma 12-24 wide angle lens
- Canon 8-15mm Fisheye lens
I figured if I could get all that in my travel case, I would be home free and be ready for just about any photographic contingencies we might encounter on this trip. But, as you will soon see, I was a bit over packed for the trip. For LaDawn, she just packed her handy-dandy Canon SX60 (16meg Raw files) equipped with its 65x 21-1365mm IS lens – her favorite.
Cameras Comparison
Here is the approximate Camera image breakdown for the 45,461 images we captured – about 30,211 for me and 15,250 images for LaDawn.
- Canon 5D Mark III: 4,623 images
- Canon 7D Mark II: 24,502 images
- Canon SX60: 15,250 images
Canon SX60
Let me first say that LaDawn loves her little Canon SX60. For a non-professional photographer, it is a great all-around camera and, because of its long telephoto reach – 21mm-1365mm equivalent, it’s perfect for safaris particularly when you want to get those “reach out and touch the whiskers” on the lion’s nose photos. I’ll go into some of the other reasons I like this camera too during my program at Photoshop World.
Canon 5D Mark III vs. Canon 7D Mark II
As you can see, I made 4,623 exposures with the 5D Mk2. I’ve had this camera for quite a while, and it works great for my wedding, portrait, and landscape photography. But none of those situations demand any rapid shooting sequences.
The frame rate is only 6 FPS. For me, that was just too slow for wildlife photography. OK, I know the Mark IV ups the rate to 7FPS but that’s still a bit slow for me, as well. That’s why I opted for the Canon 7D Mark II with its 10 FPS rate for most of my shooting of 24,502 images.
Something else I learned too – the lens/weight characteristics of the full frame Canon 5D Mark III fitted with the Sigma 150-600mm tele lens at 6.13 lbs. vs. the APS sized sensor Canon 7D Mark II fitted with the Sigma 100-400mm tele lens at 4.57 lbs. Which, BTW, gives me the same zoom range as the full frame Canon 5D above. This is a substantial difference in weight between the two cameras and that impacts camera utilization and shooting speed.
The bottom line for me was that the Canon 7D Mark II with its fast 10 FPS fitted with the fast and accurately focusing Sigma 100-400 mm was my camera/lens combo of choice for my safari experience.
Lens Comparisons
Here is the approximate lens image breakdown for the 45,461 images we made – about 30,211 for me and 15,250 images for LaDawn. The results might surprise you as I discuss them below.
Sigma 100-400mm
At 13,185 images as I said above, this was my most used lens for the reasons stated.
Sigma 150-600mm
At 6,878 images, this was used mostly on the Canon 5D Mark III but occasionally on the Canon 7D Mark II as well. I found the later combo to be just a bit too much “reach” in most of our shooting situations as our guides were able to get quite close to the animals.
Sigma 1.4x tele-extender
At 418 images, this was used in conjunction with both lens/camera combinations but I found it to really slow the focus, so much so as to be a detriment to my wildlife shooting so it spent most of its time in the bag.
Canon 24 -105mm
At 2,343 images, this was my go-to lens for the Canon 5D Mark III and for general all around, non-wildlife shooting.
Canon 18-200mm (specifically for the 7D Mk2)
At 6,371 images, this is always my go-to lens /camera combo for general travel shooting.
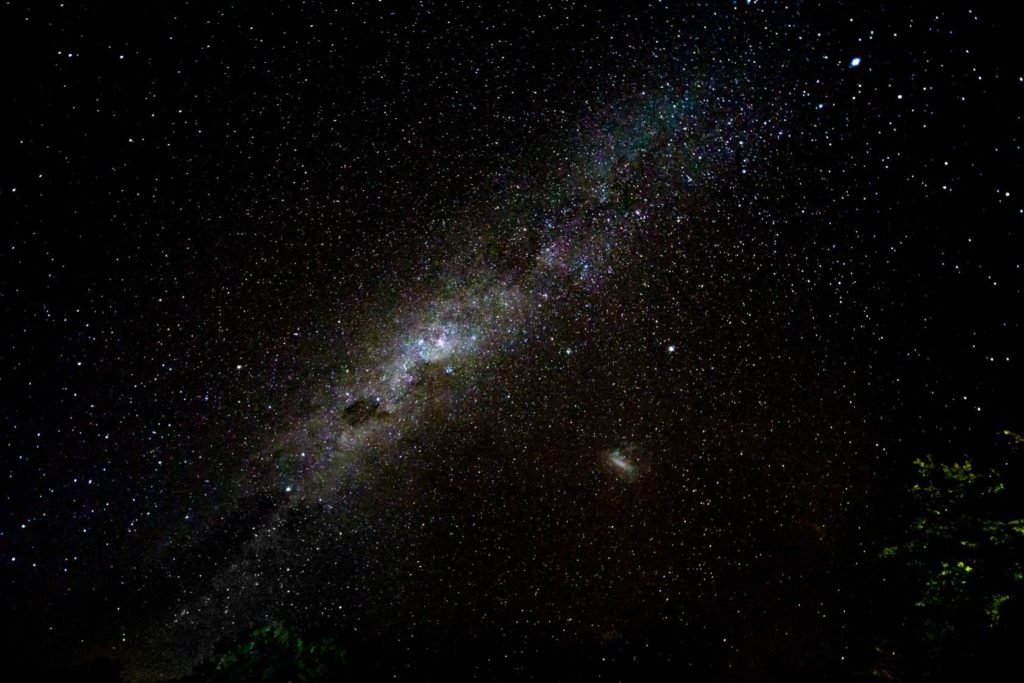
Sigma 12-24 wide angle
At 19 images, this was only used a few times and that was primarily for our evening shoots of the Milky Way.
Canon 8-15mm Fisheye
At 91 images, this was mostly just used for some fun group images in the safari vehicle and to photograph the room interiors of our lodges.
So, there you have it. I really didn’t need to pack a few of the items above and probably won’t next year when we return to Africa.
Tip #2: Dual Card Slot Cameras
I bring this up because a change of thinking can really impact your shooting strategy. Most photographers I know with dual card slot cameras generally shoot RAW files to the #1 slot which general holds the compact flash card. The #2 slot generally houses the SDHC card which many photogs use for their RAW back up. I know this differs from one manufacturer to another, but this is the card configuration on my two Canon cameras discussed here.
My suggestion is this. Make the #2 slot holding the SDHC card your primary card location and point your RAW files to that card. SDHC cards are much less expensive ($22 for a 128gig card on Amazon) and just as reliable as the CF cards. Use the #1 slot as your backup location but save JPEGs to the CF card in that slot. A 64 gig CF card can easily hold 18,000 Jpeg images. Now you have the best of both worlds when it comes to memory cards and image backup.
Tip #3: Shooting Strategies
Wildlife photography is completely different from shooting weddings or portraits as I quickly found out on my first safari. I found I needed to optimize my camera settings for fastest shooting and best results. Here is a quick overview of my preferred setting and why.
- M – Manual (but floating Auto ISO)
My favorite for daytime, bright light shooting. My shutter speed/F-Stop Recommendations are 1/2500 sec @ F8.0. letting the ISO float on Auto. I know that shutter speed seems really fast, but when you are bouncing around in a safari vehicle, photographing wildlife on the run, or chasing birds through the air, I would not be at any shutter speed slower than that.
- T – For Shutter Speed Priority
As the sun begins to set and we began to lose light, I still want to be sure I’m able to stop the action. Hence, I’ll shift to Shutter Priority and call my maximum shutter speed and let the aperture and ISO fall where they fall. As the light continues to slowly dim, I am constantly readjusting my shutter speed while still maintaining the highest speed possible to capture the image. - A – Aperture Priority
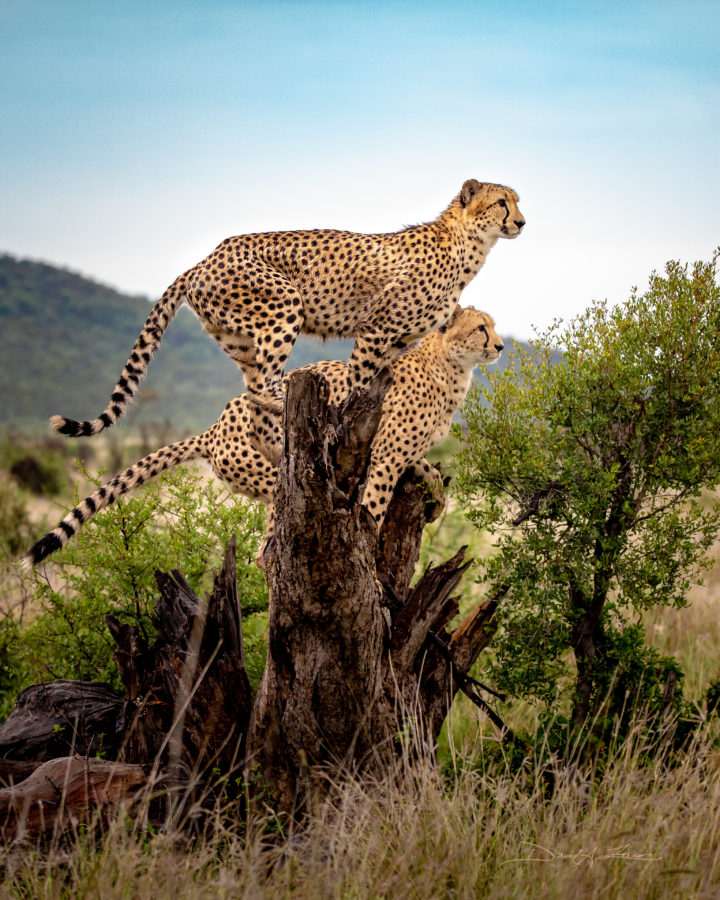
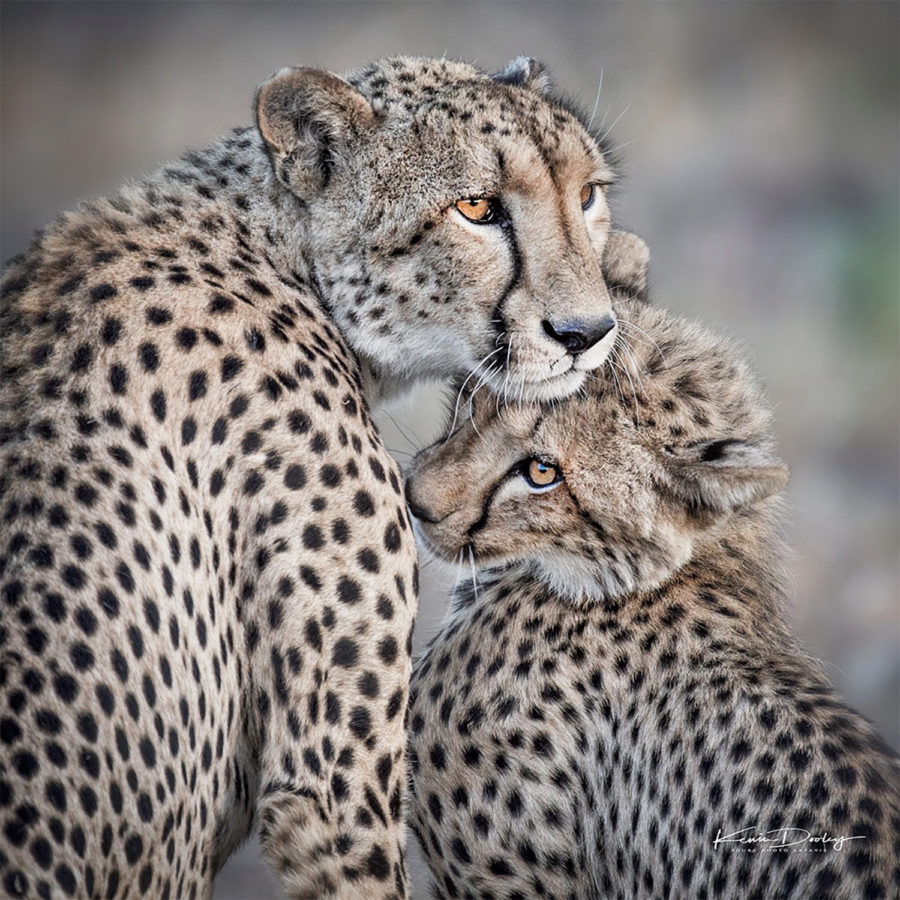
Sometimes I want to isolate the subject from the background like in this great photograph my friend Kevin Dooley captured of the cheetah mother and her cub. He was shooting a Canon 1DX Mark II fitted with a Sigma 500 mm F5.6 lens at about 30 feet away to get this fabulous image.
DAZ NOTE: The handy iOS app I use to help me calculate Depth of Field is Simple DoF. It’s fast and easy to use and is available in the app store for $1.99.
- P – For Professional: OK, everybody knows I’m joking here – it’s P for Program mode and probably the most used setting on cameras these days. Hey, I don’t deny it, I use that setting a lot too, just not for safari images. The main reason is that you will be guaranteed blurry images, day or evening, on that setting.
Remember, Program mode is trying to get you the best image possible by optimizing your ISO for image quality, your shutter speed for image clarity, and aperture for best exposure. Therefore, mid-day program mode will give you lower ISOs which necessarily means slower shutter speeds even midday. Yikes, that’s exactly what we DON’T want when shooting moving wildlife photography. So, bottom line – keep your camera off Program mode when shooting wildlife!
There you go, that should give you a good camera setting starting point for your next wildlife photographic adventure.
Tip #4: ISO Shooting Strategies – Don’t Be Afraid of the JPEG. You’ve Got to Come Home with The Shot!
Keep ISO on Auto MOST of the time! This works with just about all the shooting modes we discussed above. But there are times, especially is low light, where I’ve devised a better ISO strategy. Here we go.
- When light is really fading and it’s getting dark, shift ISO gears. Manually set ISO to 10,000 to 16,000. Yikes, you say!
- Then switch to JPG mode and…
- Set High ISO NR to MAX letting camera do the noise reduction for you. You could easily set this up as a Custom setting which would make the quick switch effortless.
Here’s what happens. The images will come out of the camera silky smooth with the camera’s built in Noise Reduction capabilities. Then, once imported into Lightroom, you get another “bite of the noise reduction apple” where you can now handle any additional noise issues easily. It works like a charm!
Keep remembering one important thing – we’re talking about GETTING the Shot, NOT talking about the ones we missed because we weren’t using best settings to obtain the image.
Tip #5: Travel Considerations – If You Are Going to Travel Half-Way Around the World, Stay a While
One thing LaDawn and I have learned in our extensive travels these days is simple. If you are going to travel halfway around the world (or any great distance) to shoot, lions, tigers, or bears don’t just stop there. Our wonderful world if overflowing with rich cultures, wonderful histories, exciting world citizens – all of which you don’t want to miss in your travels. Here is a case in point. Last year we were going to travel to South Africa, about a 19-hour trip for us from Cincinnati, OH. We know we were going to have some major jet lag issues and we knew we wanted to see what South Africa had to offer other than just Safari wildlife.
Our advance planning rewarded us with some unforgettable experiences. We took about four days just to tour Johannesburg and its surrounds breathing in the wonderful and important history of the area that we only get a glimpse of here in the good old USA. Uncovering the history of Nelson Mandela, his relationship with Mahatma Gandhi, the Soweto massacre, and visiting the Apartheid museum was an eye-opening experience that really brought home for us what that part of the world went through and how the political landscape changed dramatically for so many people not that many years ago.
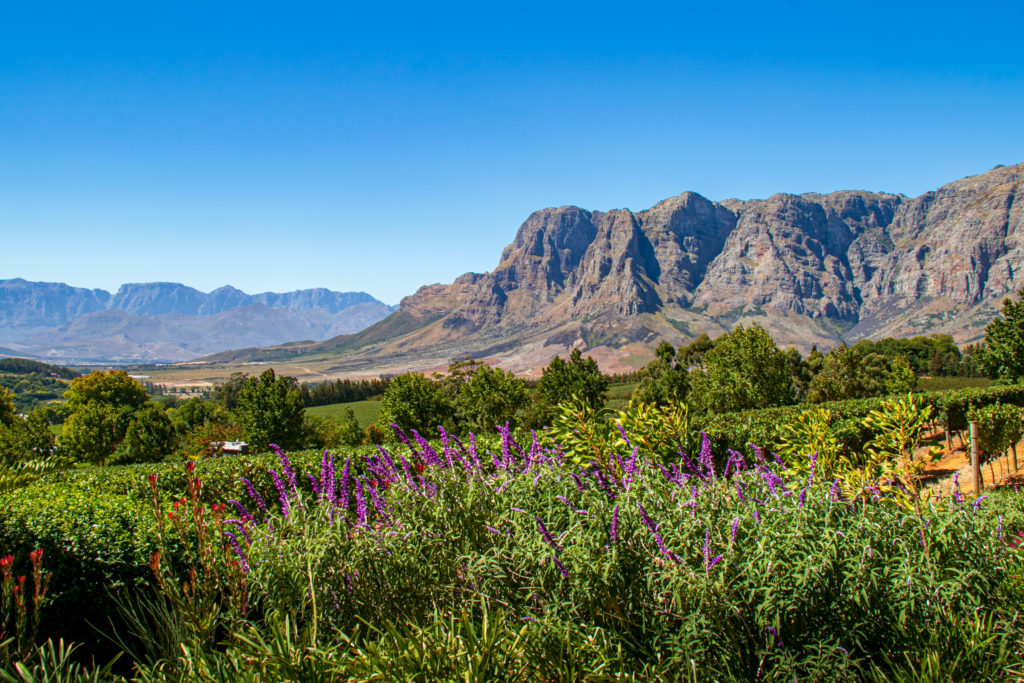
After three weeks on Safari, seven of us then flew to Cape Town, home to South Africa renowned wineries, and spent a week there enjoying and sampling the wines, visiting the Cape of Good Hope, Table Top mountain, and Simon’s town – all must see destinations if you have travel half way around the world to get there.
Final Thoughts: Join LaDawn and I On Safari Next Year in South Africa!
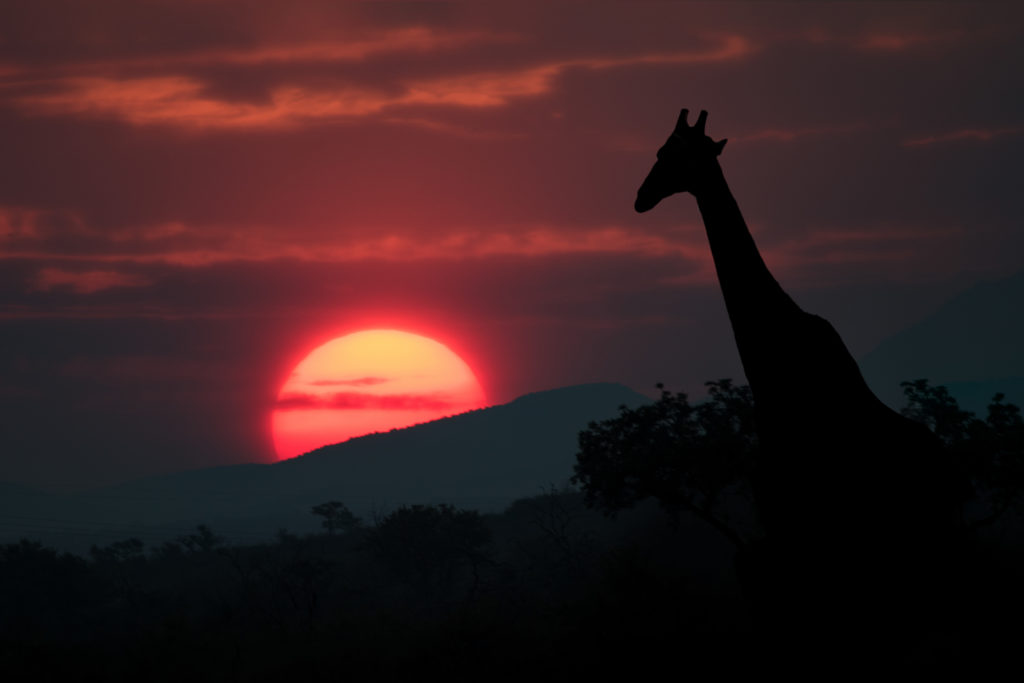
Anyone who has been to Africa on a safari before has called it a life changing experience and one of the best of their lives. As a photographer, it’s a phenomenal experience. And yes, we’re heading back to South Africa again next April 1 – 11, 2020 for our fifth Photo Safari.
My friend, Kevin Dooley, whose work has been selected several times for National Geographic’s website, and was featured above in my post, is coordinating our travel and co-leading the safari with me. If you are the least bit interested – we only have 7 places available right now for the April safari – please contact Kevin at 505-345-6322 or 505-401-2988 or me at david@ziser.com or check out the website for more info. Either one of us would be happy to give you complete details on the safari so please reach out to us.
Hey Gang, that’s it for me today. I look forward to seeing all of you at Photoshop World. Please come up and say Hi.
See you then,
David
You can see more of David’s work at Ziser.com, keep up with him at DigitalProTalk.com, and meet him in person at Photoshop World this week!