


My name is Joe Glyda and I am a commercial photographer specializing in food photography.
I would like to thank Scott for inviting me to be a guest on his blog. This year marks my 40th year as a commercial food photographer. Yes, I am one of those photographers that worked my way through the darkroom and started my career using 4×5, 8×10, and 11×14 Deardorf view cameras that used film.
The one thing I loved about shooting film was, ‘the set’ had to be ready and complete before the film was loaded into the camera. There wasn’t “I’ll just fix it in Photoshop.” Getting it all put together in one shot and looking at the subject upside down and backwards taught me to see the food ‘as a subject’ very differently. Painstaking details went into every shot, as Polaroids were used to get the test shot done, before exposing the film. But seeing that transparency on the light box was extremely rewarding.
I thought I would talk a little about my favorite subject, Food Photography. The unique aspect about commercial/food photography is that it’s ALL about the product. It’s NOT about you the photographer and your style, or your vision. It’s about the client’s vision, who in turn, hires an art director to come up with an approved layout and make the product be the hero. It then becomes the photographer’s responsibility to engage in a conversation with the art director and concur on a plan of action.
In other words, ask questions, LISTEN, then solve the problem.
Engage in a conversation prior to the photo session. Do not wait until the art director shows up to start setting up. Be prepared and ready to go. Do some testing to get yourself familiar with the product that’s about to be photographed ahead of time.
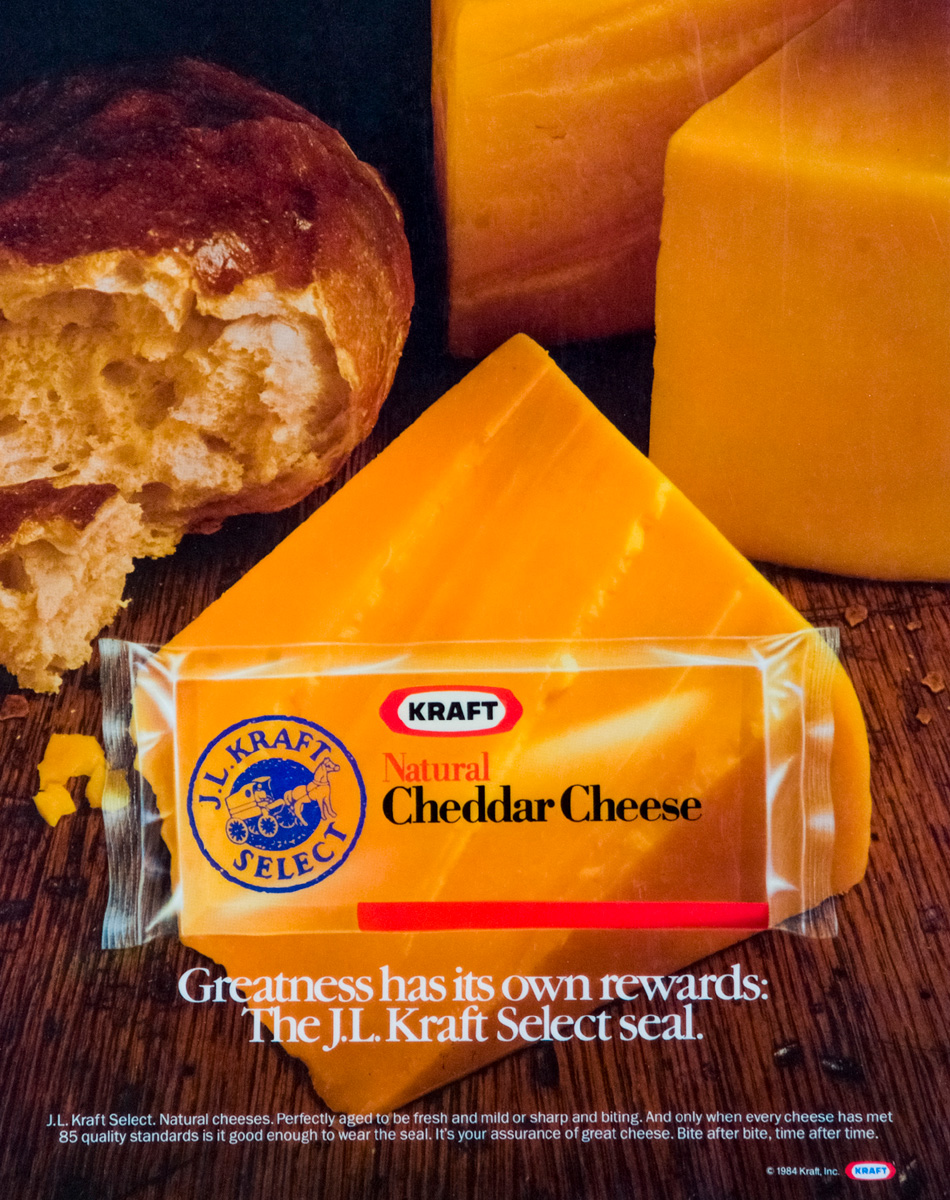
One of the key elements in food photography is finding the products with the right elements of detail that work with all the other elements in the photo. So, in the case of this print ad, what seemed to be an easy shot ended up taking a dozen cheese wedges and twice as many Polaroids to create the cut marks on the cheese wedge so they fell exactly under where the package artwork was to be placed. The client wanted the package to represent the natural look and flavor of real Cheddar cheese. Knowing what the client wants is so very important before the camera is even set-up.
That doesn’t mean photographers can’t have their own ideas or be able to contribute an idea regarding the images. At first, it’s important to leave your personal vision at the door. What I mean is, waiting for the right opportunity to share your ideas with the art director or client, after learning what the vision of the product is. Don’t be afraid to talk to the art director. Take an AD to lunch. Share ideas with them.
![]()
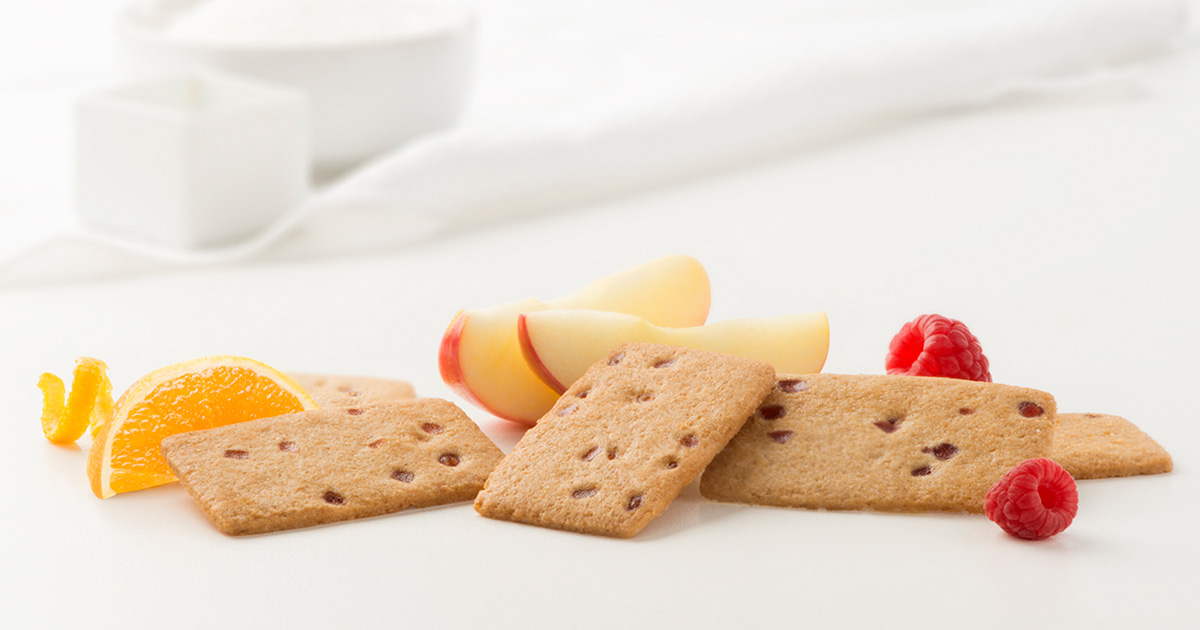
This image was part of a year-long campaign which stemmed from a lunch appointment with an AD who just finished meeting the client from Cracker Barrel Cheese. We talked about the client’s needs to make their snacking product look different and more trendy. Polaroid transfers were very popular at the time, so I suggested to shoot the real food on a Polaroid of an empty plate. The art director drew up layouts and our collaboration was a success.
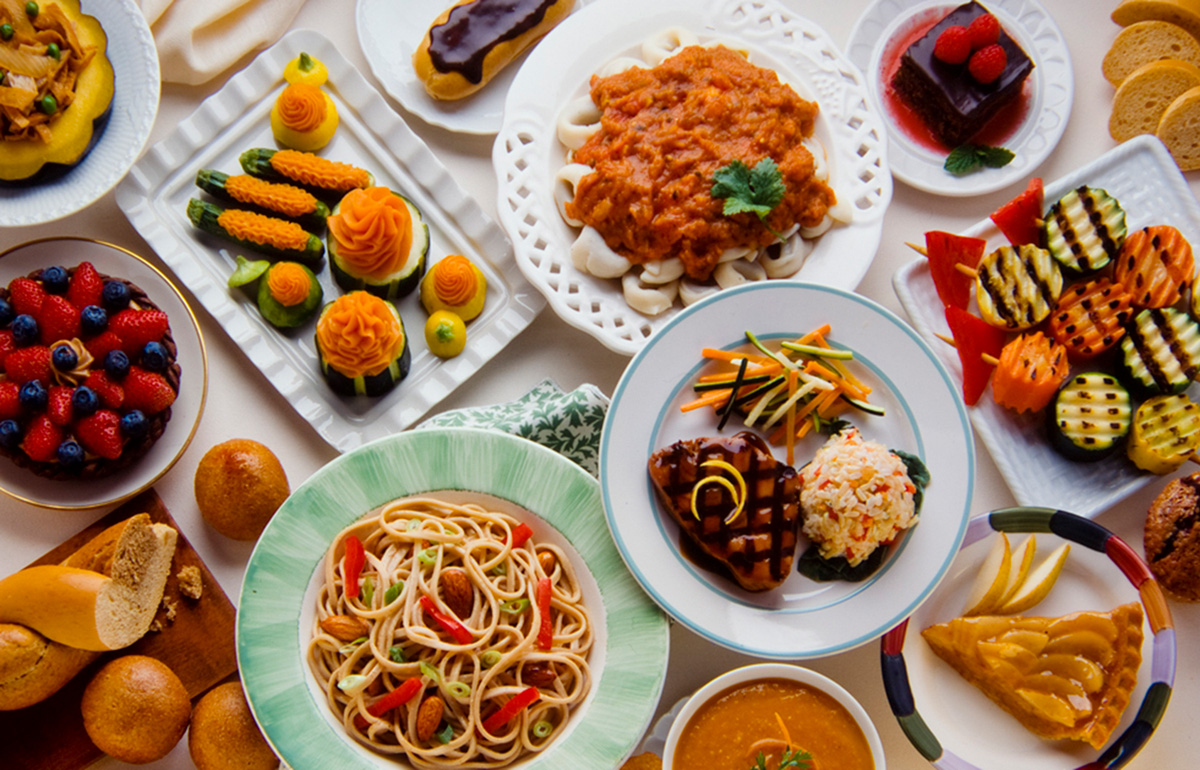
When shooting multiple dishes, it is crucial to work with a prop stylist. They have resources beyond the photographers’ prop room. They tend to watch trends and have a pulse on what’s hot and what’s not. It’s also important to know what foods will last on the set longer than others, especially with multiple dishes. In this case, it was the spaghetti sauce that was put in place last so the sauce wouldn’t run through the tortellini.
In 1986, I witnessed my first retouching job on a Scitex Response-300 computer and knew right then that I had to get into digital technology. By 1993, I was using a Kodak DCS 460 digital camera and stopped using film by 1995. I helped convert the Kraft Foods in-house photography department from film completely over to digital by 1999. I wanted to have more control over the quality of the final image using the digital process. With the art director on set, we could see instantaneously together what we were getting, and make sure the color and direction was correct. Color management in food photography is so important. Food products have a certain color and their companies pay extra to make sure their products are not falsely advertised.
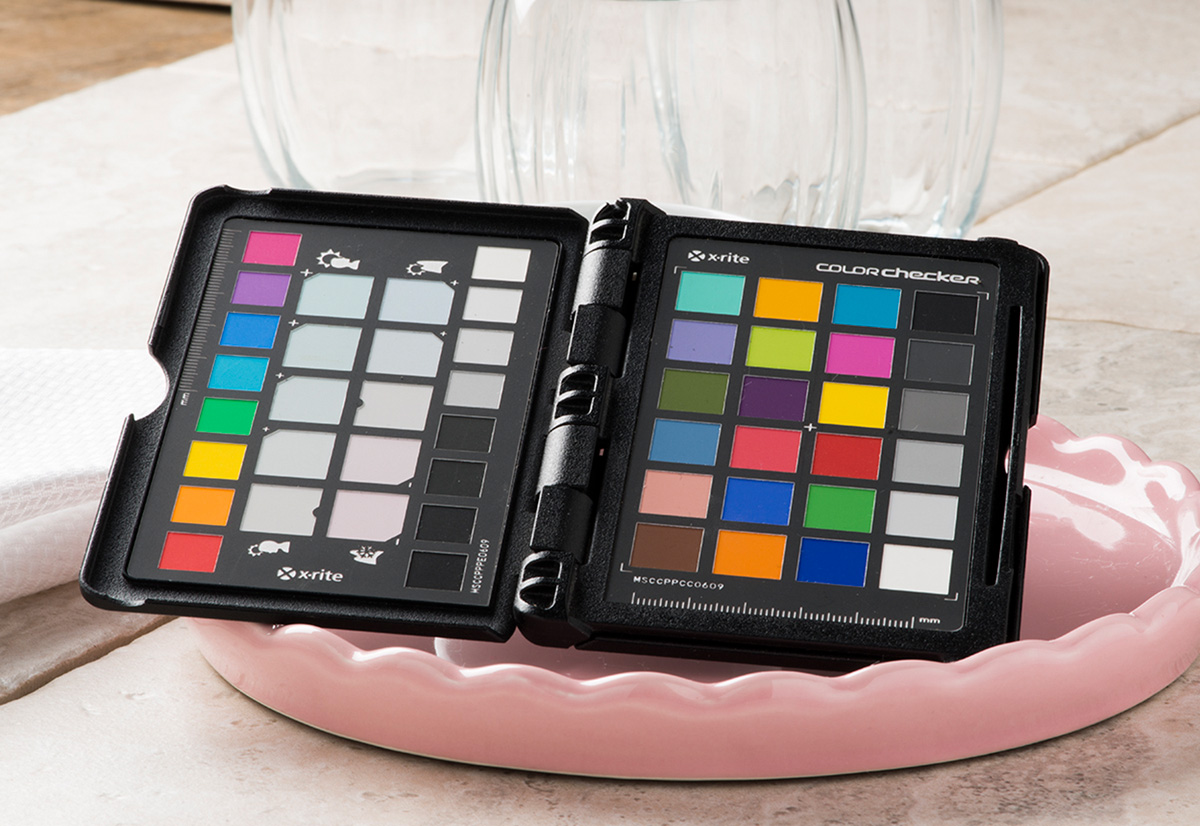
I use an X-rite color checker before every shot series to ensure the color is correct. Changing the color checker every time the light source changes is very important. This will ensure that the color of the food is right on.
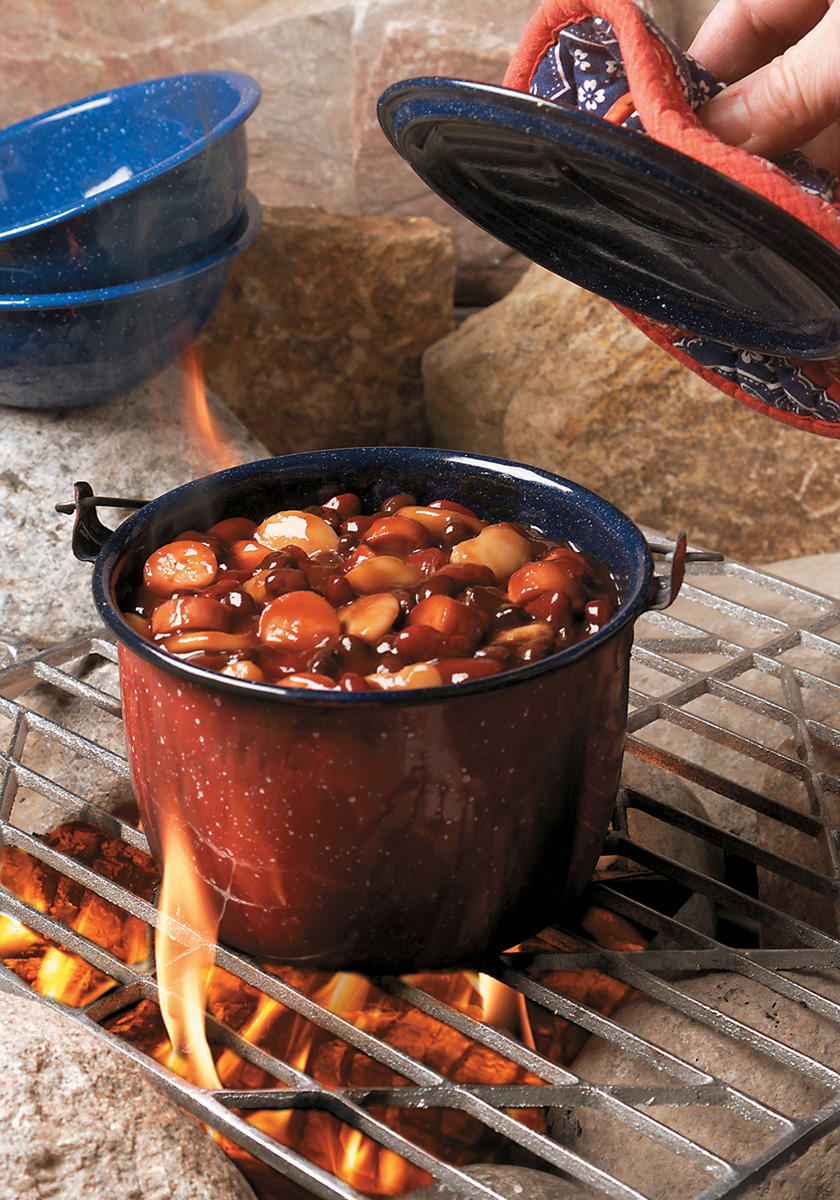
Even though Photoshop 2 was a big part of the digital process, at the time, I continued to have the mind set of getting things done on set, prior to engaging the camera. I used the digital technology to my advantage whenever possible. It helped me create these images using digital fire in a campfire scene, and digital water from a pool on the deck while still having full control in the studio. Then creating outdoor lighting effects on the food to match the digital images made them look like they were photographed on-location.

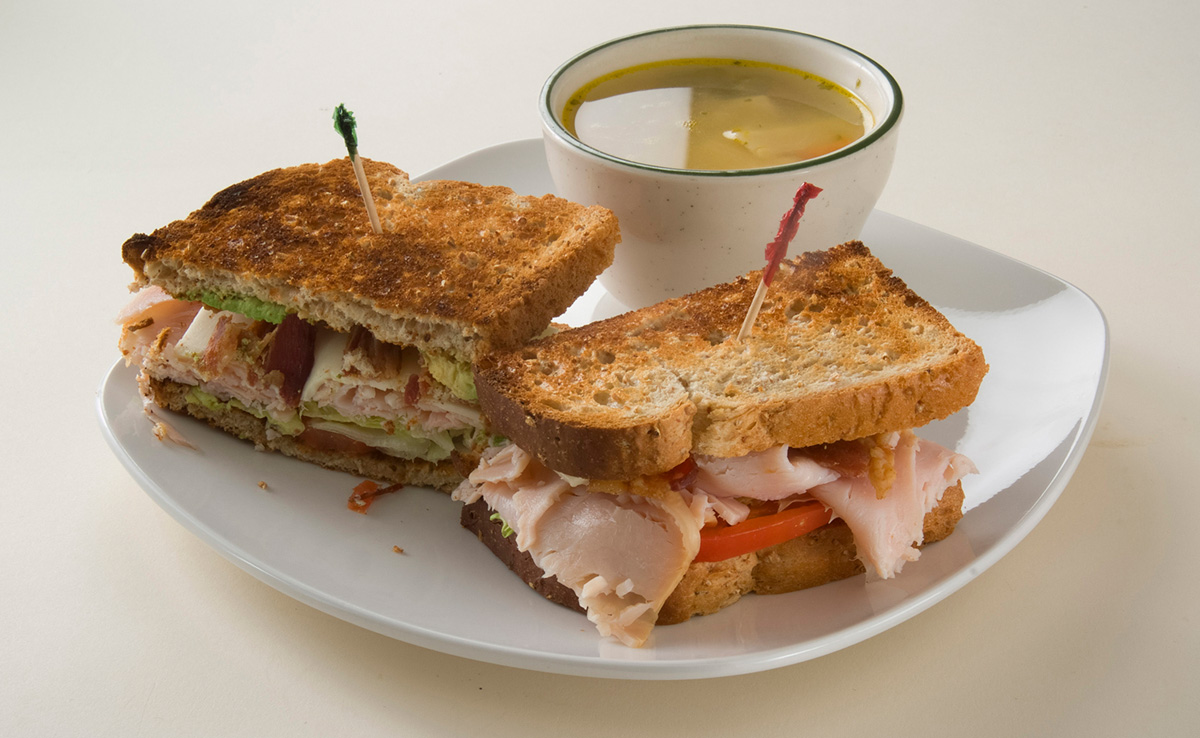
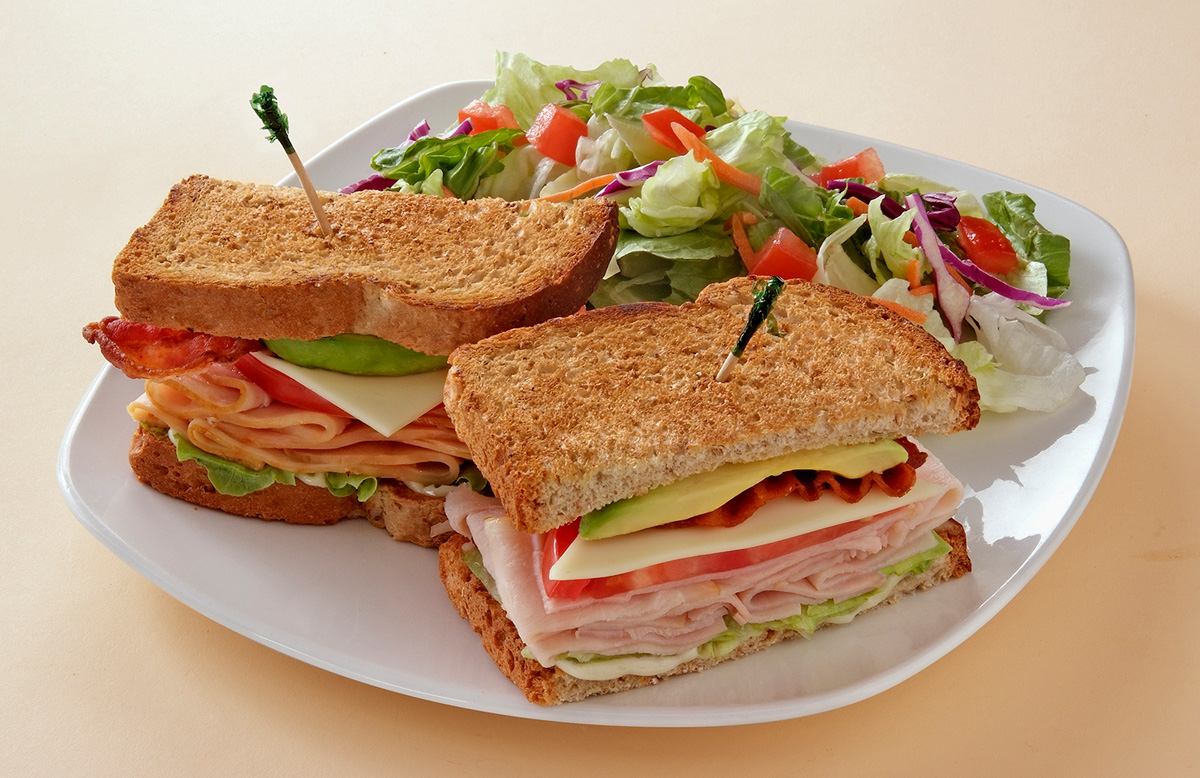
Working with a food stylist is a must when working with food products. The job of a food photographer is lighting, composition, and the technical aspect of the photo session. The food stylist’s responsibility is to make sure the food looks good for the camera. They get the camera position in relationship to the plate from the photographer, and then position the food on the plate to make the food look its best. Dummy food is usually used during the set-up. Dummy food is a representation of the hero food but not yet styled. This helps the photographer light the food and create the composition needed to make the food look great. In this case, the soup was replaced by a salad and the sandwich direction was changed once the client saw the dummy food shot.
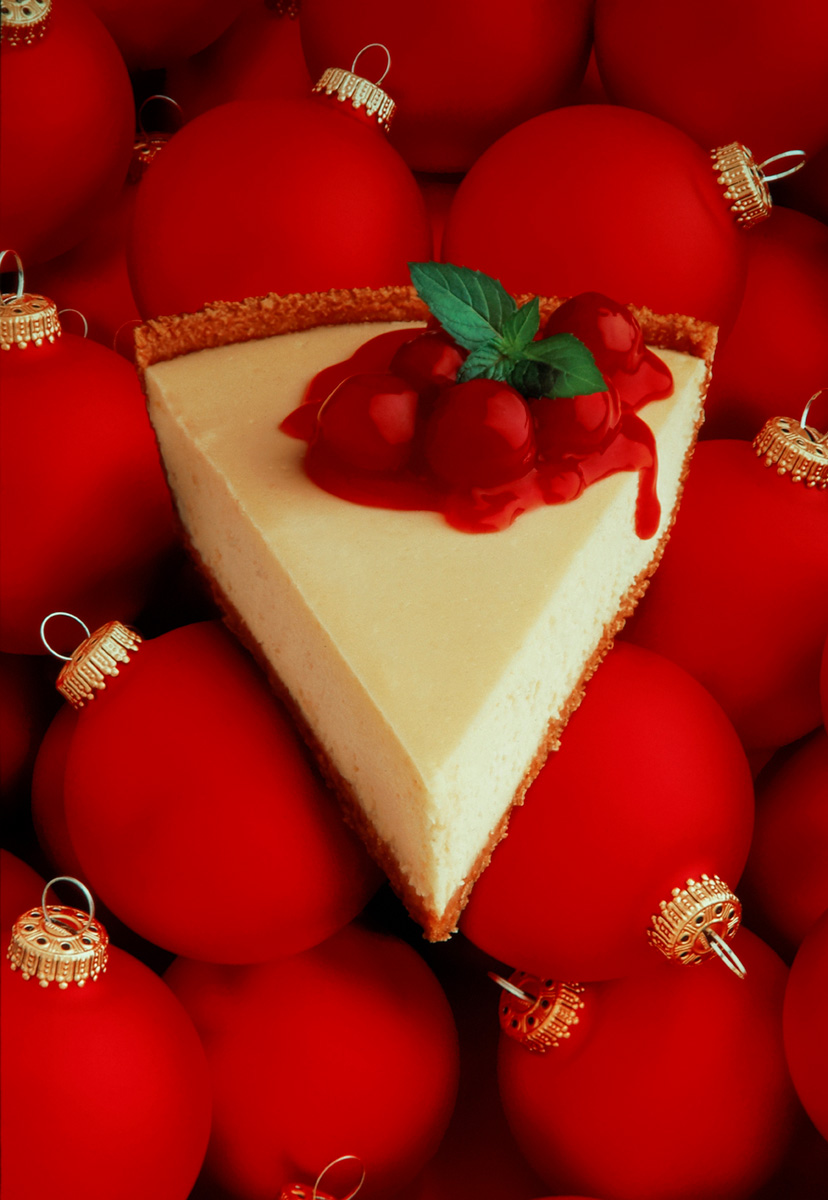
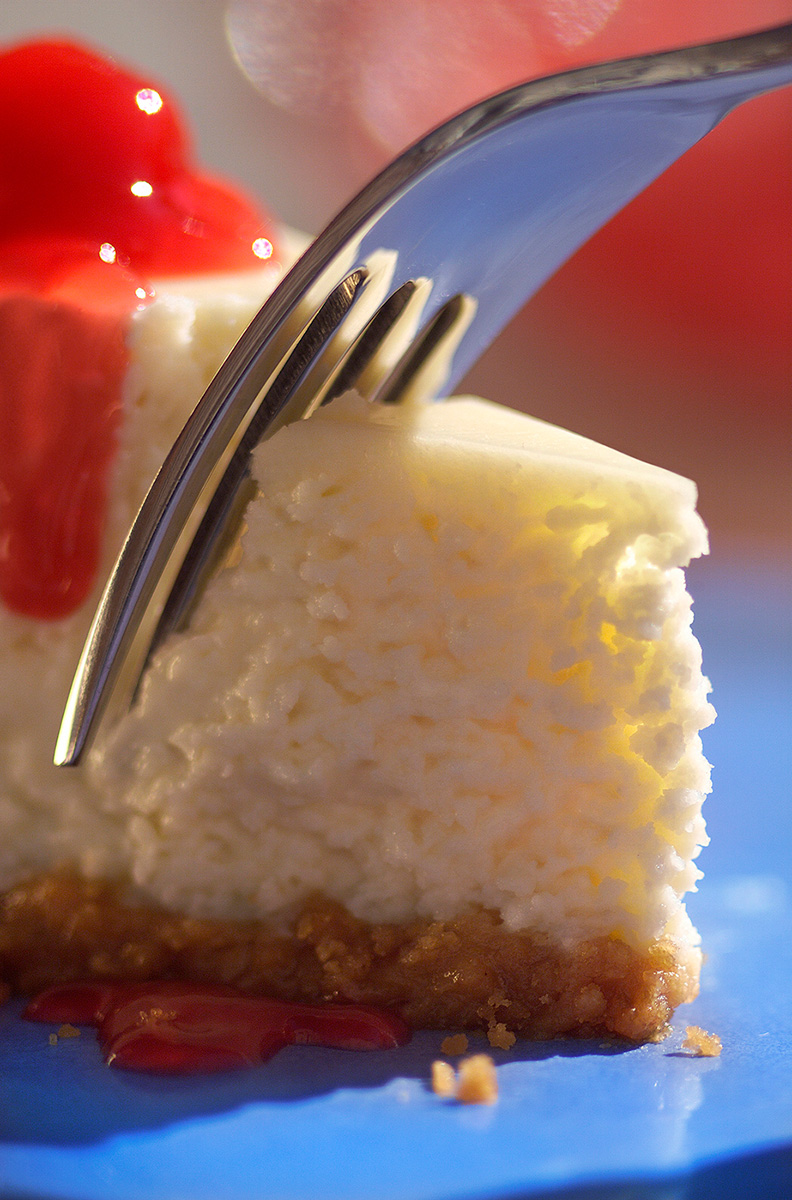
My favorite foods to photograph are desserts, for the obvious reason, they taste the best. They tend to be difficult to maneuver around the set during the set-up, but once the hero food is placed on the set, the shot is taken quickly before the food dies. My lens of choice is a Nikkor 100mm macro lens, and in some cases I love to use a bellows attached to my Nikon D800. It brings the texture and details of the food to the forefront. And the clients are thrilled because it shows off their product.
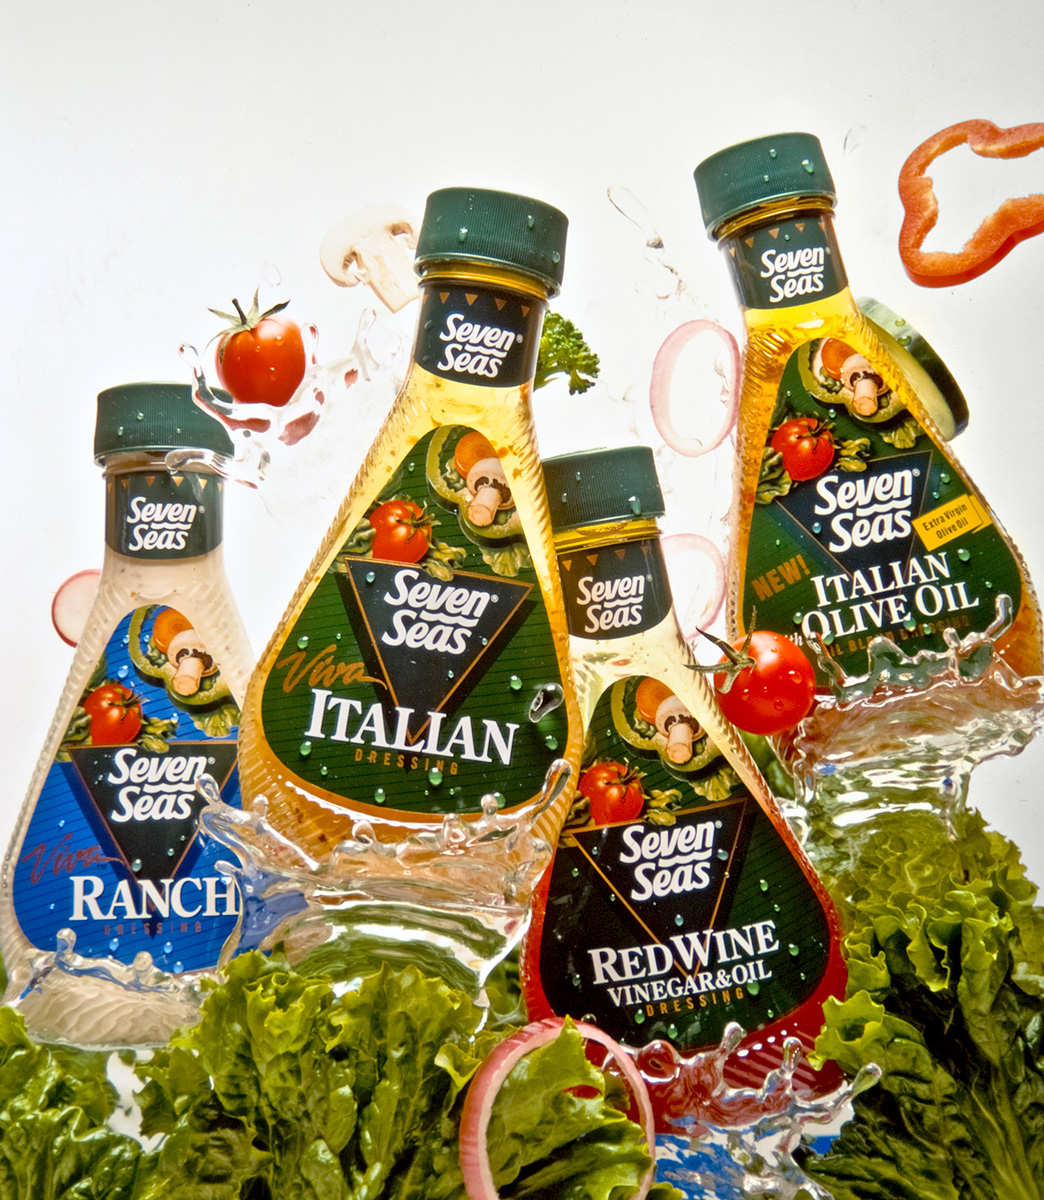
Another kind of food photography that I enjoy doing is packaging photography. It takes more patience because the image needs to FIT in between words, logos, or call-out flags. If there are multiple products, they all have to fit together like a family! Usually in this situation the camera angle is locked down so the position of the image stays the same throughout the series of shots. Notice the color under the plates on these packages change but the plate position does not.

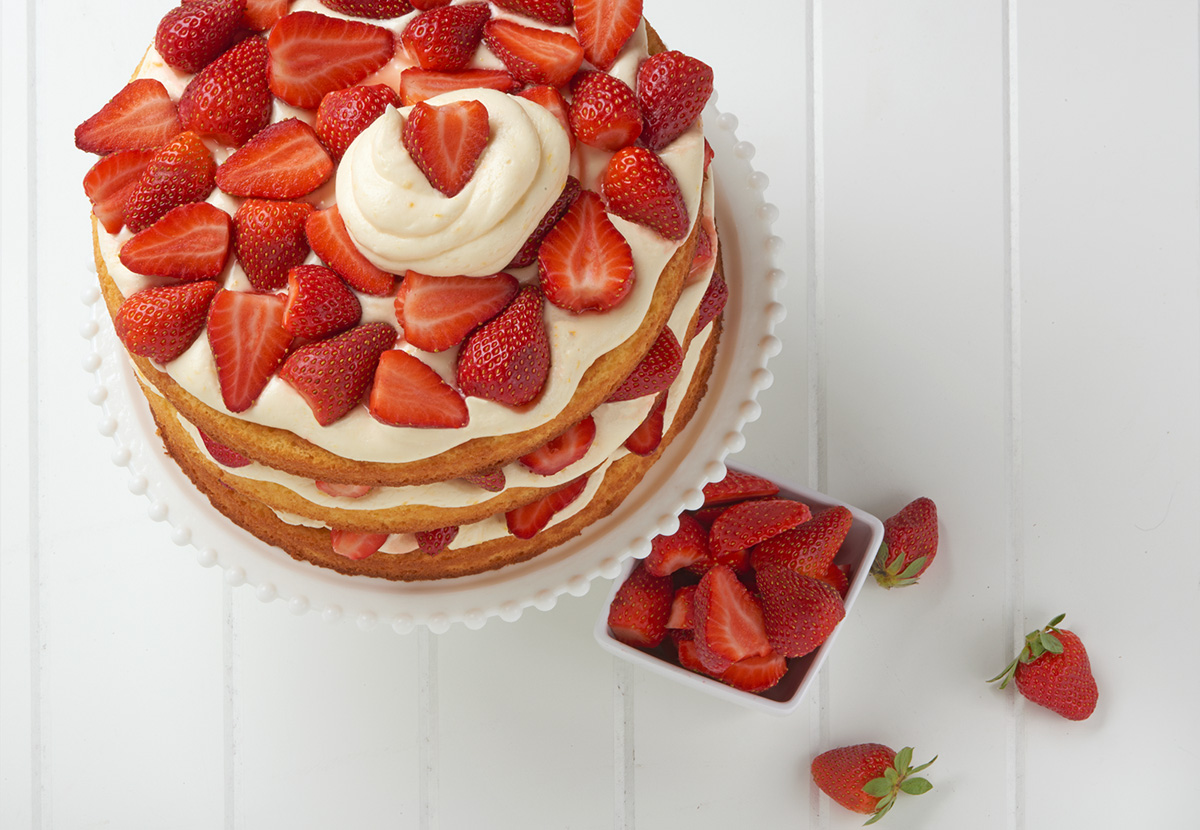
Styles and trends, like in fashion, come and go in food photography. It’s important to watch how these trends influence the images across all media. Over the past year, straight down shots have been the angle of choice. Panera, Qdoba, and Starbucks are a few companies changing their look to this elevated level. I just had a client this month that wanted to see their cake recipe from this angle, and they loved it!
Even some of the car companies are now using this look and some say that it’s because of the increase of drone photography that has inspired the look. But I guarantee you, this trend is not new. It was very popular in the late 80’s, and here is one of my shots of asparagus I did in 1988. I remember an art director back then, saying after meeting with a client, “Do they really want to shoot from above again? I’m tired of this angle” Watch for the new trend to take over, and believe me, it will.

Finally, the secret to good food photography is backlight. The food looks best when the shadow falls under the front of the food to act as a base for the food to sit on. The light from behind the food creates a highlight effect along the top and back edge of the food to give the food a heroic effect. Fill cards are used to bounce the backlight back into the front of the food, creating a soft and pleasing appetizing appearance.
In summary, remember these five steps when working with food:
- Listen to the client, It’s ALL about the product, not you!
- Talk to the art director, engage in discussion about the project prior to the session, don’t wait till the day of the shoot.
- Use a color management system to get accurate color.
- Hire a professional food stylist. (and a prop stylist when necessary)
- Backlight most food subjects for ultimate results.
Using these simple ideas will make your food images more appetizing and give the illusion that they are jumping off the page.
You can see more of Joe’s work at JGlyda.com, and follow him on Facebook and Twitter. Check out his courses on KelbyOne, and come see him at Photoshop World Orlando where he’ll be teaching a food photography workshop on April 19 and a class on creativity on April 21.
This post made me hungry! Beautiful photos. :-)
Joe –
Today is a hallmark day for me (in a bad way).
Your post contained just the right mention to pull me out of quite a funk.
My dad was a cheesemaker (mostly various cheddars) and later packaging plant guy for Kraft.
Seeing the packages brought back a lot of positive memories of my dad, who’s been gone for 10 years now. We have a phrase in my church “tender mercies” – it’s when something comes into your life as a providential guide or comfort that you need… Today, that “tender mercy” was a picture in your post.
Thanks for your post – good read as well as the pick-me-up I really needed.
Lyle
Superb post with stunning, colourful, and mouthwatering photos! I’ve done some in the past, but yours are truly inspiring. Thank you Joe Glyda for sharing your tips and experience – much appreciated!
Cheers,
Frederic Hore,
Montréal.
Great post! Thanks for sharing.