It’s #TravelTuesday right here on Scott’s blog, and that means that I, Dave Williams, am here!
It has been a full-on week with lots of prep and planning for a couple of upcoming missions for me. I’ve been working through files from my most recent trip to Norway, and I’m lining up ideas for a little trip to Dorset this weekend for my birthday. It’s all go here, and to top it all off, I’m formulating ideas for an awesome project that has already started rolling: The Diary of the Traveling Platypod, which sees a Platypod Ultra travel the world to help create amazing images (#TravelingUltra)! Larry, the creator of Platypod, sent it to Gilmar Smith to begin its journey, and now I have it! You can sign up here if you want to host the Ultra on its global journey.
But, let’s get back on track and take a look at a cool Adobe Camera Raw trick that can help you create an HDR look from a single file.
HDR (High Dynamic Range) is a look that has come in and out of fashion, but the concept behind it remains very useful. With this trick, you can take a single exposure, so long as it isn’t overly clipped either
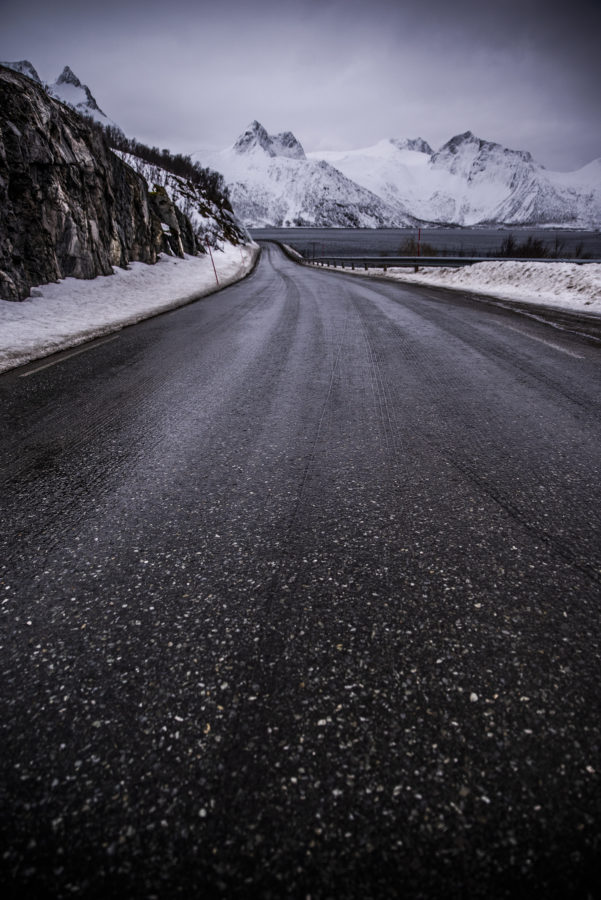
Here’s a fairly bland shot of a Norwegian road in Senja, turning a corner along the edge of a fjord, with the rugged mountainscape background (mountainscape—definitely a real word).
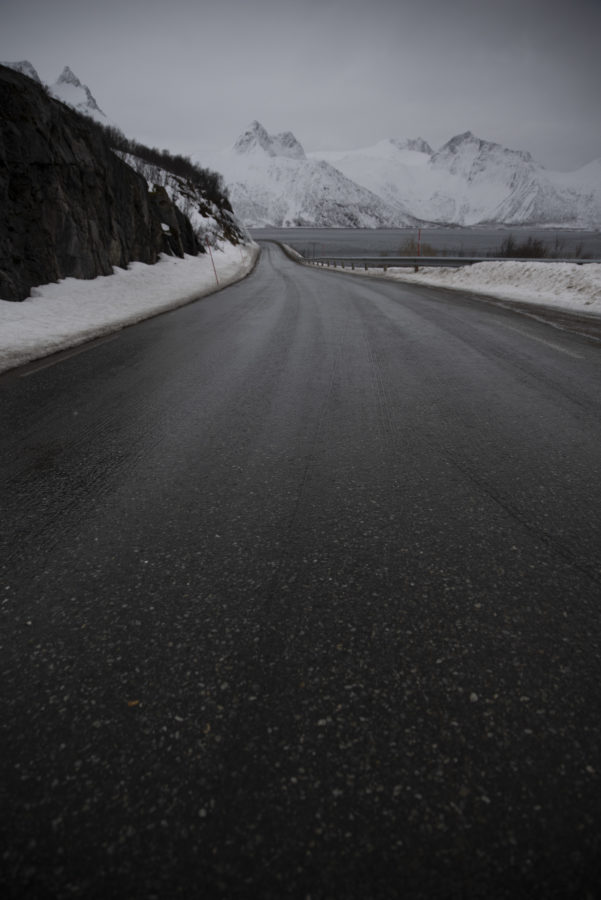
You can see it’s pretty “regular” looking—more of a snapshot than a creative photograph. By opening this RAW file in Camera Raw and maxing out some sliders, we can really bring it to life.
If we first consider what HDR processing involves, we can start by replicating it. We’ll do this by bringing in the darkest elements of the brightest exposure and the brightest elements of the darkest exposure by setting the Highlights slider to –100 and the Shadows slider to +100. We can give some “punch” to the image by also setting the Contrast slider to +100 and the Clarity slider to +100, increasing the contrast across the entire dynamic range of the image.
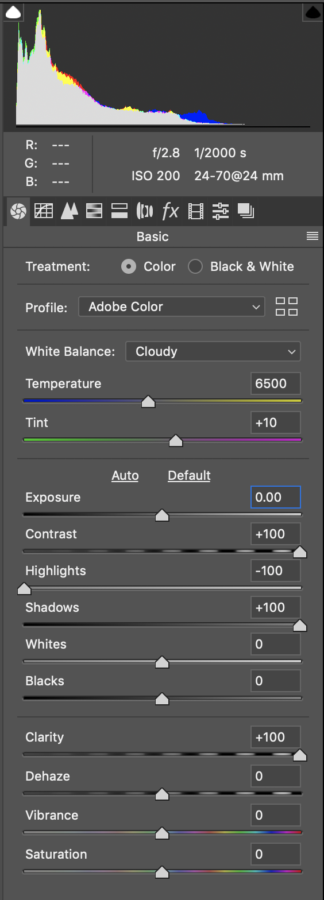
Once this is done, we’ll likely end up with something a little bit dodgy looking, but stick with me. The last little tweak is the Exposure slider. We’ll just move this slightly in order to reduce that overly dramatic hit. In this image, I’ve moved it to 0.60, and it has done just the trick.
We now have that HDR look from a single exposure, and it was incredibly easy!
Catch you all next week and, in the meantime, please do keep in touch over at @CaptureWithDave on Instagram, Facebook,
Much Love
Dave