When Scott asked me to pen a guest blog, I was honored and thankful to have such a great opportunity to reach so many passionate users of our application… Then I realized I’d have to constrain my piece some and focus it on a particular room in the funhouse that is Photoshop. I feel the same way when I’m demoing; whether I have ten minutes or two hours, it never seems to be enough time. So I’m going to attempt two things here; one, to deep-dive on some new technology that I haven’t seen thoroughly explored, and two, to let this post be a launch pad towards some great resources for information and technology related to Photoshop.
Of the many twists and turns that Photoshop has taken over the course of my (nearly) 10 years on the team, none have been as interesting to me as those related specifically to photography. My background is behind the lens and it’s my love for the medium that first drew me to Adobe. Being mindful of photographers and the applications we provide for them, today I want to focus on two features whose powers can be tapped directly from Bridge CS4, Lightroom 2.0 or from within Photoshop CS4 itself.
The ability to Auto-Align and Auto-Blend layers first became available in CS3; with them came vast panoramas and content so well aligned that opening eyes and turning heads was just a layer mask away. Of the dozens and dozens of new features in CS4, very few are as powerful as the changes we’ve made to these – if I weren’t so obsessed with combating feature bloat, I’d lobby for them to have a home all of their own, separated by name from their CS3 cousins.
Before we talk about what each of these does, I should mention how you can easily assemble multi-layered files. From Bridge, multi-select your images and choose Tools/Photoshop/Load Files into Photoshop Layers. From Lightroom, multi-select and Ctrl+Click on any of the selected images, then choose Edit In/Open as Layers in Photoshop – or from the Photo Menu, under the same heading. From Photoshop itself, navigate to the File Menu/Scripts/Load Files into Stacks (yes, “stacks” are the same as Layers and yes, I just reported that inconsistency as a bug).
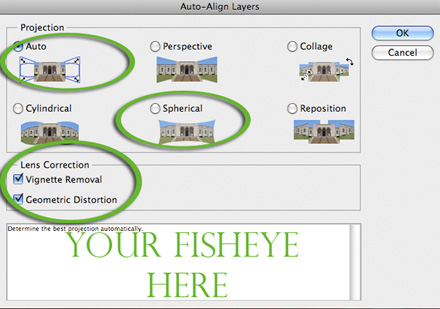
As of Lightroom 2.0 you could send those layers to CS3 and do any number of things with them, but a lot has changed in CS4. Starting with Auto-Align (even if you shot on a tripod, I still recommend Auto-Align, because minor movements in the lens are enough to disrupt the composition – if you’re shooting handheld, consider it mandatory) we see a litany of new choices; there’s a new Spherical projection that can render certain panoramas even more accurate than before, but if you’re like me that means another method to confuse you… Luckily, there’s a new Auto button too, enabled by default so you never forget. The Auto projection is very, very accurate; not only will it choose the best projection for the job, but if you try to fool it with two different panos of mixed files, it’ll chew through them and assemble two panoramas on one canvas – just like you asked!
We can also now remove vignettes as we align. Not only does this get us further, faster than CS3, but it keeps you from having to tune images prior to loading. For a comparison between CS3 and CS4, look here.
There’s a checkbox to counter Geometric Distortion as well. This helps in many situations, but is most obvious when you stray from the tripod or don’t have your lens consistently perpendicular to your subject. Those of you shooting with a fisheye lens are in for a treat the first time you go to align your ultra-wide imagery – we’ve profiled the most popular fisheye lenses and built custom corrections for each!
In addition to telling you more about what’s new in Auto-Blend, I also want to SHOW you (thanks Scott for getting me to try this out instead of talk about it!). Auto-Blend as we knew it in CS3 was the next logical step after stitching together a pano; the blend would smooth any seams and make several images appear as one. As you can imagine, this works even better than before…but it does more too; CS4 can now blend focus as well! I often demo this feature with several images of books, which I photographed in varied, shallow depth of field; I show how light and focus can effectively be “bought” after-the-fact, via software and one composite can be rendered. A couple weeks back I was asked, “why not just shoot those books at f/8?”. Not a terrible question. While I know a number of product photographers already benefiting from the feature, I think what they were after was, “what else can I do with it?”
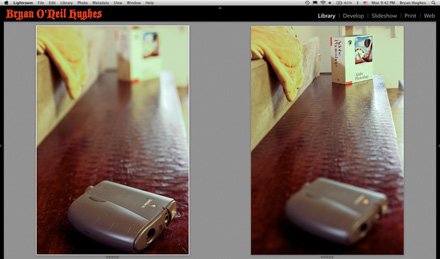
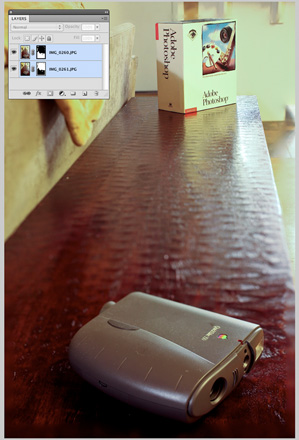
I decided to try something photographically impossible: take two images, one with focus solely on a foreground subject (my old school Apple QuickTake) and the other with focus solely on a background image (my older school 1.0 copy of Photoshop) and merge both together – sharp on each subject, blurred in a soft bokeh before, between and after. I’ll be the first to admit that this experiment calls for something much more interesting (I’m imagining a band photo with members at dramatically different distances, in a field, each member in focus, focus blurred all between)…but the result is pretty cool.
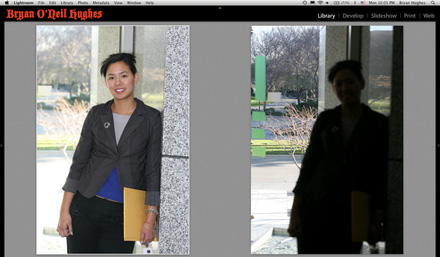
Here are the originals, side-by-side in Lightroom:
And here’s what Auto-blend was able to do with the focus and blending (note the detailed masks that CS4 built):
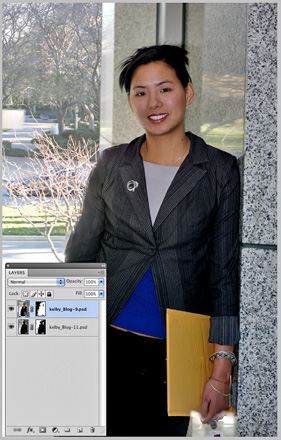
Those following along in CS4 may have noticed that Auto-Blend has one more trick up its sleeve – a seemingly minor checkbox titled, “Seamless Tones & Colors”. In the example you might have seen of my old books, I celebrate this feature’s ability to bring a balanced exposure to my wonky series of captures. I remember hearing from an engineer that it “could do more”, and with only minutes between meetings I dragged my colleague and fellow PM, Zorana Gee aside to see if it was true. I understood that the color blending was so good that you could take an image with and without a flash and merge them into one. My capture breaks a number of rules but still works fairly well. I show you my half success below as much as a learning experience as anything. Here’s what I came up with when shooting an image of Z with flash and an image out the window (behind her) without. All told, not too bad.
What did I learn? It’s DEFINITELY possible, the shot wants data (not 2 shots like I went with, but ideally 4 or 5), stabilization (amazing how many problems a tripod solves) and a couple of paint strokes on the mask. It’s very important to be focused on each area that you want to appear in the merge, because Auto-Blend (in this case) is detecting the sharpness of neighboring pixels.
As a photographer, I spend a lot of time with my large volume of images in Lightroom. But I’m thrilled that when I move over to Photoshop I can take my winning images further, faster and with more power than I’ve ever been able to in the past. I really believe that the two coupled are the ultimate workflow solution for professionals. Below are just a few other random examples of how new changes to CS4’s masks, adjustment layers, dodge, burn, sponge tools and much more are making my job more fun than ever and taking my images well beyond the digital darkroom…
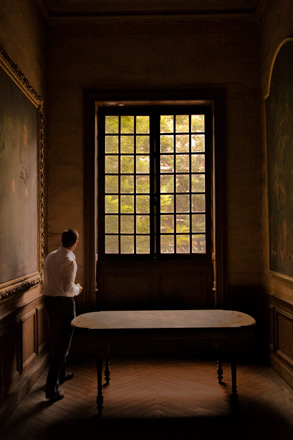
With a few quick Adjustment Layers and a low opacity Multiply Blend Mode, Adobe VP, Kevin Connor looks like he belongs in a museum ;-)
Photomerge meets the new Dodge, Burn and Sponge tools in this shot from a recent trip to Death Valley.

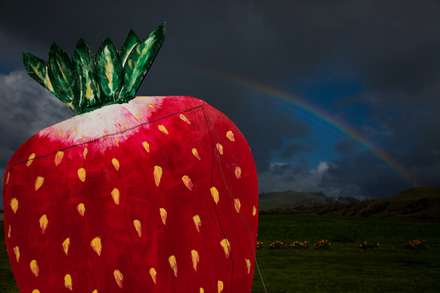
An interesting morning made to look the way I SAW it with the help of CS4’s new on-image Hue, Sat and Curves controls.
If you’ve found your way to Scott’s blog, you’ve already found a treasure trove of incredible info; if you’re NAPP members, you have that much more. Below are a few bits and pieces from within Adobe…including some of the demos and features that are referenced above.
Videos:
Shorter:
Longer:
View full size here.
Blog posts:
Much more from me regarding CS4 for Photographers:
http://blogs.adobe.com/jnack/2008/11/cs4_for_photographers.html
My friend and colleague, John Nack chronicles all of the little things – CS4 Sweating the Details:
http://blogs.adobe.com/jnack/2008/09/cs4_sweating_the_details.html#more
Paul Burnett challenges CS4 to merge a coffee cup full of images:
http://www.mad.com.au/blog/?cat=8
The incredibly busy Julieanne Kost:
http://www.jkost.com/photoshop.html
The inimitable Russel Brown:
http://www.russellbrown.com/tips_tech.html
Thanks for reading, I hope to see you at an upcoming show or event,
-Bryan O’Neil Hughes


