In today’s blog, I will be discussing two of my favorite shoots from the past year from start to finish. They showcase my love for fun and unique subjects, working on-location, and using Photoshop to bring elements of a photoshoot together to create a strong final image.
SWAT TEAM SHOOT:
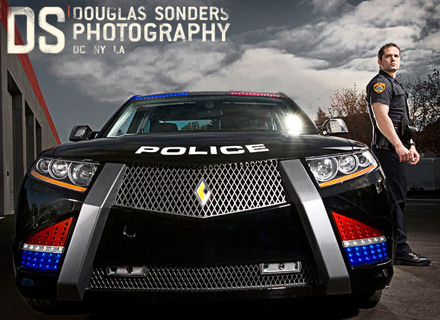
In the Spring of 2008, the Howard County (Maryland) Police Department hired me to shoot a variety of promotional and recruiting material. I photographed patrol vehicles, K9 units, bicycle officers, community relations, etc. Although, the SWAT team portion of the job was by far my favorite. Maybe I just watched too many action movies with my big brother growing up.
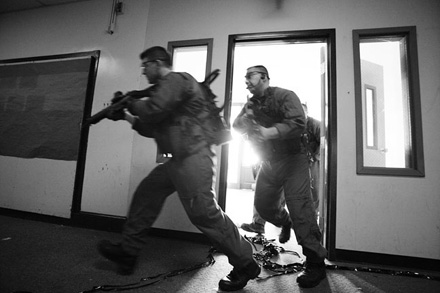
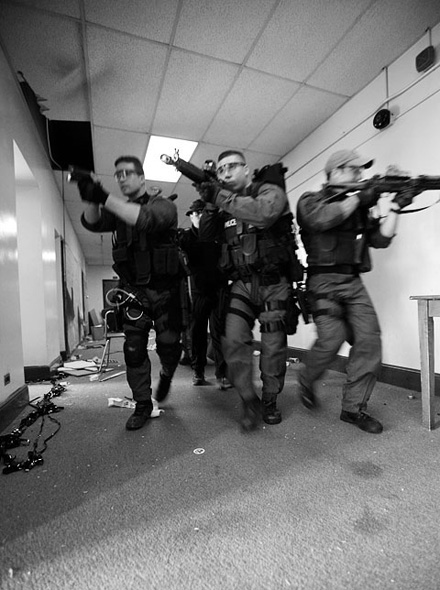
We started the day in an abandoned high school near Baltimore, Maryland. They were running training exercises pretending to rescue hostage victims from terrorists. I took a lot of natural light shots with my Canon 1Ds Mk2 body and my trusty Canon 16-35 2.8L lens. Due to the low light scenarios, I shot at 1000iso at f/2.8 and very slow shutter speeds (around 1/10 of a second). I had to use something I learned from living on tour buses and shooting thousands of photos of bands in low-light back rooms and concert venues, control your breathing and use any object (wall, pillar, an assistant’s back) as a makeshift tripod when you can’t bring one with you.
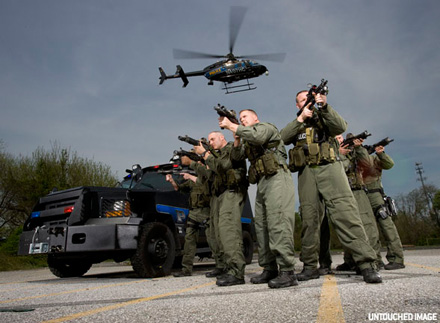
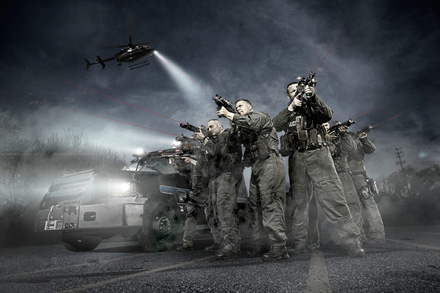
Next, we moved outside to do a set-up portrait of SWAT team members in action with their armored assault vehicle and their new Bell 407 pursuit helicopter. Boy were the neighbors concerned to see a police helicopter hovering 20 feet off the ground next to the old high school and 7 SWAT guys with large guns pointed at a guy with a camera.
The biggest issue we faced with this photo was the wind produced by a low-flying helicopter; thus, using my favorite Photoflex Extra Large LiteDomes were out of the question. In fact it was so windy, I had to have 4 police officers volunteer to hold my lights with only 7′ reflectors attached to make sure they didn’t blow away. Trust me when I tell you that I was eating bits of gravel for a week after that shoot.
{module:vimeo_guestblog120308}
As you will see in the video, I used 3 White Lightning X1600 strobes (660/165 true Ws, 1600/400 effective Ws) set to 3/4 power with 7′ silver reflectors attached as fill to the left and right of the SWAT team, and a White Lighting X3200 strobe (1320/330 true Ws, 3200/800 effective Ws) with a 7′ silver reflector set to 3/4 power to be used as the main light. I set it a little higher than my subjects and pointed it down to give them a dramatic overhead light. I wanted to shoot with enough light power that I could shoot at 1/160 at f/18 at 100iso, thus, turning a bright sunny day into a moody dusk shot.I used a police radio to have the helicopter position itself in the frame. The shoot itself took only 15 minutes. Any longer and I believe we would have died from rocks to the head from the low-flying Bell 407.As for on-site power, I used 2 Innovatronix Tronix Explorer battery packs (a great value for the dollar) and my SUV, which I converted into a 2000 watt sine wave power inverter, but that’s an entirely different blog for another day.
I couldn’t contain my anticipation to sit down the computer and begin editing. Here are the initial steps I made when I did my post-production:
- IMAGE >ADJUSTMENTS > REPLACE COLOR. I selected the blue-ish sky and decided to desaturate it 75%.
- I used the burn tool set to 15% exposure on the “shadow” range and burned in the gravel on the bottom of the frame to give it a gritty look.
- I used burn tool again set to 15% exposure on the “midtone” range and burned a slight vignette effect by hand to the edges of the photo.
- I wanted to add a high-pass “pop” to the shot next. Here are the steps I took
- Create duplicate layer of the original image
- Selected that duplicate layer and selected the Hard Light blend mode and set the layer’s opacity to 33%.
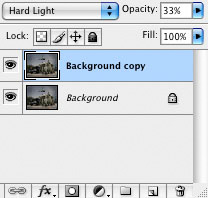
- FILTER > OTHER > HIGH PASS set the Radius to 29.0
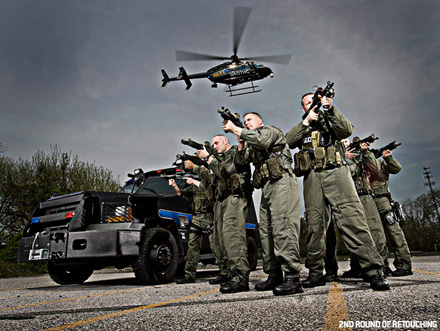
- At this point the shot was looking pretty moody and dark. High pass has a tendency to create a halo effect around the helicopter/SWAT team/guns/truck, which can be good or bad depending on the look you are going for, which I would probably choose to clone stamp out, but that would take a lot of time and I wanted to try out my new retoucher, Justin to do some special effects.
- I called Justin and we had a discussion about where I wanted to go with the photo. I wanted to add laser sights to the guns, a spotlight out of the helicopter and lights coming out of the truck. Justin suggested we turn the shot from dusk to night and make it foggy. Sounded great to me!
- Justin proceeded to clean up the image, removing imperfections (comping, warping, or liquefying)
- Next, Justin adjusts the brightness and contrast to add POP to the photos before applying color effects, where he makes it more moody and adds cool tones.
- Justin next applied the special effects (smog, lasers, and light beams). Justin requested I take a bunch of photos of clouds in the sky during a sunny day. According to Justin: For the smog, I used the clouds with different opacities and layer filters to get a certain look….I would then duplicate it and adjust it on the layer mask so some parts would be shown and some taken away.
The laser beam was pretty much the same thing as the smog…..They were created using multiple layers with masks to it so it looks like it’s affected by the smog
iii. The headlights were rendered digitally from scratch using the brush tool. Pre-existing elements that the light went over or fell on (say the bumper on the armored car for example) were brightened using the dodge tool and selective use of curves to further assist in creating the light beam effect. The headlights are also multiple layers. If you study how light works and how it interacts with its surroundings, then you can guess where the light would be strong or eventually fade out in the image. After I created the main light beam effects on the truck and the helicopter, I would add the light effects to the SWAT team as if the lights from the vehicles were actually hitting them.
The SWAT team shoot is a perfect example of the importance of a commercial photographer having a retoucher you can really trust and rely on. I did my own retouching for years, but there were things I wanted to create in my images, but simply didn’t know how. Don’t get me wrong, I still do a lot of my own retouching, but it is a huge help having a team of people (producers, stylists, assistants, retouchers) you can work with that understand what you want to accomplish with your photos and can help you do so.
SECRET AGENT SHOOT:
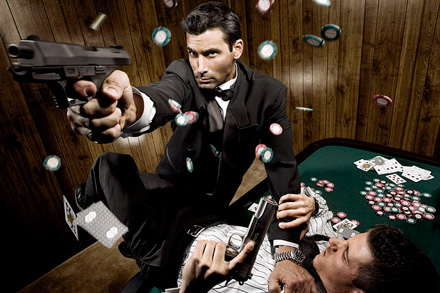
I put together this photoshoot late last year with some police and model friends for my portfolio. I always loved James Bond movies growing up, so I figured it was worth creating my own vision using the film series as inspiration.
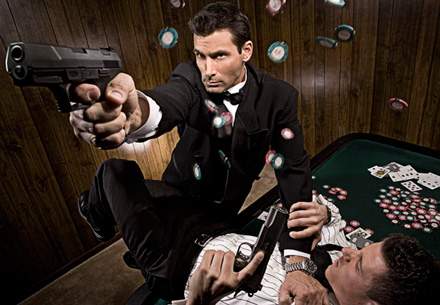
For this photo, I wanted to create a casino action shot with 2 models–chips flying in the air, gun in the viewer’s face.
We didn’t have a real casino, so we got an old pool table, covered it with green fabric, and brought some poker chips and playing cards from home.
{module:vimeo_guestblog120308b}
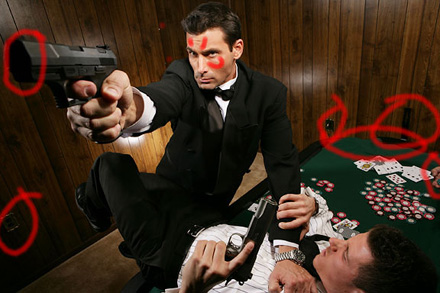
As you can see from the video, I shot White Lighting 22″ beauty dish mounted to a White Lighting X3200 strobe (1320/330 true Ws,3200/800 effective Ws) set to 1/2 power placed above the models. I had a bare bulb White Lightning X1600 strobe (660/165 true Ws, 1600/400 effective Ws) on a short tripod behind Bryce (James Bond) to separate him from the background. I had another White Lightning X1600 strobe with narrow barn doors to the left of the frame aimed at Jonah (white shirt model on table) for a little fill. I had another White Lightning UltraZap1600 strobe with 30-degree honeycomb grid aimed at the table behind the subjects so it would not look too dark (losing the environment. I had a last light, another White Lightning X1600 strobe with narrow barn doors, aimed at Bryce's face to make him pop out from the frame.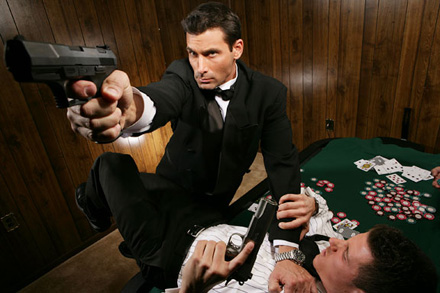 Above, you can see the first, untouched version of the photo.
- I marked up the photo to note what things I needed to remove/change. I had to get rid of wall plugs, I need to round the table out and get rid of the loose fabric, remove the hand of the assistant ready to throw chips in the air, soften the lines in the model’s face, and I needed to drop in another shot of the gun barrel so it wasn’t a black hole.
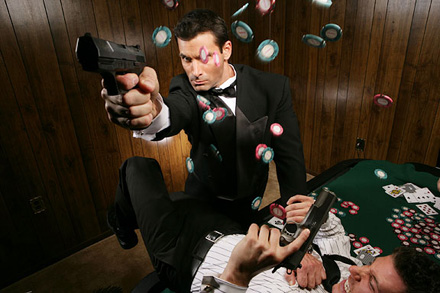
- I took a variety of photos with 2 assistants throwing boxes of chips and cards in the air. I would use the magic wand tool to select each chip and card that I liked and would drop them into the final image. I probably used chips and cards from 3 different photos.
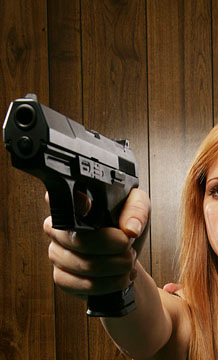
- Above is the shot I used to pull out the end of the gun to drop in the final image. I had to dodge and burn it to blend it into the gun properly. Also slimmed out the end of the barrel using a simple Free Transform tool.
- We are getting closer now. You can see the gun barrel dropped-in, the wall plugs removed. And the edge of the table has been rounded out and fabric removed. You can also see I started dropping-in poker chips from other photos. I applied a slight motion blur to some of the chips to give them a little more directional motion. Next, I wanted to make the gun look like it was firing, add a little highlight to Bryce’s hair and tweak the color and brightness so it was dark and moody, but not too dark.
- I called my retoucher, Justin, and had him make the gun look as if it was firing. He completely rendered the firing motion and the empty bullet casing flying out of the gun. He also redid the edge of the poker table for me so that it looked a little cleaner.
I hope everyone found this blog helpful. It is a pleasure writing for you. Feel free to contact me (
Douglas@SondersPhotography.com) if you have any photo questions for myself or my retoucher, Justin.
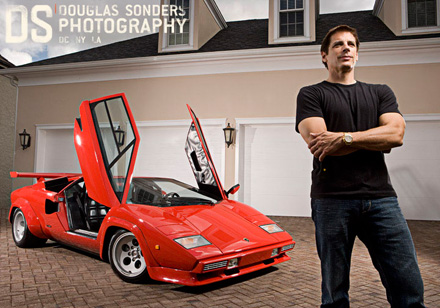
Here are a few more samples of my work, and you can also view my website for even more.


