Dustin Snipes is a full time staff sports photographer and part-time Red Bull drinker in Los Angeles, Calif. When he is not taking photos (or drinking Red Bull) he spends his time watching reruns of “How I Met Your Mother.”
For the last few months, people have been asking me about the post-production involved in the photos on my blog post “70 basketball portraits I did in two days.” I always planned on sharing it with everyone but just haven’t had time to put anything together until now. Recently, I was asked to do a guest post for Scott’s blog and thought, “What better way to share this Photoshop tip with everyone than on Mr. Photoshop himself’s blog, Scott Kelby?” I was pretty giddy, to say the least.
It’s actually a pretty simple process that has a few steps to get this “look” (and it’s not LucisArts or HDR :) ).
Here goes:
There is one thing you must promise me–and yourself–before reading this post. Repeat (or read) after me:
“I, (state your name, or clever web user ID) will not overuse this technique on EVERY photo I take. I will only use it in moderation.”
Good, now that we got that out of the way, I just want to say that I don’t have an action made, nor do I think you should make one with this style of post processing. It all has to be about feel and knowing when you have gone too far or when to go further. It all varies depending on the scene and lighting. On this session of portraits, I went further than I normally would because that is what the client needed.
Step one: Lighting
To get a hard look, you have to have a hard light. I started with a three-light setup for most shots: Two back lights set at full power (Alien Bees Ab800) behind the subject, hitting the sides of their faces, and one in the front at a lower power with a small softbox. I added a fill light and background light when needed. See setups here.
This light setup changed slightly depending on the subject.
Step two: RAW Conversion
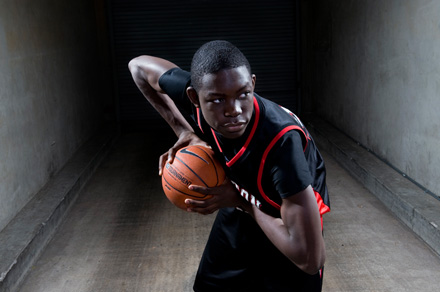
On this photo I started with a RAW conversion and just slightly tweaked levels to get the photo at a good color and contrast. The photo below is very close to raw, I cleaned a few dust spots that were on the photos from not cleaning my camera before…oops.
Step three: Dodge and Burn
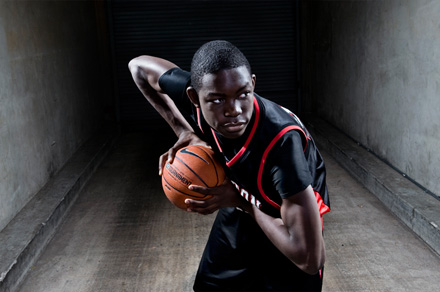
The next step is the one that really gives it that 3-D look. It’s where you take the subject’s highlights, shadows and features and “carve” them out using dodging and burning.
Now there are a ton of ways to do this, but this is how I do it. I first create a new layer by pressing command+shift+N or by going to Layer/New on the top bar. I then change the blending mode to Softlight. Then change your brush opacity to 5% and make sure it’s on 0% hardness. You can make two layers, one for highlights, one for shadows, but I usually just use one.
Next I go along and “paint” (with the brush) or enhance shadows and highlights that are already there. This really makes the photo pop out.
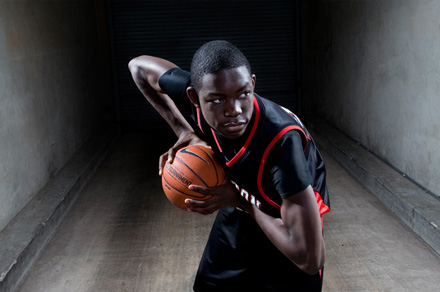
Step four: High Pass
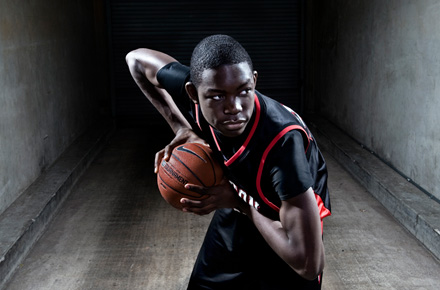
I enhanced the contrast by duplicating the original image layer and de-saturating it by pressing command+shift+U. This is important. If you don’t do this, your photo’s color will be really off once you select your blending mode. Then I select either soft light or hard light, depending on the amount of contrast I want to add.
The next thing I do is go to filter/other/high pass. This is what gives it the shinier look. This is also a key step because you must use judgment to determine how much of the effect you want. I usually go from somewhere between 100-200 depending on the amount of highlights I want to bring out. Again, you have to use your best judgment on this.
If the effect is still too much, be sure to use your layers window and decrease the opacity on the high pass layer.
Step five: Color
The next thing I did was de-saturate the reds in the photo. I used the hue/saturation window for this and changed the edit color from “master” to “red.”
Again, use your best judgment on this as well and take down as much or little as needed.
After I de-saturated the reds, I cropped and turned the image.
Step six: Final Touches
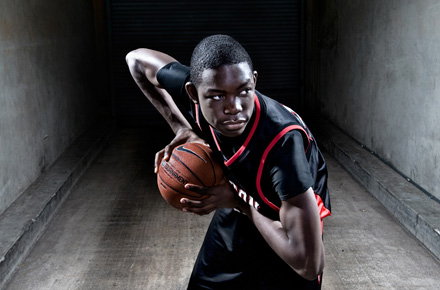
I’m almost done and I have the look I want, so I increase the contrast and brighten the photo.
Below is my final layers window.
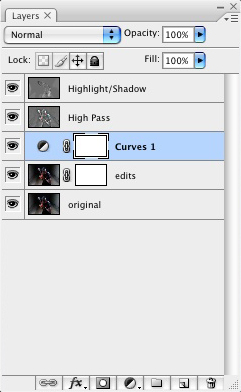
Conclusion:
As you can see, a lot of it is manual Photoshop, where you should tweak certain aspects and not rely on an action.
I hope that helps some of you in your Photoshop quests.
I would love to see finished products, so be sure to leave your comments here or on my blog with links to your finished work. If you have any questions, feel free to ask.
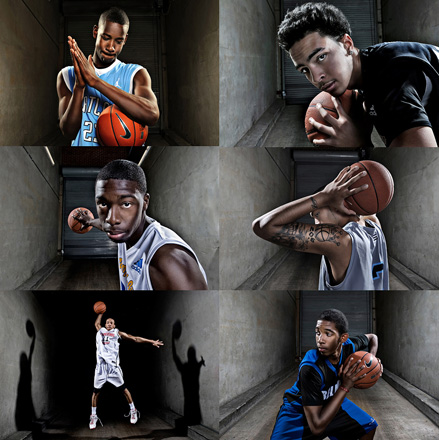
If you would like to see more photos and set up shots from the shoot, head over to my blog or click on the photo below.
Thanks for reading!
Dustin


really….?
so many mistakes in the text… missing the 50% grey fill spelling mistakes…and on and on and on
and u guys really think this is good.. crap!!! grat outcome in the pic yes no doubt… but the text and didactcal: crap!!!
Great tutorial!! Thanks so much for sharing!