
Editor’s Note: With next month’s KelbyOne Live conference coming up, I wanted to share a past guest post from one of the talented instructors (and one of my favorite people), Gabriel Biderman!
Shooting Stars
Admit it, you are enamored by certain stars; you follow and keep track of all of their movements. I’m a sucker for stars too, but more of the celestial type. There is a certain magic to shooting at night and capturing what can’t be seen with the naked eye. Hopefully these tips will inspire or help you improve your night visions.
The Right Stuff
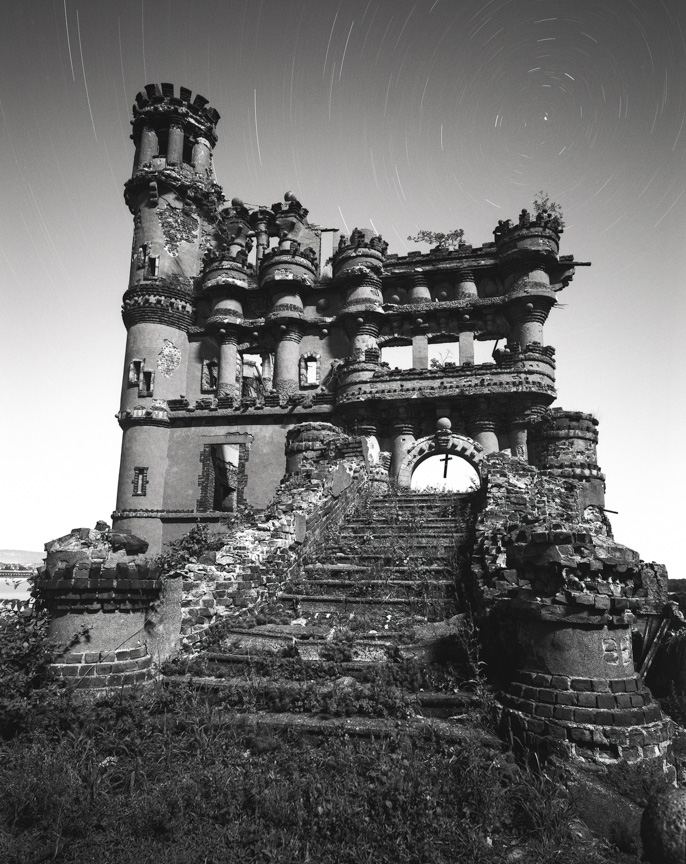
In order to successfully capture the night I would recommend a digital camera from the last 2-3 years, a sturdy tripod, and a cable release. I tend to shoot wide, 18mm-21mm, to include more of the sky. However when shooting wide, it is very important to incorporate an interesting foreground. Trees, rocks, and structures will add more dimension and scale against the night sky.
Get Out Of Town
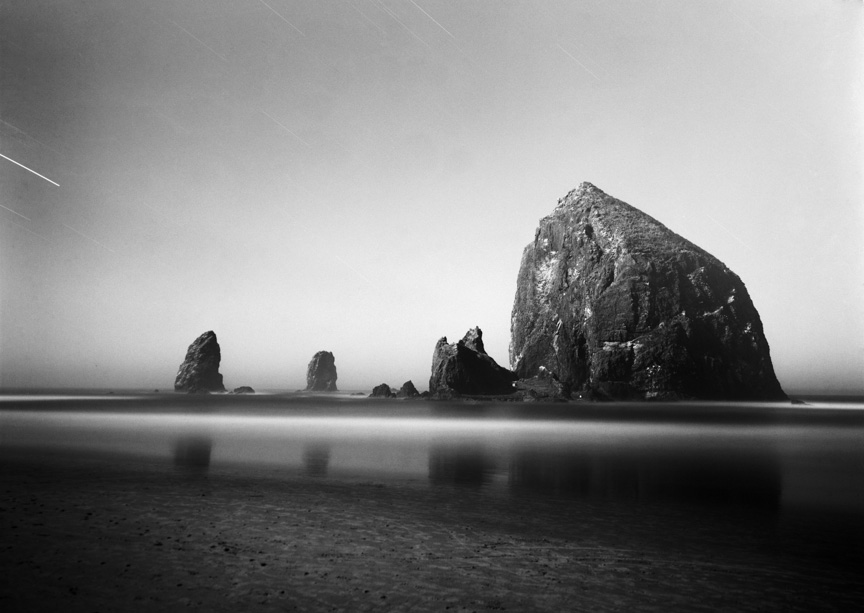
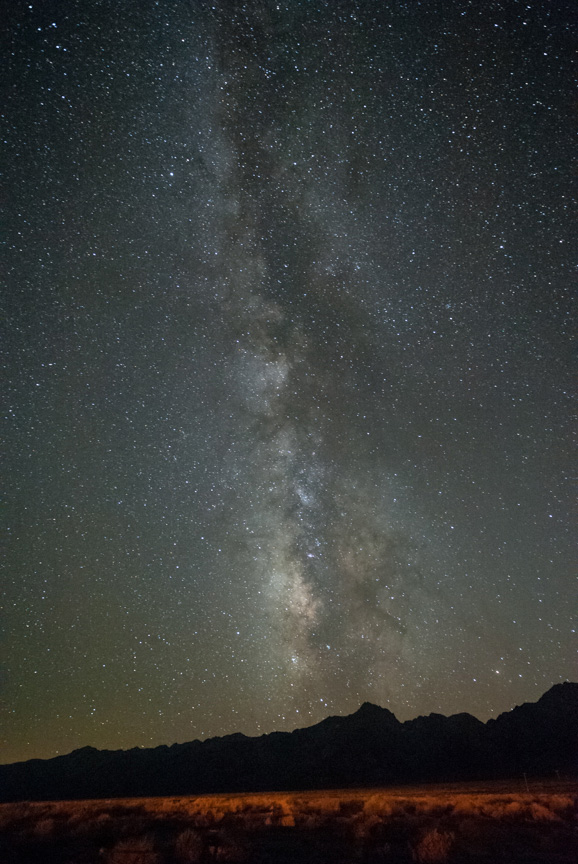
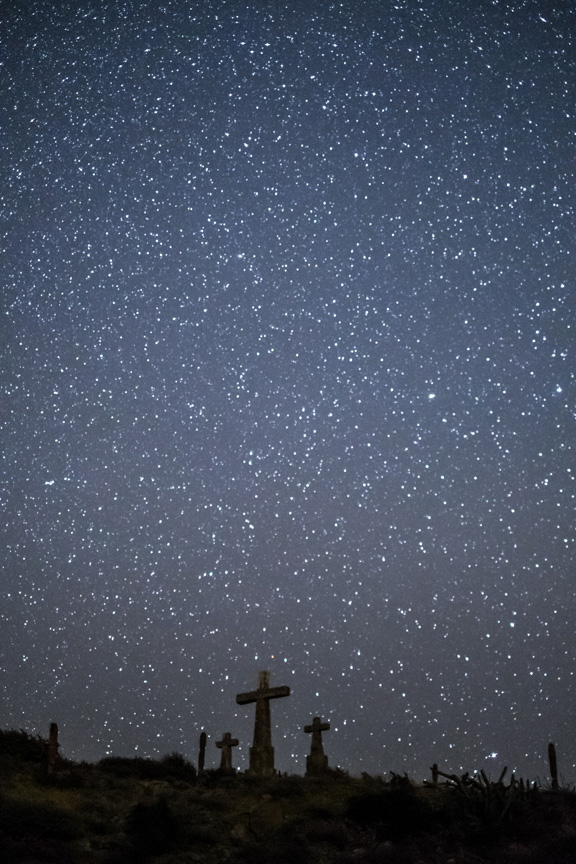
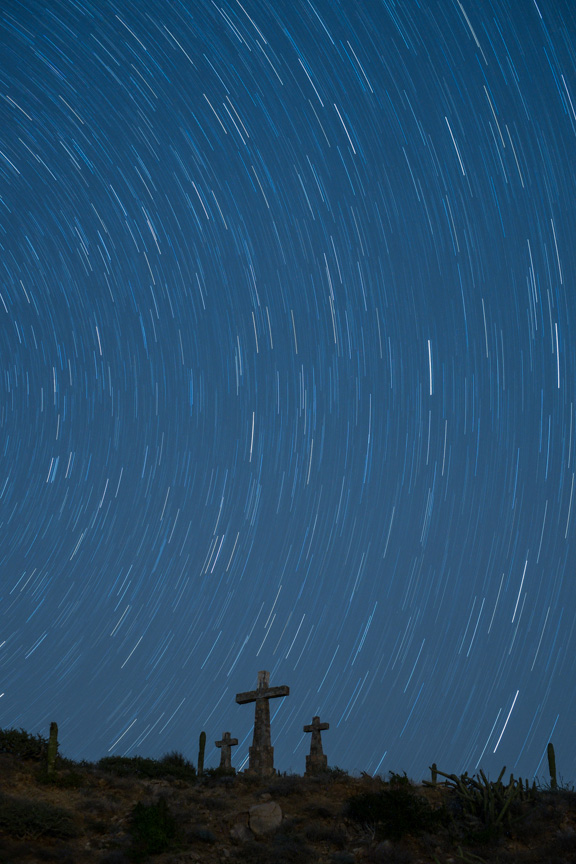
Get away from all the light pollution of the city to better capture the starry skies. If you can’t see the stars, then neither can your camera. This shot was taken 40 minutes north of NYC, at the Sleepy Hollow Cemetery. The three crosses shot (later in the blog) was taken in the remote town of Las Cruces, Baja and revealed more stars than I had ever seen or imagined.

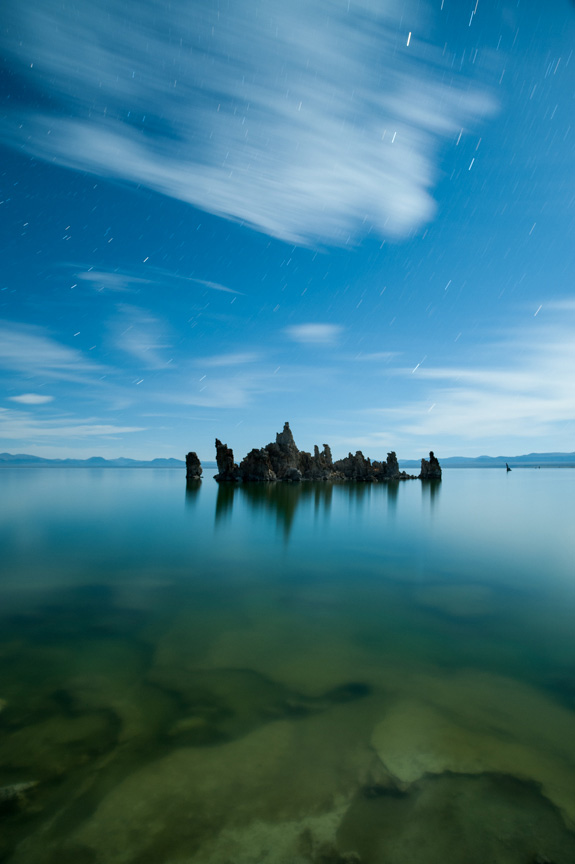
Be In Tune With The Moon
Photographing under the moonlight can be a magical and therapeutic experience. The size and brightness of the moon will depend on what phase it’s in. Knowing this and what time the moon will be rising, will dictate the length of your exposure. I use the MoonPhase app to plot out what nights will be the best to shoot. The app, Moonrise, lets you drop a pin on a location/date and find out when the moon will be rising and setting.
Focus To Infinity
Autofocus doesn’t work for most night photography; there simply isn’t enough contrast in the scene. If you are shooting the stars and not including any foreground for 20-30 feet then switch to manual focus and set it to infinity. Note that most AF lenses go past infinity, so make sure to align the infinity symbol correctly to the MF hash mark on your lens. To focus on dark foregrounds without contrast use a high power flashlight so you can autofocus. Once you have locked down the focus, switch the camera back to manual focus so when you trigger the exposure it doesn’t search for focus again.
The 500 Rule For Better Celestial Skies
There are two ways to interpret stars, either as star points or star trails. Digital capture has made photographing star points, or celestial skies, easier than ever. A good starting point for capturing a celestial sky is a 25 second shutter speed, ISO 3200, at f/4. That was the exposure details of the Milky Way shot over Independence, California.
How do we figure out our exposure?
The most important factor is time. The earth rotates and when we capture star trails we are actually capturing the rotation of the earth, the stars remain constant.
There is a simple equation that will tell us how long we can expose until the stars start to trail. It was originally called the 600 Rule, which is probably safe for viewing on the web. But if you want to print or view the images at 100%, I recommend using the 500 Rule, where you divide 500 by the focal length of your lens.
500/24mm = 20 seconds
500/50mm = 10 seconds
The more telephoto the lens, the more it will zoom in and magnify the movement of the stars.
Now comes the balance of ISO and Aperture. The two factors to consider is how fast and sharp your lens is wide open and how high can your camera’s ISO safely go? I typically like to stop my lens down at least one stop, so from f/2.8 to f/4, and there is often a big difference between the noise at 3200 ISO and 6400 ISO.
Let Them Trail!
Star trails definitely have that “wow” factor, especially if we can point our camera north and expose for at least one hour. The problem is noise. Nothing creates more noise in-cameras than long exposures; it’s like a herculean effort to hold that shutter open! A quick and easy solution is to go into your camera’s menu and turn on your Long Exposure Noise Reduction (LENR). This will create a black mask over your image that will eat away most of the noise in-camera. However this often takes the same amount of time as your exposure (1 hour exposure + 1 hour LENR) and renders your camera useless until the “processing” is over. A more productive way is to take a series of images that will equal one long exposure and then stack them together in post. For example, 18 five minute exposures = 1 ½ hours.
The trick with stacking is that you need to use a cable release like the Vello Shutterboss, and make sure your interval between images is no longer than a second or else you will have significant breaks in your stars. Even at a second, blown up to 100% you will probably notice subtle breaks in the stars.
Which do you like more, the star points or star trails?
Stacking In Post
There are lots of star stacking actions out there but I’ve gotten the best result by simply opening up all the images as layers in Photoshop and then changing the blend mode to lighten for each one. This will quickly and simply connect all the lines.
Operating under the stars can be a magical experience. If you want to learn more, check out the book I co-authored with Tim Cooper, Night Photography: From Snapshots to Great Shots. Also, night workshops are some of the coolest ways to get more comfortable photographing in the dark. There are lots of options across the States that offer hands on teaching often in locations that you normally can’t access at a night. You can find out more info on my workshops and adventures at ruinism.com.
Carpe Noctem!
You can see more of Gabriel’s work at Ruinism.com, and follow him on Instagram, Facebook, Twitter.