

Photo by Chris Keels
Hello everyone. My name is Nick Fancher and I'm your guest blogger today. In case you don't know me (which is likely the case), I am a Columbus, Ohio based portrait and commercial photographer. A couple of weeks ago I released Studio Anywhere: A Photographer's Guide to Shooting in Unconventional Locations, on Peachpit Press. The idea behind the book is that photographers can get away with shooting without a conventional studio most of the time, as long as they can learn to make the most of their environments; all with the use of minimal, affordable gear.
This idea was born out of necessity. When I was in New York City last year, I wanted to do some test shooting in my free time. I began looking around for studios to rent for the day, and found the average price to be around $1,000. It'd be one thing if this was for a paying client, who would be footing the bill, but this was for unpaid, personal work. And even if I did shell out the $1,000, all the models would then be forced to come to me, which for an unpaid test shoot, would not exactly be a motivating factor for them. Instead, I opted to meet them at their homes, realizing that all I really needed was a white wall, and every home has at least one white wall. And it worked out just fine.

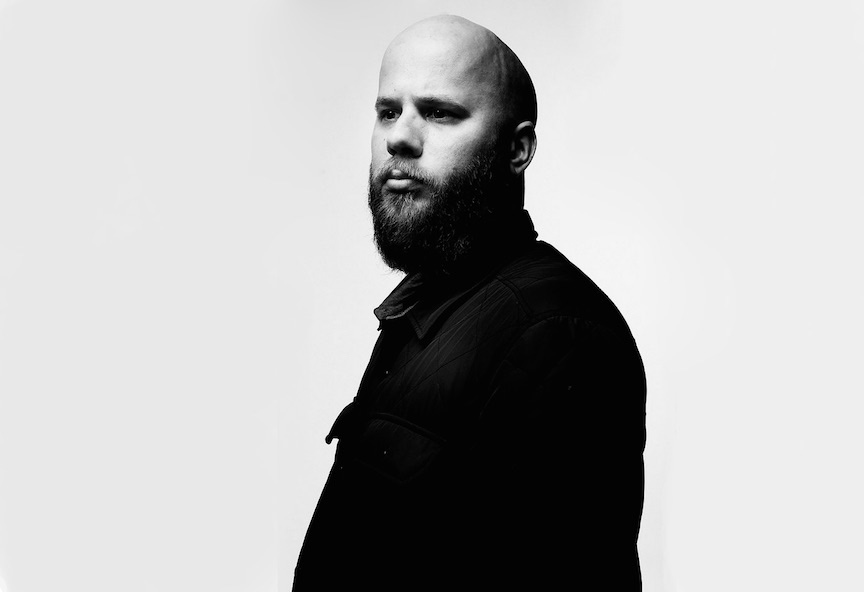
Setup: one light with grid
White walls work
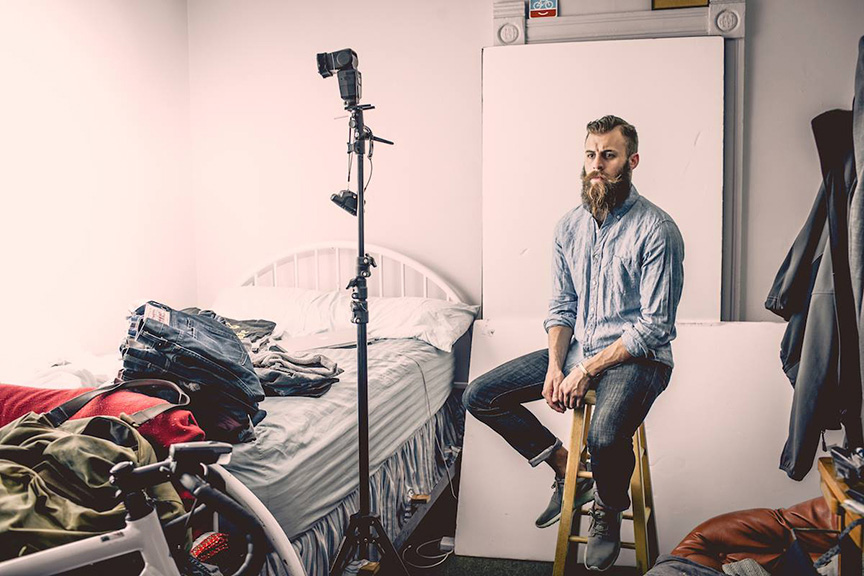
Once I returned to Columbus, I started putting this practice to test, now opting to meet clients at their homes and offices for shoots. Not only did it allow for me to happen upon some pretty amazing environments to shoot in, I think it also gave me a +1 for convenience, in the eyes of the clients. It also led me to some particularly small spaces, which forced me to get creative with my lighting. As you may know, most of the time you need your light several feet away from your subject, in order to get a larger light spread. But if, say, your client lives in a 200 square foot apartment and the only spot to shoot is the spot next to his bed in his living room, you don't have that luxury. To make my light source larger and softer, I turned the flash in the direction of the white wall on the other side of his bed and it worked smashingly.
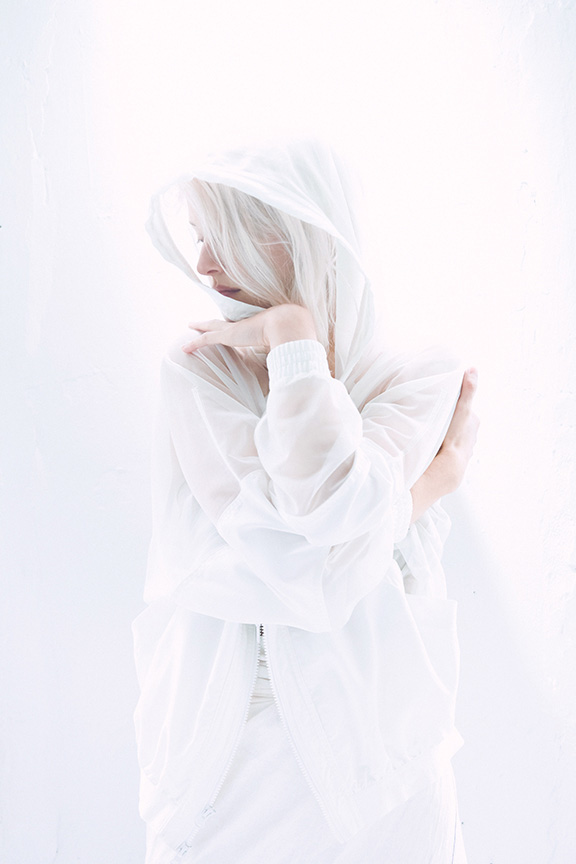
Setup: one light bounced into white wall
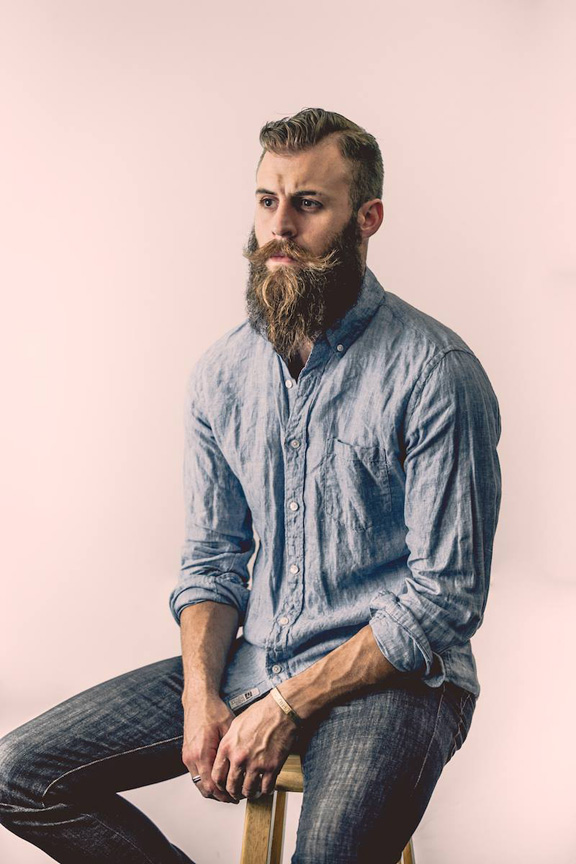
White walls wreally work!
You may have noticed in the previous setup shot that there are white boards propped up behind the subject. I have two white and two black, 40×60" sheets of foam core that I bring with me to every shoot (leaving them in the car until I see if I actually need them). I often end up needing to use them in a variety of ways. Often I tape two boards together to make a v-flat, in order to block a light source or reflect light. Sometimes I use them as a backdrop, as in the previous scenario. Other times I stack them up so the model can stand on them, if I need a full body shot and the room has an unsightly floor, such as shag carpet.
My rule of thumb is to travel as light as possible, since I typically work without an assistant. I want to minimize the amount of trips I have to make to my car. So if I am heading in to shoot in an unfamiliar space, all I take in with me is my camera bag, a light stand and an umbrella, leaving my tripod, sandbags, additional stands and white boards in the car unless they are absolutely needed. And once I get a lay of the land, I scope out viable shoot areas. Large white walls are a plus. Areas with concrete or gloss wood floors will reflect light and make seamless, full body portraits a lot easier.
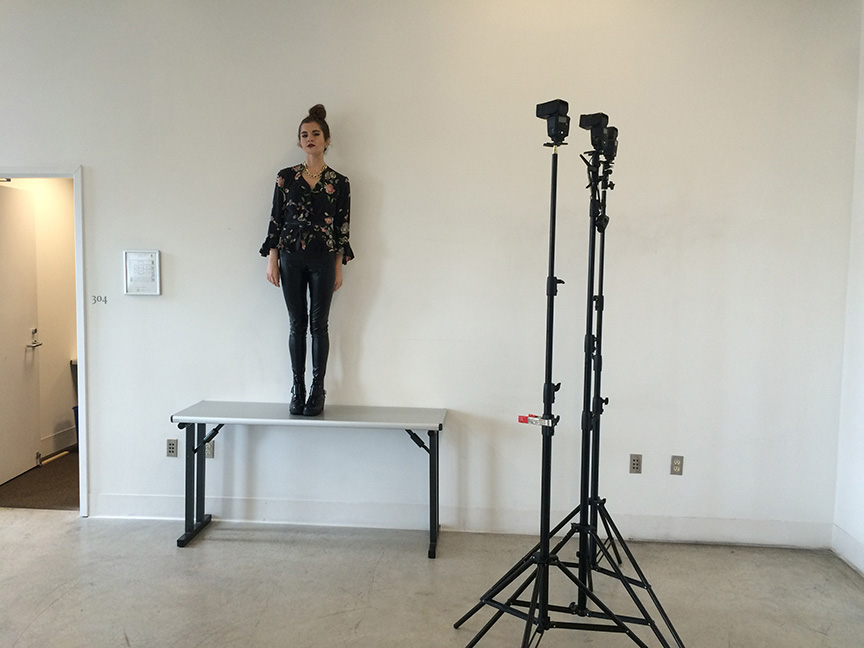
Setup: three lights gelled cyan, magenta and yellow
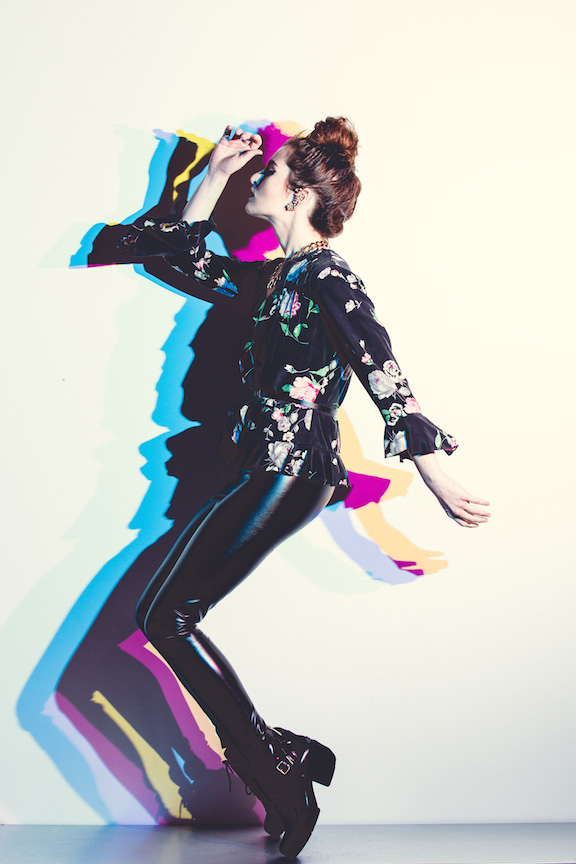
White wall plus a sturdy table = clean, full body portraits
I've even used grey walls or cream colored walls without issue. Of course white balance isn't much of an issue when your two lights are gelled red and cyan.
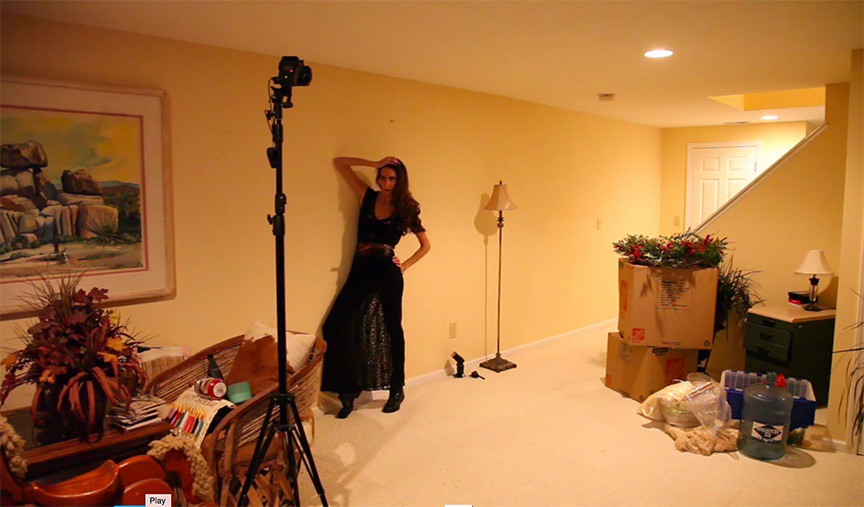
Setup: two lights gelled cyan and red
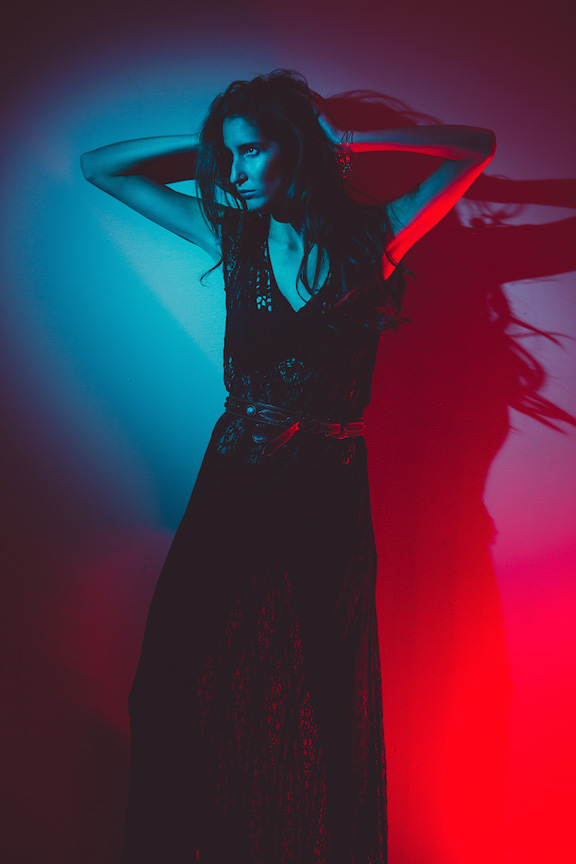
Cream colored wall is no problem when your white balance is not in play
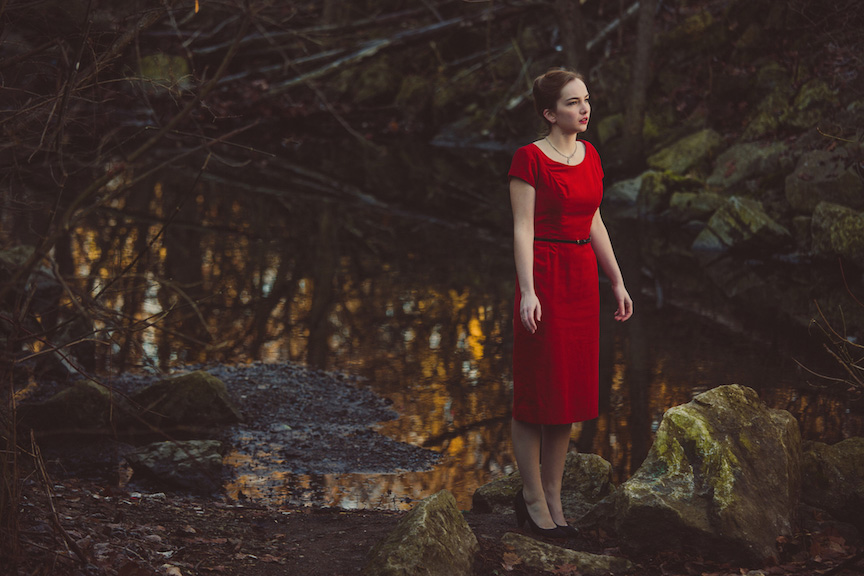
Once you start working this way, you start noticing things that you can use to your advantage, such as a nice, red wall. I made a v-flat out of my two black boards and used a white board as a bounce, opposite the red wall. By firing a flash into the white and red surfaces on either side of the model, I had a large, soft spread on a black background, creating a stylized final shot.
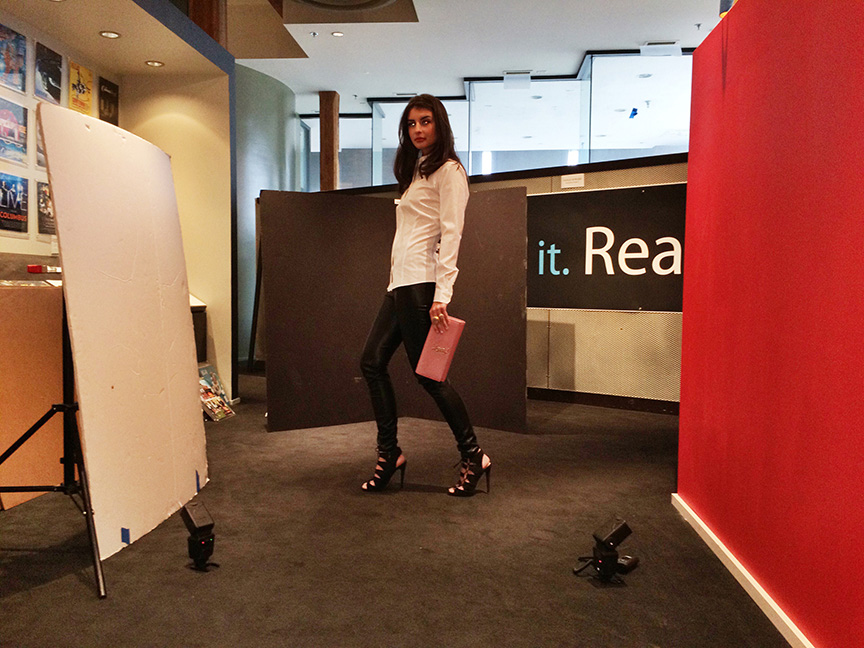
Setup: two lights, fired into white bounce and a red wall
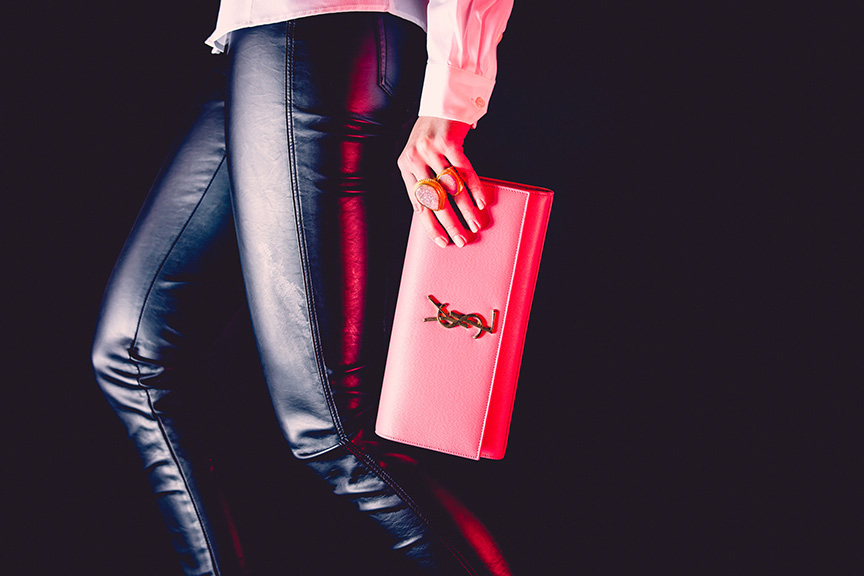
Large, soft, stylized light
Want a variety of backdrops for little to no cost? Browse royalty-free images on Google or buy cheap stock images to project onto a white wall. It's an old Hollywood trick, but it's a cool one to play with.
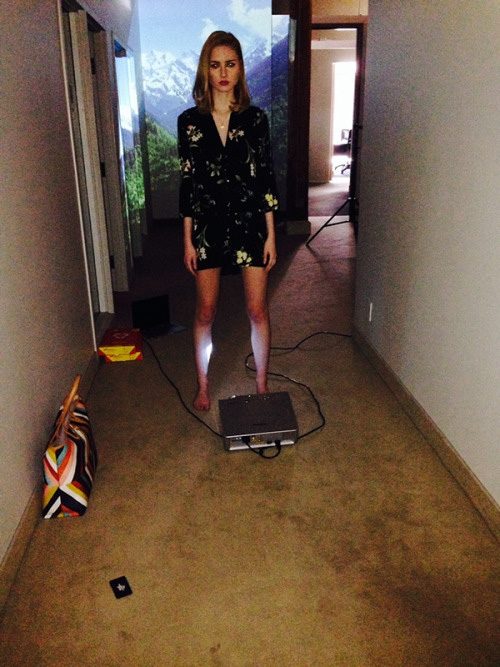
Setup: projector for back wall and one light, snooted

Free trip to Switzerland
What if you're just starting out and you don't own a strobe? Do you have a garage? It's a great spot for shaping available light. It's especially effective on a sunny day. By placing your subject closer or farther away from the open garage door, you can control the amount of light falling on them.
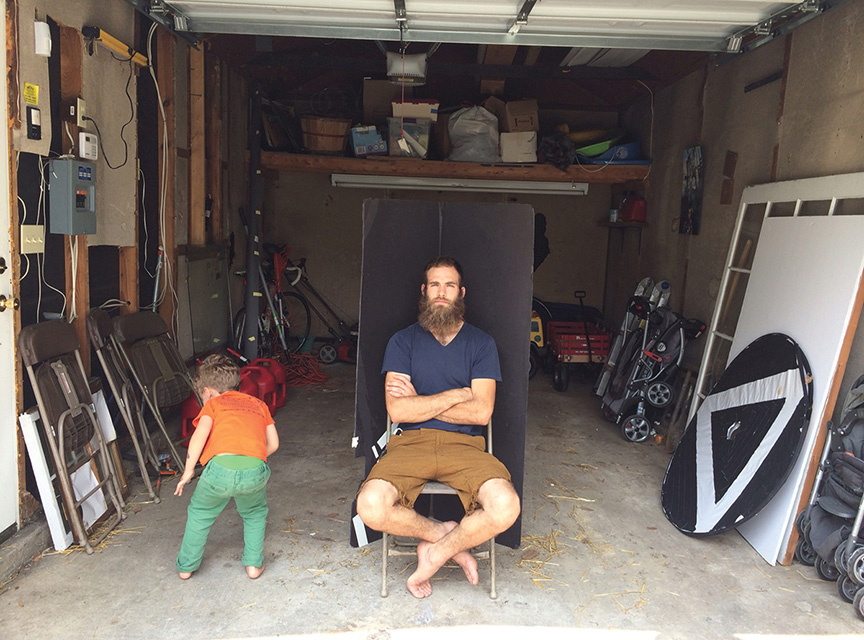
Setup: subject sandwiched in a black v-flat
Dramatic, available light portrait
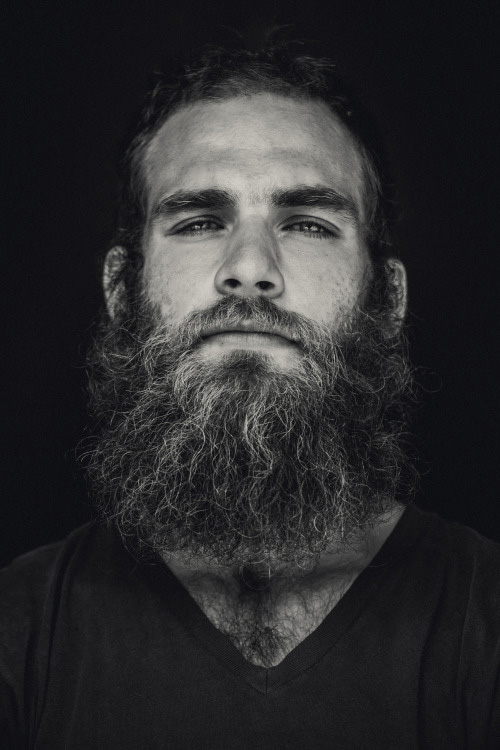
Achieving a blacked out environment, sometimes referred to as "invisible black," is a lot easier than you may think. Find a background that's a mid to dark tone, not in direct sunlight. Make sure that you have enough space to keep the subject and light(s) away from said background. Get an ambient exposure and then close down at least three stops to get it to go dark/black. Add your light, output set to a high enough output to properly illuminate your subject. Flag light as needed, to keep it from spilling on to background, by using a grid, zooming in the flash head, angling the light away from the background, etc.

Setup: A medium-toned brown wall in the shade is a perfect backdrop to achieve a black scene. I used two bare bulb flashes on the model, one to light her upper torso and one to light her legs, below the tutu.
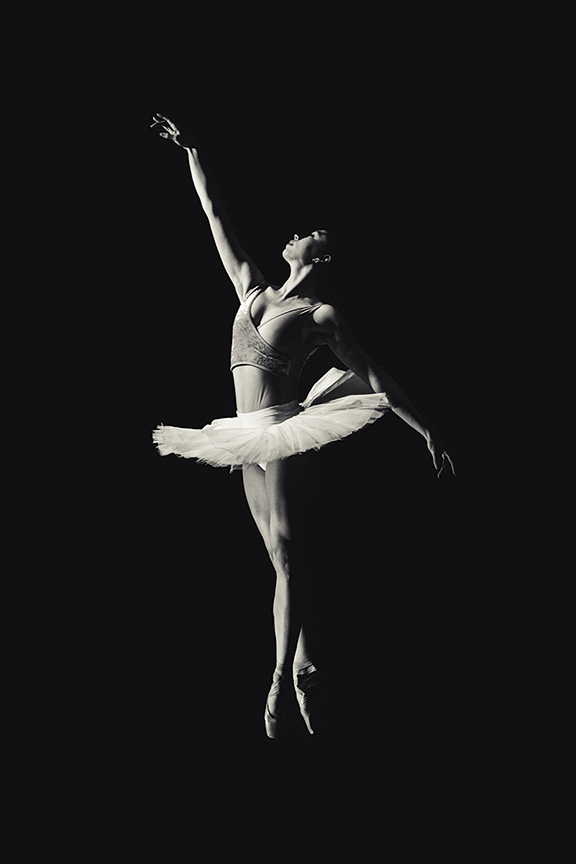
Black scene
Sometimes I want to add natural, visual elements to a shot, such as flowers or tall grass. To do this, take a black or white v-flat to a park and place it in front of said flower/grass element and have the subject sit/stand in the v-flat. Side note: if your camera case is nice and sturdy as is my Pelican 1510 case, it makes a fantastic chair for your subject.
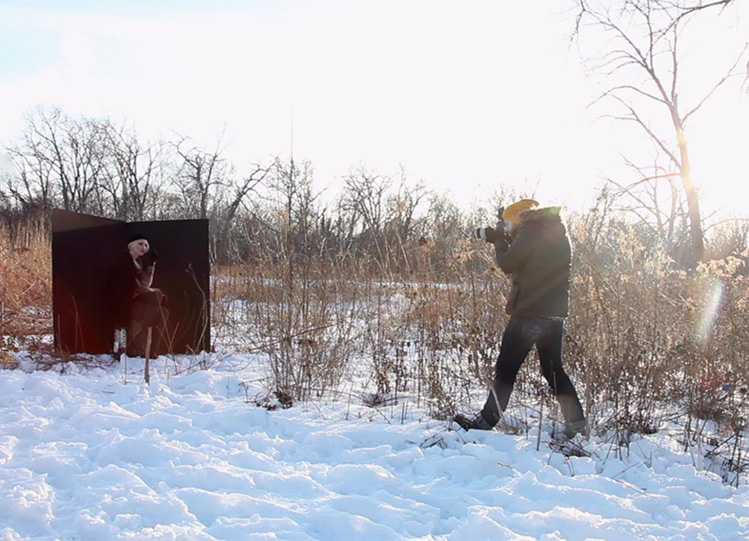
Setup: Black v-flat in a field, flagging the direct sunlight from the model

Dramatic portrait on black, with added visual elements
As I mentioned earlier, I typically work alone, without an assistant. This means that I am traveling light, without sandbags, for examples. It also means that I can't put a large light modifier on my flash, such as an umbrella, without it blowing over with the smallest breeze. So I am usually looking for ways to soften a bare flash, when I am in the field. As was the case for the living room scenarios, lighter, neutral-colored walls are great for reflecting light. Simply place your light 2-3 feet away from the wall, zooming in the head, if applicable. Angle the light into the wall so that it's heading in the direction of the subject (think banking a pool shot).
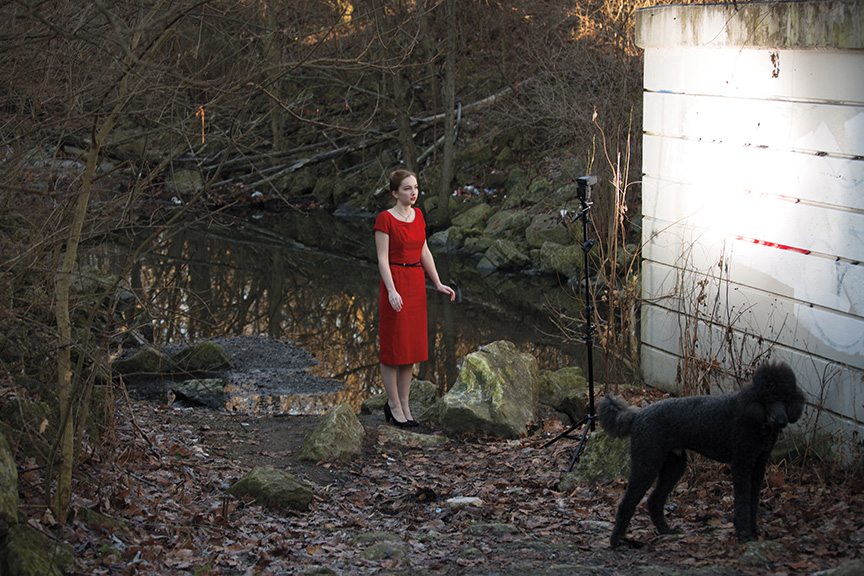
Setup: A white wall found in park made for a great bounce surface for my flash
Soft light on my subject without an umbrella (and sandbag) on my light
I realize that many of you are likely already using some of these techniques/hacks, and you may even have some that I have not yet heard of or tried. Please use the comment section for sharing your ideas and experiments. If you feel so inclined, pick up a copy of my book/ebook, Studio Anywhere, here. Thanks for reading and happy shooting!
You can see more of Nick’s work at NickFancher.com, and follow him on Facebook, Twitter, Instagram, and YouTube.
Incredible results using only ingenuity and minimal gear. Really appreciate the BTS shots and finished image.
That said, I’ll never bring this up to my wife because I needs me a bunch more gear and a dedicated photo space.
Lol. I won’t tell if you won’t
Awesome shooting techniques, thanks!
Glad you like them!
Nick – this is really great stuff. Great ideas. My favorite is using the projector for the backdrop. Nice work.
Thanks!
Great tips – so helpful to see the pull backs along with the final image. Thank you!
Happy to help!
NIce examples and work :)
Thank you!
Incredibly creative, will definitely find book thanks for guesting!
Thanks!
How Nick.
These are a) super amazing ideas and b) super amazing results/photographs!
Respect!
Martin
Thanks man!
This is amazing and a great post, thanks for sharing
Glad you liked it!
Great work!! Enjoyed seeing the use of what might be considered roadblocks and turning them into assets.
Thanks man
This is a fantastic blog post — love seeing the BTS and the final results!
Happy to help!
Great stuff Nick, a little ingenuity goes along way in these type of shoots! Love the whole idea of 1 light and some V-flats! Also really liked the projector idea, going to have to remind myself to try that one soon!
Do it!
Great Ideas…thanks for sharing
Thanks for reading!
Thanks for sharing. Genius ideas.
You’re too kind
For the first time I am seeing something that I can only describe as Cerebral. Non conventional vision and use of light and space.
Love it. Awesome complement
Great stuff, just forced me to buy some gels and a second speedlite with some cheap RF triggers to try some of these things out.
Nice! Have fun with it
Really awesome stuff. I’m a big fan of minimal gear, but that’s kept me out of the portrait game. Seeing something like this makes me want to try it again
Do it!
For the cream colored wall I only seem to see one of the lights. Where is the other?
My friend, you may need to test yourself for colorblindness.
Ha!
On the floor, to the right of the model.
Thanks for the inspiration
Thanks for being inspired!
as a professional and purveyor of photo blogs, this is one of the best intuitive lighting posts, I’ve ever read.
Thanks for reminding me that I don’t need those big lights and perfect location to create powerful/dramatic images.
Solid work Nick
Thank you so much for the kind words. That means a lot
wonderful stuff. amazing. thanks for sharing!
Happy to
Awesome post! I do location shoots all the time, great tips I can use next time out.
That’s great!
Thank you so much! Many people may know these tricks already but as a beginner these were all helpful. The BTS shots were my favorite, as they really help teach. I’m a visual learner and this was perfect.
Happy to help!
Nick, absolutely love your work. You have given me new insight on how I want to do things. Thank you so much for this!
Awesome!
You sexy creative man! If I had a question, I’d ask what the worse place you’ve shot in was.
I chuckled at the parking lot scene, having shot in some truly silly places, but then my brain started working and went “ooooh, I’d shoot there, that looks awesome!”.
Hahaha. Worst places are offices and churches built in the 80s/90s. Such boring, ugly architecture.
You say that, but Google some Romanian churches. Ugly as shit, and so tiny.
great stuff.
obliged
Awesome post Nick! I love how creative you are with the simplest of things, and the portrait work you do with colored gels is too cool.
Thanks John!
@NickFancher:disqus: Do you know B&H just put out a contract on you?!
No, seriously, great work with minimal budget strain. Love it!
Hahahaha. Undercutting Big Camera since 1980.
Loved the results especially with the gel lights. You totally just sold me on your ebook, me being a broke amateur this really is perfect for me as my only “assistant” occasionally is when my daughter goes out with me and I ask her to hold a reflector haha.
Damn just checked your site and noticed all those pics I’ve seen on jackthreads before, you’re in my inspiration folder for portraits hahaha the world is small indeed.
Nice!
Yup. I feel you
wow, was expecting something cheesy but this was pretty impressive
I live for low expectations.
Excellent tips! I’ll definitely look at getting the book as my photo work involves traveling light into unpredictable shooting environments – recently jumping between primitive kids camps in upper Finland to isolated parts of Central Asia.
One item I always carry with me on a trip is a white (translucent) shower curtain liner. I can use it as a massive light diffuser in a window, over a doorway, diffuse direct sun outside, or as a neutral backdrop. I’ve turned a chair on it’s side, draped the curtain liner over the legs of the chair to create a tent, placed curved photocopier paper inside against bottom of chair and have an awesome product light tent. They can also have handy uses if caught in adverse weather. :-) If you’re really cheap, use a white disposable table cloth, but they crumble over time.
You’re speaking my language
Thank you so much for sharing your techniques Nick. I have been panicking about not having a studio but now feel much more confident about trying your suggestions to shoot outdoor more (weather allowing the in the UK!).
glad to hear it!
Awesome post, totally inspired to play with my gels that have been sitting in a corner since they came with other stuff I wanted and figured “what the hell, buy the kit and not just the flash”…love the triple shadow and hope I can pull that off without turning my subject purple or green!
Have fun with it and keep experimenting!
Could you briefly describe the flash equipment that you use for these images?
I have 3, LumoPro LP180 speedlites and Pocketwizard PlusX triggers.
Thanks. Love your work and approach!
Really excellent shots! I need to build a black v-flat like, yesterday. I’ve been using a single black board behind my subjects and for the kind of light I try to achieve, it is a little problematic with the spill. I just wish they weren’t so easy to damage. Got any tips for traveling with v-flats?
Not really. Carry extra gaff tape with you.
Man…this concept is clear… it force imagination and creativity to the top… and maybe studios to low prices… nice article and photos off course…
thanks!
Wao, every set is simple but a big results,,,,,,,
why i did´t find you a long time ago
Ha! Better late than never
This is great. Also appreciate the BTS shots. Encouraging for people who need to shoot in small spaces.
Thanks! Glad it’s helpful
This is the best inspiring photog blog I came across so far!~
I’m tired of those “how-to” articles about making one shot with a luxury camera in some random Victoria style ballroom and have 5 lights and 10 assistants etc.
Thank you so much Nick this is awesome!
my pleasure! (I hate those too)
This was a great post. Thank you so much for sharing. I can’t wait to try some of these techniques.
This was a great post. Thank you so much for sharing. I can’t wait to try some of these techniques.
Awesome. Make sure to share them with the #studioanywhere hashtag
Great read. I really appreciated the way the images were presented. I feel like I really “get” the concepts shown. Thank you for sharing!
Happy to help!
This is genius! Thanks for this killer guide, @NickFancher:disqus!
Happy to help!
Nice executions but the themes don’t make sense. Why would a girl wear a party dress in the woods or in the mountains? Why is that girl with the legs cut off looking like that with all those colors? The pose is unnatural. There is more to photography than just nice lighting. Never forget that.
Clearly you haven’t seen much of Fancher’s work. The theme is studio lighting in unconventional setttings. Lighting is everything in photography. I’m certain he knows what he’s doing.
The mountains shot was part of a fashion spread on vacation wear. There were six scenarios with varying outfits, matching the scenes. The girl in the woods was meant to have a surreal, eerie vibe. I wanted her out of place, popping with the red. The girl with the colored shadows was merely a light test. That was the first time I was trying out that technique. Her movement was under my direction, to see how the colored shadows would change.
There is always more to a picture when taken in the proper context. Never forget that.
Super helpful tips. Thanks for sharing Ken’s insights!
This was an amazing demonstrations of using what you have to make magic happen. Gave me tons of inspiration. Thanks for that