Hello one and all, and thanks for dropping by again for #HybridDaveTuesdays on #TravelTuesday here at Scott Kelby’s Photoshop Insider. I’m Dave Williams and I’m here once a week to share something with you from the world of Photography and Retouching, and this week it’s a little note on noise in your images and using the Reduce Noise Filter. Let’s get going!
So, last week I told you all that I was in Tromsø, Norway, and despite the -12 celsius conditions and occasional blizzard I persevered and got some awesome nights of Aurora and had some stunning views before me through the fjords and snow blanketed terrain. One image in particular though, the view from my hotel, was the inspiration for this post. Here it is:-
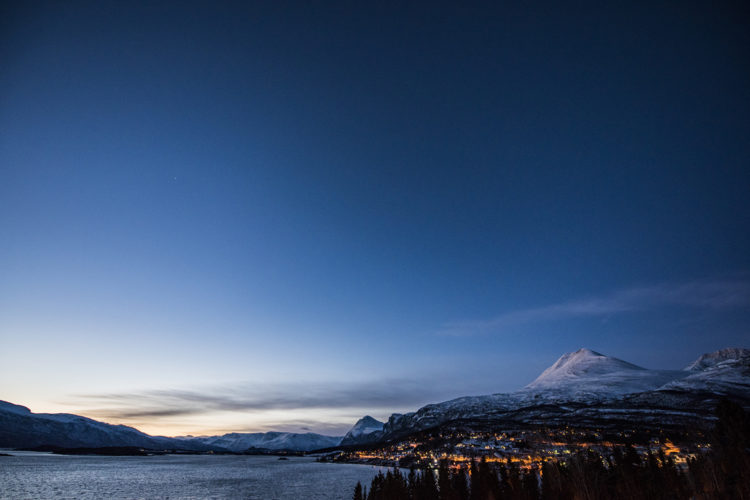
This was a snapshot caught right at the start of the day before a long drive north. The light was very low, the ISO was very high, and the grain in the image is testament to that. For me the most noticeable noise is up in the snow around the mountain to the right. So sometimes it’s good to leave the noise there, it’s quite a good characteristic to have, but often in the world of commercial photography it’s just not acceptable.
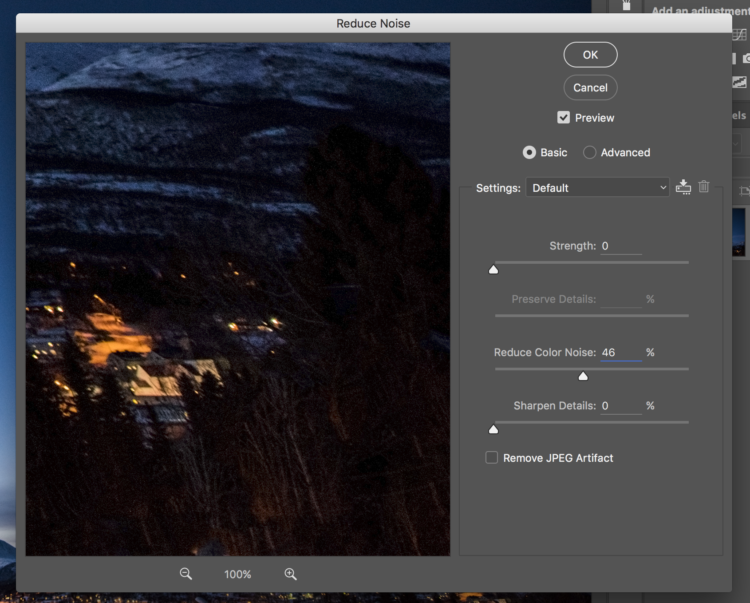
The Reduce Noise Filter

Filter > Noise > Reduce Noise
This tool has been hanging around in Photoshop for a while. It’s generally pretty good but it’s worth noting the name. It’s called the Reduce Noise Filter, not the Remove Noise Filter. The reason I point this out is because it’s pretty hard to remove the noise in an image without losing detail. This is because Photoshop is taking a look at an area of the image and trying to determine which pixels don’t fit, then replacing them with an average of the surrounding pixels. Make sense? So if I have a 9×9 grid with a white pixel in the centre and black pixels surrounding the edges, the noise filter will notice that the white pixel is the one which is out of place and stick a black pixel there. What this does on a larger scale is pretty catastrophic if you think about it. We invested in an awesome camera which we use to shoot RAW, capturing the precise colour and tone of each individual pixel, then we stick it through a noise reduction process which changes each one of those pixels based on it’s neighbour and spews out an average which it’s decided works better. That’s what you need to have in the back of your mind when you use noise reduction, along with this:-
“Nobody ever threw away a photo of their relative, their wedding, their partner, or their cat because it was noisy.”
-Hybrid Dave, 2017
So let’s break it down. One type of noise that the Reduce Noise Filter can deal with is Color (I think that means Colour) noise. This type of noise is red, blue and green dots scattered across your image, often in the form of splodges rather than individual pixels, but it could be either.
When using this filter it’s best to reset the sliders to zero each time to start off, thereby effectively hitting the reset button on the filter and seeing the preview with no filter applied.
Back to the Color Noise, with the slider at zero give it gentle progress to the right until the color noise starts to blend with the rest of the image. Be careful not to slide too far!
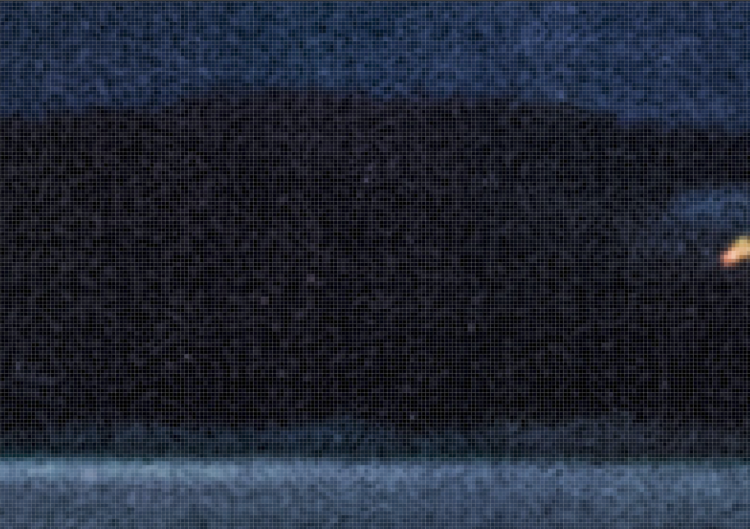
Luminance Noise is next up on the list here. Unlike Color Noise, Luminance Noise is made up of dots which are grayscale, anywhere between white and black. Here’s a closer view from the bottom right of the image showing these dots:-
Removing the Luminance Noise comes as a two part process, with the Preserve Details slider activating once you move the Strength slider. What happens here is you effectively smooth out the image using the Strength slider, then bring the detail back with the Preserve Details slider. With the Strength slider set to zero, slowly move it to the right until you’re happy with the effect it’s had on the Luminance Noise. Once you’re happy here, start increasing the Preserve Details slider to bring back the detail without reintroducing the noise. This is simple to understand, and easy to use once you do understand, but without that prior knowledge of what’s actually going on it can be just a random set of sliders being moved up and down. Let’s move on…
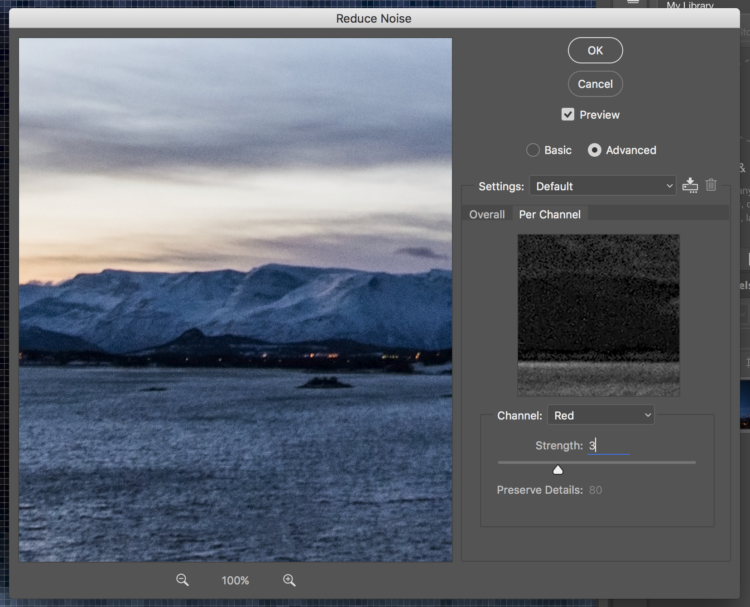
Switching the radial selection from Basic to Advanced will open up the option to apply the noise filter to single channels of colour. It’s the exact same principle as the Color filter, but applied to Red, Green, or Blue only. If you’ve noticed that only one channel needs the filter more than the others it’s a handy tool to have, and it comes with the Strength and Preserve Details sliders right there.
The last thing to look at here is the box entitled Remove JPEG Artefact. This tackles the problem caused by compression in JPEG files. Each time a JPEG is saved the quality gets worse, and it wasn’t great in the first place! This check box will do what it can to reduce the noise caused by the processes a JPEG file is put through in order to try to preserve it from the compression effects.
So that’s my breakdown for you all today on the Reduce Noise Filter right there in Adobe Photoshop. It’a a fairly simple tool, but understanding it will help you to better utilise it, and I hope I’ve helped.
As always, I’d love to see what you’ve made, and I’m on Instagram and Twitter if you want to reach out. Keep an eye on my Instagram story today and tomorrow, I’m currently in the air heading across the pond to New York City to have a little look at how they do Christmas over there!
Much love
Dave