

Millions of Homes in America Will Go Dark Monday Afternoon, Are you ready? [guest post by Erik Kuna]
Seriously, unless you’ve been living underneath a rock in the U.S.A (which might not be a bad thing lately) you know that there’s a total solar eclipse happening Monday for around four hours starting on the west coast of Oregon at 9:04 am PDT and moving all the way to the east coast in South Carolina to end at 4:10 pm EDT. While total solar Eclipses happen every year or two, it’s rare that they cover so much land mass, in fact, it’s been almost 100 years since something like this happened in America.
Being photographers, it’s an event that gives us a unique opportunity to capture unforgettable images of this rare event. Recently, I had an opportunity talk to some Astrophysicists from Kennedy Space Center while covering the NASA/SpaceX CSR-12 mission about the 2017 Eclipse. During that time, I picked up some great tips that I wanted to pass along here for you all that I’m hoping will help on Monday if you’re shooting. Fair warning that most of the tips I’ve also been hearing all over the place lately in many of the coverage about the eclipse, but they also clued me into something that made me explore one topic that I haven’t seen discussed much online. More on that later. For now, let’s give a quick rundown of 7 tips for shooting the Eclipse.
#1- Be Safe and Bring the Right Equipment
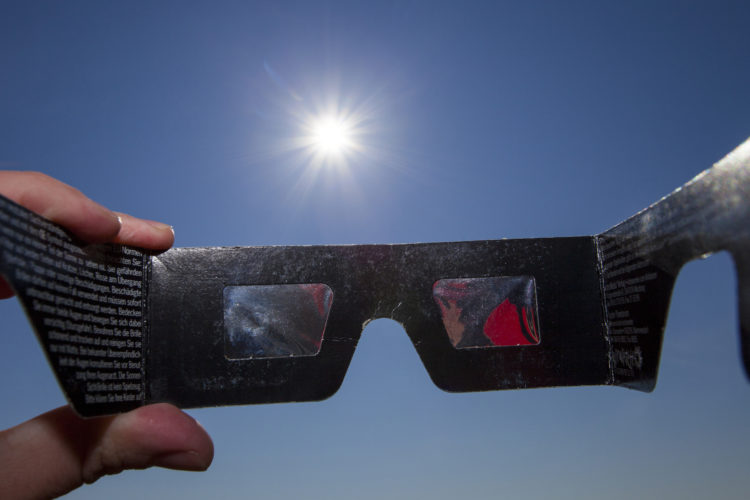
Yes, Yes, I know, I know. If you’ve heard anything about the eclipse, you’ve probably seen this in every article, video or news story. But, this is very serious. The Sun is a super mega bright ball of light, burning at 10,000 degrees with parts of its corona reaching into the millions of degrees and just like your skin will get sunburnt, so will your eyes, and fast and it will be permanent. This is nothing to mess around with and goes for every day of our life. Don’t look into the Sun whether it’s the Eclipse or not, without approved protective eyewear, period. Moving on.
Just like with your eyes, you’ve got to protect your camera sensor if you’re going to be pointing the camera at the super-mega-uber bright ball of light. So, if you’re going to be taking images while the moon is eclipsing the Sun, you’ll need to use a solar filter or solar film to protect your camera. Just as you’ll need a pair of eclipse glasses to protect your own eyes, your camera needs protection. With that said, if you’re one of the lucky few in an area of 100% totality, you’ll have the two and a half minutes or less where the Moon completely blocks the Sun you can remove the filters and eyewear so you can see the Sun’s outer atmosphere or the corona. This is the holy grail of the Eclipse, it’s the only time we can see the corona with the naked eye.

Sun’s Corona
Shot of the Sun’s Corona courtesy of NASA
Credits: Miloslav Druckmüller, Martin Dietzel, Shadia Habbal, Vojtech Rusin
Keep in mind the area of totality is very small, only about 70 miles wide. See NASA’s interactive map for the exact areas. If you’re outside this totality, you should always wear solar glasses and protect your camera with solar filters. One caveat to that is if you’re going to take a few wide-angle picture of the eclipse here and there with a smartphone and not going to point your camera at the sun all the time, you do not need a solar filter. Apple even issued a statement the other day in an article from USA Today where it confirmed it. DSLRs should be fine too for temporary exposure. We all shoot sun flares and position the sun in our shots from time to time and I’ve never heard of anyone damaging their sensor from occasional use. Of course, as with everything, in moderation. Bottom line, if you’re going to point your camera, smart phone or anything at the sun for a long time, use some sort of solar filter especially if you have a telephoto lens on your camera or smartphone.
Besides your camera and a solar filter and glasses, having a few other pieces of equipment can also come in handy during the eclipse. Using a tripod is a must to let you stabilize the camera and avoid taking blurry images. You’ll really want to use a tripod during the lower light moments around totality or if you’re using a telephoto lens. Also, using a shutter release timer or trigger will allow you to make better eclipse photos with less blur. If that strikes a chord with you, you’ll also want to use mirror lockup to minimize vibrations in your DSLR.
#2- It doesn’t matter what camera you have
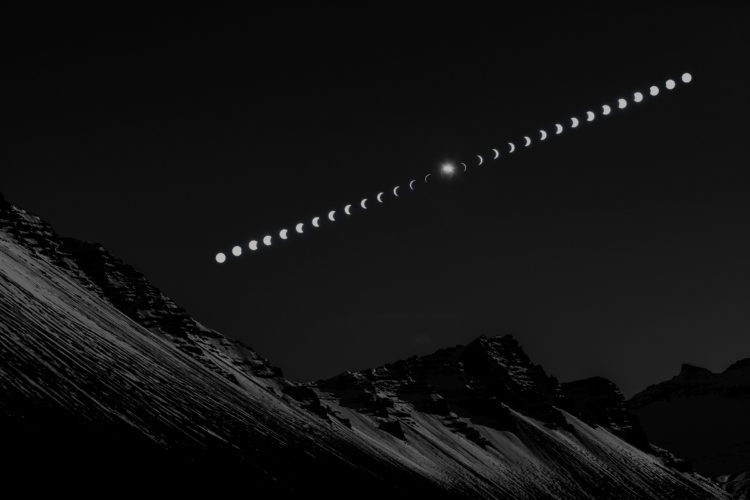
Taking an awesome photo has more to do with you as the photographer than your camera model or brand. Yes, the equipment helps, especially if you’re going for a particular type of shot of the eclipse. Like if you want something like these multiple exposure close ups, you need a telephoto lens on a tripod.

However, if you have just a camera phone or a kit lens, you can still take great photos during the eclipse. The best piece of gear with you is your own vision. (which is why you better be wearing those solar glasses) Of course, you have to work with what you’re given, so if you don’t have a telephoto zoom lens with a solar filter, maybe focus on taking landscape shots, or capture reaction shots or capture the changing environment. Which leads me to the next point…
#3- Up, Down, Up, Down, Left, Right, Left, Right, B, A, Select, Start
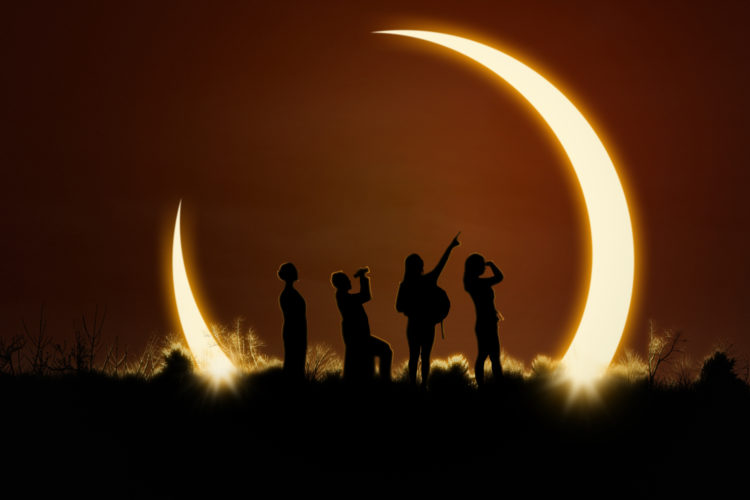
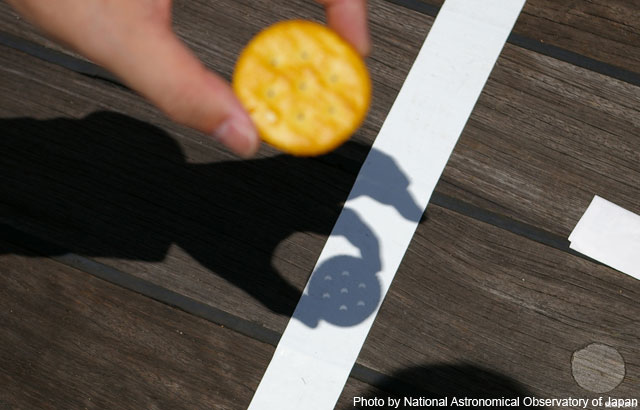
While we’re all focused on that magnificent ball of burning gas and plasma that’s being blocked by either a large rock or just huge piece of cheese (if you get your science from Folklore) remember to look up, down and all around. You’ll see changes in the way shade appear or the way the sunset comes from 360 degrees. This is the “other” side of the eclipse that most people miss. Landscapes will have long shadows, creating odd lighting across the landscape. Light through trees leaves will create creating natural pinholes, which will also create mini eclipse replicas on the ground. You can even create awesome pinhole effects with things like colanders, strainers, or even the holes in Ritz crackers.
Almost anywhere you point your camera even if it’s not into the sun, it could give you unique photos, so be on the lookout to compose some creative perspective, environmental shots or wide-angle photos that can capture the eclipse experience. Even reaction shots from people watching the eclipse might end up being the most memorable ones of the day.
Along these lines, if you’re a KelbyOne member make sure to join our photo contest over in the Community starting Monday where we’re looking for the most creative shot of the Eclipse. The winner will be selected by the KelbyOne Community and will win a ThinkTank SpeedFreak v2.0
#4- Know the Sun you’ll be dealing with…
Remember earlier I mentioned there was something big that I haven’t seen many people talking about with the eclipse. Well, here it is! Know where the sun will be and what you’ll be dealing with in the exact location you’ll be, and know it now, before the day of the Eclipse.
What do I mean? Well, if you’re in Oregan you’re going to have a very different perspective on the Eclipse than someone shooting in South Carolina. Why? The Angle and Azimuth of the Sun. What’s that you ask? Well, it just means how high off the horizon and in what location the sun will be relative to your position. Why is this so critical? This will change what gear you bring, what technique you might want to use, the lens you might want, your composition, the type of shot you plan, basically everything. You might have a vision for the image you want to create but the Sun isn’t going to cooperate. So, you’re might need to need to adjust your vision slightly.
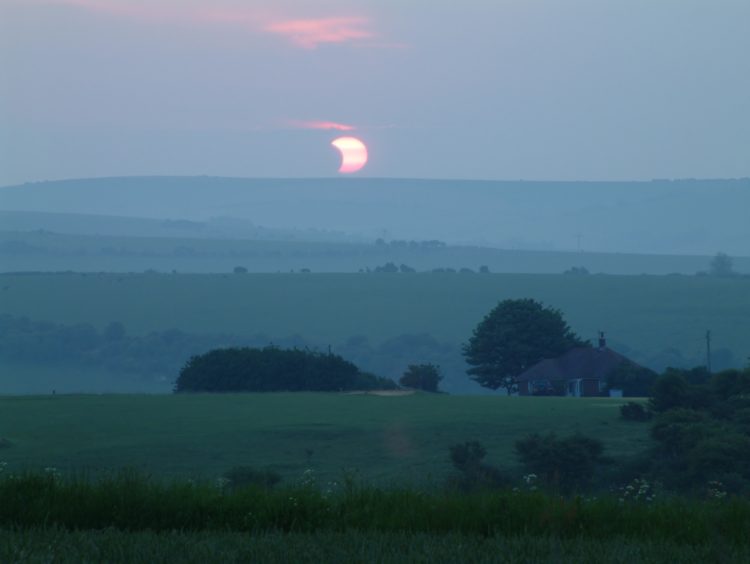
For Example, let’s say you’re going for a multiple exposure landscapes shot with the moon eclipsing the sun or any type of tighter landscape shot with the sun and the moon where it’s not just a very small speck in the sky you better be on a plane to Oregon while you’re reading this post. Even at that, the sun is going to be between 27 and 45-degrees up in the sky in the western states like Oregon, Idaho, and Wyoming. However, knowing that is valuable information. You’ll have the opportunities people in other places like the Southeastern U.S. don’t have, where we’re going to be dealing with 65 to 70-degree angles on mid afternoon sun for our Eclipse. With that kind of angle, we’d need a very very wide wide-angle to capture the sun being eclipsed in a landscape. Not to mention that the sun would be a speck in the frame.
To illustrate the point here’s an example of something you won’t see from the 2017 Eclipse unless you see a bunch of ocean in front of it, the angle of the sun relative to the horizon is too small for any land mass during the 2017 Eclipse.
Another thing to consider besides the angle is that Azimuth. That way you’ll know where the sun will be in your frame not only on the horizon but in the scene or part of the sky. For example, don’t expect to get a beach shot of the eclipse on the Oregon coast or even the South Carolina Coast, unless you’re on a boat. The Sun’s azimuth will always be in the opposite direction. That one is a little more intuitive, rising in the East and setting in the West, but again just something to consider when planning.
Transversely, if you’re looking for an awesome shot of the corona or the greatest eclipse, hopefully, you’re on your way a little northwest of Nashville, Tennessee. There you’ll experience a long eclipse where the axis of the moon’s shadow cone passes the closest to Earth. (Weather permitting, of course, it’s looking like a lot of cloud cover is predicted around this area as of Friday)
#5- Practice Now
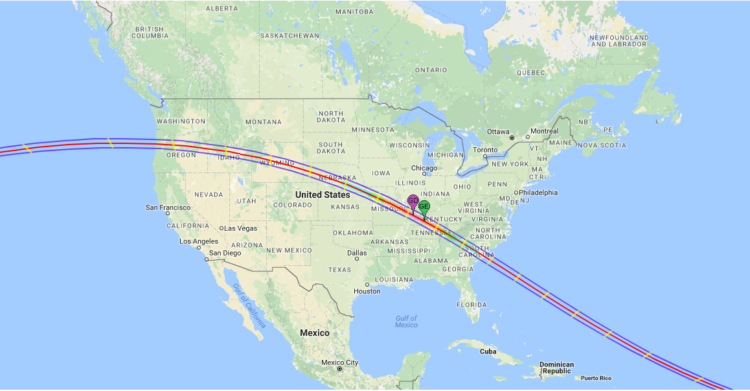
You have a couple days, and be sure you know the settings and capabilities of your camera before Eclipse Day. Start by shooting the Sun today during the times which the Eclipse is passing over you. That way you’ll know a few things. First, you’ll master the angle and azimuth of the Sun at your location. Frame up the shots you want and get your settings right. This will allow you to have a good starting point. If you’re wondering what time it will pass over you, check out this interactive map from NASA.
Our cameras and even camera phones have adjustable exposures, which is essential to help you adjust your image during the varying eclipse lighting. This is the key to getting a good eclipse shot. As for focus, make sure you know how to manually focus the camera for sharp shots and then lock your focus so your camera won’t try to adjust focus with the varying brightness. Plus, use live view to compose the image, it’s less dangerous than looking through the viewfinder especially if you’re going to be risky and shoot without a solar filter. As far as settings for a DSLR camera, the best way to determine the correct exposure is to test settings on the un-eclipsed Sun this weekend.
For the best results, you’ll want to dial in your settings manually, which is another reason to practice. Get your DSLR out of auto mode and go manual, using a fixed aperture of like f/11 or so and the lowest ISO you can go, that’s ISO 100 on my Canon. Then, try shutter speeds to find the optimal setting. You’ll probably be around 1/1000 to 1/4000 with a solar filter but just find the setting that works best for you. This will give you the exact starting point you can use to take images during the beginning stages of the eclipse. That way on the day of the Eclipse you’ll just have to adjust your shutter speed settings as the lighting changes. During totality, the corona has a wide range of brightness so it’s best to use a fixed aperture and ISO and multiple ranges of exposures from approximately 1/1000 to even as high as 4 seconds. Make sure to take your filter off during totality. I’d suggest bracketing your exposure too. There’s a lot of detail in the sun but you’ll see some things better over exposed and some thing better under exposed.
Here’s an example of different exposures of the sun and about the same time:
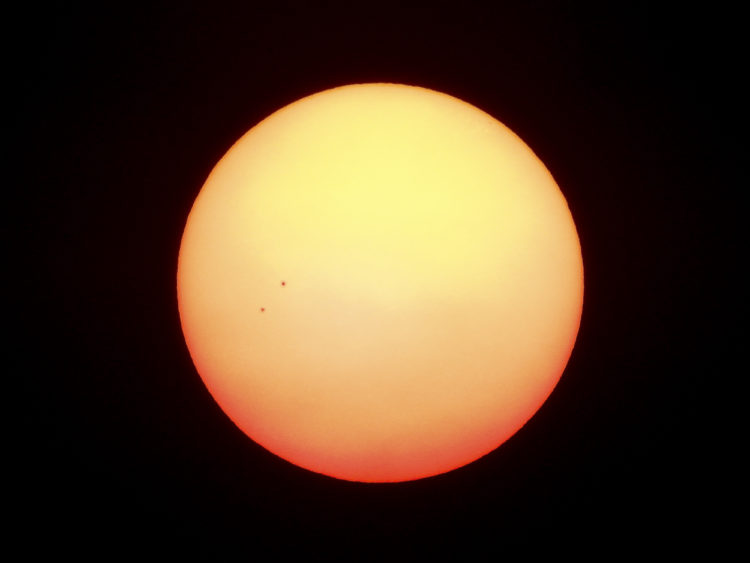
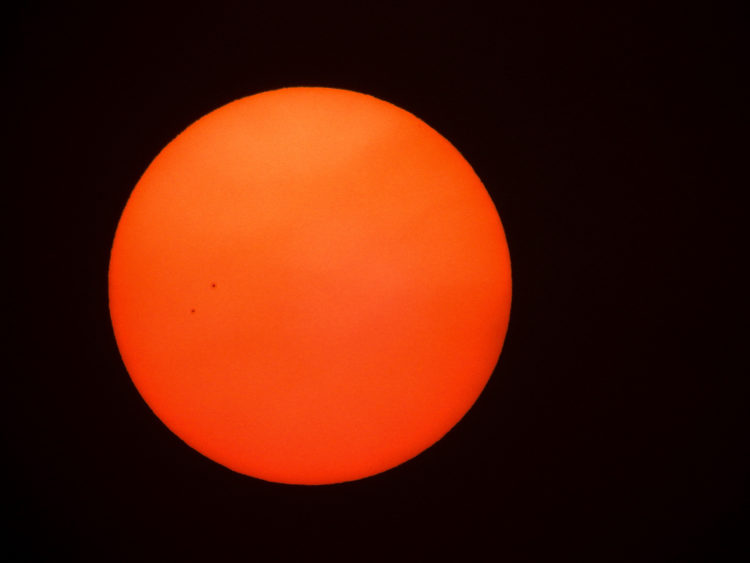
You can see the little difference in the sunspots and better to take multiple exposures than miss some sort of detail you’ll want later. Also, shoot in RAW if you can, it’s going to give you the flexibility you want later since you’re shooting a bright ball of light.
Now, If you’re going to miss getting the shot you want this time around, never fear, another total solar eclipse will be coming back to America in 2024 traveling from South Texas up through Maine. So, you’ve got 8 years to practice! Who knows though, by then we might be shooting Ultra HDR holographic light field cameras.
#6- Its mother nature, be flexible
As with anything that relies on the weather, it’s a roll of the dice. If you’re a landscape photographer, you know exactly what I mean. Unfortunately, with the Eclipse, there are no do-overs, missing your alarm or “we’ll just try again tomorrow morning” kind of plan. It’s a one and done kinda thing, so that’s why I can’t stress enough the practice element.
So, check the weather before you go out Monday to see what you’ll be dealing with before you leave for your shooting location. Maybe even come up with a backup plan if you get cloudy weather and try to have a backup location if the weather looks like it is not going to cooperate. If all else fails, NASA has tons of live coverage of the event on their site the day of the Eclipse and while I know it’s not the same, the weather just might not agree.
#7- Share your experience
The 2017 Eclipse is predicted to be the most photographed one-day event in history. Share your eclipse experience with friends and family afterward. Use the hashtag #Eclipse2017 or upload your eclipse images to NASA’s Eclipse Flickr Gallery.
While you’re out trying to capture the perfect eclipse shot, don’t forget to take a break from shooting every so often and look at the eclipse with your own eyes. And, just because I can’t stress it enough remember to wear your eclipse safety glasses for all stages of the eclipse except for the totality.
Thanks for letting me share,
-Erik
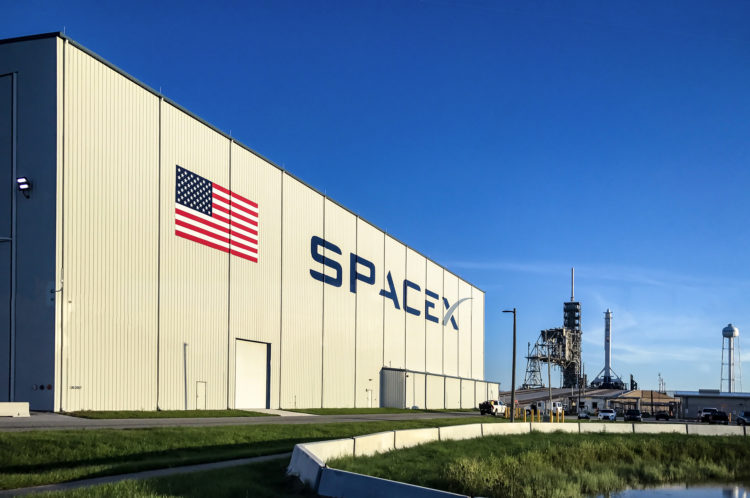
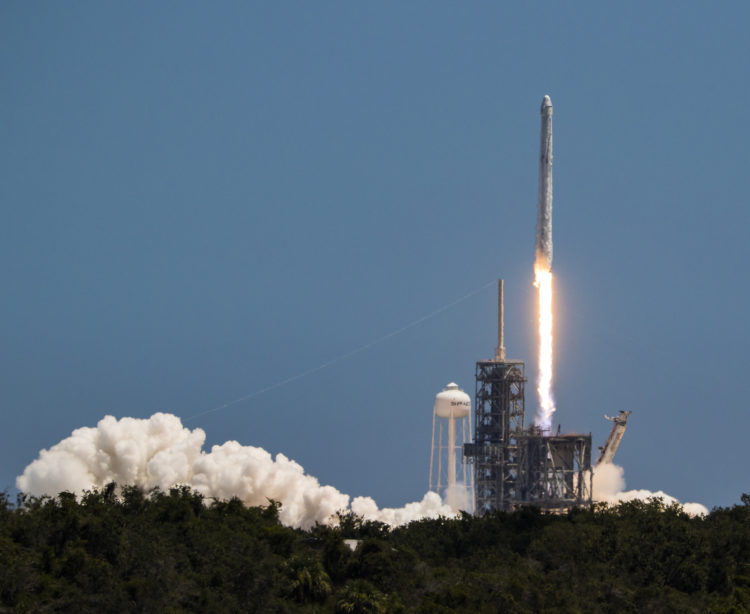
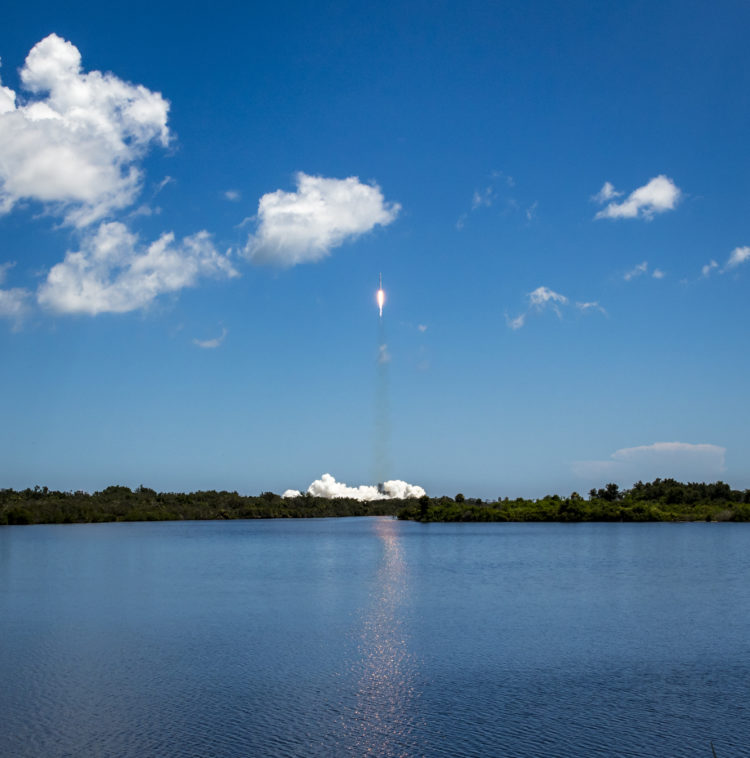
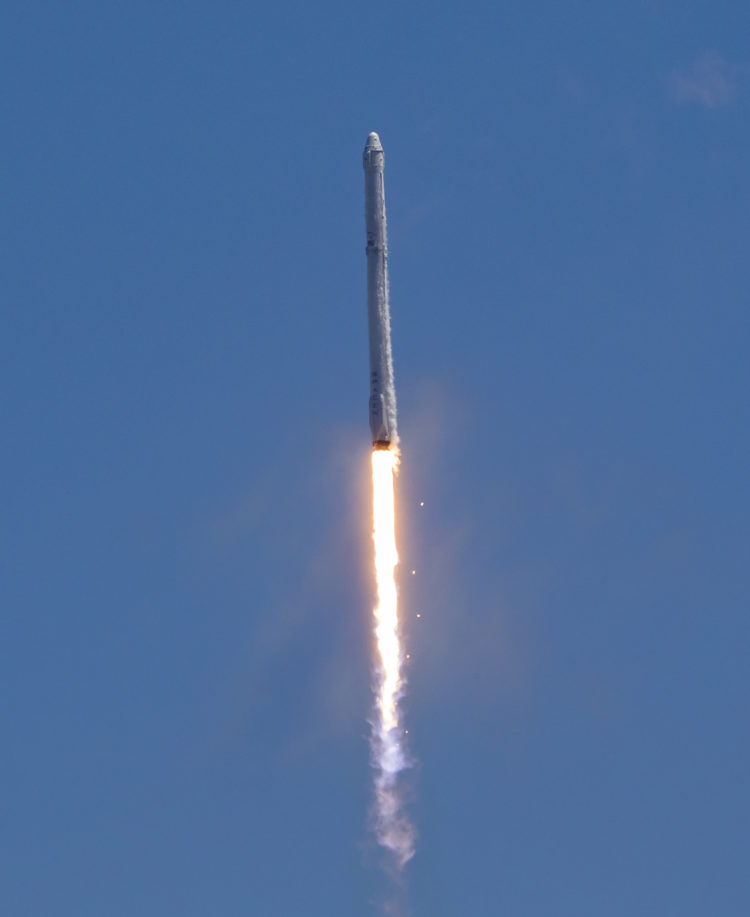
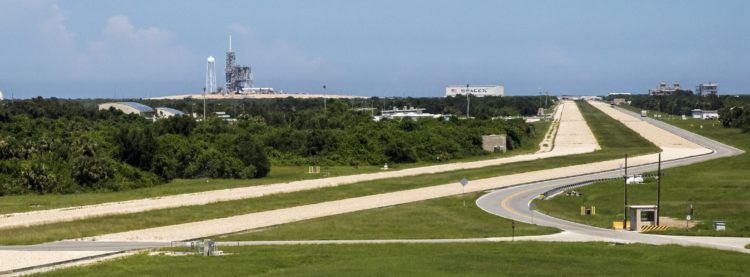
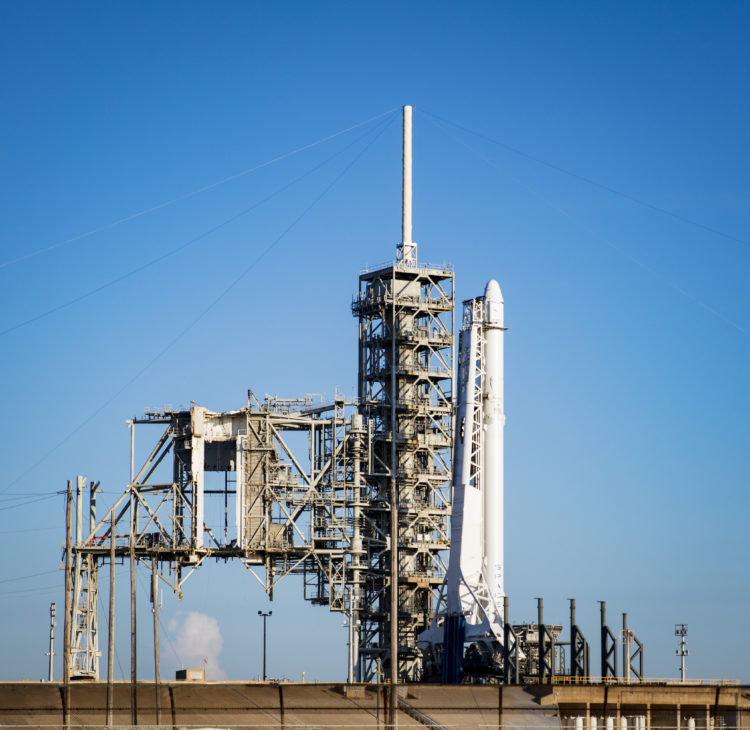
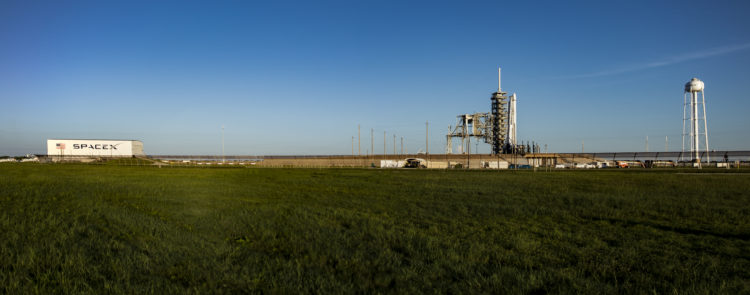
Speaking of sharing our experiences, here are a few of my shots from this weeks NASA and SpaceX CSR-12 launch. Big thanks to NASA for allowing photographer’s access to shoot these events. The Dragon spacecraft atop the rocket in these pictures docked with the International Space Station just a couple days ago with a laundry list of awesome science experiments and cargo. There’s even a huge experiment on board that might lead us closer towards a cure for Parkinson’s disease. If you’ve never experienced a rocket launch live in person, it’s probably up there with an event like the moon passing in perfect alignment with the Sun and the Earth. Plus with the frequency that Kennedy Space Center is launching rockets nowadays if you’re in the area your chances of seeing one are very high. I can’t recommend it enough.

I’ve been practicing the past few times. I’ve still haven’t figured out how to use my Vello ShutterBoss II Timer with Canon 5D III auto exposure bracketing.
But, yea, in South Carolina, that sun is pretty high in the sky. My first day of practicing, I failed using the DayStar filter on my Canon EF 300mm f4L lens. I couldn’t find the sun; it was so blinding. The next day, I used a wind breaker to drape over the camera and me to block out the surrounding light. That technique worked!
Also, I have a pan/tilt head on my tripod and some heads won’t tilt high enough for the sun. Mounting the lens backwards on the head will more than likely get around that problem. Mount the lens where the tilt lever is under the lens. I used that mounting technique (thanks to a photographer from Florida Today), for the final Space Shuttle launch. I also used it for a year long full moon photography project.