Howdy, folks. Now, if you’re a Lightroom user, you’re probably not going to find much use for this feature because Lightroom was born to make contact sheets with it’s awesome Print module, but if you’re just using Photoshop, this is one of those things you probably didn’t even realize was there (plus, Adobe took it out for a while, but enough people screamed that they brought it back after a while). Anyway, here ya go, mateys!

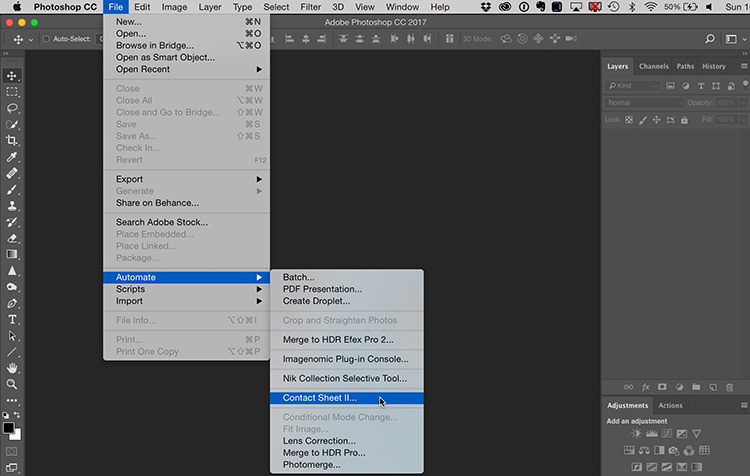
STEP ONE: Go under the File menu, under Automate, and choose Contact Sheet II.

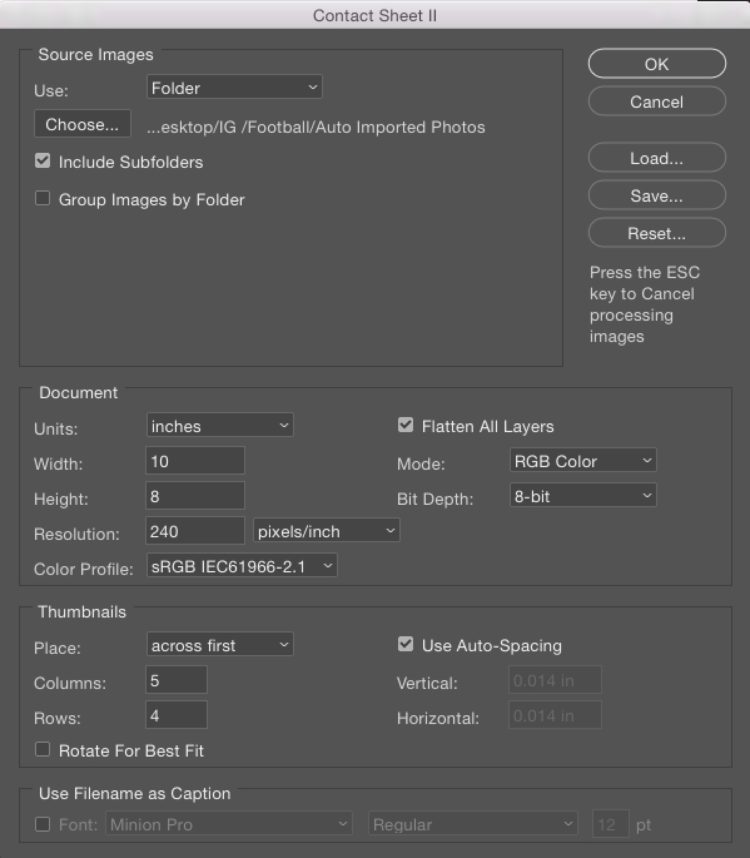
STEP TWO: When the window opens, up top choose which folder of images you want to have Photoshop make into a contact sheet. The bottom section (Document) is where you choose the size of the document you want it to create (in this case, I was feeling nostalgic for a paper size nobody’s digital camera actually cares about), so I made it an 8×10″, and I chose a resolution of 240 ppi. In the Thumbnails section, you choose how many columns and how many rows you want (and some other options are there that are self-explanatory), and if you want the file name to appear beneath the images (helpful if you’re making an actual contact sheet for yourself or a client), then you can turn on “Use Filename as Caption” at the very bottom.

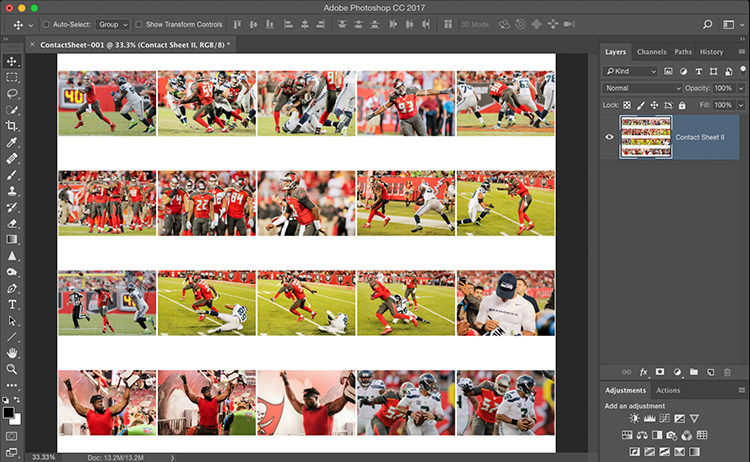
STEP THREE: Now sit back and let Photoshop “do its thing” and in a couple of minutes you’ll have your contact sheet. By the way — an especially cool feature is that it will create as many individual documents as it necessary to put all the images in the folder you choose on contact sheets, so don’t be surprised if you see 4, 5 or more tabs across the top when it’s done if you had a lot of photos in that folder.
There ya have — we’ve dug up some more Photoshop buried treasure!
Hope you have a great Monday everybody!
Best,
-Scott
P.S. We added new July tour stops in Richmond and Nashville to my “Lightroom On Tour” full-day seminar. Get your tickets now and come spend the day with me learning Lightroom like a boss!


Come back to MN soon! Excellent last month!