After my review here on the blog of the Lucis Pro 6 plug-in (link), I had a number of readers asking if I had tried the Topaz Adjust plug-in, as they felt it gave a similar high-contrast look for a fraction of Lucis Pro’s nearly $600 price tag (Topaz Adjust sells for $49).
So, I downloaded the Topaz Adjust Photoshop plug-in a few months ago and have been using it when I got the right type of image to edit, and I wanted to share my thoughts on the plug-in and give some examples.
DISCLAIMER: If you hate this high-contrast, under saturated, over-sharpened looking effect, please just skip this post altogether.
Initial Thoughts
When I first started using Topaz Adjust, it was still on version 2 and while I liked the effects themselves, the interface was….well….it needed some work. Luckily, the latest version (version 3), is a big improvement when it comes to Interface issues and most of my gripes from the previous version have been addressed.
While I know that both Lucis Art’s plug-ins and Topaz Adjust do numerous effects, what people seem to be buying these for primarily is the extreme contrast, almost illustrated, hyper-sharp look that’s so popular, so I’m going to focus on that area of the plug in.
The Results
Taking the plug-in through its paces:
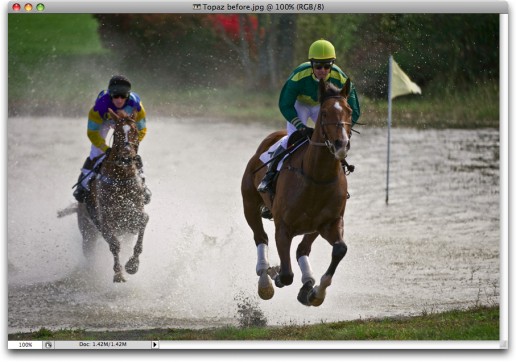
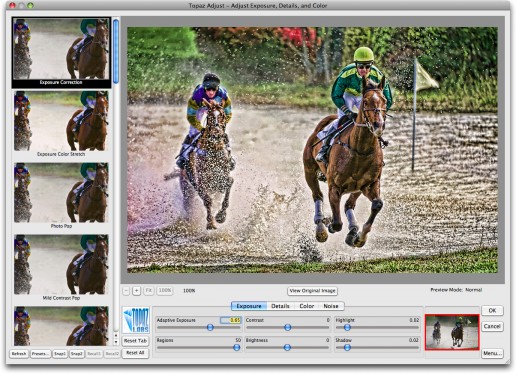
First, let’s look at our unretouched original (above), then let’s open the Topaz Adjust plug-in (shown below).
The resizable filter window (shown above) has a number of presets along the left side, and it has a decent-sized thumbnail so you can see a preview of how a particular effect will look before you even click on it. (You click on the thumbnail to apply a look. You can scroll through the effects and see them applied in the larger preview window using the Up/Down arrow keys on your keyboard, which is very handy.)
If you find a preset you like, you just click OK, and the filter is applied (it took 24 seconds to apply the filter on a 12-megapixel image on my MacBook Pro laptop).
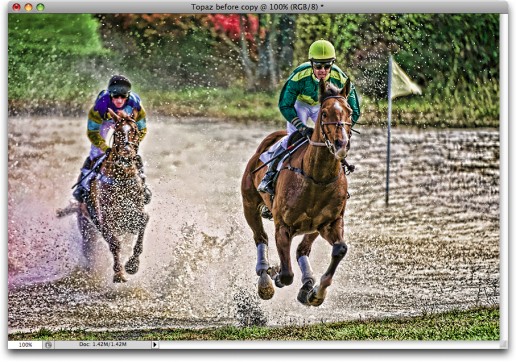
The image above has the preset “Psychedelic” applied, which I thought looked fairly close the same effect you’d get with the Lucis Pro filter.
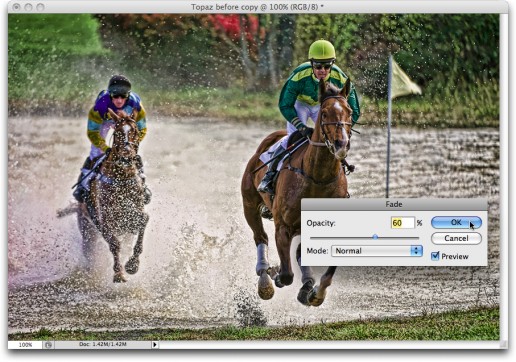
The effect seemed a little over the top, so after I applied it, I went immediately under Photoshop’s Edit menu and chose Fade, then I lowered the intensity to just 60% (as seen in the image above).
If you want to tweak the settings, there are a row of tabs under the main Preview window where you can tweak the Exposure, Detail, Color, and Noise.
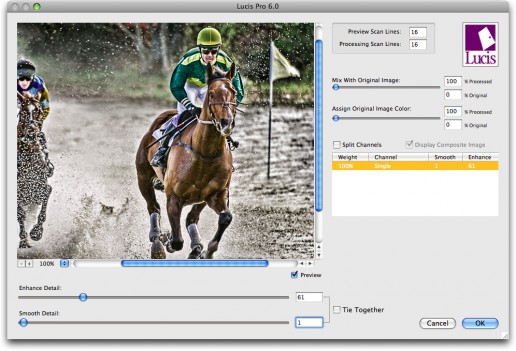
Once I saw how the effect looked, I thought it would be interesting to see how the Topaz Adjust effect compared to the Lucis Pro plug-in look, so I went back to the original unretouched image and tried the Lucis Pro 6.0 plug-in (shown below).
Here’s the Lucis Pro 6.0 Interface window. I lowered the Enhance Detail amount to 60 and clicked OK.
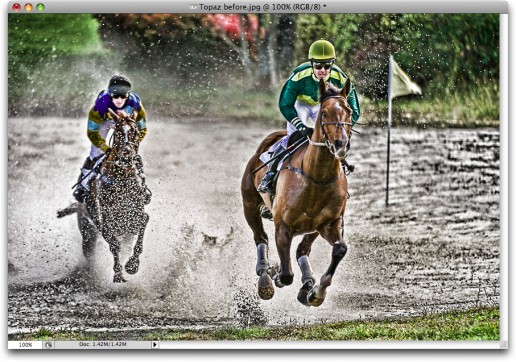
You can see the effect looks fairly similar (shown above). I also wanted to compare the effect using the same image I had used in a previous article (the image is of rapper 10-Minute).
Here’s the original image (above), right out of the camera.
The image above has the Lucis Pro 6.0 plug-in applied at that same setting of 60.
Here’s the same original image but with the Topaz Adjust filter applied (using the same Psychedelic preset). You can see the obvious green color cast on this image, so I hit “undo” and then went back to the filter to tweak the settings.
Here’s the same filter with just one setting tweaked: I clicked on the Color tab and lowered the Adaptive Saturation amount to zero. How did I know which slider to adjust? I didn’t. I just dragged each one back and forth until I found one that did it. I know—pretty high-tech, eh? ;-)
The Bottomline
While the underlying mathematical algorithm in the Lucis Pro 6.0 plug-in will probably produce a technically better image with less noise, they both create a somewhat similar effect. However, in my opinion there are three big advantages that the Topaz Adjust plug-in has that really tip the scales in its favor big time.
- The affordable $49 price tag. That’s nearly $550 cheaper than the Lucis Pro 6.0 plug-in. Yikes!
- The fact that it doesn’t require a hardware dongle (like the Lucis Pro plug-in does), is huge. In fact, the whole hardware dongle thing with Lucis Pro is a deal killer for me right off the bat, and I know a lot of people feel the same way.
- The thumbnail previews, and ability to toggle through them live, is a big advantage and makes the tool that much more usable.
Thus far, the plug-in has performed flawlessly for me (not a single problem on two different machines), but as I mentioned; it’s not the fastest plug-in in town. That’s really shouldn’t be an issue, unless you’re applying this look to a few hundred photos (and I’m praying you don’t).
NOTE: The most common way I use this plug-in, is to duplicate the layer; apply the filter on this duplicate layer, then hide this layer behind a layer mask (Option/Alt click the Layer Mask icon), then just reveal the effect where I want it by painting in white with a soft-edged brush.
While both plug-ins will do much more than I’ve outlined here, if you’re looking for this particular look, and you want a plug-in to do all the heavy lifting for you, it’s hard to beat what Topaz Adjust offers at such an incredibly affordable price.
You can download a free fully-working trial version from the Topaz Labs website, and give it a try yourself.





Your content is nothing short of brilliant in many ways. I think this is engaging and eye-opening material. Thank you so much for caring about your content and your readers.
keep it up
I see someone to are using WordPress on your blog, wordpress is the best.;.’
I only desired to make a quick comment in order to express gratitude for your requirements for people wonderful pointers you have been posting at this site. Time consuming internet investigation has towards the end for that the day been rewarded with high-quality strategies to give away to my guests. I would claim that many of us readers are actually endowed to happen in an incredible network with biggest reason so tons of marvellous those with useful hints. Personally i think quite privileged to have used your webpages and check toward actually more fabulous minutes reading here. Thank you for tons of things.
Man, you are the best… Your tips and advice is basically second to none… What else can I say. The other positive comments here speak volumes about your content.
The only books I buy is by Scott Kelby he is the best
LucisPro is now available for Windows after re-development for 2017 libraries, runtimes and MMX vector processing code.
Check it out at lucispro.com for $39.95 and there is no dongle.