Over the past few weeks, I’ve been highlighting some of the those little improvements Adobe snuck into Lightroom 3 Public Beta. These aren’t the features that are going to get any big fanfare, but may wind up impacting your daily workflow more than you’d think by either removing frustration or simply making things easier (and I’m all for that).
The first one is a really helpful tweak they made to the Import Image window (which has been completely revamped in Lightroom 3, but it’s not about the redesign—it’s about one particular tweak).
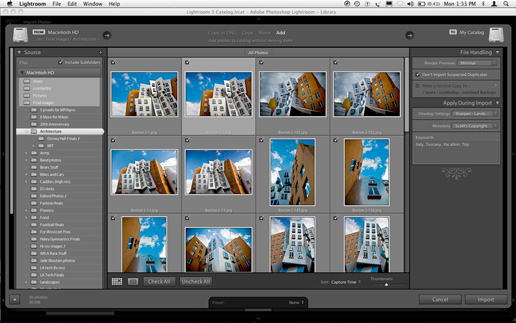
Above: Previously, your only Import choice was lots of thumbnails.
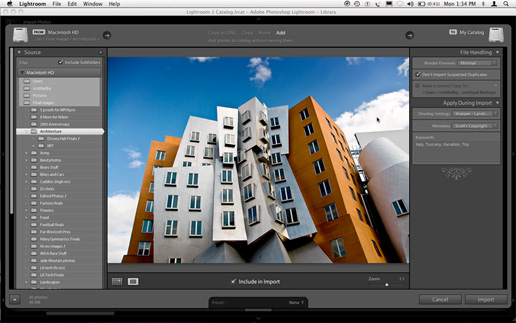
Now you can zoom in for a much larger preview to check sharpness, details, etc.
#1 The first tweak is that you now get some of the same preview functionality in the Import Window before you import the photos, that normally you wouldn’t get until after images are imported into Lightroom. Here’s what I mean: if you double-click on a thumbnail in the Import window, it now zooms into full size. Click again, it zooms in even tighter. Press the letter “G” and you’re back to the thumbnail Grid. This is really handy if you’re trying to find just one or two images you want to import from a shoot, or quickly check the sharpness of a photo to see if you even want to import it at all. Now, back in Lightroom 2, you could get a little larger view by increasing the size of all the thumbnails, but it was el-clunk-a-roonie. This is much better (and more consistent).
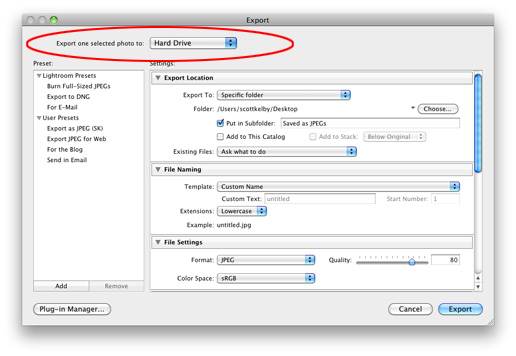
#2 The second tweak is actually something that helps new users probably more than anyone else, but it probably will save us all a click or two when we go Export our photos to JPEGs, TIFFs, etc. In the Export window, at the top of the window, is now a clearly visible pop-up menu that lets you choose whether you’re saving your images to disc, or burning them to a CD.
The little menu up top is now so obvious, actual users may find it!
This feature was actually in Lightroom 2, but it was hidden way over on the right side—I know it doesn’t look like a menu, but click and hold on it—and the default was to burn a disc, rather than saving to your computer. Again, it’ll probably help new users a lot (and I’ve gotten a lot of emails over the years about it), so I’m glad they made this feature “More Discoverable” (which is Adobe-speak for “now it’s not hidden”).
By the way—while we’re on the topic of Hiding things; there’s one feature in Photoshop that is so hidden, yet so important, that I can’t believe after all these years they’re still hiding it. It’s the button that Resets your current tool to it’s default settings. I get asked how to do this all the time, because if you didn’t know this feature was hidden there, you’d never find it.
Above: Here’s how you’d imagine this reset button would appear in the Options Bar
(way too easy for users to find).
Above: here’s what you actually have to do in Photoshop to find this hidden Reset button. You have to Ctrl-click (PC: Right-click) on the little down-facing arrow to the right of the Tool Presets pop-up menu in the top left corner of the Toolbar (as shown here).
Above: ….and from the pop-up menu that now appears (shown below), you can choose Reset Tool, or Reset All Tools.
Now, you might be saying to yourself, “Scott, what’s the big deal about having to right-click on that button? That doesn’t look so complicated.” You’re right—It’s not—as long as you already know to click that button in the first place. That’s the “gotcha!” Most users don’t know that (how would they?).
So, if anybody out there in Adobeland is reading this, and you feel like making life a little better for everybody, but especially for new Photoshop users, I hope you guys consider this little improvement for the next version of Photoshop. :)


