Hi everybody and happy Friday. I was taping a segment to a new class I’m doing — a follow-up to my “Just One Flash” called (wait for it…wait for it…) “Just one more flash.”
Anyway, when the taping was over, I wanted to try something a little different portrait wise (well for me anyway), so I did a very simple portrait where the goal was to try and give it a window light look, and I thought I’d share the final image, some behind-the-scenes shots, and talk a little about camera settings and post processing. I’ll do that all in the captions below.
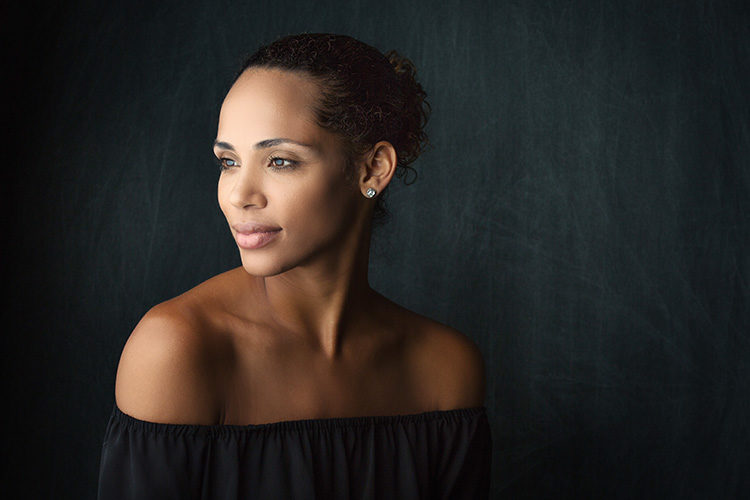
Above: Here’s the final image.
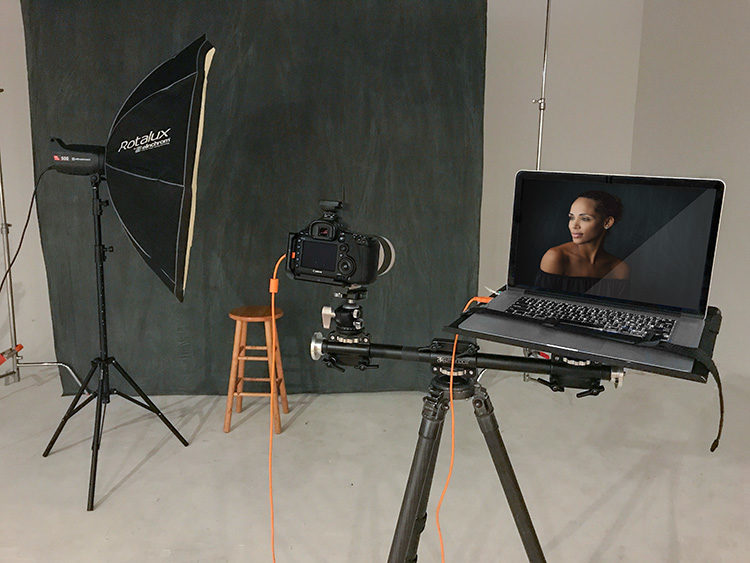
Above: Here’s an over the shoulder view of my shooting rig. I’m using a Canon 5D Mark III with a 70-200mm f/2.8 lens (my go-to lens for portraits). My camera is tethered into Lightroom CC on my laptop using a 15′ TetherPro USB cable from Tethertools. It’s supported on a Really Right Stuff tripod with a Tethertools Rock Solid Tripod Crossbar; an Aero Table, and the strap that keeps my laptop from sliding around is an “Aero Secure Strap” and you can’t see it in this photo, but my tripod is on a rolling rig that is designed to let you easily roll the whole thing called a Rock Solid Tripod Roller.
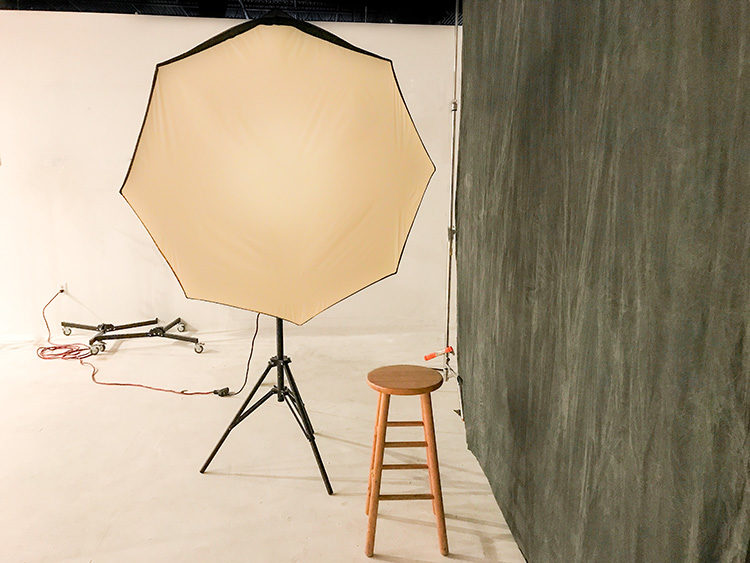
Above: Here’s a clean view of the lighting set-up. I used just one Elinchrom ELC 500, and put it close enough to the cloth backdrop that some of the light would spill onto the backdrop. I didn’t want a bunch of light because I wanted kind of a dramatic portrait, but I needed a little spill. You can see from the shot above that my subject is seated way at the back of the softbox (a technique called feathering where your subject is far away from the hotspot in the center of the light).
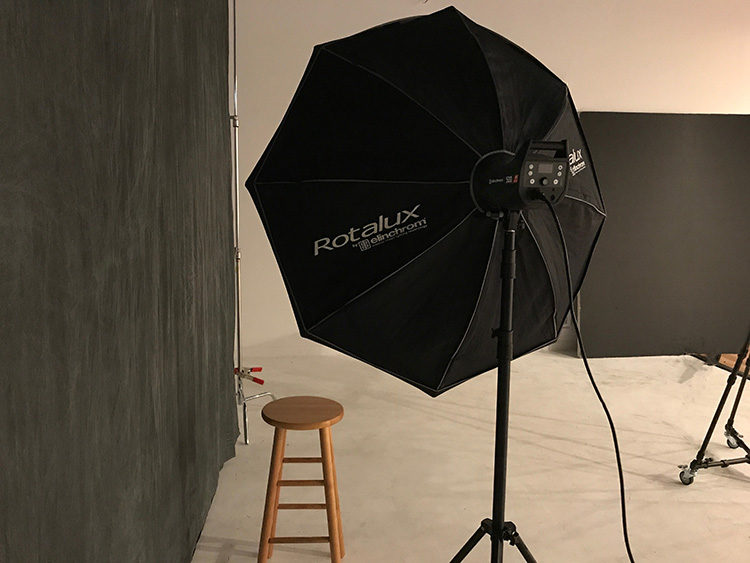
Above: The softbox I used was an Elinchrom 53″ midi-octa, which is kind of my go-to big octa for portraits (and it’s not too expensive considering how awesome it is. B&H Photo has ’em for $324).
SETTINGS:
I had the power of the Strobe pretty low because it was so close to my subject (less than 18-inches and at times less a foot). My camera was in Manual mode, with my shutter speed at that nice happy 1/125 of a second; my f/stop was f/9; and my ISO at 100 (the cleanest native ISO for my camera). Just one single light, and some simple very repeatable settings for a set-up like this.
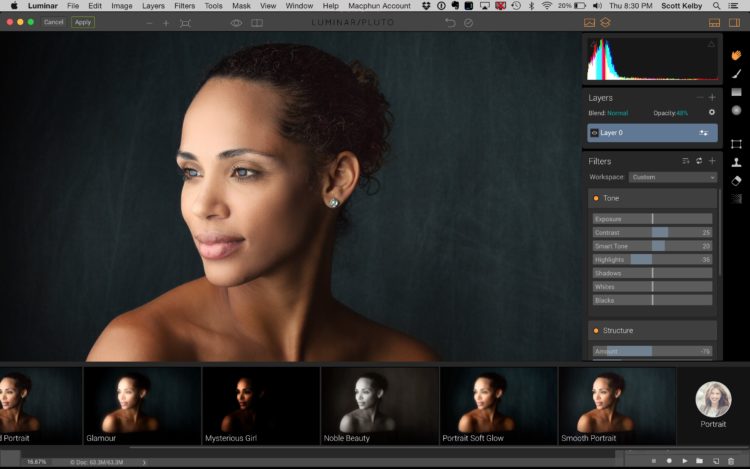
Above: I started in Photoshop doing some standard portrait retouching stuff (removing blemishes, some skin work, a little work on the whites of her eyes and her iris – pretty minor stuff overall).
I’m embarrassed to tell you how easy the rest was — I opened MacPhun’s Luminar plug-in; I went to their Presets (I have my own set-up presets you can get from MacPhun), but I actually wound up going with one of their built-in Portrait Presets called Smooth Portrait. I like the glow and the color grading it gave, but once I applied the preset, I backed off the amount to 48% strength. I also pulled back the highlights a bit and increased the amount of edge vignetting. That’s it. Easy peasy. I clicked OK, and that’s what you see at the top of the page as the final image.
Hope you found some of that helpful. :)
Have a great weekend everybody! I’ll be working on my new book all weekend — almost done (a brand new one!).
Best,
-Scott
P.S. Next Friday I’m in Minneapolis with my Lightroom On Tour full-day seminar. Hope you can come join me if you’re up that way. :)



That first class was so great – I fell in love with my flash thus the continuation is most welcome. It so happens that recently I bought a second hand Elinchrom midi octa (to cheer myself up as I couldn’t go to PSW this year) therefore I want to learn the ways to use it of course.
This series seem to become pretty epic. Do you think you’ll ever get to the episode called “Just for the nut with four strobes and three speedlights” (me – talk about GAS…)?
Thanks Piotr – That sounds more like the territory of Joe McNally – he’s a wizard with multiple flash set-ups, and he’s already got classes on KelbyOne with that type of stuff, so I’ll set aside at that point. Once it goes over three flashes, I’m like “this is too much work for me” LOL!!! ;-)
Insightful article: http://architecture.uonbi.ac.ke/
Superb lighting and tutorial Scott. The final result sings! Thanks for sharing.
I bought a complete Elinchrom lighting kit with several Rotolux sofboxes after your recommended it in some of your tutorials and books a few years ago. They’ve been a great performer – the system rocks!
A couple of things caught my eye in your setup. The first is the light stand supporting the Rotolux. I notice the leg braces are not fully extended straight for extra stability, and you don’t have a sandbag on the rear brace to prevent it toppling over. I’ve found that some of the larger Rotoluxes are pretty front heavy, and can tip if a photographer is not careful with leg positioning relative to where the softbox is pointed. You have some nice wheeled spreaders in the background – surprised you didn’t make use of them for the lighting tripod.
The other thing that worries me is your combo camera and computer setup. Take the camera off to do some freehand shooting, and the center of gravity shifts. That lovely laptop might take a tumble. I use a video projector stand instead, the type with removable telescoping legs. Very portable, and much more stable! Just saying!
Cheers from Montréal.
Hi Scott,
I recently sold a 150cm Octa and replaced in with this one. Have to say I wasn’t expecting the quality increase that I got in that sale, despite the reduction in size. I’ve even been using it with speedlights on location with the Godox bracket for Elinchrom. It’s such a gorgeous modifier.
Sean
Lovely Photo shoot. Really appreciate it. Thanks for sharing
annieoneillweddings.com
Very wise use of distance and a large light source – beautiful distribution of this single light from the model face to the backdrop. Simplicity usually produces better results.
Lately I started experimenting with minimalist lighting for my portrait photography too:
mirchevphotography.com/gallery/creative-portrait-photography/