

OK, I’m not the first one to come up with the idea for a Safari-themed fashion shoot. I’m probably about number 500, but I wanted to do something different and fun, and this seemed like it would both (and we could do it without breaking the bank).
Here’s how the shoot came about
I was working on a class on how to use the location strobe I’m using now, (the Profoto B1x), and I was going to do the whole thing in the studio because the class was about how to use the light and the wireless remote, but since the strobe is made for location shooting, I thought at the end of the course, I would go on location and actually do a shoot, so the photographers watching the course would see how easy and awesome they are to use in the field.
Kalebra is my art director for production shoots like this, and while she usually comes up with the concept for our shoots, I knew this time I wanted to try this Safari Fashion look and she was happy to help. I did some upfront research (on Pinterest, Google Images, and Instagram), and I compiled a list of what we would need to pull this off.
- A Luxury Safari tent. I found ones you could rent for $500 a day (yikes!), but that’s kinda outside our budget but then we found one that looked nearly as good that we could buy for $249 from Walmart — we would just have to cut a slit in the back so you can see through the tent to the field behind it (I wanted to have some depth behind it). As it turned out, I’m so glad we didn’t rent and bought the tent instead because the shoot was canceled three times due to rain. The rental house doesn’t care if you got rained out — you pay for the days you have it.
- A rug or two, for the floor of the tent, or for in front of the tent.
- Some steamers or luggage as props
- Some chairs (I originally wanted something nice Safari-looking chairs, until I saw the prices) so Amazon to the rescue with a director’s chair and HomeGoods came through with the other.
- And some side tables and props, many which we literally took on our sets at the office, and people’s desks, and well…we kind of borrowed them for the day
Kalebra went to work on getting the outfits, hair and make-up concepts, finding the right model, and figuring out the props; Christina (our super awesome in-house producer for our online courses) set about to find us an outdoor shooting location that didn’t look “Florida-ish” (it’s supposed to look Africa Safari-like), and a rental jeep (I thought it would be cool to have a jeep out of the focus in the background, but the jeep actually broke down on the way to shoot and never showed up, so scratch the jeep).
The biggest challenge was the cows. This was a cow-pasture in Plant City, Florida (about an hour from the KelbyOne HQ), and from time to time the cows would wander behind the tent and become part of the scene, and nothing says ‘this isn’t Africa’ like some dairy cows roaming behind your model.
Above: Here’s my first test-shot of our model Gabi on the set. The lighting looks pretty bad. The idea of this location shoot was to show how to mix your flash with the available light, and this looks way, way too “flashy” (looks like I used a big utility flashlight from Home Depot), but hey — we just set up the light; aimed it at her, and took a test shot. Hey, ya gotta start somewhere, right? Also, during this “setting the lights” stage I tell the model they don’t need to pose while I’m working on the lighting.
After all the work she had done, I felt bad that Kalebra couldn’t actually be at the live shoot, but she had a scheduling conflict, so we set everything up as best as we could, but we knew it didn’t look right, so we had Kalebra FaceTime in. That way she could see the tent, the props, and the outfits, then she worked directly with our make-up artist (whom we all adore and use every chance we get), the awesome Hendrickje Matthews to get everything right on set, and Christina and Rachel from our crew to get the set looking good, so I could focus on dialing in the lighting.
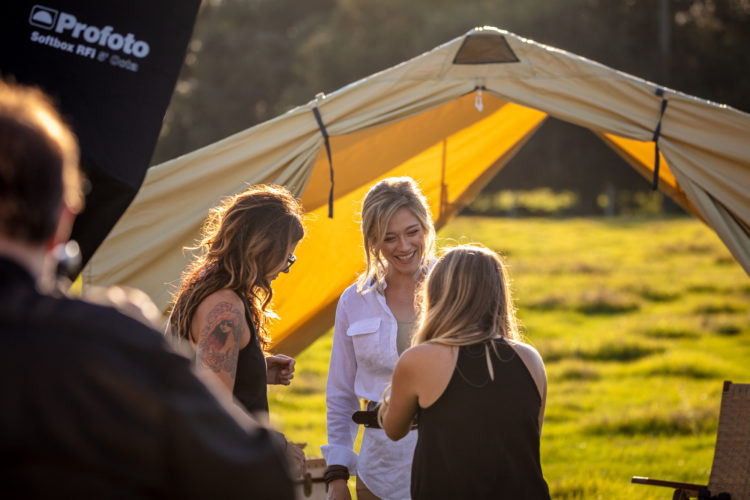
Above: Hendrickje (L) and Rachel work on tweaking the outfit after Kalebra FaceTimed into the shoot.
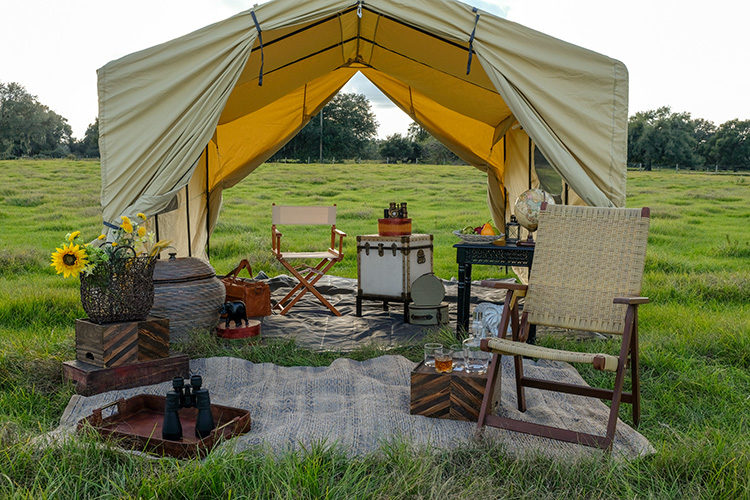
Above: The first thing Kalebra did was remove most of the junk (see above) we had piled in and around that tent. It was “over-accessorized.”
Above: Once we started removing stuff per Kalebra’s guidance, the set was starting to look much better. The light still isn’t there, but at this point, we’re mostly focused on getting the set right, and the outfit, and stuff like that.
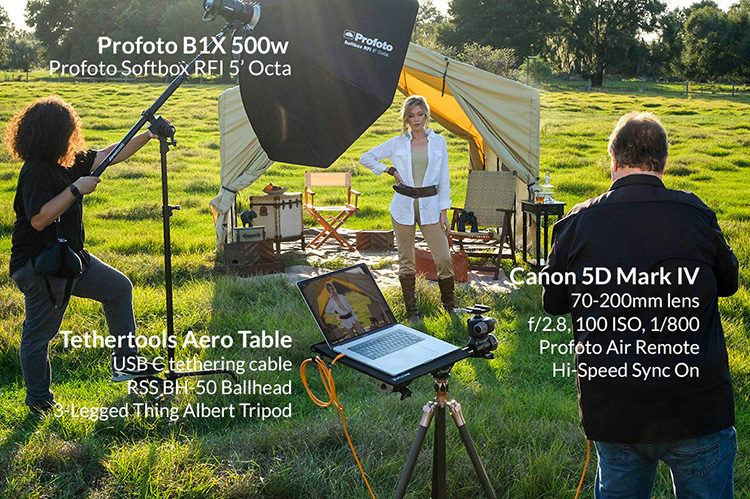
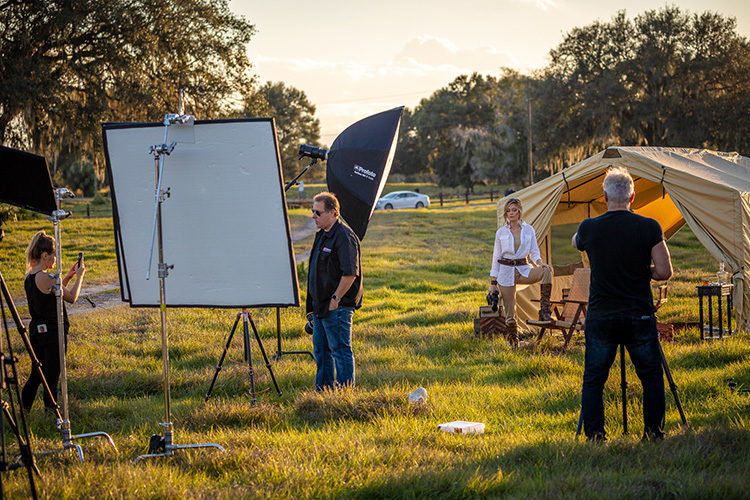
Above: Here’s a behind-the-scenes look at the set-up. Just one light (the Profoto B1x 500-watt battery-powered strobe). Special thanks to Kathy Porpukski and Erik Kuna for the behind-the-scenes shots. :)
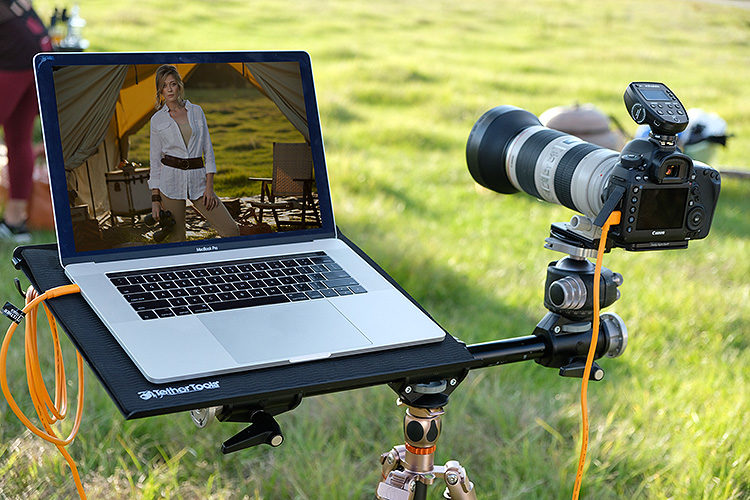
Above: I take my tethering rig on location every chance I get — it makes that big a difference. Shoutout to the folks from Tethertools.com – they make awesome tethering gear!
Above: It’s every educator’s dream to teach standing in a cow pasture. 😂
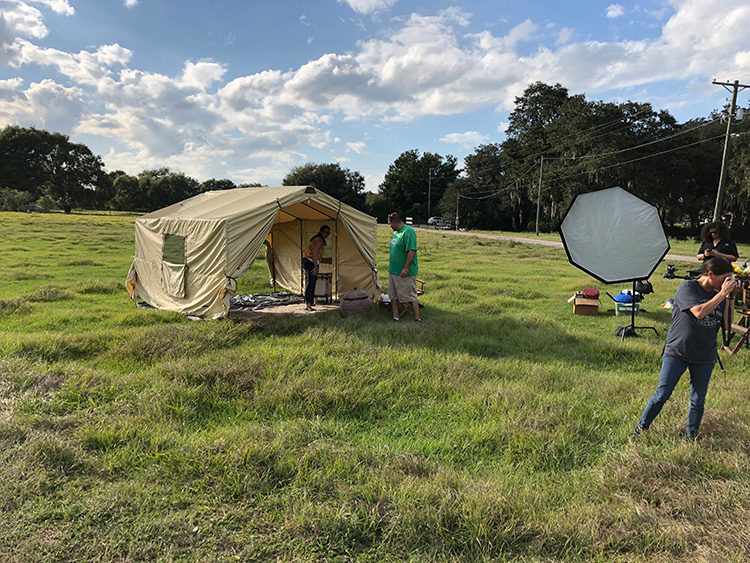
Above: The glamour of shooting on location is real. Real smelly.
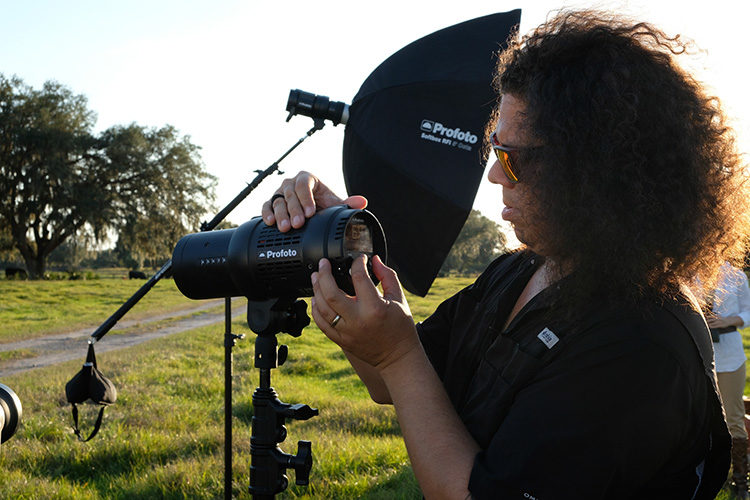
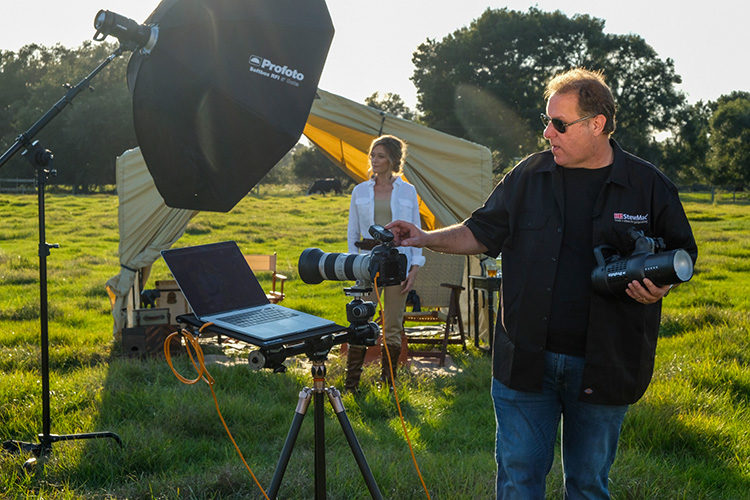
Above: The awesome Julio Agular assisting me on the shoot. Look how small that strobe is. Sa-weet!
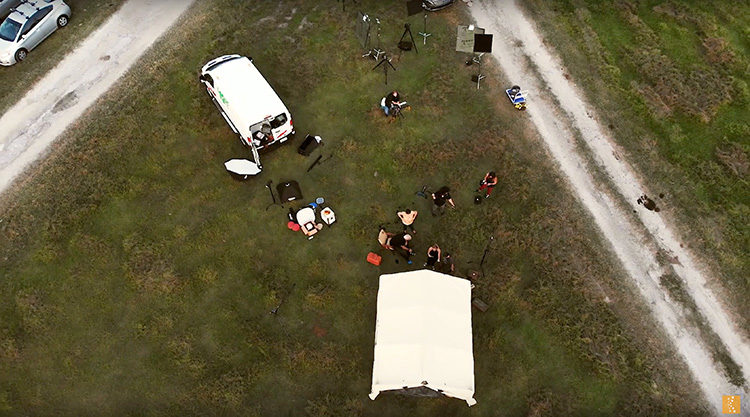
Above: Here’s the overhead view from our drone. A cow pasture in the middle of nowhere is about the only place you can still actually fly a drone.
Above: Here’s what it looks like with the light off, and just the available light.
Above: Here’s what it looks like when your flash is too bright.
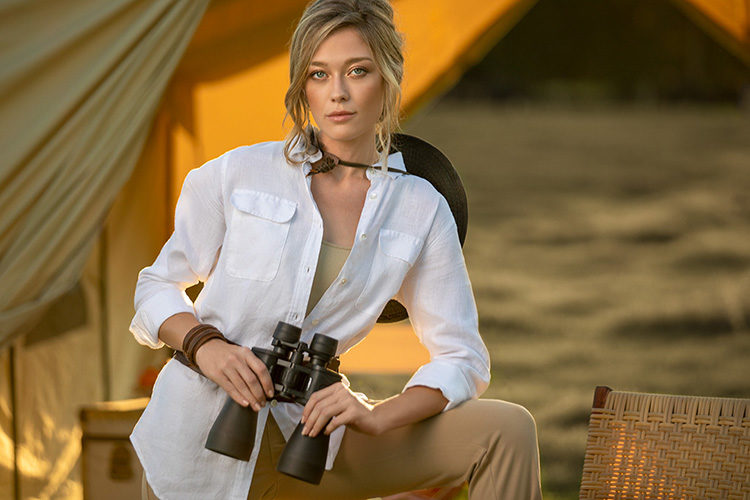
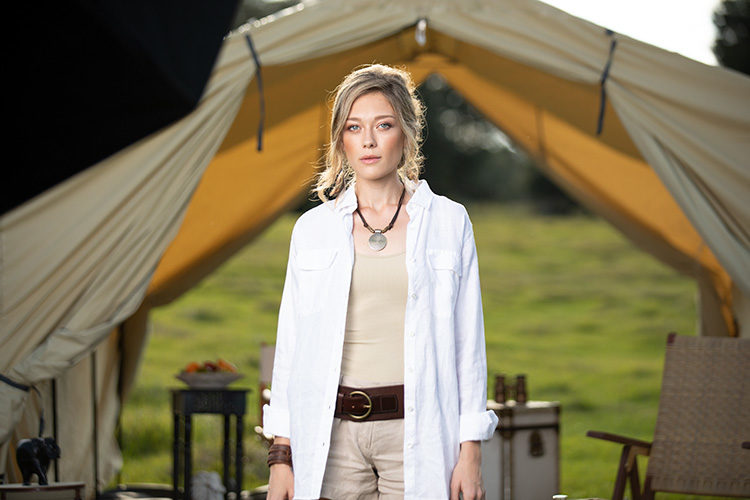
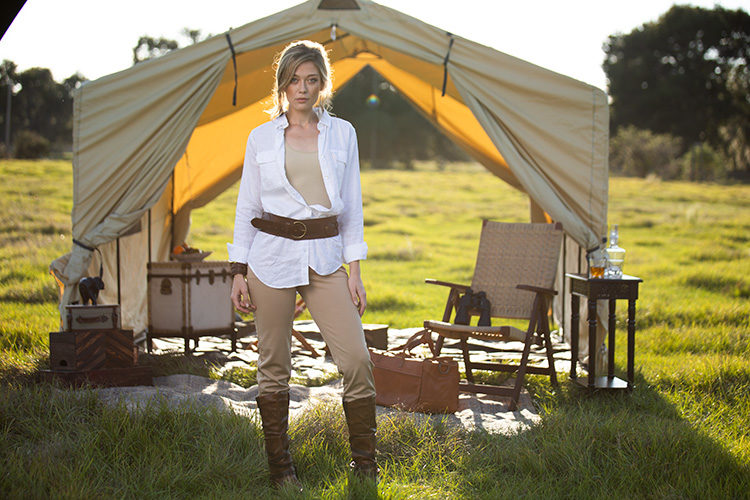
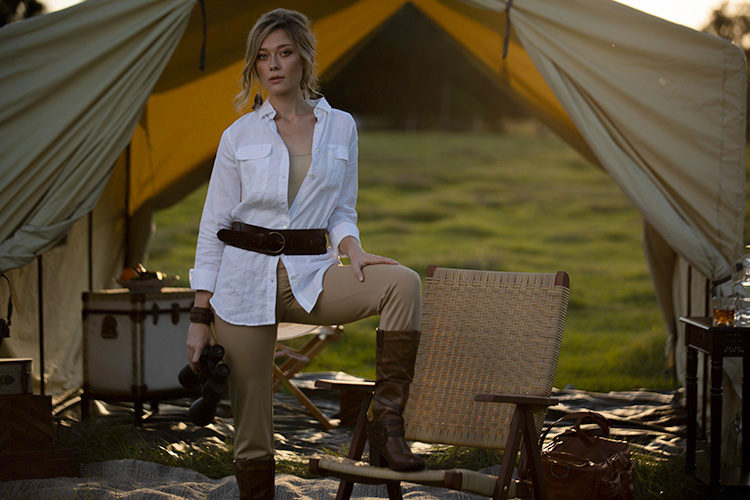
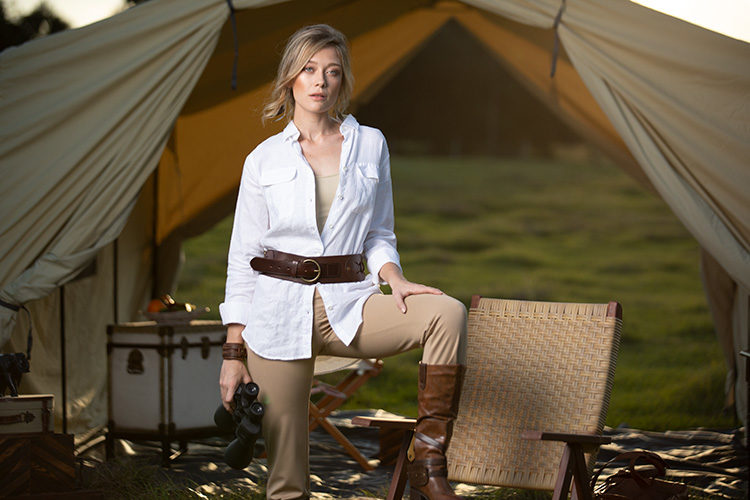
Above: Here’s the final image, with the light from the flash balanced with the natural light.
The lighting is supposed to look natural, not too bright, not too flashy. The goal is to make it look like natural light. It shouldn’t be obvious you used a flash. It’s a dance between adjusting the shutter speed (which controls now much natural light you’re letting in – the slower the shutter speed, the more natural light you get), and the power of the flash (which I try to get looking natural by not overdoing the power of the flash). Believe it or not, it just takes a couple of minutes to dial it in and get it looking right. We also feathered the softbox (so it’s not aiming directly at the subject) to create an even softer more flattering light. As much as I already loved the B1x, I feel even deeper in love during the shoots for this class. It’s such a brilliantly designed light — I’m thrilled to finally get to use them.
Also, I wanted to make the grass in the background look more “Safari-like” so in Lightroom I desaturated the greens quite a bit (using the HSL panel). You can also see the addition of the prop binoculars and the hat over her back (both Kalebra’s tweaks via watching the shoot via FaceTime).
Here’s the trailer for the full online course (in case you want to check it out)
I start in the studio and go through how the light works, and how the remote works with it (it’s super simple), and then we head out for the location shoot. I also added a bonus lesson which is a quick-start guide, so if you watched the class, and later want a quick recap when you’re out on a shoot, you’d be able to just watch that one lesson as a refresher.
Here’s a link to the class.
I hope you found this behind-the-scenes stuff helpful. In just a few weeks I’ll be recording a Part 2 of this class, where the entire class is all location shoots (based on feedback from the class – folks wanted more of the live shoots, so I’m happy to add another three shoots to the mix).
Here’s to a great week. Hope you’re staying warm (wherever you are) and see ya here tomorrow for Travel Tuesday’s with Dave. :)
Thanks,
-Scott
This demonstrates why it is so fun to learn from you and Kalebra. You show the process behind the result. Thank you for candor, clarity and simplicity.
You bet, Tej :)