

Here’s the behind-the-scenes video I mentioned on Tuesday from my car shoot at an airplane hangar (as luck would have it, the hanger was the exact same hangar at the airport where my wife flies out of). I used the Priolites again but I also used a new super-lightweight battery pack that let us take one of our Elinchrom studio strobes out on location (I did a quick demo of it on the video above).
Anyway, we were planning on shooting two cars and a plane, and it turned it to a six-car, six-hour long shoot with two Ferraris (an F-430 and a California); a Devon GTX, a Rolls Royce Ghost, a Spyker, and a Audi R8. We were psyched! (Plus, I was finally going to get a full-body shot of the Audi R8 I did the detail shots of last month).
Anyway, I’ll tell the rest in the captions (BTS photos by Brad Moore), but first a big thanks to my buddy David McComas who not only has some amazingly cool cars (and let me shoot them, and borrow his hangar), but he also has friends with more cool cars. Not a bad combination (thanks David!)
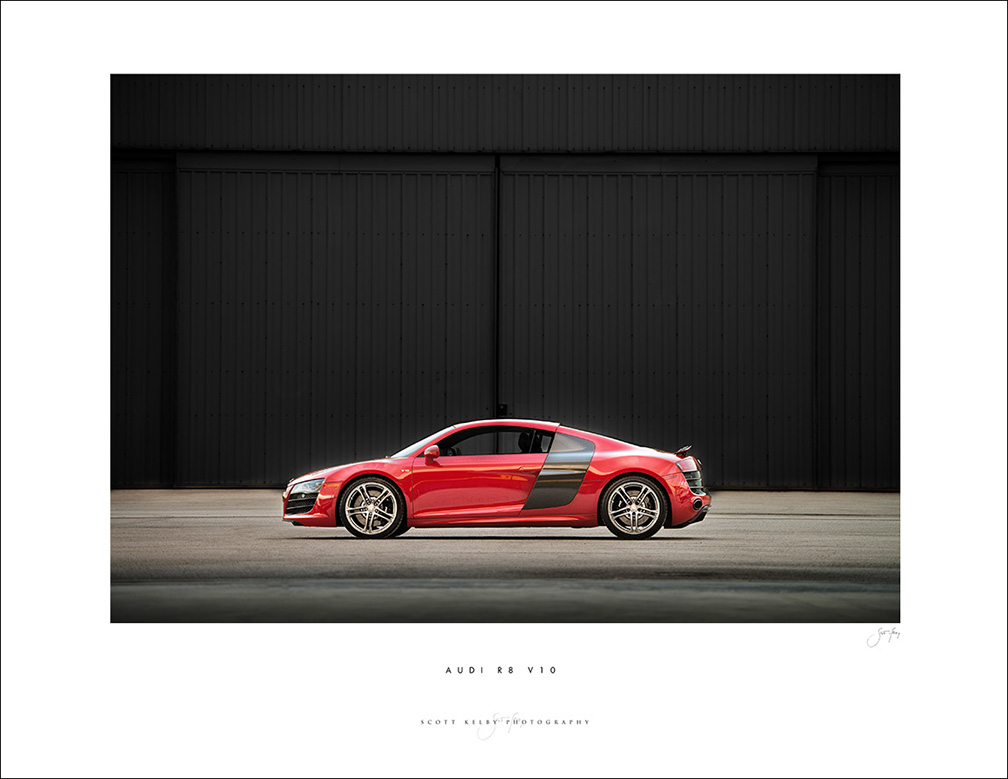
Above: This shot is just natural light. We only had a few minutes where the sun had tucked behind the other hangar, but it wasn’t sunset quite yet, so we actually had a decent amount of light, and that’s when I had my crew pull the R8 out in front. I wanted to take a shot that had lots of negative space (the total opposite of the close-up detail shots I took last time).
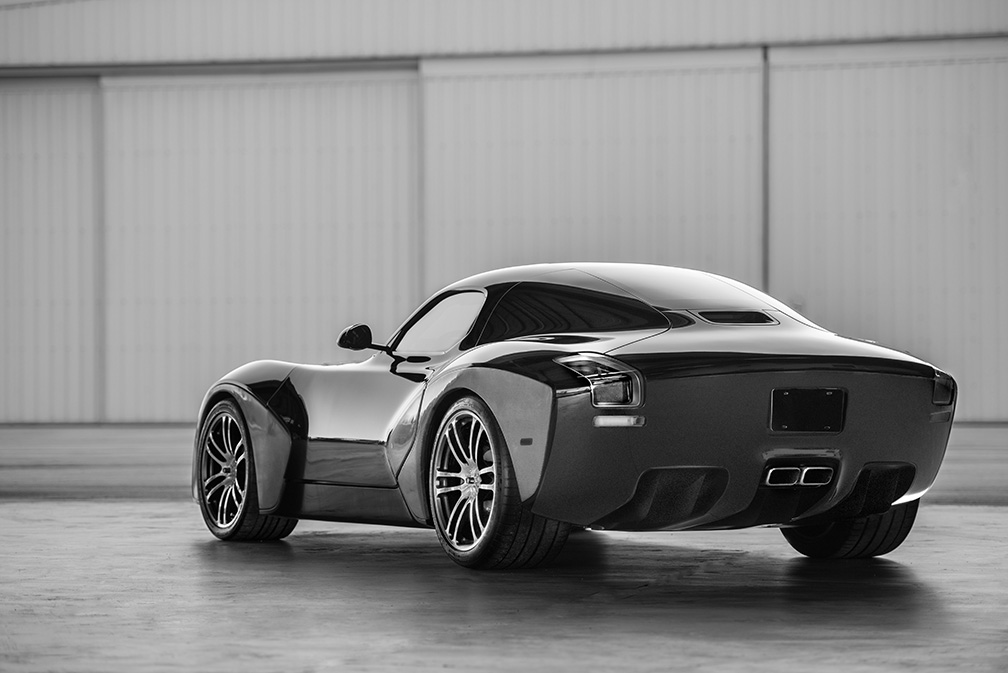
Above: The Devon GTX. What an insanely cool car (with gull-wing doors, no less). I love how the back has no bumper â” it just go straight from the truck to the rear in one solid piece. The color of the car was pretty monochromatic so I went ahead and took it all the way with a black and white conversion. Again, just natural light near sunset.

Above: Here’s a shot with me standing where the Audi R8 was parked, looking back in toward the Devon in the hangar (now you can see the full-color version).

Above: That little red circle in the back of the hangar. That’s me. 70-200mm f/2.8 lens at ISO 100. I switched to the D800 for this one to get extra resolution.
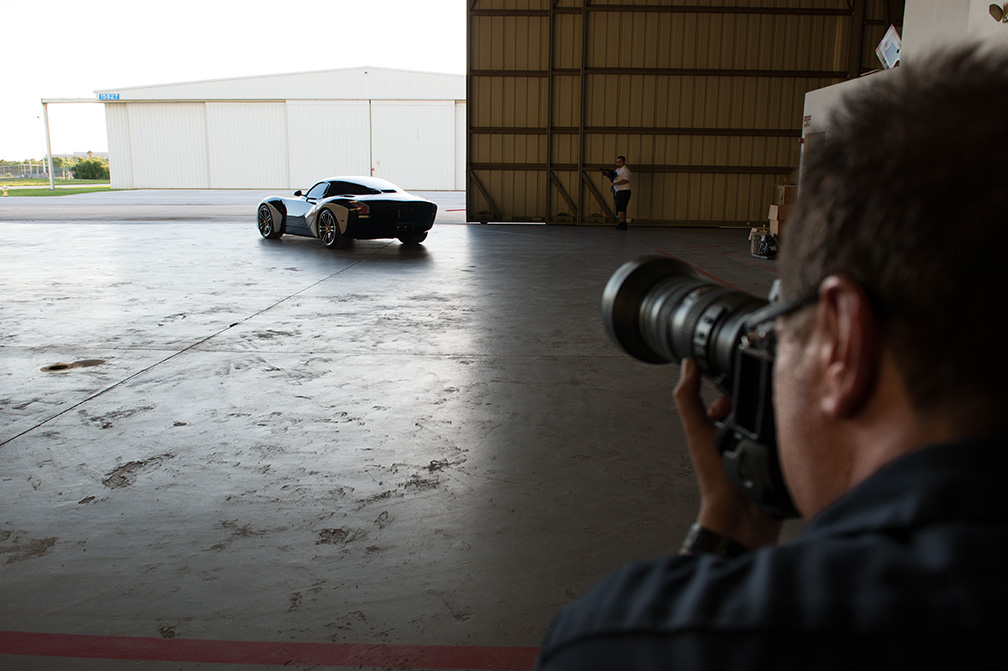
Above: Here’s the over-the-shoulder view.
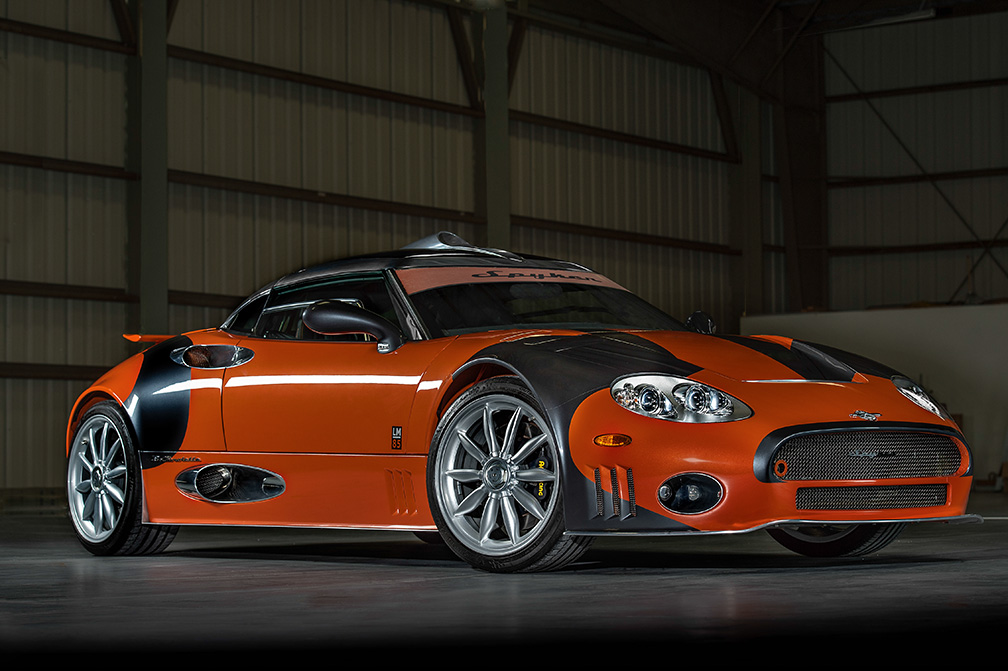
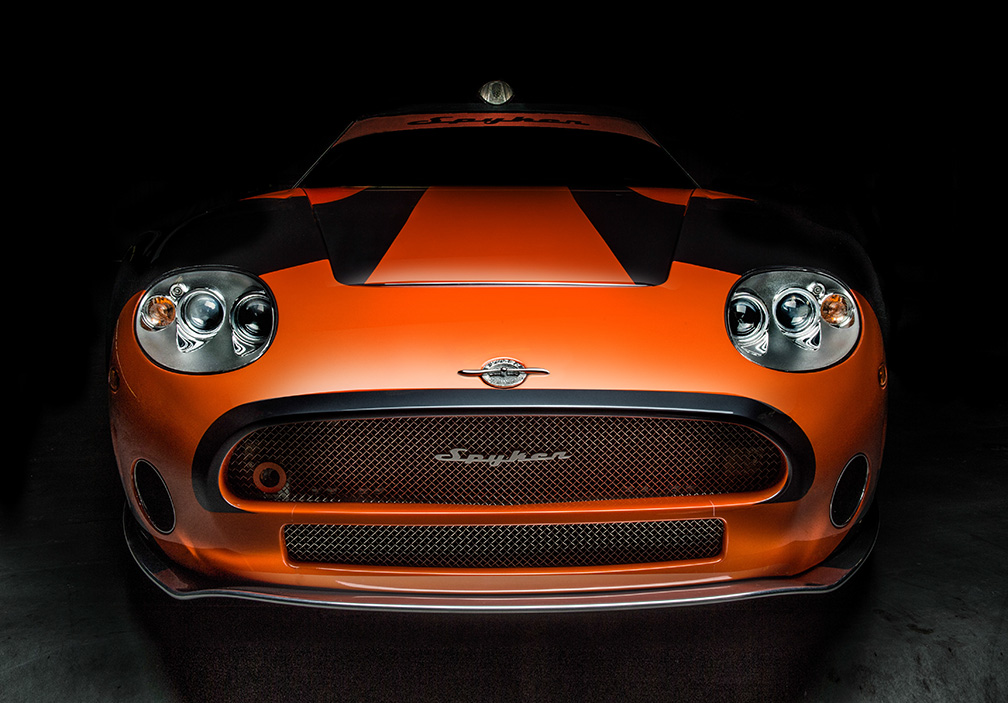
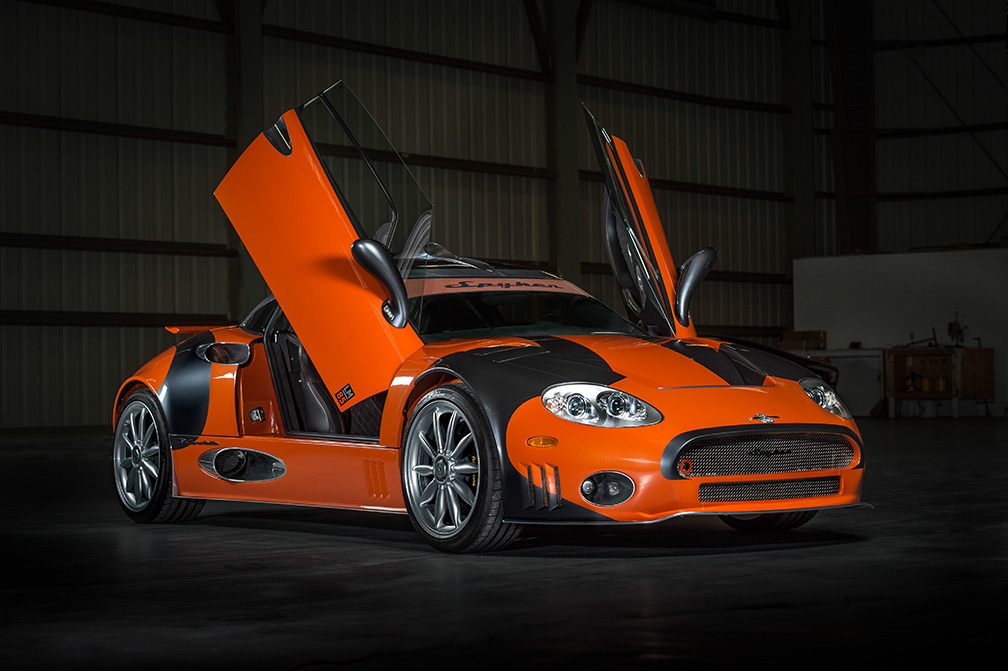
Above: here’s the Spiker (the one I showed in Tuesday’s behind the scenes shot). Sick car!!! I only had time to shoot two of the car full-body and this was one of them.
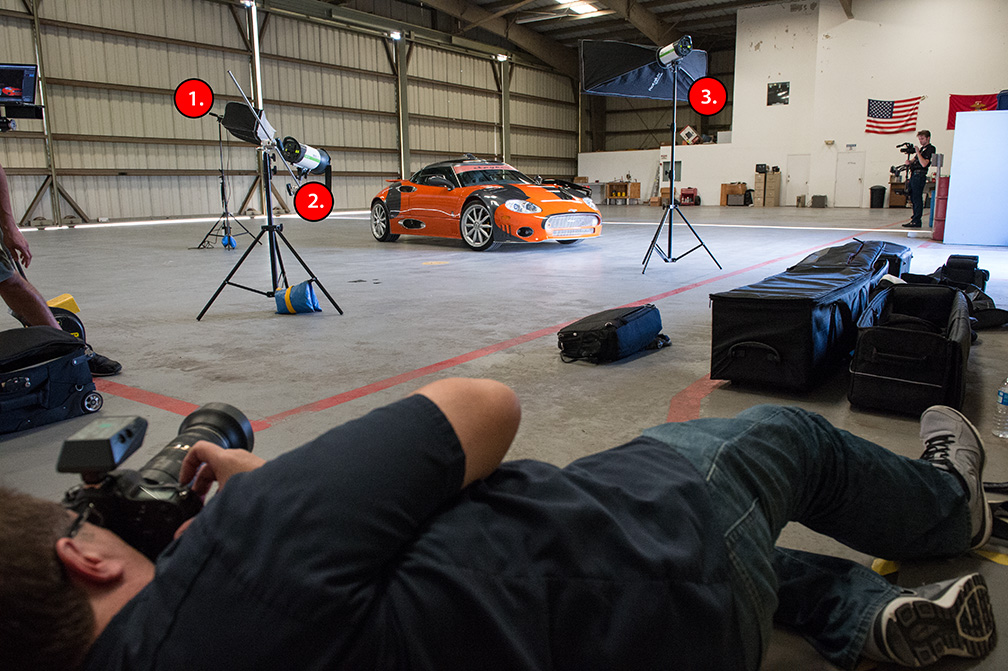
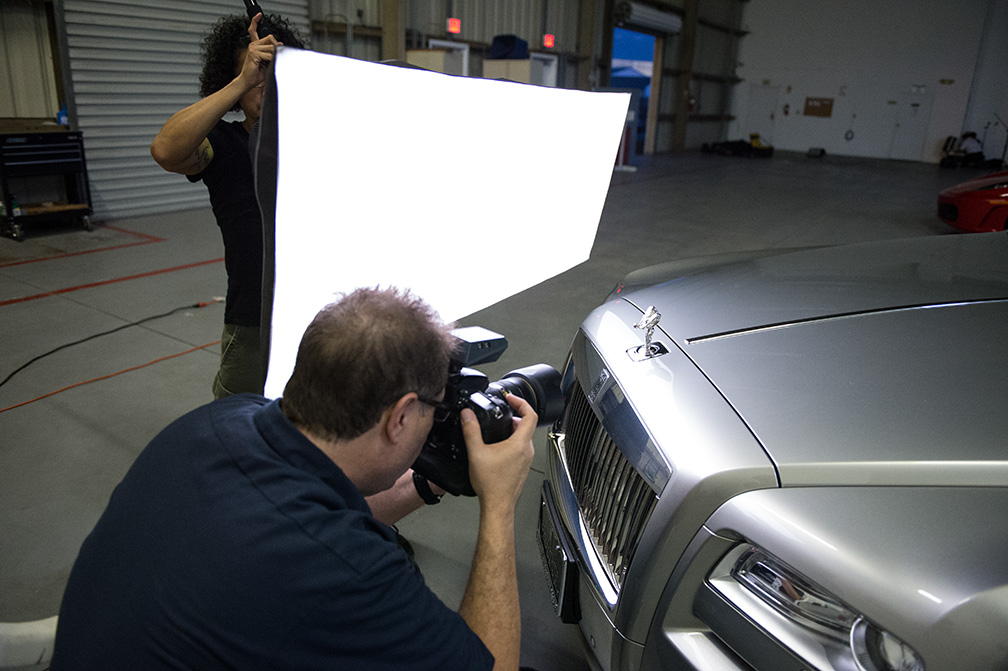
Above: Here’s the lighting set-up for the Spyker. Three lights total. #2 and #2 are Priolites (the same ones I did the Audi R8 with last month), so there’s no power pack or cables â” the battery it built right into the lights (which is pretty sweet!). The #2 light is a bare blub strobe. It was supposed to have a grid on it, but we somehow misplaced it before the shoot and of course didn’t realize it until we were actually at the shoot. That posed quite a challenge because the light was spilling like crazy, but it was what it was. The #3 light is using a large strip bank.
The #1 light (with a large Tim Wallace-style strip bank) is a regular studio strobe — an Elinchrom BRX 500 (my go-to light int he studio), but we were able to take it on location thanks to the brand new lightweight battery pack I talk about in the video (though here’s a direct link to it at B&H Photo).
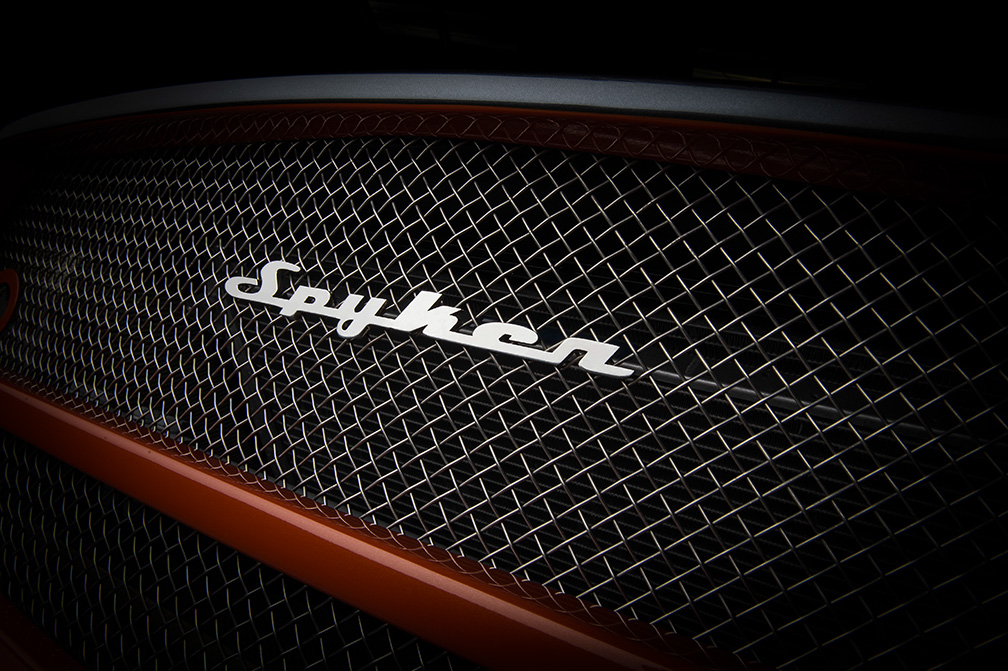
Above: I love the front grill of the Spyker!

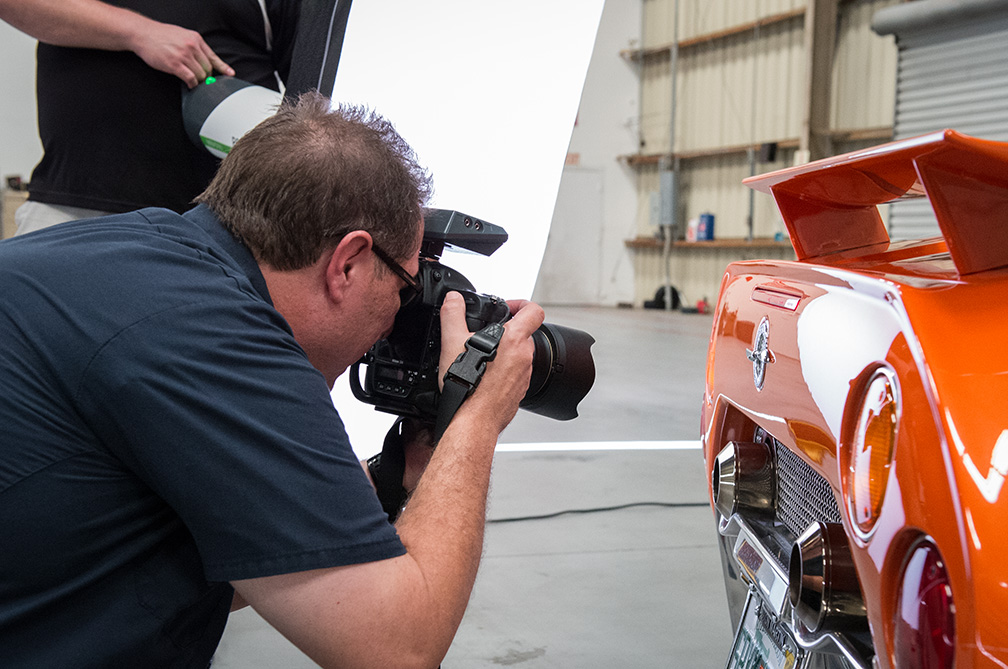
Above: I’m not a big fan of laying down on the job, but sometimes ya gotta do what ya gotta do. That’s Brad Moore holding a Priolite with a large strip bank and that’s how we made the detail shot you just saw. Shooting at f/22 makes the light fall off to black on the edges almost instantly (thank you Tim Wallace — it’s his technique).
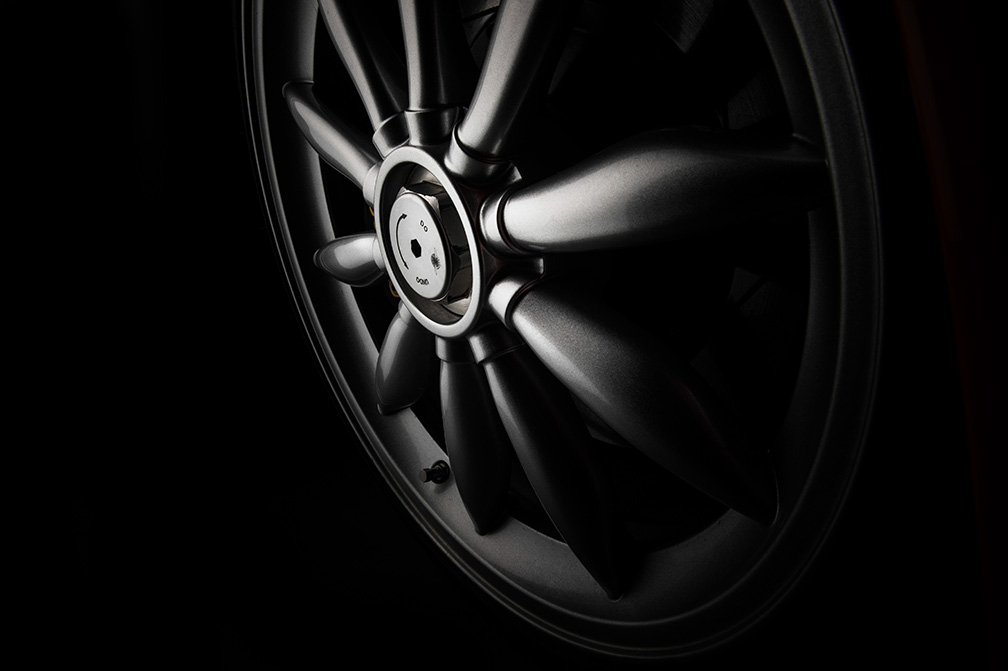
Above: Same lighting, same technique, same settings. It still amazes me how the light falls off to solid black like that. I know it makes sense, but it still makes me smile every time I try it.

Above: Here’s the distinctive rear-end of the Spyker — same everything as far as lighting and camera settings.
Above: Yes it was that bright where we were shooting, and yes shooting at f/22 makes it fall off to black like that without having to fake it in Photoshop. I was just as surprised as you are, but son-of-a-gun it works!

Above: The rear emblem and very soft lighting.
Above: I wish I had the time to really experiment and get the lighting just right on this one, but with six cars to shoot in the absolute stiffling heat, we pretty much had to run and gun all day. Even though it was really cool to have all these cars on hand, I wish we had half as many cars and the same amount of time, because if something didn’t work lighting wise, I didn’t have the time to really make it work — I had to cut my losses and move it if it didn’t come together pretty quickly.
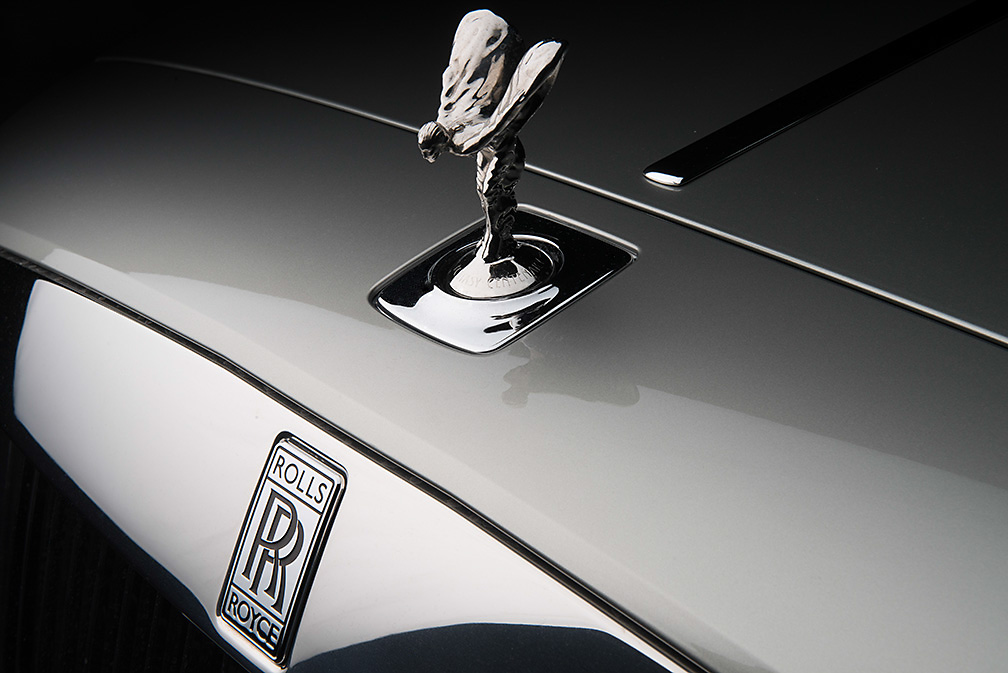
Above: The Rolls was Amazing. First time I had ever sat in one, and the interior was really something to behold. I could have spent two hours just on it, but I only had about 20 minutes (we spent waaaaayyyy to long on lighting the Spyker), and it caught up with us time wise.
Above: As the heat took its toll on all of us, I started to lame out and shoot some of the shots from a chair, and that’s the on you saw above. We were beat like you cannot believe. Drenched in sweat, semi-dehydrated (we only brought six bottles of water for the three of us — huge mistake) and though we started at 5:00 pm, none of us got home before midnight.

Above: We had two Ferrari’s but all I had time for were detail shots. I just love the Ferrari nameplate so I spent a while on trying to get the lighting right, but I still had to add a radial gradient in Photoshop to get the look I was trying for.
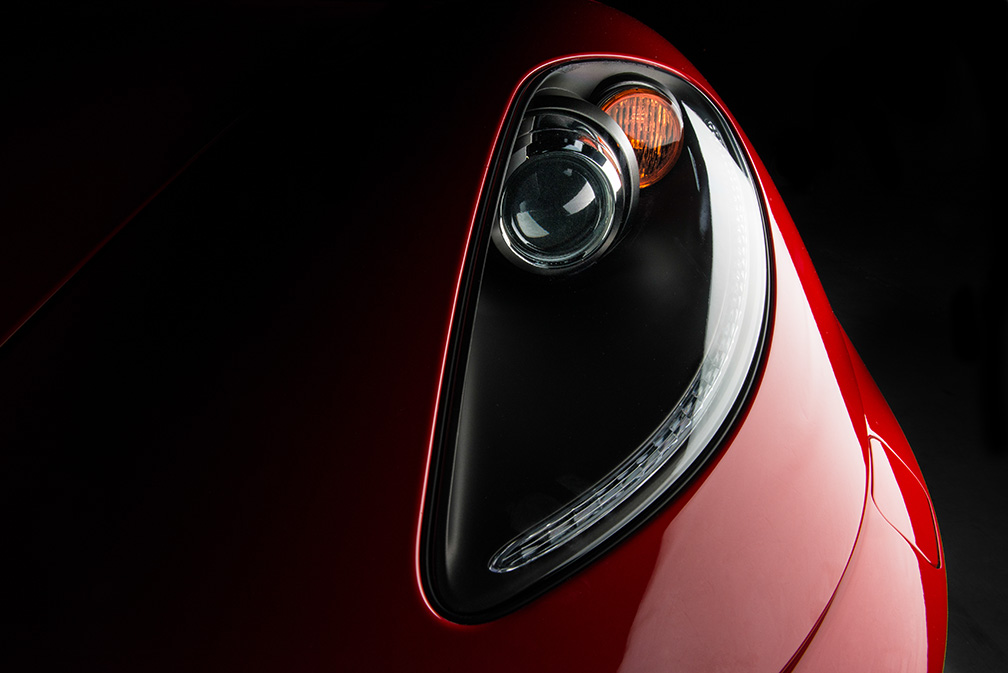
Above: I’m a sucker for headlamps.
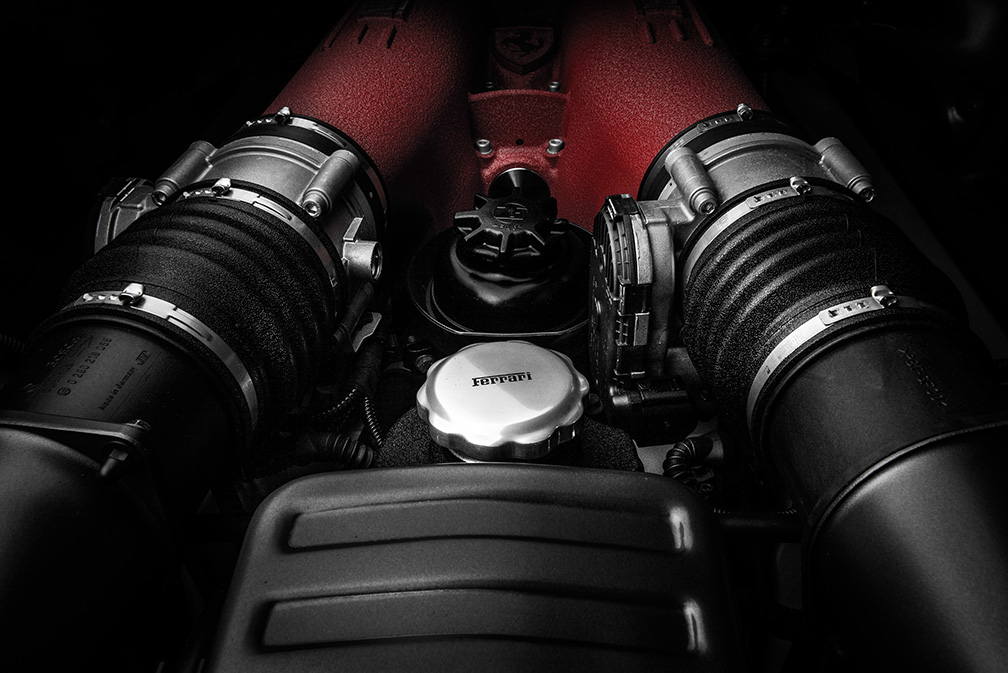
Above: I had to get an engine shot of the California — just one light — still that Priolite but we switched to a small softbox. We probably should have switched back to a stripbank, but I’m still OK with how it came out.
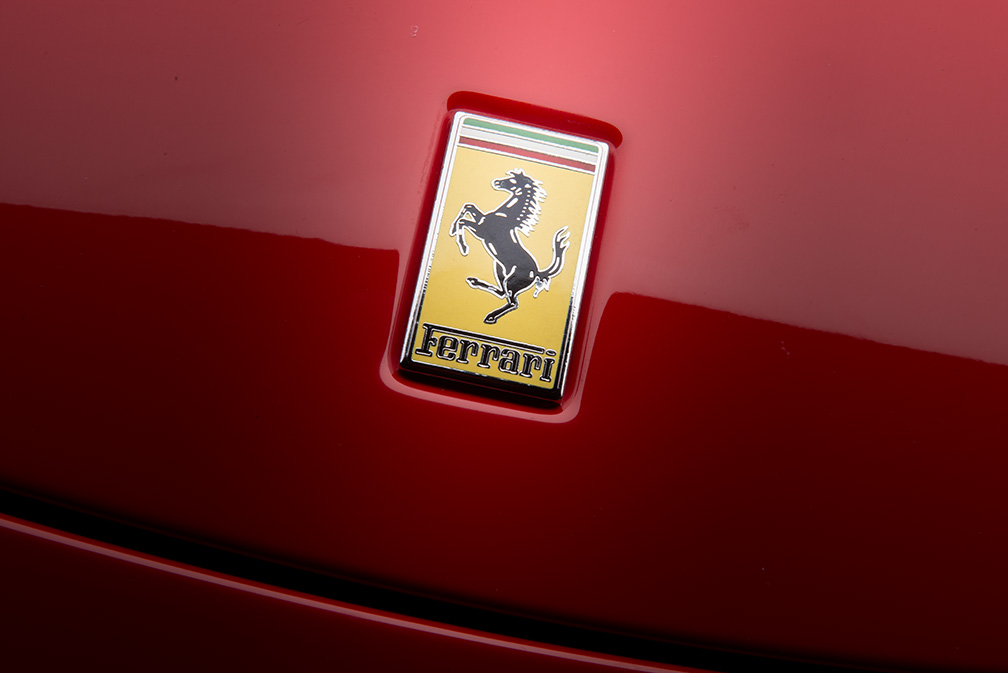
Above: In Tim’s online classes for Kelby Training, he talked about splitting the logo with the light, so we spent a few extra minutes trying to get it right on the money.

Above: This is actually the interior of the Ferrari F-430 and I shot it with a 24-70mm f/2.8 using a technique I learned from Tim when we taped his class for Kelby Training on shooting car interiors (should be coming out soon. Brilliant class — I learned a ton!).

Above: Here’s a parting shot of the Ferrari California.
Wrap up
While I’m getting much more comfortable with lighting and shooting the up-close detail shots, I still need a lot more practice with full body shots, and that’s what I’m going to focus on next. While we were out on location I heard about a studio locally with a huge drive-in cove and a giant overhead softbox made for lighting entire cars, and I got a line on a few other cars to shoot. Brad’s on vacation this coming week, so nothing next week, but when he gets back, it’s time to sweat once again!
Above: OK the lighting is kick of whacked in this shot, but I couldn’t leave without showing you at least one shot with the doors open. Is that car sick or what!!!!
Thanks to Brad and John for assisting me on the shoot (couldn’t’ have done it without you guys), and thanks to David for rounding up lots of cool cars for us to shoot. Also, thanks to my readers for stopping by and here’s wishing you all a sweat-free weekend and lots of shooting opportunities.
Close-up shots are great. Normally, I admire your photography, but the car shots in environment are overdone, too slick/glossy and don’t fit with the background. With that as my first impression, these shots clearly fail. Might as well be a green screen as the background, with post backgrounds added. Not what I’d expect from a ‘ pro’.
I love the fact that there are no cup holders in the Ferrari!
I don’t let people bring drinks into my toyota. I’d definitely not let anyone including myself bring drinks into a Ferrari. It’s a sports car, not a ” hey want to grab coffee and go for a stroll “
Wow Scott. It’s art and everyone has their own likes and dislikes. I cannot agree with bobavo but each their own. Love the interior stuff. Can’t wait till Tim’s next class comes out. Love the man. Man crush city. Good going.
funny, I’ve seen that battery pack advertised in magazines and it looked like one of those gimmicks where it would give you 1 flash charge and die. Glad to see it really worked, it would help me a ton in the field.
Great shots, I cannot agree with Bobavo either. Unless someone has a productive criticism like “here’s how you could do this better”, I’d suggest not blasting someone in the comments.
I’m shooting a Viper very soon, all your tips plus Tim Wallace’s have helped me a ton. Thanks Scott.
Scott, I noticed one shot showing a stabilizer of sorts holding a video camera. Like to know what you suggest for my D600. I am moving into video work and looking for a modest priced stabilizer for my D600. And on the the battery pack. I am in the market for my elinchrom strobes. Where Can I find out about these lights and “stuff”, Thank you, Ken in Kentucky
he linked to the pack he used above. here it is. http://www.bhphotovideo.com/bnh/controller/home?O=getpage.jsp&A=continueShopping&Q=
Also, the priolites he used are found here. they are cordless with the battery inside the flash head. http://www.bhphotovideo.com/c/search?Ntt=priolite+m500&N=0&InitialSearch=yes&sts=ta&Top+Nav-Search=
Thank you for your assistance. You have any suggestions about a modest priced hand held stabilizer mount for my D600 ?
I don’t but Scott may know. They used one that was on a boom stand for some of the kelby classes which looked sweet.
I am looking for one that I hold with my hands and shoot,
Here’s one from B&H with decent reviews. http://bhpho.to/15rdUhu
Hi Scott,
What makes the new battery pack superior to the Paul Buff Vagabond Mini Lithium that you have used. Both 3.5 pounds, both 130 watt hours. Buff unit almost $150 cheaper! Why the sway to the new Photogenic box?
Thanks…
I’d be curious too. with the vagabond, you can’t use a modeling lamp. But not sure on the Photogenic…
From what I understand it’s not that you can’t use a modeling lamp with this kind of portable power unit, it’s more that the battery will not last very long because most flash units have modeling lamps with a wattage between 150W and 250W (and sometimes up to 300W). However though, if you use Paul C. Buff’s Einstein Unit with the Vagabond Mini Lithium he actually has a specially-made-for-using-with-Vagabond-Mini 25 Watts Modeling lamp (which produces Lumen equivalent to a 35 Watt)
My guess is the reason why the Photogenic is much more expensive than the Vagabond Mini Lithium is that Paul C. Buff sells directly to the end user instead of using distribution channels, thus eliminating the additional overhead…
Comparing the specs of the new Photogenic Unit (as listed on B&H) to Paul C. Buff’s Vagabond Mini Lithium (VML for short) it seems to me that they are the EXACT same thing. Same power rating, same size, same weight, down to the same LiCoxNiyMnzO2 battery chemistry. So the Photogenic Unit is just a (blatant) copy of the VML since it doesn’t seem to offer any additional/revolutionary or tweaked feature set. Only difference is the Photogenic uses a white battery, a different multi clamp (which attaches the unit to a light stand) and it puts the power outlets on the side of the unit as opposed to a Black battery and outlets on top for the VML…
The Vagabond Mini Lithium has one advantage though. Due to the connectors that Paul C. Buff used on his system both on the charging port and the connector that attaches the battery to the inverter, it is possible to mount 2 batteries in parallel (as explained by Rob Galbraith) and double the number of flash pops for extended shooting sessions.
On a different note, It’s almost funny how Scott loves this new Photogenic Unit while the VML has been around for such a while. In fact I don’t think I’ve ever read or heard (at least as far as I can remember) any mention of any of the Paul C. Buff Products on this blog. Scott loves the New Priolites which are relatively pretty expensive and yet he seems pretty oblivious to the Einstein
though some of the instructors on Kelby Training use/have used Paul C. Buff Einstein units (Joel Grimes and Erik Valind are the first names that comes to mind). Too bad cuz Paul C. Buff gets soooo much raves about the quality of his customer service and the Einstein is suuuch an amazing flash unit (just ask David Hobby Scott).
I have actually used the Vagabond mini and featured them in one of my videos.
Take it easy guy. Why so serious!
Michael: I don’t have a Vagabond mini — I borrowed one from a friend and I liked it. I just got ahold of this Photogenic and I wanted to try it out. I didn’t make a comparison between the two — I just showed how it works.
Hi Scott,
Thanks for the reply. The only reason I asked is that you called this one the “winner” over others you have used and implied that it was lighter and easier to use. (Which did not make sense to me since they seem to be the same weight and operation). Both look good to me, but the Buff unit is much less expensive and has a track record. Thanks and talk to you soon. Might be panacea on the horizon :>)
Michael
Hey Scott – So, you like Photogenic packs the best? Huh, how much are they paying you?
DOH! Kidding, Just kidding!
The shots rock, but your closeup stuff is really awesome, I’m sure you’ve made Tim proud!
Keep up the good work Scott. It is wonderful to get people together who share the same interest and all be friends, besides it is fun!
A little curious when you say Tim Wallace Large Strip bank, are you talking about an elinchrom 6ft strip bank? Or larger yet? Brand Make?
Thanks!
It’s an Elinchrom 6ft strip bank — I used “Tim Wallace” for people who have been following my progress using Tim Wallace’s techniques.
Scott, better late than never :-)
Amazing cars! Great shots! I’m just looking for an opportunity to put Tim’s classes in practice!
Nice to see your progress in this area @ScottKelby:disqus. And Tim is very good at what he does, no doubt. He is ligthing cars in a way that i like. Although i still love shooting cars in available light, it´s just a matter of seeing the light and using it in the best way possible.
I hope you get a chance to shoot with constant light sometime in the future, look for a studio with constant light and try it. It is simply amazing, what you see is what you get.
Take a look at the image below to see an example of what you can get out of a great studio with constant light. It is incredible easy to work in an environment like that. :)
Good luck with your future car shoots, and dont forget to try a polarize-filter for your next car shoot.
Great cars. I had the pleasure of driving an Audi R8 around Tokyo for a week a few years ago. Absolutely amazing car…
What a great opportunity – love those cars! Really like the lighting in the detail shots. While I tend to shoot with speedlights and modifiers when I can, sometimes you just need more power!
Scott, does Tim Wallace gave you some tip how to shoot car in available light or on-location ?
I just watched Tim’s class on photographing cars on KelbyOne.com — he gives you everything you need to know!