

Game-changing AI Hacks Every Portrait Photographer Should Know
There’s a ton of buzz out there when it comes to AI infiltrating the photography industry. Some photographers are adamantly against using AI in their work, calling it fake or cheating. But the truth is, this disruptor is here to stay, and while it might feel nice at the moment to side with the ‘never-AI-ers,’ you’ll end up regretting your resistance to it in the long run.
I, too, was cautious in the beginning since I’m primarily a portrait photographer, and no photographer can compete with an AI generated corporate headshot for $30 bucks. So I definitely understand both sides. But in this article I’m going to highlight some of the amazing ways photographers can use this new tech to their advantage, in their portrait sessions.
Adobe has officially released their AI image generating engine (Adobe Firefly) into Photoshop. In my other business, I teach Photoshop. This allows me to beta test for the company, so I’ve been exploring this new tech for a few months now. And… it’s amazing. Tasks that used to take me half an hour to complete now take a few seconds.
Tip 1: The Dreaded Fly-Away Hair Cleanup
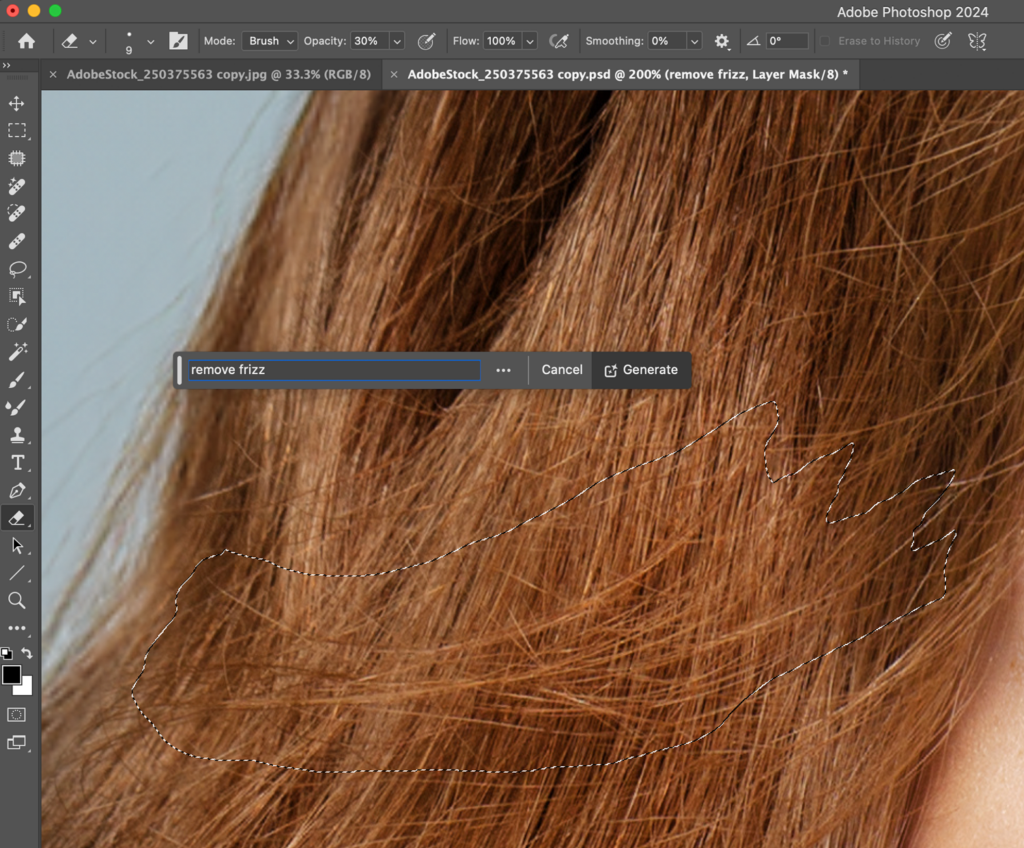
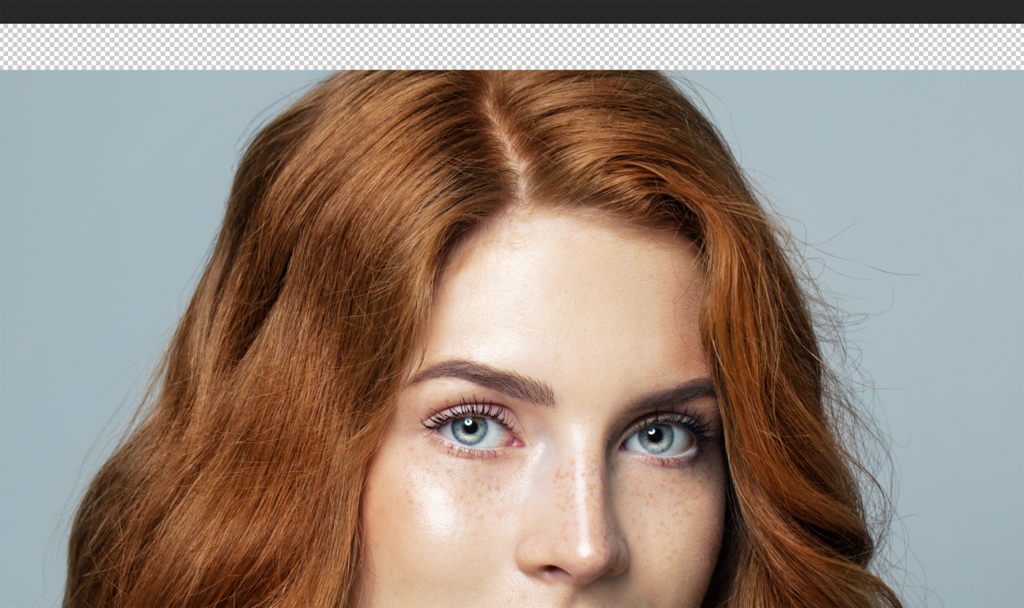
Gone are the days when I used to have to spend hours painstakingly retouching out each individual stray hair from a portrait. Now, I let Photoshop’s AI do that grunt work. I start by making a selection around the edge of the hair, and then use the prompt area in the Contextual task bar to input a phrase like “remove fly away hairs, clean polished hairline.”
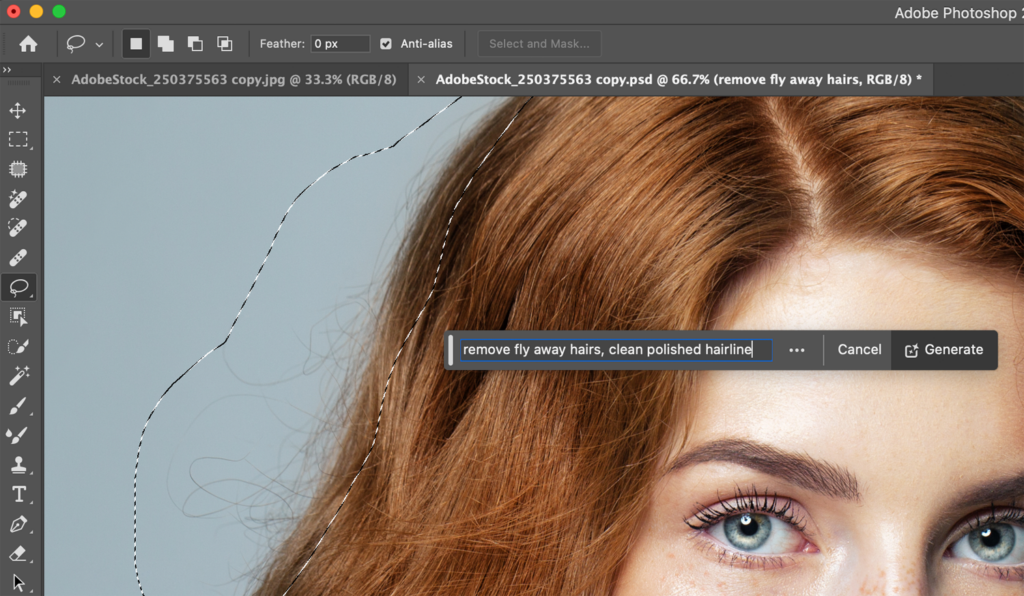
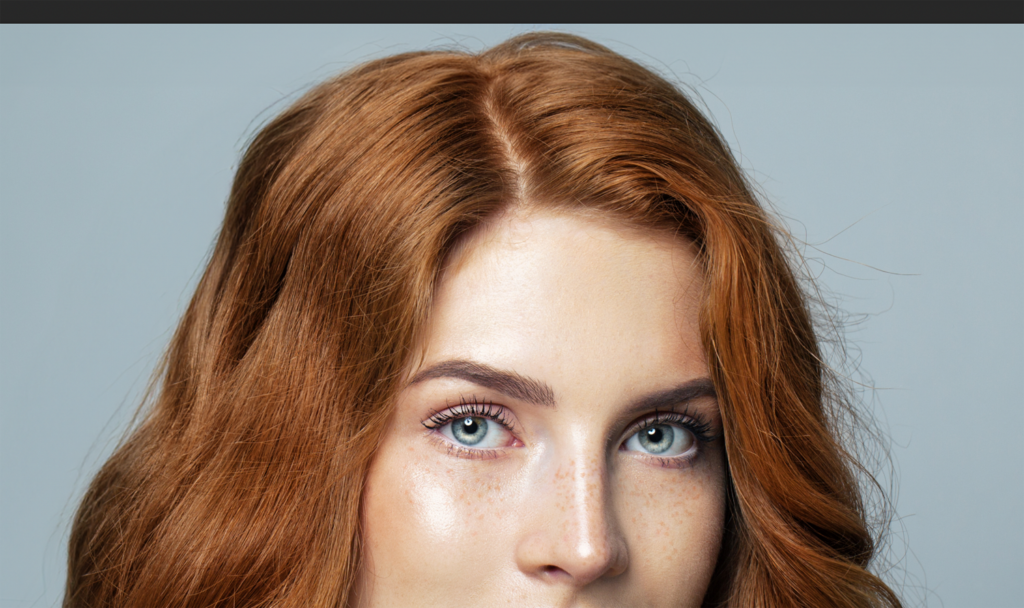
The generative fill then gives me three variations to choose from (within the Properties window) and all I have to do is simply pick the one I like best. Here is the before and after of the one I chose as the final.

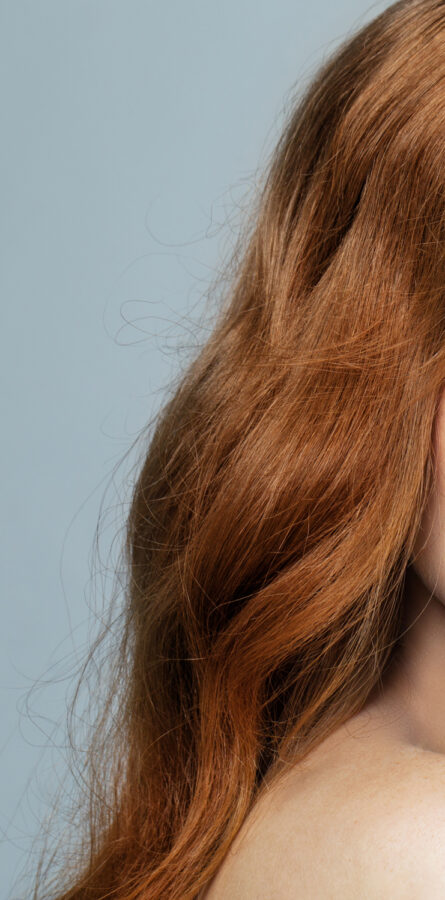
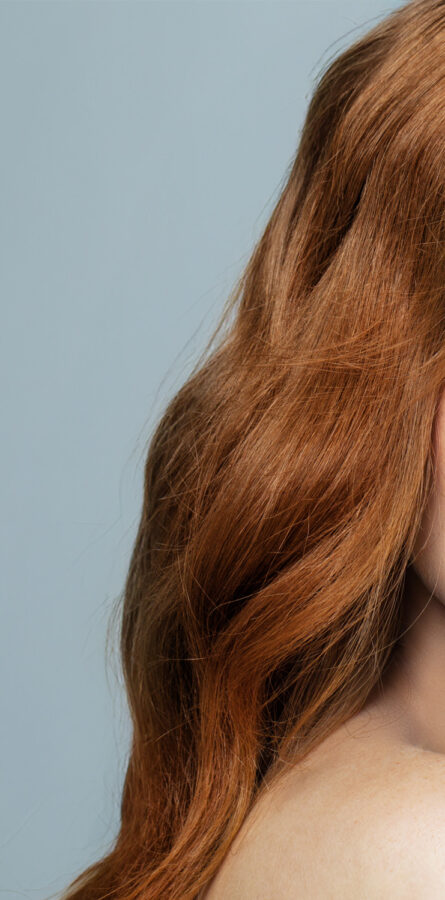
And the magic doesn’t stop there. I wanted to see if the AI could reduce cross hairs which make hair look frizzy in some instances. So I tried it and to my astonishment it worked. I circled the affected area, imputed the prompt “remove frizz,” pressed the generate button and was astonished by the results.
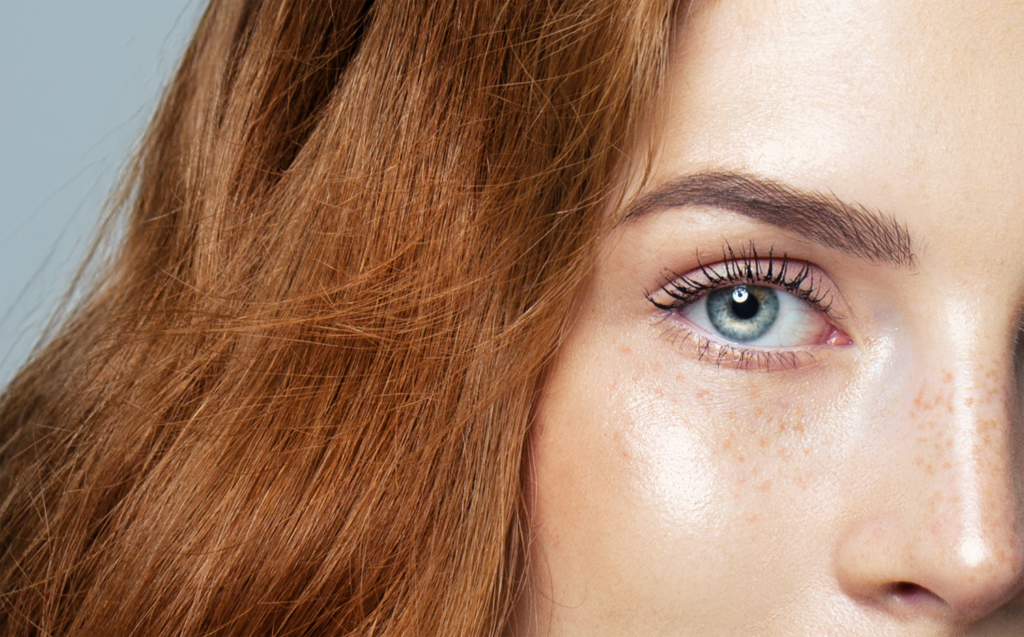
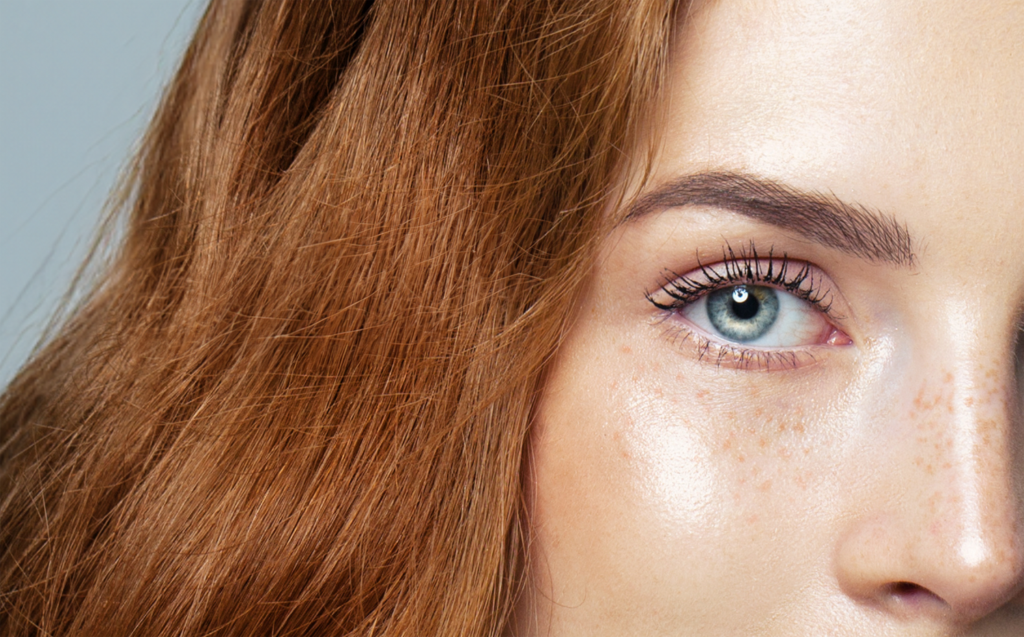
This type of work used to consume my time worse than mistakenly stepping through the Narnia wardrobe portal. And now it can be done within seconds. These are the types of tasks you can easily use AI for when you’re a portrait photographer.
Tip 2: Reconstructing Parts of Your Subject
Often, in an effort to make my subject feel closer to the viewer, I’ll slightly crop off the top of their heads in the images. This gives the viewer the feeling that the subject is closer to them than if their head were intact. It’s a tried and true method many headshot photographers have used over the years. But every so often I get a reply from a client asking me to put the top of their head back in. In the past this would have required me to go back to the files in my archives, find the certain look/outfit that client was wearing in the chosen frame, find a nearby shot that had the top of their head in the photo and then manually try to align both images and blend them.
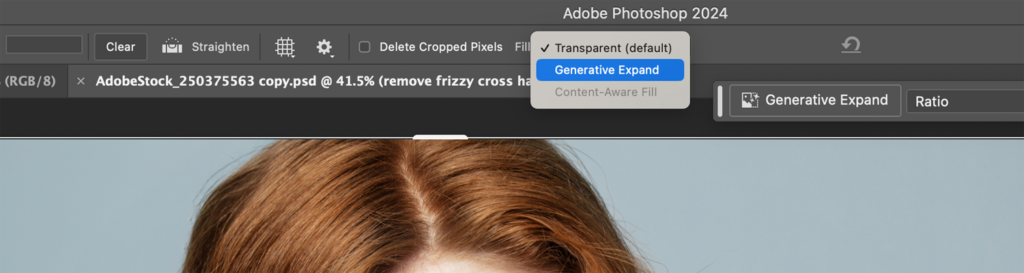
Now, thanks to AI, it’s as easy as using Generative expand.
All you need to do is activate your crop tool, then make sure your Fill option in the top settings bar is set to “Generative Expand,” drag the canvas out, hit the crop check mark, and viola! The top of the head has been constructed for me within seconds. Another instance where AI has saved me 20 minutes of work.
This also works for arms and shoulders that may have been inadvertently cropped out of the shot during a headshot session. Reconstructing these parts of a body is easy-peasy for Photoshop’s Adobe Firefly.
Tip 3: Easily Remove Glare from Glasses
This is something I’ve learned how to avoid over years of trial and error in camera. But trust me when I tell you these techniques were not learned overnight. Thankfully generative AI can help with this too, and with a much faster learning curve.
Make a selection around each set of reflections, and simply click generate. The AI will do it’s best at matching the color, contrast, lighting and surroundings of your image while generating your fix.
For this, you can either choose to leave the prompt field blank, or input what would be generated behind the reflection.
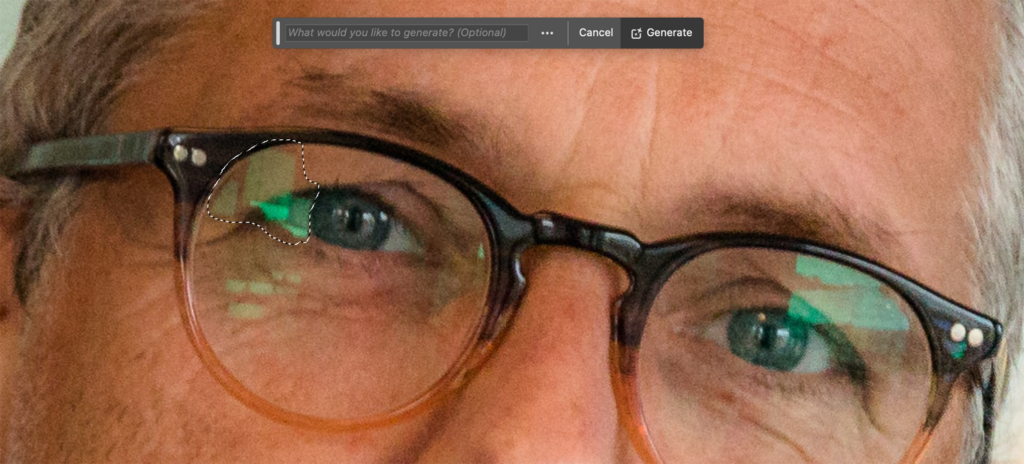
I find that doing this in chunks gives you a better result. So do one section of the reflection, then repeat the same steps until all the reflections are gone.
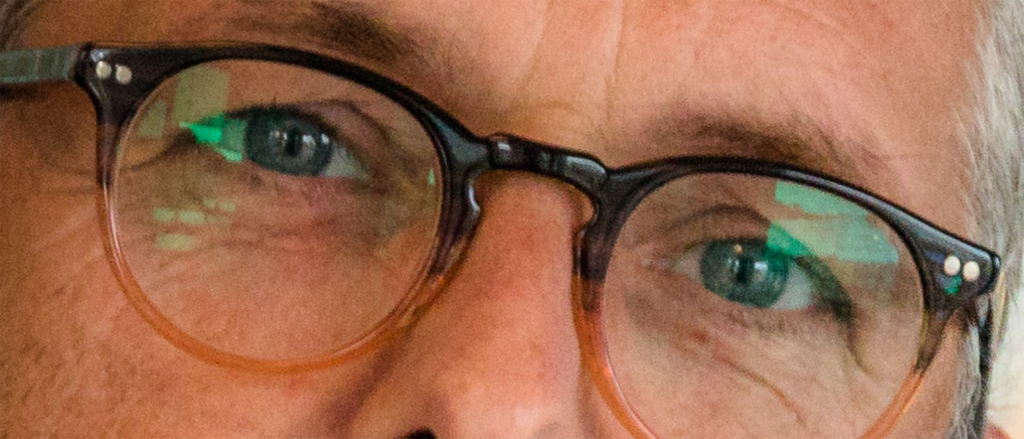
Remember that you have three options to choose from each time so make sure you choose the best result for each area. Here are the results after I completed three generative fills to remove all the reflections:
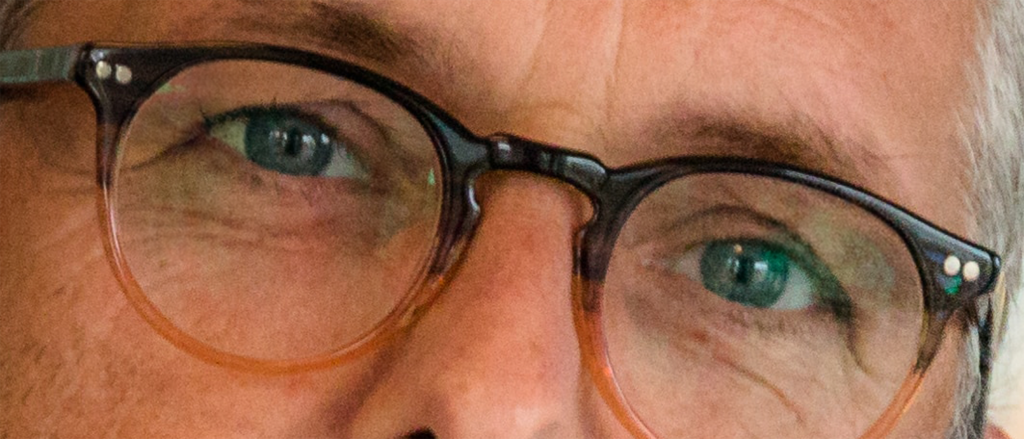
WARNING: Make a note NOT to select the subject’s iris in your selection. If you do so, you’ll generate a new iris which will not represent the person you’re photographing and will make the portrait unauthentic.
In closing, AI doesn’t have to be scary… at least not yet. So why not use it to make your life easier as a photographer. Using these tips while you retouch your portraits can save you tons of time and increase your productivity tremendously.
For more Photoshop training, please visit Kristina’s YouTube and Instagram pages. And for more of her portrait work, visit KristinaSherk.com.
2 comments