

Your Questions & My Answers
Hi and welcome to Scott’s blog … It is an honor to be asked to write a Guest blog for Scott … many thanks Scott for the opportunity.
I receive dozens of questions via my website’s Contact Dave page every month from passionate photographers eager to learn, and so this guest blog will be Your Questions and My Answers to a variety of my Instagram and Portfolio images.

Q: Hi Mr. Black, Greetings from Switzerland. I really enjoy your Instagram pictures/mini photo lessons each day, and in particular the Alpine Shadow picture from Switzerland. Please can you elaborate with some backstory? Kind Regards. Francois – Zermatt, Switzerland
A: Hi Francois. So glad that you are enjoying my Instagram posts @daveblackphoto and the mini photo lessons that often accompany each IG picture.
As mentioned in the IG post, Rotenboden Station is a familiar location for those who are climbing, hiking or photographing the alpine sunrise at the Matterhorn in Switzerland.
The backstory is an exercise in patience. I had completed making my sunrise image of the Matterhorn from a location about 1 kilometer away from the Rotenboden Station and had just hiked back to the alpine railway station.
While I was waiting for the train to return and continue my journey up the mountains the sunlight and shadows on the station were beautiful and seemed to be begging for a human element to enter the scene.
The train arrived and I let it go without me. Then, after about 15 minutes, the shadow moved to reveal the cross and a minute later a fellow hiker (with backpack) approached the railway platform and his shadow was cast onto the station wall … thus offering a “different” image of the Matterhorn.
We often go out “looking” for a picture, but we must always be aware of the changing light and shadows around us… and be ready to capture a “moment” when it happens along.
Thanks for your question Francois, hope the backstory is helpful. Cheers. Dave
Q: Hi, Dave! I always check out your three portfolios on your website to see what’s new. Thanks for adding new pics each month. Can you explain where you placed your Speedlights for the Red Rythmic gymnastics image in your Creative Lighting Portfolio on your website? Thanks. Kevin – London.
A…Hi Kevin. Glad you are enjoying my portfolios. I really enjoy adding new images each month to the three collections!
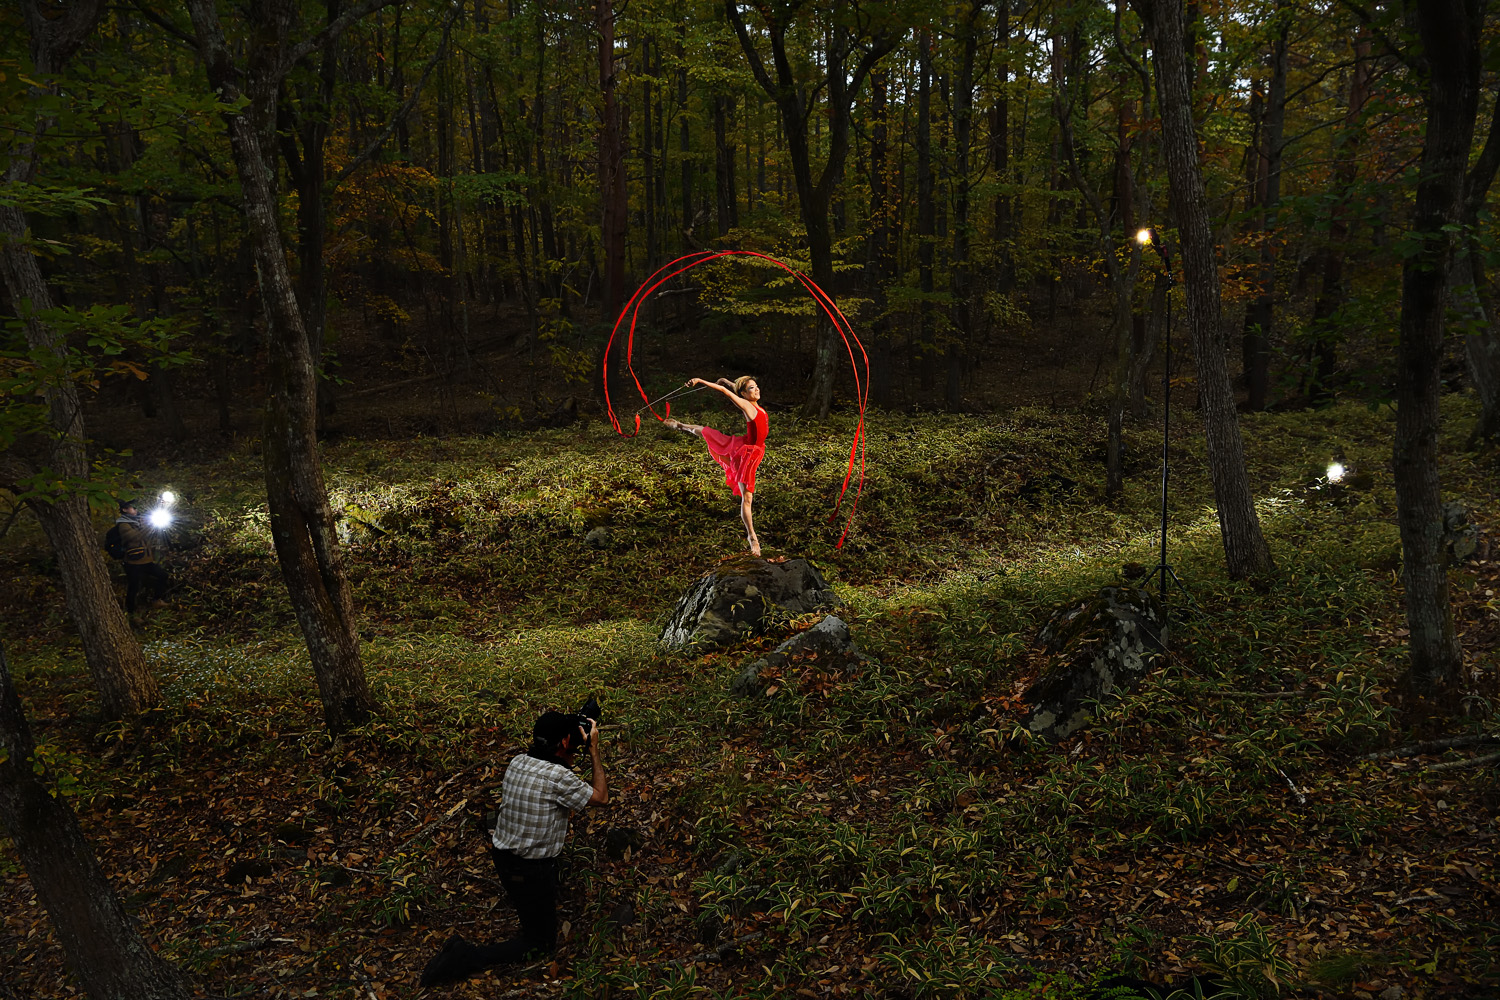
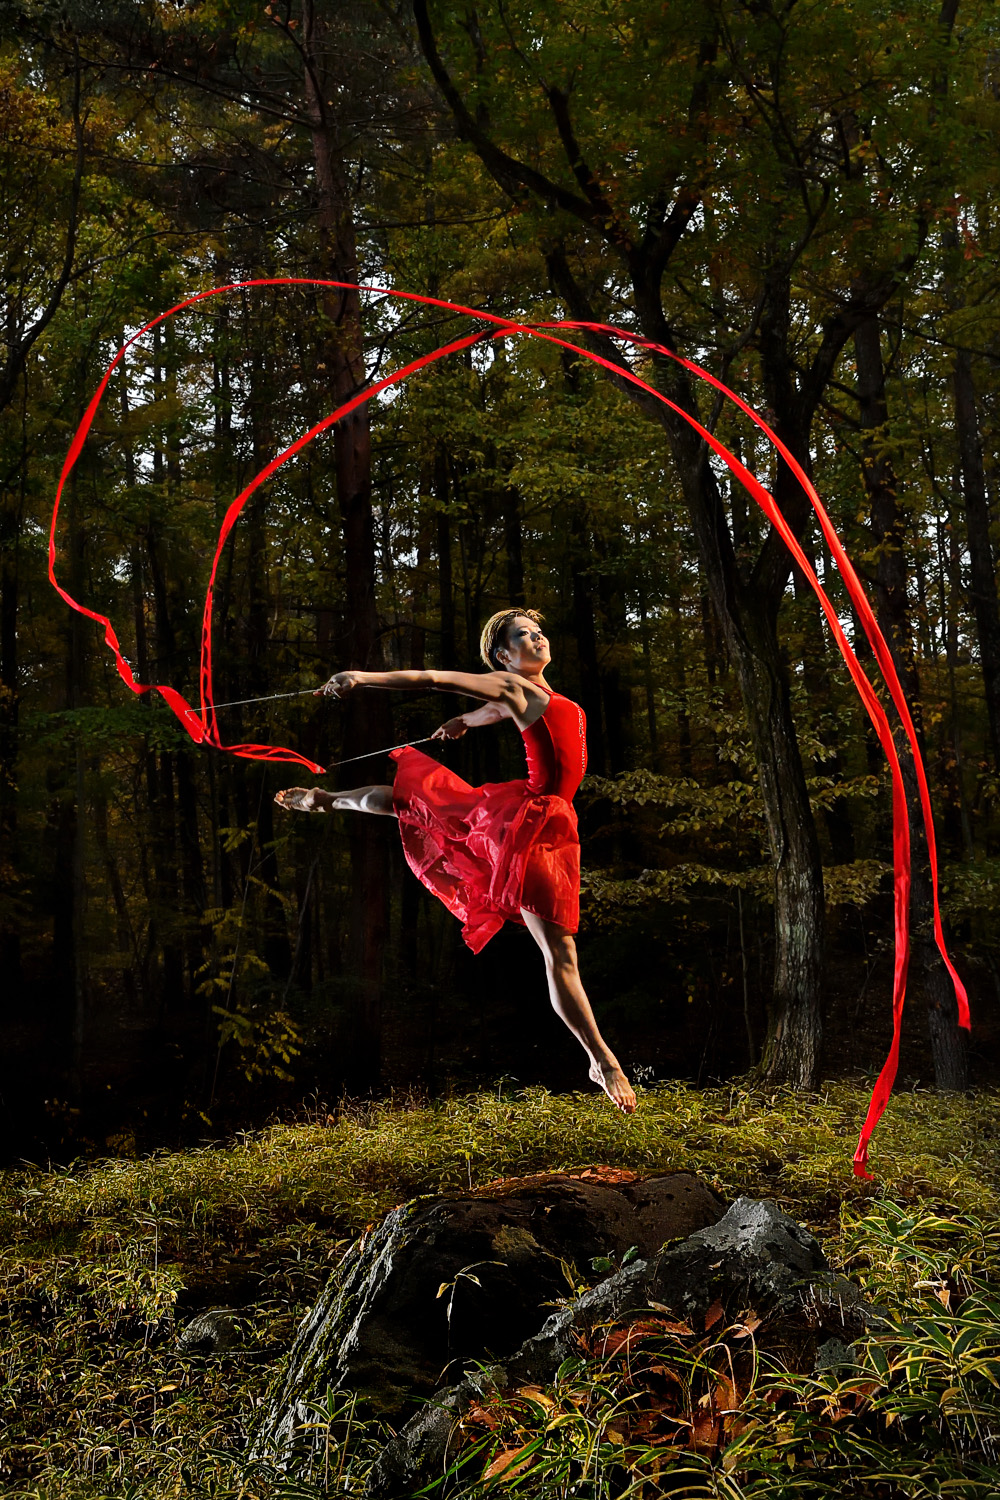
I purposely underexposed the scene by -2.0 stops and then illuminated my subject with FLASH. I used 4 NEW Nikon SB-5000 Speedlights with Radio Control, all of which were in High Speed Sync mode.
The main SB-5000 had a Grid to help spotlight my athlete and was set to FULL power and placed high on a light stand 15 feet away.
I placed a second SB-5000 on a small rock about 20 feet out in front of the athlete and about one foot above the ground cover. This SB-5000 was set to 1/2 power and illuminated the foreground vegetation and the tail ends of the red ribbons.
Because of the uneven terrain, I had an assistant hand hold two SB-5000 Speedlights about 35 feet behind the subject. These two Speedlights, each set to FULL power illuminated some of the vegetation behind her, but not the forest background which I wanted to remain dark.
The subject was an Olympic athlete who was amazing to work with. She performed multiple leaps on the boulder despite it being a very cold, early morning shoot in the Yamanashi Forest of Northern Japan.
Thanks for a great question Kevin. Cheers. Dave
Q: Dear Dave, I’m a longtime fan and very much looking forward to attending your classes at Photoshop World in Orlando this April. I just love the Winter Coyote picture in your Planet Portfolio. Can you tell me the how you captured this picture. Thank you. Debbie – Jacksonville, FL.
A: Hi Debbie. Gad you like the “Winter Coyote,” and please come up and say hello during Photoshop World Orlando. Your question fits into one of my favorite classes at PSW 2017: THINK Before You Press the Shutter a class teaching pre-visualization.
This image was made recently when I joined good friends Keith Ladzinski and Doug Ladzinski for a fun photo safari on a snowy January day in Rocky Mountain National Park.
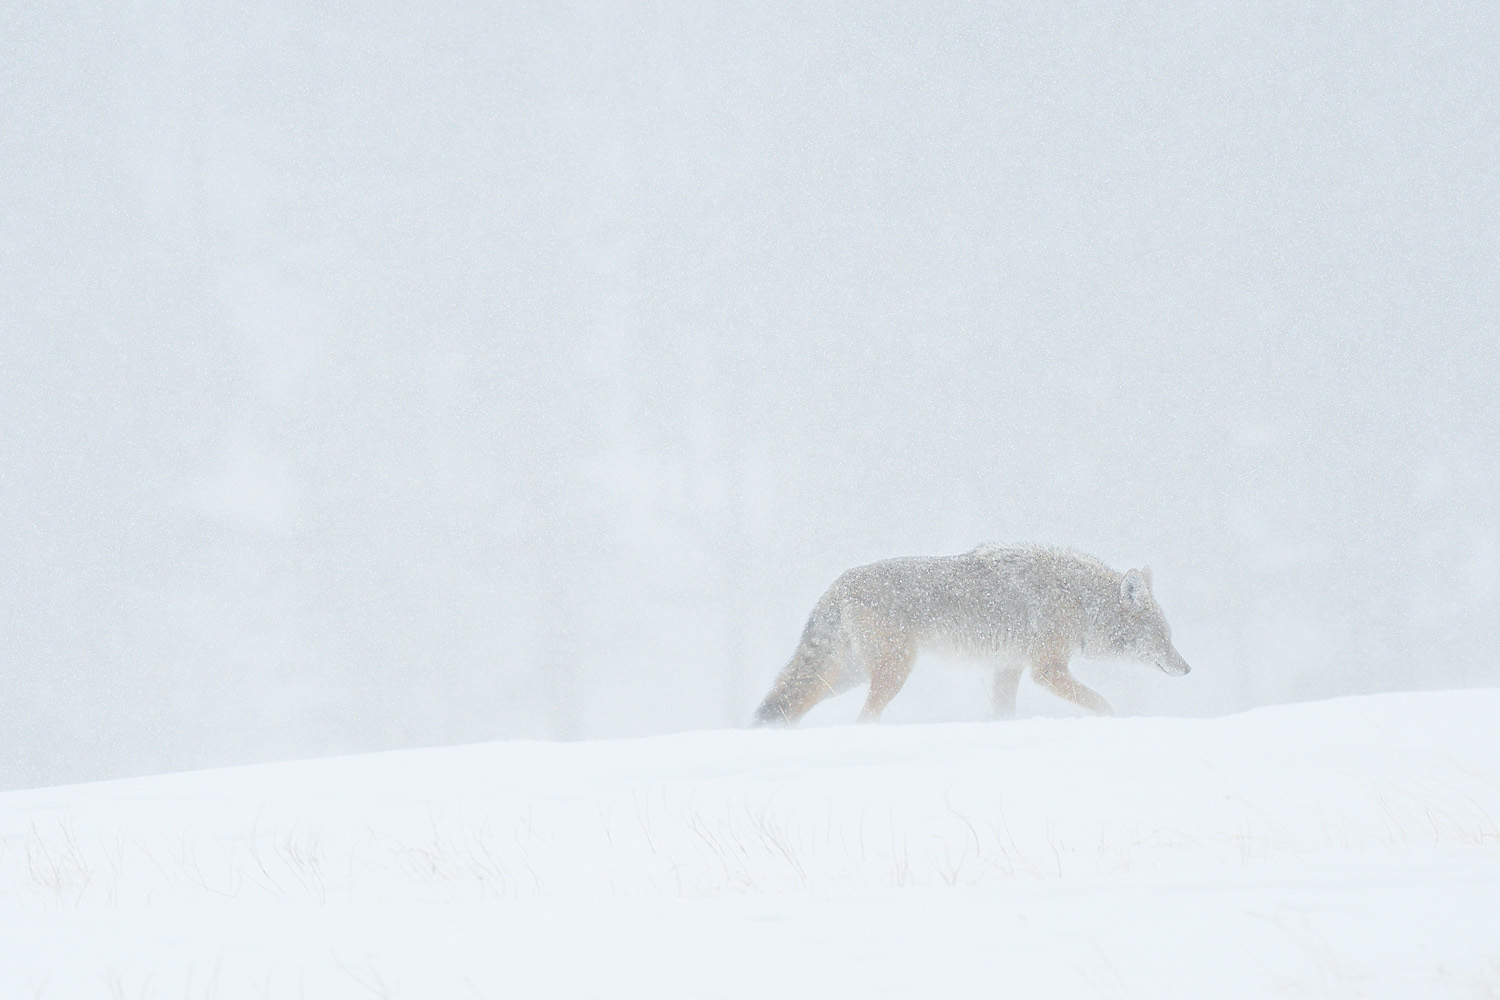
We had been slowly cruising around the park photographing elk when Doug saw four coyotes way off in the distance, braving the winter storm on a small ridge about 150 yards from the road. With the snow storm and the long distance to the coyotes, I sensed this could be an opportunity for a very special picture.
Let me emphasis that, before I stepped out of the vehicle, I set the in-camera Set Picture Control menu of the D500 to standard and also reduced the contrast and saturation levels slightly. Then I increased the clarity level to help define the snow flakes and Coyote.
I kept my distance on purpose as I wanted to shoot through more volume of the falling snow. The camera-lens combination of the Nikon D500 cropped sensor and 200-500mm f/5.6 lens (at 500mm) with a 1.4x teleconverter gave me a visual lens length of about 1,050mm.
All these preparations: 1,050mm, Set Picture Control adjustments and keep my distance from the coyotes in order to shoot through as much falling snow as possible, but still see my subject clearly… were “pre-visualized” in my mind in just a few seconds. THEN I stepped out of the vehicle onto the snow.
I used manual exposure and chose to nearly overexpose the snow, but not quite. Once this single coyote moved away from the pack and ventured out onto the ridge with the falling snow and head-down posture, the “click” of the shutter was all that was left to do… Voila! “Winter Coyote.”
This process of creating the scene and technical scenario in my mind first is called “pre-visualization” and is what I believe to be the “key” missing component for many photographers trying to make the memorable pictures they want.
Hope this answer is helpful and I look forward to meeting you at PSW. -Dave

Q: Hi Dave, Your sports portfolio has an insane moto shot with one guy flying and another guy upside-down. Can you tell me what flash was used and how you pulled this picture off? Brandon – Louisiana.
A…Hi Brandon. Thanks for a great question, glad you like the shot.
This Freestyle Motocross image of Team FMX stars Travis Willis (white) and Ed Rossi (blue) was a commercial project that was quite an undertaking for myself and my #1 assistant, Julio Aguilar to accomplish.
I typically use my Nikon SB-5000 Speedlights with radio control for about 90% of my flash work as they are small-portable and have High Speed Sync. But occasionally I need a BIGGER blast of FLASH from a long distance to override the bright ambient sunshine and illuminate my athletes against the underexposed background or sky… so I bring in the Profoto B1 Air strobes.
As mentioned in the image caption above, I used three Profoto B1 Air strobes in High Speed Sync. Each is equipped with Profoto Tele-Zoom Reflector and Clear Glass Protection Plate (instead of the factory frosted plate).
These two modifications that I’ve incorporated with my B1 strobe system have helped make the factory 500 watt second power of a B1 illuminate my subjects more like a 1200 watt second power pack. That’s a HUGE increase in illumination simply by using the Tele-Zoom Reflector and clear protection plate on each B1 unit.
To get up where my athletes perform, I used an Articulating Boom Lift (king size Cherry Picker) to have maximum stability in the bucket, and to access my athletes at about 70 feet in the air for this particular shot.
Travis and Ed made a dozen “tandem” jumps, but this jump in particular was performed with them only a few feet apart and nearly on top of each other at the landing area… CRAZY and AMAZING skill. The icing on the cake was the full moon rising in the upper right corner in front of the lead rider’s boot.
A really awesome photo shoot and a blast to pull off … Thanks for asking.
Adios, Dave

Q: Hello Dave, I am a student looking for a direction to take my life. I was very interested in photography which I really enjoyed and achieved high grades. As an enthusiastic sportsman, I was considering merging the two and becoming a sports photographer. Would you recommend this, and do you have any advice? Gavin – Houston
A: Hi Gavin. The road to being a professional SPORTS photographer who makes their entire living from their craft is not usually achieved overnight, but is an extremely rewarding occupation to pursue.
If you are currently enrolled at a university, or if you have graduated, consider assisting a local sports photographer as a way to learn the profession. Some assistants make good money assisting someone until they are ready to set out on their own business.
Just so you know, the notion that all a SPORTS photographer does is go to a game for three hours, take pictures, and collect a check is far from accurate. “Speedy” computer skills and business savvy are just as important as photographic skills if one is to “make it” in today’s sports photography market place.
The SPORTS photography industry is highly competitive, and your degree of passion should demand a great deal from you, but if you persevere and make GREAT pictures you can have a fine living.
So, do I recommend having a career as a SPORTS photographer….YES, absolutely! It’s the greatest job on the planet. And when you “make it,” you are truly on top of the world each and every time you arrive at the event.
Best to you Gavin. -Dave
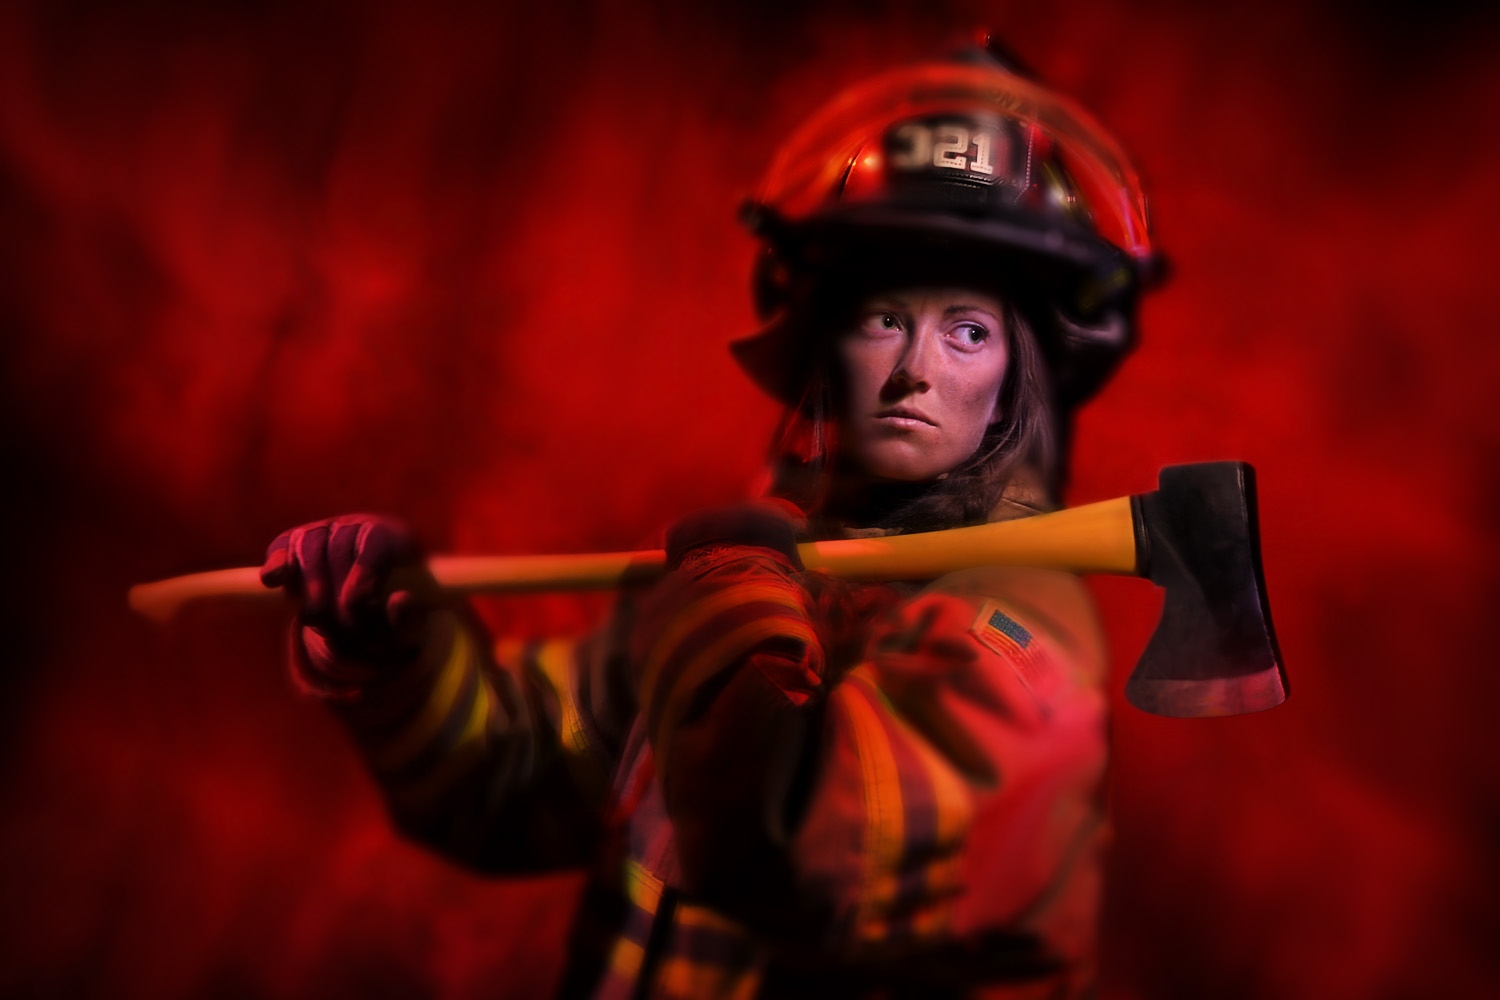
Q: Hey Dave, love your light painting portraits. I read your instructional blog about the “soft focus” technique for your portraits but I don’t get it??? Can you explain it. Thanks, Jeromy – Chicago
A: Hi Jeromy. Whether you use Photoshop’s Gaussian Blur tool or my “soft focus” technique with camera and lens, the purpose is to create selected areas in the scene that are soft looking so as to draw attention more directly to the subject’s face which is in focus.
This light painting portrait of a female fire fighter makes use of a manual exposure time of 30 seconds. I used seven seconds to light paint her face, helmet, ax and torso using a small white LED penlight.
For the next 12 seconds of exposure time, I turned off my flashlight, walked to the camera, and manually unfocused the lens to infinity, then walked back to the subject to resume light painting using a small red LED penlight to “soft focus” areas of her arms and helmet.
Finally, with about 11 seconds remaining in the 30 seconds exposure and with my lens still unfocused to infinity, I light painted the backdrop with red LED flashlight while the backdrop was being “fluttered” by an assistant, thus creating a “soft focus” & motion blur… I’m always experimenting.
Hope this answer explains “soft focus.”
Adios. Dave
THANKS again to Scott for having me write this guest blog. Looking forward to seeing many of you at Photoshop World 2017 in Orlando, Florida: April 19-22. See you there! -Dave
You can see more of Dave’s work at DaveBlackPhotography.com, where he shares his monthly Workshop At The Ranch posts like this one. You can also follow him on Instagram and Twitter.
1 comment